Another Big Failure (and Another Lesson Learned)

Reading Time: < 1 minute

Last week, I wrote about how I was proud of failing again when I corrupted my Photo Mechanic Plus catalog and had to rebuild it. That was frustrating, but the path to fixing it was clear.

This week brought a much bigger challenge.

I had installed OpenCore Legacy on my older 2016 MacBook Pro to keep running the latest macOS. It had been working fine—until Apple released macOS Tahoe. Without thinking it through, I let my machine automatically upgrade.

That was my mistake.

OpenCore Legacy didn’t yet support Tahoe, and the upgrade instantly turned my computer into a brick.

Recovering from this took me more than two days of trial and error. At first, I tried restoring from Time Machine, but I didn’t realize it only works if the system runs the same macOS version you backed up from. My machine wasn’t, so I ran into a mess of error codes.

I tried rolling back to Catalina. I tried multiple Sequoia jump-drive installs using OpenCore. At one point, I even questioned whether my installer drive was the problem—so I rebuilt that too.

The real turning point came when I discovered that my Sequoia install had never been correctly set up in the first place. Once I finally got the system running on Sequoia again, I could restore from Time Machine.

What did I learn from all this? Two simple things:

  1. Turn off automatic upgrades. Primarily, if you’re running patched or non-standard software.
  2. Check compatibility first. Just because Apple releases a new OS doesn’t mean everything in your workflow—or your hardware—will play nicely with it.

It was a hard lesson that took a lot of time, but I’ll never forget it. Sometimes, our biggest failures become the most memorable teachers.

Tagged :

Proud of Failing Again

Reading Time: 3 minutes

This week, I managed to break something big. I was working on my Photo Mechanic Plus database from two different computers, and in the process, I corrupted the catalog. With more than 670,000 images in that system, the only solution was to rebuild it — a process that takes several days.

At first, I was frustrated. Nobody enjoys setting themselves back. But once I stepped back, I realized two important things:

  1. I hadn’t been backing up my catalog. Since it lived on an external drive, it wasn’t included in my Time Machine backups. That was a blind spot in my system. Now, I’m fixing that issue and ensuring the catalog is protected.
  2. Failure is one of the best teachers. If I hadn’t made this mistake, I might have gone years without realizing the risk I was taking with my archive.

It reminded me that failure isn’t the opposite of success — it’s part of the path to it. Every time we stumble, we gain clarity on what needs to change.

So here’s the bigger question for all of us in business (and life): Have you failed lately? If not, are you stretching yourself enough to grow?

I’d rather have the occasional setback that teaches me something vital than stay safe and stagnant. Because at the end of the day, failure means I’m still learning, building, and moving forward.


In case you have a problem with Photo Mechanic Plus, here are the steps to fix it

Common causes for the red “Maintenance” warning

  • Corrupted database: This can occur for various reasons, including crashes or improperly closing the application.
  • Catalog moved: If you have moved the catalog folder or the image folders it references without using Photo Mechanic Plus, the database will lose track of the files and show a maintenance warning.
  • Software update: Some updates to Photo Mechanic Plus require the catalogs to be re-indexed to incorporate changes to the database structure. 

How to resolve the red “Maintenance” issue

Option 1: Reintegrate the catalog (Recommended)

This is the most common fix and is often required if you have moved a catalog to a new location.

  1. Navigate to Catalog > Catalog Management….
  2. In the Catalog Management dialog, find the catalog with the red “Maintenance” button and click the small disclosure triangle next to it.
  3. Click the triangle next to “Maintenance” to show the options.
  4. Click the “Reintegrate Forgotten Catalog” button. Photo Mechanic will then rescan the catalog to repair the database. 

Option 2: Optimize SQL Query Planning

Optimizing the database’s query plans can resolve the issue if you have added or removed many images.

  1. Navigate to Catalog > Catalog Management….
  2. Expand the affected catalog and the “Maintenance” options.
  3. Choose “Optimize SQL Query Planning“. 

Option 3: Re-index the catalog

This more intensive process should only be done if prompted by the application or if other methods fail.

  1. Navigate to Catalog > Catalog Management….
  2. Expand the affected catalog and the “Maintenance” options.
  3. Click “Re-Index Catalog“. 

Option 4: Restore from a backup

If the database is severely corrupted, a restoration from a backup may be necessary.

  1. Quit Photo Mechanic Plus.
  2. Restore your catalog from a known good backup.
  3. Restart Photo Mechanic Plus. 

What to do if the maintenance options are greyed out

If the maintenance options are greyed out, the catalog may be so corrupted that it can’t be repaired through the standard interface. In this case: 

  1. Stop any catalog tasks listed in the Catalog Status window.
  2. Quit Photo Mechanic Plus.
  3. Delete the cat_state.db file (instructions for macOS):
    • In the Finder, go to the “Go” menu and choose “Go to Folder…”.
    • Enter the path: ~/Library/Application Support/Camera Bits, Inc/Photo Mechanic/catalog/state.
    • Delete the cat_state.db file and any files starting with cat_state.
  4. Restart Photo Mechanic Plus and use the “Reintegrate Forgotten Catalog” button as described above. 
Tagged :

From Field to Frame: My New Captioning System for Sports Shoots

Reading Time: 3 minutes

Fourth quarter — No Huddle-Shotgun: South Carolina Gamecocks quarterback LANORRIS SELLERS (16) rushes left for a 16-yard gain, shaking off a tackle by Virginia Tech Hokies linebacker MICHAEL SHORT (30) to reach the VAT 40, where defensive lineman KEMARI COPELAND (13) pushes him out of bounds for a first down during the 2025 Aflac Kickoff game at Mercedes-Benz Stadium in Atlanta on August 31, 2025.

This past Labor Day weekend, I had the opportunity to shoot two football games back-to-back at the Aflac Kickoff Games. It’s been many years since I’ve shot sports under a wire-service deadline, so this was a fun challenge and a reminder of how much has changed—and stayed the same—in sports photography.

When you’re shooting for a wire service like ZUMA Press, your job isn’t just to get the action shot; it’s to get the caption right, which means following AP Style. AP Style isn’t just grammar—it’s a specific way of presenting sports information: the team names, player names, scores, times, and other details must all be correct and formatted as editors expect.

ATLANTA, Ga. — In a no-huddle shotgun formation, Tennessee Volunteers running back STAR THOMAS (9) rushes left for a 22-yard gain to the Syracuse 32 before being tackled by Syracuse Orange linebacker DAVID OMOPARIOLA (18) for a first down during the Aflac Kickoff game on Saturday, Aug. 30, 2025, at Mercedes-Benz Stadium in Atlanta. Tennessee defeated Syracuse 45–26.
« of 43 »

Here’s a look at my workflow for the weekend:


1. Shoot the Play

My first priority during the game is capturing the action. With the Nikon Z9, I can shoot up to 20 frames per second in RAW, which means I often have dozens of frames for a single play.

2. Capture the Scoreboard

I photograph the scoreboard whenever I can. This provides the game clock and quarter, which I later use to locate the play in the Final Game Book supplied by the Aflac Kickoff Game Staff.

3. Tagging the Best Shot

While shooting, I tag the best image from each play. This makes it easier to find the standout moments later when editing hundreds or thousands of frames.

4. Post-Game Ingestion

After the game, I ingest all photos using Photo Mechanic Plus. This software allows me to organize and review the tagged images quickly.

5. Caption Prep

I add the game clock and quarter to each tagged image using the scoreboard photos. This ensures I can match the photo to the correct play in the Final Game Book.

6. Editing

I only edit the tagged photos, importing them into Lightroom for adjustments before exporting back to Photo Mechanic.

7. Final Caption Writing

Using the Final Game Book, I match each play’s time and quarter to the action in my photos. Then I draft captions.

8. Code Replacement

Before the game, I download the latest rosters and team codes from Code Replacement. This tool lets me quickly verify player names, uniform numbers, and team information. It ensures that my captions are accurate and up to date.

9. AP Style with ChatGPT

Once I have a draft caption, I use ChatGPT to rewrite it in AP Style. I instruct it to capitalize all player names, critical for consistency and readability in wire-service submissions.

10. Copy Editing

Even after using AI, I review every caption like a copy editor would, checking for accuracy, grammar, and AP Style compliance.

11. Delivery

Finally, I uploaded the photos to ZUMA Press and emailed the photo desk, letting them know how many images I had sent and providing context for any standout plays.


Shooting under a wire-service deadline combines speed, precision, and attention to detail. It’s not just about getting a great image—it’s about ensuring every photo is accurately captioned, timed, and ready for editors to use immediately.

This weekend reminded me of the craftsmanship behind sports photography—the part that happens long after the play is over, in the careful assembly of captions, edits, and metadata that turns raw images into stories people worldwide can follow.

Tagged : /

The Nikon Z 9’s Autofocus: A Steep but Rewarding Learning Curve

Reading Time: 4 minutes

The Steep Learning Curve of Autofocus in Mirrorless Cameras

Switching from DSLR to mirrorless has been one of the steepest learning curves of my career. Not because the mirrorless system is inferior—it’s the opposite. The Nikon Z 9 outpaces any DSLR in sheer autofocus speed, accuracy, and subject detection. But the sheer number of autofocus settings available is both a gift and a challenge.

You might have had a handful of AF modes to learn with a DSLR. With the Z 9, multiple focus modes, AF-area modes, and subject detection options can be combined in countless ways. Picking the proper setup for the right situation can be perplexing, but it’s also where the magic happens. That “extra bump” of sharpness and accuracy comes from knowing which AF setup works best.


Autofocus Options in the Nikon Z 9

Focus Modes (4):

  • AF-S (Single)
  • AF-C (Continuous)
  • AF-F (Full-time, video only)
  • MF (Manual focus)

AF-Area Modes (8+):

  • Pinpoint AF
  • Single-Point AF
  • Dynamic-Area AF (S, M, L)
  • Wide-Area AF (S, L, C1, C2 custom shapes)
  • 3D-Tracking
  • Auto-Area AF

Subject Detection (6):


Example: Birds in Different Environments

  • Bird in an open sky: AF-C + Dynamic-Area AF (L) + Bird detection
  • Bird in dense foliage: AF-C + Single-Point or Pinpoint AF + Bird detection (or Off, relying on contrast-based focus)

The settings change drastically depending on context. That’s the power—and challenge—of the Z 9.

Cautions: Subject Detection Using “Birds”

  • Subject detection may not perform as expected if:
    • The subject’s face is too large or small relative to the frame,
    • The subject’s face is too brightly or dimly lit,
    • The subject’s face or eyes are obscured by a feather or the like,
    • The subject’s face and eyes are of similar colors, or
    • The subject moves excessively during shooting.
  • The camera may display a border around subjects that are not birds but that resemble them. If the camera often mistakenly detects subjects other than birds, changing to an AF-area mode with smaller focus points may improve focus performance.
  • Flickering is more likely to occur if photos are taken under fluorescent, mercury-vapor, or similar lighting than in other environments.
    • Selecting [ON] for [Photo flicker reduction] in the photo shooting menu reduces flickering effects.
    • If there is no flickering, we recommend selecting [OFF] for [Photo flicker reduction] in the photo shooting menu.
  • The light from the AF-assist illuminator may adversely affect some birds’ eyes; select [OFF] for Custom Setting a12 [Built-in AF-assist illuminator] when using autofocus.
  • “Birds” cannot be selected as a subject detection option for [Auto capture] in the photo shooting and video recording menus. When taking pictures of birds, choose auto or animals as the subject type.

Quick Wildlife Cheat Sheet

SceneRecommended AF Setup
Bird in open skyAF-C + Dynamic-Area AF (L) + Bird detection
Bird among foliageAF-C + Single-Point/Pinpoint AF + Bird detection (or Off)
Portraits (people)AF-C + Wide-Area AF (S/L) + People detection
Vehicle in motionAF-C + 3D-Tracking or Wide-Area AF (C1) + Vehicle detection
Complex actionAF-C + 3D-Tracking or Auto-Area AF + Auto subject detection

Mastering Sports Autofocus with the Nikon Z 9

If wildlife autofocus is challenging, sports photography takes it up another notch. For good reason, Nikon even provides a dedicated technical guide for Z 9 sports autofocus. In sports, where action is fast, unpredictable, and often blocked by other players, you must optimize every AF setting to keep up.


Baseline Sports Settings

  • Focus Mode: AF-C (Continuous AF)
  • AF-Area Mode:
    • 3D-Tracking (best for individual athletes)
    • Dynamic-Area AF (S) (best for team play with crowded fields)
  • Subject Detection: Auto (lets the camera choose humans/vehicles)
  • Custom Tweaks:
    • a1 (AF-C priority): Release
    • a3 (Lock-on): Blocked-Shot Response = 2, Subject Motion = Steady
    • a9 (Focus mode restriction): Limit to Continuous AF

Dialing in by Sport

SportRecommended Setup
SoccerDynamic-Area AF (S) or Wide-Area AF (C1) — helps isolate players in a crowded field
Sprints3D-Tracking or Wide-Area AF (C1, wide) — keeps one runner locked in
MarathonsDynamic-Area AF (S), lock-on = 3, motion = Steady
SwimmingWide-Area AF (C1 small) or Dynamic-Area AF (S) — avoids focus jumping to splashes
Table Tennis3D-Tracking or Wide-Area AF (C1) — helps avoid net interference
Motor Sports3D-Tracking or Wide-Area AF (C1 wide), subject detection = Vehicle

Bringing It All Back to Storytelling

Whether you’re photographing wildlife or athletes, the Nikon Z 9 is not just a better tool—it’s a smarter, more adaptable one. But mastery requires intentionality. The settings that give you tack-sharp eyes on a bird in flight will not serve you as well courtside at a basketball game. Learning which autofocus combinations work best for your story takes your images from “good” to “magical.”

As I teach in storytelling workshops, the right tools, used with purpose, elevate every story. The Z 9 gives us the freedom to adapt—our job is to choose wisely.

Tagged :

Be Prepared: What To Do If Your MacBook Pro Has a Meltdown

Reading Time: 2 minutes

Well, today didn’t go as planned.

Instead of spending my workday creating stories or editing videos, I fixed my MacBook Pro. Again.

This morning, I opened my laptop and was greeted with a warning: “Your disk is almost full.” Sound familiar? The crazy part? I had about 1.5 TB of free space on my 2TB internal SSD. So what happened?

Something corrupted the “Macintosh HD – Data” volume like last year. It made the system think I only had 5.8 GB of space left, which locked everything up: no saving or updating. I had a machine with storage, but it couldn’t see.

What I Had to Do

Once this happens, there’s only one way out:

  1. Erase the internal drive.
    Yep, all of it. Completely reformat the disk.
  2. Reinstall macOS.
    This part takes a little time, but it’s straightforward.
  3. Restore from a Time Machine backup.
    This is where having a solid backup plan pays off. I had a full-time machine backup on my NAS (Network Attached Storage) device. A NAS is like your own personal cloud—a hard drive (or multiple drives) that connects to your network and lets you store, access, and backup files from any device in your house or studio.

Restoring from Time Machine is smooth, but it’s not fast. Between all the steps—erasing, reinstalling, and restoring —this whole process takes up most of a workday. That’s time I should’ve spent on client projects; that’s billable time I can’t get back.

Lessons Learned (Again)

If you’re a creative or business professional who relies on your MacBook Pro every day, here are a few takeaways:

  • Always have a current backup. I recommend a Time Machine backup to a NAS, external hard drive, or both.
  • Know how to boot into macOS Recovery Mode. Press Command + R during startup.
  • Plan for lost time. Even when you’re backed up, you’ll likely lose an entire day restoring everything and getting your setup back to normal.
  • Consider using Disk Utility regularly to check and repair your drive. It might help you catch an issue before it becomes a disaster.

The Bottom Line

You can’t prevent every issue, but you can be prepared. If this ever happens to you—and trust me, it might—having a reliable backup system could be the difference between a quick recovery and a complete meltdown.

I didn’t lose any files, and that’s a huge win. But I did lose a day of productivity. Hopefully, sharing this saves you from the same.

Tagged : /

Capturing the 4th of July Fireworks – From the Air and the Ground

Reading Time: 2 minutes

This year’s 4th of July celebration was a little different for us—but in the best way possible.

Our friends George and Robbie Coppenhaver graciously invited us to join them for fireworks in their cul-de-sac inside Roswell Country Club, here in Roswell, Georgia. It was the perfect setup for a relaxing evening. My wife Dorie is recovering from some cartilage damage in her knee, and her doctor has her off her feet for six weeks. So we parked in a driveway, set up our chairs about 20 feet away, and enjoyed a full-blown fireworks show without walking more than a few steps. Talk about front-row comfort.

As a storyteller who rarely leaves the camera behind, I packed a few tools to capture the magic.

Tools of the Trade

I used my Nikon Z9 paired with the 14–30mm f/4 lens to photograph the fireworks. I locked it down on a tripod and went fully manual for complete control. Here’s my setup:

  • ISO: Between 100 and 400
  • Aperture: f/8 to f/11
  • Shutter Speeds: 1 to 25 seconds
  • Trigger: Cable release to hold the shutter open for multiple bursts—typically 4 to 8 fireworks per frame

If you’ve ever photographed fireworks, you know that long exposures let you paint multiple bursts into a single frame. It’s all about timing—open the shutter just as the shell pops and close it after a few nicely spaced explosions.

Eyes in the Sky

I also launched my drone to capture video footage from above to get a unique angle. There’s something magical about seeing fireworks from the sky—watching them bloom over neighborhoods, lighting the night from a new perspective. I later edited the drone footage in Adobe Premiere Pro.

The stills were processed in Lightroom, where I fine-tuned the contrast and color to give the images that extra punch you want with fireworks photography.

One Last Tip

If you can watch a stunning fireworks display just 20 feet from your car, take it. especially when you can bring your gear, settle in comfortably, and still capture professional-level images and video. It was a beautiful night with great company, and I’m grateful for the chance to document it from both the ground and the air.

Tagged :

How Nikon Metering Modes Changed My Photography—and What Still Matters Most

Reading Time: 3 minutes

When I started in photography, getting the exposure right meant knowing your film, your light, and your camera like the back of your hand. There were no histograms or blinking highlights, just your eyes, meter, and instincts.

Back in the Kodachrome days, there was little room for error. That film had a narrow latitude—you exposed for the highlights or you paid for it with lost detail. It trained me to see light with discipline. There were no safety nets.

Then Nikon started evolving their metering systems, and everything started to change.


A Quick History of Nikon Metering Modes

Here’s a timeline of how Nikon evolved metering, each innovation promising better consistency:

  • Center‑Weighted Metering
    📷 Nikon F (1959)
    Focused most of the meter’s reading on the center of the frame—perfect when your subject was dead center.
  • Matrix (Evaluative) Metering
    📷 Nikon F-601 / N6006 (1990)
    Game changer. The camera divided the frame into zones and used algorithms to guess the best exposure.
  • 3D Color Matrix Metering
    📷 Nikon F4/F5 (1996)
    Brought distance and color into the metering equation. The camera was getting smarter.
  • Digital 3D Color Matrix Metering
    📷 Nikon D1 (1999)
    Added a 1,005‑pixel RGB sensor. Welcome to digital wizardry.
  • Spot Metering
    📷 Nikon F-601 (1990) and D1 (1999)
    Gave precise readings from a small portion of the frame—ideal for tricky lighting situations.
  • Highlight‑Weighted Metering
    📷 Nikon D810/D850/D5 (2014–2016)
    Specifically, it protects highlights and is a mode designed around how we see and work.

More Intelligent Cameras, But Still Not Smarter Than the Photographer

With every advancement, metering improved. It helped with consistency. But I also learned that no matter how smart the camera got, it could still be fooled, especially if I wasn’t entirely in control.

If you shoot in Aperture PriorityShutter Priority, or Program, your camera makes decisions for you. And sometimes, it makes the wrong call.

That’s why manual mode—with all these tools as guides, not governors—is still my home base when it matters most.


Enter the Histogram—A Digital Lifesaver

When digital came along, the histogram changed the game. I could finally see whether I was clipping highlights or crushing shadows. It took all those years of Kodachrome discipline and gave me a feedback loop. That made a massive difference in fast-paced situations.

I dive deep into this in my blog post, “Changing My Photography Game with the Nikon Z9 – White Balance and Metering Insights”. The Z9 gave me metering tools I never imagined years ago—but I still had to learn how and when to override them.


The Promise (and Pitfalls) of Eye-Tracking + Spot Metering

When I started using eye-tracking autofocus combined with spot metering on the Nikon Z9, I thought I had found the holy grail for portrait work.

It’s fantastic for a single person.

But on a football field? Where are there dozens of faces in the frame? The camera might suddenly lock onto a coach on the sideline instead of the wide receiver sprinting downfield.

That’s where I leaned back on my sports settings for the Nikon Z9. You’ve got to train the camera for the game, not just the face.


Metering Glitches? Sometimes It’s Not You

There have also been times when metering just seemed off. It turns out it wasn’t user error—it was a glitch.

In one post, “Troubleshooting Nikon Camera Glitches—Unveiling Solutions Beyond the Exposure Triangle,” I discuss how understanding metering modes also means knowing when the camera needs a reset or when firmware updates fix bugs that quietly wreak havoc.


Final Thoughts: Tools vs. Trust

Today’s metering systems are nothing short of incredible. But they are tools, not truth-tellers. They can inform, assist, and enhance—but only if you, the photographer, are in charge.

You still need to:

  • Know the lighting
  • Understand your subject
  • Choose the correct metering mode
  • Review your histogram
  • Be willing to go manual when things get unpredictable

Metering modes may have changed how I work, but they haven’t changed why I meter: to tell the story with clarity, consistency, and control.

Tagged :

Why I Use Manual Flash Most of the Time (Even Though TTL is Pretty Smart)

Reading Time: 4 minutes

Over the years, I’ve used everything from Nikon’s speedlights to studio strobes like the Flashpoint XPLOR 600, and I’ve learned that manual flash gives me the consistency I need when the light—and the story—matter most.

Don’t get me wrong—TTL flash (through-the-lens metering) is an incredible tool, especially in a fast-moving, unpredictable environment. It’s like having an assistant constantly reading your scene and adjusting the light. TTL can be a lifesaver for event work, weddings, or situations where your subject and background continually change.

But when I have the time to set up and shape the light—whether it’s an environmental portrait, a brand shoot, or storytelling for a nonprofit—I switch to manual flash every time.

Shaping Light for Portraits — Demonstrating the shift from butterfly lighting to clamshell lighting by introducing a lower fill with a reflector or second light source during a live demo in the SOP1 class at YWAM’s School of Photography in Kona, Hawaii. Photo by Dennis Fahringer. Model: Julie Gavillet.

Manual = Control and Consistency

TTL works by firing a quick pre-flash and measuring the light bounce to determine power. The problem? If your subject moves slightly or the background changes, your exposure can shift, even if nothing about your lighting setup changes.

That’s where manual flash shines. Once you dial your settings—say 1/8 power, 1/200 shutter speed, f/4, ISO 100—you’re locked in. You can reposition, recompose, and shoot knowing your light won’t surprise you. That’s a big deal when trying to match strobes to ambient light or nail a consistent look across a series of images.

As I’ve written, “Flash is like garlic—a little goes a long way.” Manual flash gives me the finesse to use enough light to sculpt the subject without overwhelming the scene. With TTL, you sometimes get too much “garlic” when you weren’t expecting it.

Controlling the Light, Not Guessing — Demonstrating a classic 3:1 lighting ratio using manual flash setup—key, fill, and background light—to create consistent, controlled portraits without relying on TTL. This hands-on session was part of the SOP1 class at YWAM’s School of Photography in Kona, Hawaii. Photo by Dennis Fahringer. Model: Julie Gavillet.

When TTL Makes Sense

There are times when TTL flash is exactly what I need. In my post on slow-sync TTL flash, I discussed balancing flash with ambient light during low-light moments. TTL is perfect for that, especially when people are moving in and out of shade or you don’t have time to meter and tweak.

I also appreciate TTL using small flashes like the Godox V860 in rapidly changing lighting conditions. TTL gives you a strong starting point; some systems even let you dial in exposure compensation if TTL overshoots.

But again, if I have the time, I’ll almost always switch to manual after that initial TTL reading—because I want consistency from frame to frame.

Revealing, Not Replacing the Light — Teaching how to use flash to gently lift shadows and reveal detail in a backlit scene, preventing the subject from becoming a silhouette. Photo by Dennis Fahringer. Fire dancer: Aileen Kunewa.

Real-World Example: Flashpoint XPLOR 600 and the Nikon Z9

When I tested the Flashpoint XPLOR 600 with my Nikon Z6 (and now the Z9), I was impressed with how well the TTL worked for quick setups. But for my storytelling work—especially when I’m controlling background light with high-speed sync (HSS)—I rely on manual mode to avoid fluctuating exposures that TTL can sometimes introduce.

Once I’ve dialed in that look—backlight from the sun at f/2.8, a soft key from my off-camera flash—it’s smooth sailing. Manual gives me repeatability, and that’s critical when I’m shooting interviews or sequences where continuity matters.

Teaching the art of light on location — I’m demonstrating off-camera flash techniques with fire dancer Aileen Kunewa on the beach in Kona, Hawaii, during a live shoot with the School of Photography 1 class at YWAM. This hands-on session focused on using manual flash to shape light creatively in challenging environments—photo by Stanley Leary.

Final Thoughts

If you’re new to Flash, TTL is a great teacher. It helps you understand how flash balances with ambient and gets you close quickly. But if you’re ready to take control of your lighting, manual is the way forward.

So while both TTL and manual flash are in my bag, manual flash gives me the light I trust frame after frame.


Let’s connect:
Do you have a question about manual flash, or would you like help with setting up the Nikon Z9? Please message me or check out more lighting tips on my blog.

Tagged :

Why Now Is the Moment to Upgrade from DSLR to Mirrorless

Reading Time: 3 minutes

If you’ve been holding on to your DSLR, hoping to squeeze out a little more life from it, it’s time to consider upgrading seriously. The industry has spoken—and mirrorless cameras aren’t just the future but the present.

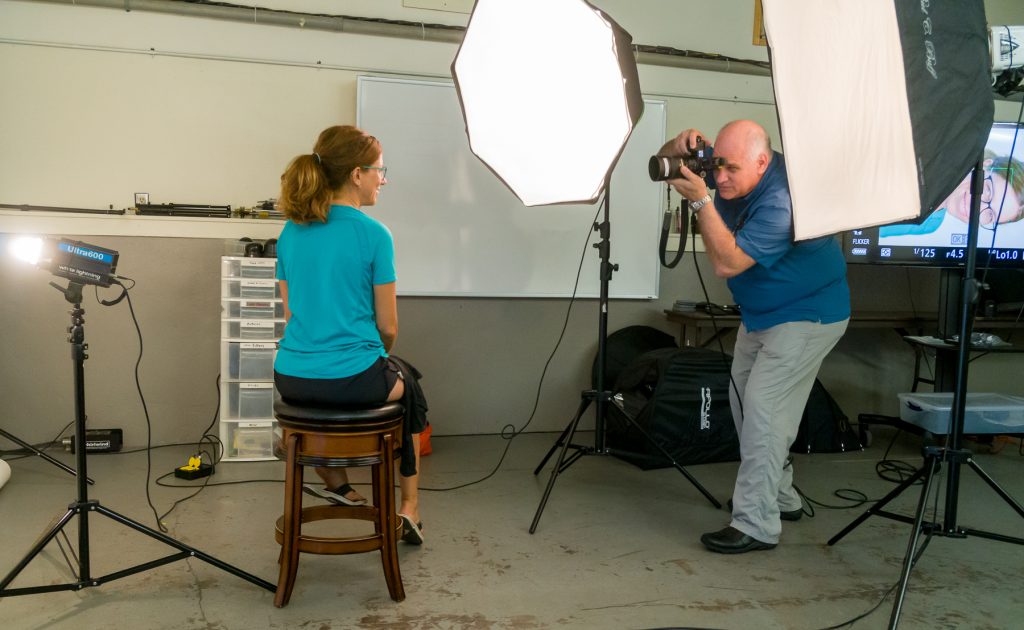
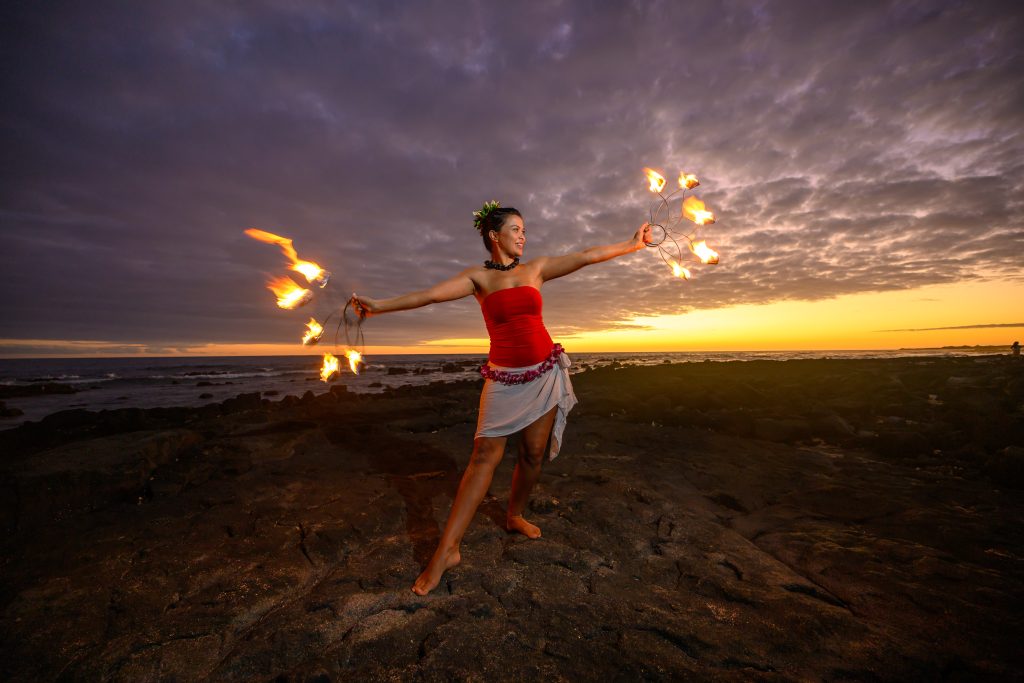
As a professional photographer and storyteller, I’ve seen firsthand how switching to mirrorless has changed my work. If you’re still on the fence, here are the biggest reasons why now is the time to make the move.


1. DSLRs Are No Longer Being Made

Let’s start with the most significant reason: major manufacturers are phasing out DSLRs entirely.

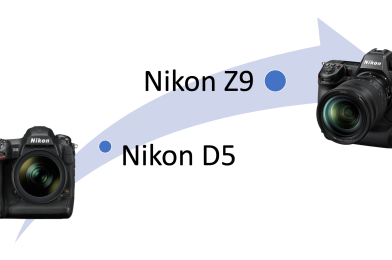
Canon has already announced that the EOS‑1D X Mark III is its final flagship DSLR. Nikon hasn’t introduced a new DSLR since the D6, and reports have stated that they’ll stop production completely soon. Sony made the move even earlier, completely halting DSLR development in favor of its mirrorless Alpha line.

If you’re using a DSLR, you’re holding onto a system that’s no longer being supported. That alone should get your attention.


2. Innovation Lives in Mirrorless

Every new advancement is happening in the mirrorless space. That includes:

  • Faster, smarter autofocus powered by AI and on-sensor phase detection.
  • Live exposure preview in electronic viewfinders—what you see is truly what you get.
  • Incredible video tools like in-body stabilization, high frame rates, and pro codecs.
  • Silent shooting and high frame rate burst modes that outperform DSLRs.

All the cutting-edge features are going into mirrorless systems, not DSLRs. If you want to keep up, you need to switch.


3. Smaller, Lighter, More Efficient

Mirrorless bodies are typically more compact and lighter than their DSLR counterparts. This makes a big difference if you’re traveling, shooting long events, or working in tight spaces.

Fewer moving parts also mean greater reliability and fewer potential mechanical failures.


4. The Market Has Moved

Sales of mirrorless cameras surpassed DSLRs a few years ago, and that gap has only widened. Mirrorless cameras now dominate both the enthusiast and professional markets. Camera companies invest their resources into mirrorless R&D, marketing, and customer support.

When the market moves, it’s wise to move with it.


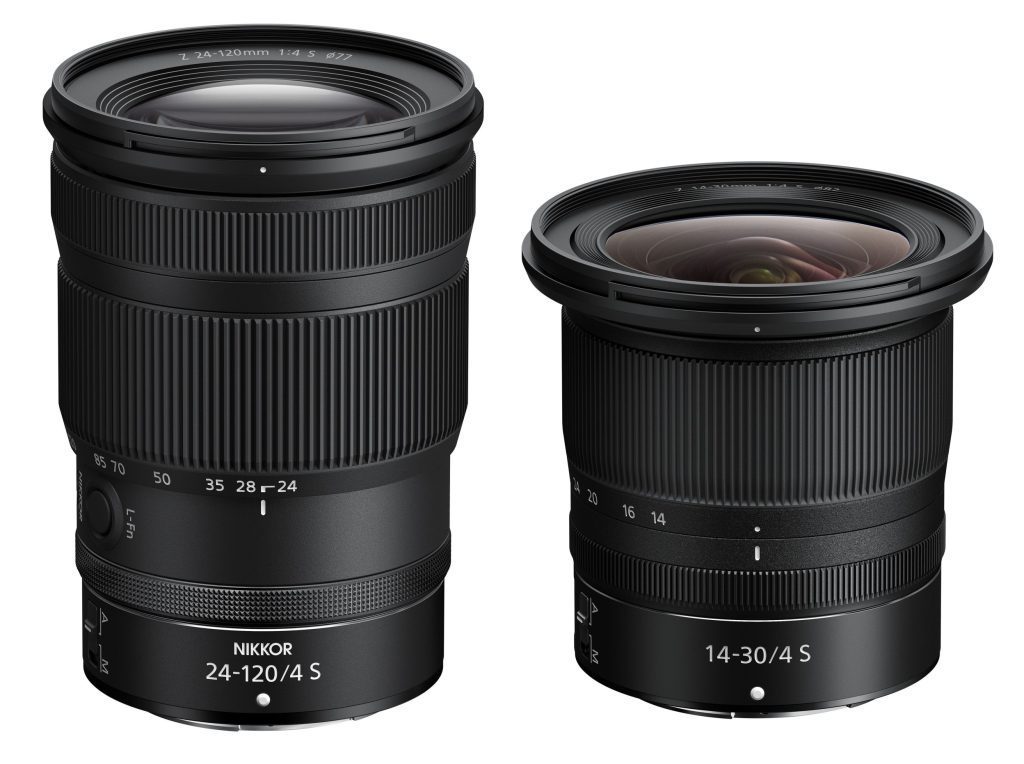
5. Lens Ecosystems Are Focused on Mirrorless

Canon’s RF lenses, Nikon’s Z-mount lineup, and Sony’s ever-growing FE collection are where lens innovation is happening.

Yes, you can adapt DSLR lenses to mirrorless bodies, but in the long term, you’ll want to build your collection with native mirrorless lenses designed for faster autofocus and edge-to-edge sharpness.


6. Perfect for Hybrid Creators

More than ever, content creators are being asked to shoot video and stills. Mirrorless cameras are built for this hybrid world, offering:

  • Flippy screens and touch controls
  • High-quality video modes
  • Seamless streaming and live content capabilities

If you’re a solo creative or small business storyteller, mirrorless makes your workflow faster and more flexible.


Bonus: Trade-In Value & Repair Considerations

1. Trade-In While It Still Has Value
As DSLR production stops, used DSLR gear will lose value fast. Trade-in programs currently still offer decent returns, but that window is closing.

2. Repairs Will Get Harder
With production halted, parts will become scarcer. Fewer authorized service centers will prioritize DSLR support, which means longer turnaround times or no repairs.

3. Fewer Buyers for DSLR Gear
Fewer people are looking to buy DSLR systems as more people are jumping to mirrorless. Resale will only get harder with time.

4. Mirrorless Adapters Give You Flexibility
Most mirrorless systems offer adapters that let you use your existing DSLR lenses. So your old gear doesn’t go to waste immediately—you can gradually transition.


Final Thoughts

I know change can feel risky, especially when it involves gear you’ve come to rely on. But the shift to mirrorless isn’t a trend. It’s a complete evolution. The cameras, lenses, support, and innovation are all headed in one direction.

If you wait too long, you may end up with a system that is not only obsolete but also harder and more expensive to support.

I made the jump, and I haven’t looked back. If you’re ready to discuss your next steps or want help figuring out what gear best suits your style and needs, I’m here for you.

Tagged :

Three Cameras and a Flash: How I Covered Roswell’s First Pride Parade

Reading Time: 2 minutes

When I set out to photograph Roswell, Georgia’s first-ever Pride Parade, I knew I needed a setup to keep up with a fast-moving, emotionally rich community event. My goal was to capture everything from sweeping crowd shots to personal moments, without missing a beat.

For this assignment, I used a three-camera setup that let me move fluidly between wide, mid, and tight compositions:

  • Nikon Z6 with 14–30mm f/4 — This is my go-to for wide shots. This lens was perfect for capturing the crowd’s energy and Canton Street’s architecture.
  • Nikon Z9 with 24–120mm f/4 — This was my most versatile setup. This combo easily allowed me to go from documenting small groups to mid-range portraits.
  • Nikon Z9 with 100–400mm — Essential for capturing moments from a distance without interrupting the scene. Great for emotional candids, speakers, and layered compositions.

Even though the event was outdoors on a sunny June day, I brought an on-camera flash and used it often. Hats and harsh sunlight can create deep shadows on faces (those classic raccoon eyes). A bit of fill flash helped lift the shadows and bring out the expressions that tell the story. It was invaluable when I was up close with people fully engaged in the moment, but standing under intense sunlight.


What Worked

  • The three focal ranges let me react quickly without needing to swap lenses.
  • The flash was a game-changer for maintaining detail and clarity in challenging lighting.
  • Carrying two Z9s meant I had the speed and autofocus reliability I needed all day.

Covering events like this is about more than just documenting who was there—it’s about showing how it felt to be there. This gear setup helped me stay present in the action without compromising the quality of my storytelling.

Tagged :

Why the MagMod Sphere is a Game-Changer for Event Photography

Reading Time: 5 minutes

As a photographer, I always look for tools to enhance my work while keeping my setup simple and efficient. This past weekend, I had the opportunity to put the MagMod Sphere to the test during an event that included both outdoor and indoor settings. The results were impressive, and I can confidently say this flash attachment is the way to go for on-camera event photography.

I am standing on the porch, which means they were pretty much silhouetted [extremely dark], so by using the MagMod Sphere, it is bouncing off the porch’s white ceiling and directly at them, making it easier to show this bride/groom and daughter with those who showed up for the party in the background. [NIKON Z 9, NIKKOR Z 24-120mm f/4 S, Mode = Aperture Priority, ISO 10000, 1/25, ƒ/5.6, (35mm = 24)]

The Benefits of the MagMod Sphere

The MagMod Sphere is designed to transform harsh flash light into a soft, diffused glow. This is particularly useful in event photography, where you must adapt quickly to varying lighting conditions.

Nikon Z9, 24-120mm ƒ/4 Z, Godox V860IIN & MagMod Sphere

Here are a few reasons why I believe the MagMod Sphere is an essential tool for photographers:

  1. Easy Attachment: The magnetic design makes it incredibly easy to attach and detach. Depending on the available light, I could quickly switch between using the Sphere and shooting without flash during the event.
  2. Soft, Even Light: The diffusion provided by the Sphere allows for a soft light that reduces harsh shadows and creates a more flattering look for subjects. I noticed a significant difference in the quality of my flash shots compared to when I shot with direct flash.
  3. Compact and Lightweight: The Sphere is lightweight and doesn’t add much bulk to your gear. This is crucial when walking around an event space, where you must be agile and quick.
  4. Versatile for Different Settings: Whether I was shooting outside during the day or indoors with mixed lighting, the MagMod Sphere adapted beautifully. If the available light was sufficient, I could quickly turn off the flash and capture natural, ambient shots without hassle.
The sun was setting, and it was much darker under the porch. I used the MagMod Sphere but pointed the flash straight at the couple. In the post, I used the gradient mask on the lower half to darken the banister. [NIKON Z 9, NIKKOR Z 24-120mm f/4 S, Mode = Aperture Priority, ISO 3600, 1/80, ƒ/5.6, (35mm = 52)]

Speeding Up Your Workflow in Lightroom with the MagMod Sphere

In addition to its advantages during shooting, the MagMod Sphere can significantly streamline your post-processing workflow in Lightroom. Here are a few reasons why:

  1. Consistent Lighting: The soft, diffused light from the MagMod Sphere creates a more uniform exposure across your images. This consistency means less time spent adjusting individual photos in Lightroom, allowing you to edit in batches more efficiently.
  2. Reduced Post-Processing: Because the Sphere minimizes harsh shadows and helps achieve more flattering skin tones, you won’t need to spend as much time correcting or retouching in post. This translates to faster edits and more time for other projects.
  3. Easier Color Correction: The quality of light from the Sphere can lead to more accurate colors in your photos. This makes color correction easier and quicker in Lightroom, as you’ll spend less time adjusting white balance and saturation.
  4. Fewer Exposures to Adjust: When using the MagMod Sphere, your images are less likely to have extreme highlights or shadows. This means fewer exposures to fine-tune during editing, speeding up your workflow.
  5. Streamlined Preset Application: If you use presets in Lightroom, consistent lighting can make it easier to apply your favorite presets across multiple images without needing to tweak settings for each photo.

By using the MagMod Sphere, you improve the quality of your images during the shoot and set yourself up for a more efficient editing process later. This means more time doing what you love—capturing moments—while minimizing time spent behind the computer.

No Flash Example [NIKON Z 9, 35mm f/1.4G, Mode = Aperture Priority, ISO 2000, 1/250, ƒ/1.4, (35mm = 35)]

Real-World Application

During the event, I relied on the MagMod Sphere for various shots. For example, outside, I used the flash to fill in shadows on faces, which helped create a balanced exposure. Indoors, I used it to illuminate subjects without overwhelming them with light.

I will share some examples of my work: shots taken with the MagMod Sphere and those taken without flash, showcasing how the quality of light can significantly affect the final image.

Challenges with Off-Camera Flash

While off-camera flash can yield stunning results, it can be impractical in an event setting. Even with an assistant, it’s easy for guests to cast unwanted shadows, disrupting the event flow. Using the MagMod Sphere as an on-camera flash solution helped me avoid these pitfalls while providing the necessary lighting.

Flash is mixing with the available light. [NIKON Z 9, NIKKOR Z 24-120mm f/4 S, Mode = Manual, ISO 25600, 1/160, ƒ/4.5, (35mm = 36)]

Tips for Using the MagMod Sphere in Event Photography

  1. Assess Available Light: Before you start shooting, evaluate the lighting conditions. If the available light is good, don’t hesitate to turn off the flash for a more natural look.
  2. Use Flash as Fill Light: In bright outdoor settings, use the flash to fill in shadows rather than overpowering the ambient light.
  3. Experiment with Angles: Slightly angling your flash can change how the light falls on your subject, so don’t be afraid to play around.
  4. Keep It Simple: The MagMod Sphere is designed for quick changes. You can do so in seconds if you need to switch back to natural light.
  5. Capture the Moments: Focus on candid moments and interactions. The Sphere allows you to illuminate your subjects without drawing too much attention.

Conclusion

Incorporating the MagMod Sphere into my event photography this past weekend was a game-changer. It allowed me to navigate different lighting conditions effortlessly while maintaining the quality of my images. If you’re looking for a versatile, efficient, and effective flash attachment for event photography, the MagMod Sphere should be at the top.

For more information on the MagMod Sphere and other tools, check out MagMod’s official site and read reviews such as the one on Digital Camera World. Happy shooting!

Tagged :

Speed Up Your Photo Culling Process with Photo Mechanic and Lightroom

Reading Time: 3 minutes

In the fast-paced world of photography, efficiency is critical, primarily when culling your images. With countless photos taken during a shoot, quickly sorting through them can feel overwhelming. Fortunately, combining the power of Photo Mechanic and Adobe Lightroom can streamline this process significantly. Here’s how to leverage both tools for faster image culling, whether starting fresh or working with images already in Lightroom.

Getting Started with Photo Mechanic

Photo Mechanic, developed by Camera Bits, is a fast and efficient tool for photographers to manage their images. It’s perfect for the initial ingest and culling process. Here’s how to begin:

Ingesting Images into Photo Mechanic

  1. Open Photo Mechanic and select Ingest from the top menu.
  2. Choose your source—a memory card or a folder on your hard drive or external drive.
  3. Set your destination folder for the images.
  4. Start the ingest process. This will import your photos and allow you to review them instantly.

Culling Your Images

Once your images are ingested, you can quickly sort through them:

  1. Use the arrow keys to navigate through your pictures.
  2. Press “T” to tag the images you want to keep. This is a quick way to mark your favorites without interrupting your flow.
  3. For images you don’t want to keep, use the arrow keys to move on.

Deleting Unwanted Images

To delete images you don’t want:

  1. Navigate to the top pull-down menu in Photo Mechanic.
  2. Select “Untagged” from the middle menu. This will filter out all the tagged images, showing only those you’ve rejected.
  3. Press ⌘ + A to select all untagged images, then hit ⌘ + ␡ to delete them.

Using Photo Mechanic this way, you’ll have quickly culled your images before pictures stepping into Lightroom.

Syncing Changes with Lightroom

  1. Open Photo Mechanic and navigate to the folder where your images are stored.
  2. Use the same tagging method as above to mark the keepers.
  3. After you’ve tagged and deleted the unwanted photos, return to Lightroom.

Synchronizing Folders in Lightroom

To update Lightroom with the changes made in Photo Mechanic:

  1. Go to the Library Module in Lightroom.
  2. Locate the folder on the left panel containing your images.
  3. Hover over the folder name, right-click (or hold the Control key and click) to bring up the context menu.
  4. Choose “Synchronize Folder”.
  5. In the dialog that appears, click “Synchronize”. Lightroom will automatically highlight any changes, updating your catalog accordingly.

Conclusion

Using Photo Mechanic with Lightroom can drastically reduce the time spent culling through your images. By ingesting images first into Photo Mechanic, you streamline the culling process, allowing you to focus on your best shots before they even enter Lightroom. Even if you start with Lightroom, Photo Mechanic can enhance your workflow, making tagging and deleting unwanted images easier.

Embrace this powerful duo and watch your productivity soar, giving you more time to focus on what you love most—creating stunning photography!

Tagged :