Photographers need calibration

Bill Bangham, Gary & Vivian Chapman and Ken Touchton sit on the front row of the Atlanta Photojournalism Seminar in Atlanta on Saturday, December 1, 2012.

Industry Workshops and Seminars

Why do pros who have twenty, thirty, forty or more years of experience continue to go to workshops? You would think they know all there is to know about photography. Well for the most part they do know most everything to do for what they are currently doing. Sure they could use a tidbit here or there, but most photographers are not going to learn a tidbit at these workshops.

Michael S. Williamson is a two-time Pulitzer Prize winning photographer who joined The Washington Post in 1993 after working for the Sacramento Bee from 1975-1991. He taught at Western Kentucky University (1991-93). 

Review

Michael Williamson titled his talk to us “It Ain’t The Tool. It’s The Fool.” He was helping us to understand it isn’t about all the gear it is the what you do with it. While teaching at Western Kentucky University Williamson had two things he required the photographers put on the back of their cameras.

  1. What am I photographing?
  2. What am I trying to say with the photograph?
The seminar audience was “photojournalists” whose purpose is to tell stories with their cameras.  He even joked about not being an artist. “It must be art because I don’t get it,” is how he was trying to distinguish the difference between a picture just created for no reason and the other of having a message, which is the journalists’ job.
Limits
Michael would joke about he was shooting a silouhet because he wasn’t over his limit for that today. His joke was to remind us to look for different ways to engage our audience. “Photos that work are not good verses bad, they are interesting verses boring,” commented Williamson.

Michael Schwarz captures some of the event with his DSLR as video and is helping to put together a package on what the conference is all about.
Your gifts and talents
Vincet Laroret told us to know your role and those around you. He was helping photographers understand as they take on bigger projects some of the roles they play will change when they must collaborate with others.
Laforet used movies to help us know the role of those making them. You have your visionary Director, the director of photography,  ADs, Gaffers, talent and more working on a movie set to create the movie. He was emphasizing the need to be clear in your communication and why each person had roles that all needed to be flexible.
What I was learning from his discussion was that as the lone guy producing a package you must juggle all these roles. I reminisced that had I not spent time in different roles through my life I couldn’t do this all by myself today at times. I also started to see how I was mentored to learn how to come up with an idea–the vision. 
Early in my career I was just executing many other creatives visions. I was like a first camera guy on a movie set. There was a senior photographer (Director of Photography) and they helped to guide me.

Today I bring on other pros to help me on projects as the budget allows.  

My take away to pass along:
  1. Learn how to work your camera
  2. Learn how to be a storyteller
  3. Learn how to create a vision (How to find a story)
  4. Continue to learn all you can about tools that will help you tell the story more effectively
  5. Learn to collaborate
David Gilkey is a staff photographer and video editor for NPR, covering both national and international news. He has produced award-winning photo essays, videos and multimedia presentations for NPR.org, as well as radio reports for NPR.
National Public Radio
Dave Gilkey talked about at NPR for the staff means “No Planning Required.”  He has had to jump on planes at the last second to cover major stories around the world. 
Gilkey commented on coming to NPR that he learned from the best how to do audio. He knew he had to master it or face the wrath of his counterparts and is bosses. Before coming to NPR Gilkey knew how to shoot a photo story, but now he had to produce them with sound and at the quality of NPR.
Today he works on every story with basically two lists working simultaneously in his head. 1) Shot list like he had always done, plus more shots were needed and 2) Natural sound list.
He also was working many times with the NPR reporters and discovered the two of them were trying to get the same thing often. He needed a shot of the door opening and closing sometimes and so did the reporter need to capture that sound. So the lens and microphone were often needed to be close to get those clean shots and sound.
The Calibration
I was learning over these days of the Atlanta Photojournalism Seminar what was being produced today in the industry. This helps me know more than my little world. Without this time to come and see what others are doing I could easily become irrelevant to my clients.
Storytelling for the most part hasn’t changed since before the invention of the camera. Writers were writing visual stories before we could capture them for the audience. 
Todays movies are using the latest technology to help communicate the storyline more effectively than before. The movie Avatar let us into a world that prior to computers could only be told with words.
I was learning some new twists on the storytelling to help me be the best I can be for my customers.
My question to you is have you calibrated to the industry yourself? Are you loosing jobs to other photographers and not knowing why?  
Going to a workshop will not stop you from loosing every job, but it will help you be more relevant in today’s marketplace.
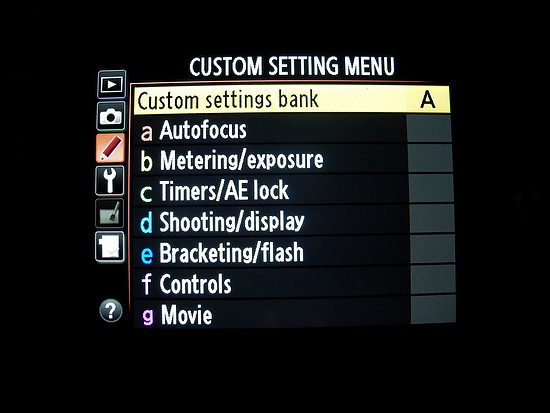
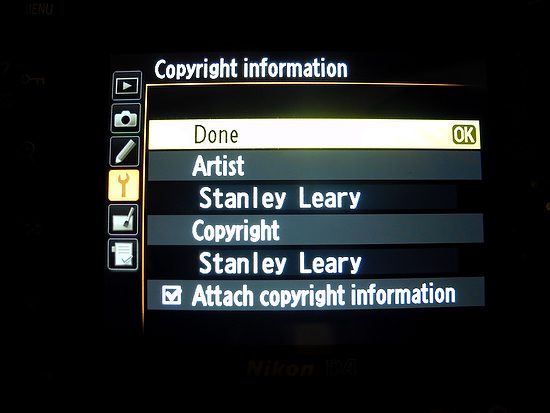
Besides calibrating myself, I was able to get my camera checked out and cleaned by Nikon. Hey there are many things to calibrate if you are a digital visual storyteller today.

Photography Workshops and more

Vincent Laforet is keynote speaker at the Atlanta Photojournalism Seminar.

The Stars

I always am interested in who is the faculty of a workshop/seminar. I come wanting to see their work and learn something that I cannot get from just seeing their work online or in a publication.

Vincent Laforet did a great job impressing us at the Atlanta Photojournalism Seminar with his work, which most of us will never shoot.  It was still inspiring.

While I learned years ago to go up and ask the instructors questions I learned how to make better use of my time. I learned that if I get to the event early I could grab the speakers before when few people were wanting their time.

The more I went to these events I got braver and then asked the speakers to eat lunch or dinner. I then got great time with some of the best in the field.

Christians in Photojournalism had dinner together at the Atlanta Photojournalism Seminar

Fellowship

Slowly I started to realize those people going to the seminar were just as valuable a resource as the “Stars.”

Today I cherish my time listening to just about anyone. I love to hear what they are doing. Usually this gives me a very unique time to learn something new.

Ron Sherman shares with a few of us during lunch break.

 I love to sit around and just listen to stories people are sharing. Today I listened to a lot of photographers. Ron Sherman told us some fun stories.

Tip

While you may go the the seminar/workshop for the stars the people sitting next to you are just as valuable as a resource. The other thing is by just being interested in them and what they have to share you can learn a great deal. What I also learned is I get more time with them than the stars. They have more time and do not have a line of folks waiting to talk to them.

The key is spending time with someone. It is about getting to know them. Now when I see them again we acknowledge each other and catch up with each other.

Bill Fortney the Nikon representative has become one of my best friends and resources. 

Another great reason to go to conferences with Nikon is they often will do “free” camera cleaning.  I had two cameras cleaned that would normally cost about $30 to $50 each.  

Going to conferences is where I grow and learn. I get the side benefit of getting my cameras cleaned and learning about the latest gear. I can put my hands on the new gear and ask questions to those who are experts.

The first thing you want to be sure you do if you do not already have a photography seminar/workshop on your calendar is to put one on for next year.  I personally recommend joining me in Fort Worth for the Southwestern Photojournalism Seminar, March 1 – 3, 2013.  Here is a link to that conference www.swpjc.org.

Historic Roswell Georgia: Took 20 years to discover

Nikon D4, 14-24mm, ISO 100, ƒ/5.6, 1/400

During the 1996 Olympics I was reminded of how much people travel from all over the world to my part of the world just to see what we have here.

I have lived in Roswell, Georgia since 1993 and just now did I take in some of the local historical sites almost 20 years later.

BBC sent a reporter to the Road to Tara Museum to film for the special on “Gone with the Wind”  It was rated in the top book favorites of all time for the BBC audience.

During the Thanksgiving holiday our family took in two of the three historical homes on the tour of Historical Roswell.

This is Bulloch Hall built in 1839 and the childhood home of Mittie Bulloch, President Theodore Roosevelt’s mother.

Besides seeing the house we also listened to the cell phone tour and listed as well to the docent.  We learned quite a lot about the history of the house and the founders of Roswell.

Teddy Bears which have their roots with Teddy Roosevelt.
Each room had a president’s theme. This was the Teddy Roosevelt room in Bulloch Hall. 

Photographer reasons to visit historical sites

The reason I like to visit locations is to gain a better understanding of visual cues. Historical locations help you understand how things looked during a certain period of time in history. The more you are aware of these visual cues the more you can pull upon this knowledge when helping clients.

Barrington Hall is listed on the National Register of Historic Places and was voted one of the 50 Most Beautiful Homes in the Atlanta area. The surrounding seven acres of grounds feature the only public antebellum garden in the greater Atlanta area. With guided garden walks, cooking classes and other special events, the site is a popular destination.

President Jimmy Carter’s aunt lived just down the street from these two homes and would come to visit here as well.  I think for those who enjoy history and want to know more about the history of Metro Atlanta, they need to come to Roswell, GA and take in Bulloch Hall, Barrington Hall and The Smith Plantation.

My daughter now wants an arbor after visiting Barrington Hall.  

While Thanksgiving wasn’t the best time of the year to take in the garden, we did see some flowers.

These photos were taken just taking the tour with the family. I may go back another time and do a story on the homes during the spring when the azaleas and dogwoods are in bloom.

Have you taken for granted things closer to your home that you could photograph? Tour groups come from all over the world to see things in Roswell, GA. How about your town?  Have you been there yourself?

Covering a typical community meeting tips

Rabbi Greene of Temple Beth Tikvah speaks to the HomeStretch volunteers at their appreciation dinner. (Nikon D4, 70-200mm,  ISO 12,800, ƒ/2.8 and 1/160, Custom White Balance with ExpoDisc)

One of the staples of many professional photographers is covering meetings. Very seldom do these photos end up in your portfolio. Unless you are covering a meeting where they hired a lighting crew you have to work just to get acceptable photos.

This event was in the meeting room of the local synagogue.  They had wonderful stage lighting, but like many groups they choose not to put their speaker on the platform where the stage lighting would have helped. No they put the speaker on the floor where the lighting was the worst in the entire room.

Lucky for me in the first photo that the podium was draped with an off white cloth. It helped to kick light back into the face of the speaker.  I prefer not to use a flash because it can be distracting to everyone. So I did use it sometimes, but tried to use it sparingly as more of a backup.

I wanted to show you this overall photo of the meeting I covered. Now notice how the white tables are kicking light back up into the faces of those people seated. You can see their eyes.  Now look at those people standing around.  The canned lights above are creating raccoon eyes for them.

From this photo I can tell I can easily shoot the people around the tables, but I may need some fill flash on those with the raccoon eyes.

As a photojournalist I was trained to see those things to be sure the photos were useable.

(Nikon D4, 28-300mm,  ISO 12,800, ƒ/5.6 and 1/50, Custom White Balance with ExpoDisc)

I decided I didn’t need the flash for the ladies at the table.  I just cranked the ISO up and shot it.

Here I put a CTO (Color Temperature Orange) filter over my Nikon SB-900 flash. It comes with the flash. I still shot at ISO 12,800 ƒ/5.6 and 1/100 so that the background wouldn’t go dark and look natural. I also did a custom white balance using the ExpoDisc.

I wanted to be sure I was getting good skin tones, so I would get a few shots of speakers and people in the room using a fill flash.

In all of these photos I was what I call running and gunning. As a photojournalist I don’t stop people and ask them to do it again. Now when I shoot for a company where we need certain things to look a certain way it is OK to make changes–it isn’t photojournalism it is advertising or corporate communications.

It is due to all my training as a photojournalist that companies need me. They need a photographer that can deliver in any situation with photos that communicate.

The professional photographer needs to get the best possible photo and sometimes that means without taking away from the atmosphere of what you are covering. They need the fly on the wall and not the Hollywood film crew making the meeting a set for their movie or TV show. Sure the photos would look 100% better doing just that, but the reason they are having the meeting isn’t primarily for the photos.

Can you get photos like these of your meetings?  Maybe this is why you should hire a pro sometimes.

Stanley’s DSLR Buying Guide

I get asked all the time which cameras I suggest people buy.  While I will mention specific models, those can change at anytime, so I will address features to look for when buying a DSLR camera.

I will first cover the different features and then my recommendations for the first time buyer of DSLR suggestions.

List of features:

Effective pixels
Sensor Size
Card Slot/Storage Media
Shooting speed
ISO Sensitivity
Movie
File format still/video
Lens Compatibility
Maximum Auto Focus Points
Built in flash
Live View Shooting
Microphone/Headphone for Video

There are many other features and even in these it maybe more than the nuts and bolts I think are most important.

Effective Pixels

How many pixels per inch does your camera capture?  First of all we need to know that for the most part today’s camera are capable of producing larger size prints than most people will ever need.  However with that said you could read this blog post if you need to figure out how big of a print the camera will produce.


There are basically two different physical sized sensors on the market.  Full framed sensors and cropped size of 1.5 or 1.6 sensors.

While the number of pixels may be the same the larger sensor has less noise as a rule and therefore cleaner images when taking photos at a higher ISO.

The larger full-framed sensor means you need lenses that support this.  The smaller sensor can usually use the full-framed size lenses, but not the other way around.  Lens made for the smaller sensors cannot be used on the larger sensor.

Besides noise differences the physical size of the camera gear weighs more and is heavier with the full-framed cameras.

Card Slot/Media Storage

DSLR cameras take 4 different types of cards. SD, CF, QXD & CFast.  The SD and CF are the two most dominant. The QXD is a new format used in the Nikon D4 and the CFast will be used in some newer Canon cameras.

SD cards are used in most point and shoot cameras and are the card readers are build into most laptop computers. If you choose any of the other cards then you will need a card reader most likely to transfer from the card to the computer.

You also want to read the small print details to see which cards in a format they support.

Shooting Speed

This refers to how many frames per second you can make.  Very important for things like sports photography.

ISO Sensitivity

In the days of film, the film you bought determined the ISO settings on the camera.  Today the digital camera works like having a shelf of film ready and you can change the sensitivity of the camera from frame to frame if you like. You can even let the camera figure all this out for you if you choose Auto ISO.

Basically the higher the second number the less light you need to make a picture. Today’s cameras are usually looking at ISO settings of 1600, 3200, 6400, 12,800, 25,600 or even higher.

The cameras have what they call their sweet range for the camera. It may look like this ISO 100 – 3200 and then state can be boosted to ISO 12,800 for example.  What this means is the ISO 3200 will make acceptable prints and the ISO numbers above this will give you an image, but it may be pixelated.

Movie

Many of the cameras will also take video.  In general there are two formats 720 and 1080.  This refers to the pixel height.  Both of these are really high resolution and if you are showing this video on a TV bigger than 46” you will notice a difference.

What type of movie file the camera makes is useful to know what you need on your computer to open it and or edit it.  Most all will play on any computer, but when it comes to editing this is when you need to really pay attention to the format.  You may have to purchase special editing software.

File formats

For stills the major thing to look for is if your camera shoots RAW in addition to JPEGs and possibly Tiff.  You have more control of a RAW image, but you need a RAW editing program like Adobe Lightroom or PhotoShop to edit these images.

Lens compatibility

If you buy a Nikon or Canon that doesn’t mean all the Nikon lenses will work on all the Nikon Cameras and the same for Canon.  Read the fine print. In general the entry-level cameras have less lens choices.

Higher end cameras have motors to operate lenses whereas some of the entry-level cameras save money and the lens has to have the motor.

Maximum focus points

Each camera manufacturer addresses this a little differently, but the general rule is the more expensive cameras in the manufacturers line have more focus points and more settings you can choose to help you focus a camera.  This is important to those who want the camera to help them focus more accurately and quickly.

Built in flash

While the top end cameras do not have built in flash there are many reasons you may like to have it. First of all they are not all that powerful, but they are always there if you need it. Second, both Nikon and Canon for example have very advanced flash systems where the built in flash can help trigger an off camera flash wirelessly. For the top end camera you will need to buy an additional piece of equipment to fire the off camera flash.

Live View Shooting

Since most cameras now have video capabilities, this helps photographers use the LCD screens on the back for more than just movie mode. You can often use this to view the subject rather than the viewfinder only.  Can help you when you want to shoot from the floor or above your head for example.

Microphone/headphone Jack

If you want to do some serious video with your DSLR then I suggest being sure it has a microphone jack. To control the recording level with just the camera you will need a headphone jack. If you have no headphone jack you can run your microphone through something like the Juicebox to monitor your recording levels.

What I suggest are key features

First thing that needs to be decided is this for professional use or as a hobby?  I will first address the hobbyist.

Hobbyist suggestions

In general the least expensive camera will do for general all purpose shooting. However, if your hobby is photographing your children playing sports or wildlife for example you need to spend just a little more to be satisfied.

For the most part the number one feature to consider is the ISO. The highest ISO cameras will let you take photos in low light situations and/or situations where you need to stop the action.  ISO 6400 or higher is necessary to really shoot indoor sports and in the woods of wildlife.

If you are shooting sports inside the high ISO will let you make photos without a flash and this is very important for many sports where flash isn’t allowed.  Spend the extra $500 to $1,000 to get the high ISO.

You may also need to invest in faster lenses. Think of the ƒ-number for a lens as a fraction.  The smaller the fraction the cheaper the lens and requires more light to take a photo. In general a ƒ/2.8, ƒ/2 or ƒ/1.4 lens is what you want to photograph sports and wildlife.  This combined with a high ISO will let you get the photo.

The kit lens and low end camera is not going to be the camera for the parent with a kid in sports.  It is a great camera for people who travel and take photos of friends.

You may want to consider the full-framed camera to reduce noise as well if you are needing the high ISO.

In the Nikon lineup I recommend the Nikon 3200 for the person just wanting to take snapshots. If you want to do video as well I think the Nikon 5200 is the model I would look at due to the swiveling LCD.

For the sports shooter I would start with the Nikon D600.  If you have the funds then look into the Nikon D4.  It is the perfect camera for the sports shooter.

Considering going pro

The minute you decide you want to go pro plan on backup for everything. You need an extra body a few lenses and a couple flashes to do jobs. You cannot be caught shooting a wedding for example and the camera dies on you.

Now that you know you need two cameras and multiple lenses, be sure everything is compatible. For example While you can have one full-framed camera and the other a smaller chip, the lenses should most likely all be good for the full-frame or you will be caught if the smaller chip camera dies having to shoot everything with the full-framed camera.

Some of the major differences between the very top of the line cameras and the next level is about how well they are built.

The high end cameras have better seals to help keep out moisture. They are not water proof, but water resistent. Very important for the photojournalist who is called to shoot in all types of conditions. Even if you have the high end camera still buy some rain gear for the camera and lenses.

If you are primarily shooting portraits in a studio, then even the entry level cameras will work fine.  Put more of your money into lights and other gear, than all of it in a camera which is overkill for your use.

In general it is harder to make the mistake of buying too good of a camera if you can afford it.  The problem is under estimating and then having to sell the camera and buy a better camera later.  Cameras loose a lot of value quickly as compared to lenses, flashes and other camera gear.  As soon as the next model comes out your camera will drop in value and for every new model introduced since your camera, it will continue to drop.

There are three cameras I recommend for the pro shooter today in the Nikon lineup. Nikon D4, D800 or D600.

The Nikon D800 is the studio camera and for those who remember photographers shooting medium format, unless you are ready to shell out $25,000 for those cameras this is a great medium format quality camera in a DSLR 35mm size.  The D800 is also one of the favorite video cameras of those shooting video with DSLRs today.

If you need a work horse camera to shoot everything from sports, portraits, weddings, to video the Nikon D4 is the camera to get. It does a great job with video. It has microphone and headphone jacks making it possible to monitor sound.

I believe the Nikon D600 is the lower end pro camera only due to the weather seals and body build, but as far as functions, this camera rocks.

300 PPI and Output sizes

“The magazine that is going to publish my pictures says the images must be at least 300 ppi.  How do I change the resolution to 300 ppi?”


Editorial Note: While DPI is commonly accepted, it is not technically correct. DPI (or dots per inch) refers to the resolution of output devices such as laser or ink jet printers and platesetters or film imagesetters. For the sake of accuracy we will use the term PPI (or Pixels Per Inch).


I’m asked this question a lot and it is based on a misunderstanding that I hope we can clear up in this newsletter.

First of all, it is rare that you need to do anything.  They are requesting an image with a resolution of 300 ppi when printed to a specific size.  A request for a 300 ppi or any ppi without any associated width and height dimensions of the print it is nonsense.  The dimensions of the print need to be know.

The Formula:  

Width x 300 = a
Height x 300 = b

Multiply a times b to determine the minimum size mega pixel camera needed to make the photo.

Here’s an example for an 8 x 10 inch print.  Width 8 x 300 ppi = 2400.  Height 10 x 300 ppi = 3000. 

You need an image of at least 2400 x 3000 pixels.  Multiply 2400 x 3000 = 7,200,000 or 7.2 mega pixels.
Now we know the minimum size mega pixel camera that’s needed, but how do we change resolution?  Photoshop to the rescue…. again.
The dialogue to change the ppi-number in Photoshop is Image->Image Size.  When you choose it, you get a dialogue box like the one shown Example 1.  Be sure the Resample Image checkbox is left unchecked.  This prevents accidentally throwing away pixels that will diminish the quality of the image.

The Image Size box is a resolution calculator.  Your camera manufacturer has a default setting.  It may be set at 72 ppi or something else.  In this example the default setting is 240.  Remember you can change this to 300 ppi and it will then tell you the maximum size print you can make with this image.  As long as the Resample Image checkbox is unchecked you will not accidentally damage your image.

Take a look at Example 2.  Here you can see that the Resample Image box is unchecked and the Resolution was changed to 300 ppi.  Note: the Width and Height remain the same in Pixel Dimensions.  The actual image didn’t change.  You now have a calculator that tells you the size print you can make at any ppi.

There are many different output devices.  Let’s look at printers. Canon and HP desktop inkjets are usually optimized at 600 ppi, for Epson it is 720 ppi. The Fuji Frontier, used in many minilabs, is usually optimized for 300 ppi, some laser jet printers offer a choice between 200 ppi and 400 ppi.  You should refer to the manufacturer’s specifications or ask the lab to determine the optimum resolution for a specific printer.

You need to know the optimum ppi for your printer to determine the largest size print you can make.  Just be sure the size image is not larger than your printer’s quality capabilities.  You want it large enough, but there is a slight chance it can be too big.
An often forgotten aspect of quality prints is the distance from which the prints will normally be viewed.
The viewing distance changes everything.  You do not need a 300 ppi image to produce a billboard.  Actually you only need about 6000 total pixels for a Billboard. 
Use the chart below to help you in making display prints for trade shows or other places you need extremely large images.

Determining PPI by Viewing Distance

To determine an optimal PPI (resolution in Photoshop) for a photo the calculation is as follows:

7000 / viewing distance in inches = PPI

This is for optimal results.  Using half that number will still provide good quality results. Any lower and you will begin to sacrifice image quality.

A Quick Chart for Determining PPI by Viewing Distance

Under 24 inches = 300 PPI

24″ to 36″ = 200 PPI

36″ to 60″ = 120 PPI

5′ to 10′ = 60 PPI

10′ to 20′ = 30 PPI

Billboard = 10 to 20 PPI

I hope this bit of information about ppi, image size, viewing distance and printer capabilities has been of use to you.
Nothing is EVER simple, right?

Selling photos online couldn’t be easier

Today it is easier to sell your images than ever before.  I wanted to share what I am using to sell images online.

I have been posting images in galleries online for people to purchase since 1993, so from all this experience I chose PhotoShelter as my online gallery.

Here is what my clients see when they go to the home page of my gallery:

I could probably use this as my website.  It has everything pretty much here in addition to the galleries clients want to go to for their images.

Security

Now I can create a private gallery that with just an email and password people can access. I prefer doing this with most clients since they are less likely to pass around their email address with a password.

I can also create a gallery that has access with a password.

What can you order?

There are four things I offer on some of my galleries. Depending on which ones I turn on I have the option to sell: 1) Prints, 2) Products, 3) Downloads and 4) Rights managed Downloads.

This is an example of once a person likes a certain photo and clicks on the +Buy button they will see something like this screen above. The three colored arrows I added to help you see there are three of the four things I offer here with this photo.

Prints are highlighted here by the red arrow. My clients can order just about any size print that my supplier offers. I just go through the form when setting up my price and just those that I put my price on will show up.  I can have as many price lists I want and choose the list for any group of photos. I may have print prices really high since the photos might be rare or they are for fine art work to display in galleries.

The products tab which is highlighted by the blue arrow lets the customer order things like coffee mugs, mouse pads, t-shirts and more things like this. Again, only those item I choose to price will show up.

So many of my customers just want the digital image for usually two reasons. First of all most people want an image they can use on social media. They just want to display it for their Facebook friends for example.  These are low resolution and you cannot do too much with this size image other than social media.  I also offer a full high resolution download as well.  This is for folks that want to make their own prints. Since this means they will not be order a multiple print package and I will loose these sales the price is much higher to offset the sales I am loosing.

Rights Managed Sales

I also have media outlets and companies that want to buy my images to use to help their business. Depending how they want to use them they pay a different price. Now this is where the online website does so much for me that I would always prefer the customer buying online rather than the phone call.

The prices for stock sales go from really small amount to rather high due to how they plan to use it. PhotoShelter has built into their system FotoQuote’s pricing for stock. You can make modifications to the pricing structure. You can lower or raise your rates in different categories by percentage of fotoQuote’s rates.

The client just picks from the pull down menus and when they are done they have a price that they can agree upon and quickly pay and get the download right then.  No phone calls or negotiating.  Of course they can send an email and let me know they want to pay me double the price if they like, or as many will try and do get me to lower my price. Either way they now have a starting price based on parameters. Gives us a starting place for negotiation.

As you can see in the screen grab above, the client made choices and ended up with a quote of $126 for use of an image one time in the magazine and digital version.

What the photographer does to make all this work

I upload the high resolution images to PhotoShelter. I must pick a vendor to fullfil my prints and products. I then set the prices for the vendor.  I setup the prices for download for personal usage and also setup the rights managed prices.

After I upload and set of images then I normally select all the images in that gallery and price them choosing from the price lists I created.

I then set the security for the galleries and then send links to the customers I need to see the images.

The only other thing I can do is then also promote stock images I have for sale.

Once they are up I just get notices when an order is made and then payments online to my PayPal account. Now that is super easy for me.

Check out PhotoShelter yourself.

Pricing depends: Full-time or Part-time

Regularly, I get a variation of the question, “How much should I charge?”

I teach a class with a few assignments yearly to help the students price a project. I have noticed that many students copy each other’s work rather than try to figure out the numbers themselves.

Many people make assumptions that are costly mistakes for their success.

Myth #1

Everyone’s situation is the same. While people may say this isn’t true, their actions say otherwise. If you have researched the prices of other photographers and then charged a similar price, you might be just proving me right.

Many people who shoot weddings all charge similar amounts in a market. A new photographer comes along and sees that everyone is charging $2,500 to shoot a wedding. Upon further investigation, that photographer finds out what is typically being offered with a $2,500 wedding package and, after looking at how much it costs to make prints, create an online gallery of images, and create a book, sees that they can charge the $2,500 and still make a lot of money, so they offer the same package.

It takes some time before someone will discover if this pricing will work.

Hawaii Tropical Botanical Garden

Myth #2

Pricing is relative to the quality of work. Most photographers believe a highly skilled photographer should be the most successful photographer. This is a widespread stake in any profession. Businesses fail every day because people think it is all about the quality of the product.

The “Return On Investment” formula:

Return On Investment (ROI)

You need to understand the “Return On Investment” to understand why quality alone does not equate to success.

One of the best examples I have firsthand experience with is shooting sports. Most teams that use photography do so to help promote the team. High schools and colleges need photos of their athletes for their websites and maybe a media guide. They need an image they can use rather than a Sports Illustrated-quality image; the organization will not benefit monetarily from the better photograph.

Even professionally, the great photograph of an athlete rarely translates into profits for the team.

If you have a great action photograph of the league MVP, you will see a difference in sales. You will not see more sales if the picture is equally suitable for an average high school player. Why? The thing driving the sales is more about the player’s performance than the photo’s quality.

Great-quality photos do help organizations build a brand. Sports Illustrated, for example, built a brand around high-quality photography and writing about sports. However, few organizations are willing to pay to build their brand in this way.

The bottom line is that you must produce good photography to have someone pay you for it, but many other factors influence the purchase rather than the quality alone.

Honu’apo Bay, The Big Island of Hawaii


Myth #3

How long you have been making photographs determines your pricing. The number one group I hear this from is college students who think they must charge less for their work because they are students.

A customer is looking for a photographer. They see a couple of photographers work on their websites. They like the photographs of one photographer. They will then check and see if they can afford that photographer to do the work.

The only time a customer factors in whether someone is in school is when it comes to price. Customers need some photography and realize they can save money by looking for a different photographer. The number one place most of these customers look is to students.

What matters the most to customers when hiring a photographer is that the quality of work matches the examples shown by the photographer.

Experience cuts two ways in photography. Many customers look for a fresh eye and experience old style. Where you need more experience to help you is when a client always goes for the safe and secure photographer. This is rare but does exist.

Your Situation

You must know your situation and what you are trying to do with photography to understand how to price.

Hobbyist 

You enjoy photography but have no plans to do it professionally. You are very pleased with your profession and love what you do, but you also like taking pictures as a hobby.

There are two types of hobbyists I see shooting today.

The first group is financially capable of buying the gear they need. They may even have enough money to make prints and give them to their friends as gifts. Many of these photographers enjoy traveling, and some enjoy shooting sports. To gain better access to things they like to photograph, they offer to give their photographs to the groups they photograph.

They know that to get better photographs, they need to be closer. So, to move from the stands to the sidelines of their kid’s games, they give their photos to the team so they can get better access.

The second hobbyist group is those who need help funding their hobby. They need to offset their equipment purchases. This group will price their work so they have enough income to offset their gear purchases.

Part-time photographers

One classic example is a bi-vocational photographer. I have also seen many school teachers who like to shoot weddings. Since most brides get married in the spring and summer months, this works well with teachers’ schedules.

I have seen many professionals who also like editorial work. Many National Geographic Photographers have been biologists, anthropologists, and other experts in the field. Their photography and their profession go hand in hand.

Full-time photographers

I don’t have to go into the details here, but this group earns a living alone through photography.

Which photographer are you?

You need to know which category you fit into and own it. You must understand pricing if you are in any category other than a full-time photographer and want to become a full-time photographer.

You cannot make the switch as long as you need another job to pay your bills because photography does not generate enough income.

Balloon Ride in North Georgia

How to make the switch to Full-time Photographer

First, you’ll need to take the time to know what your financial needs and wants are. If you have Microsoft Excel, a great tool comes with it to help you. There is a template in the personal section for “Household Budget.” If you don’t have this, you can use the “free” Kiplinger online form to get help.  (http://www.kiplinger.com/tools/budget/)

Second, you need to know all the expenses related to the business’s operation.

Third, you will have to get a good idea of what you will offer and how many times people will hire you a year. If you have no idea, this is like putting your finger in the wind. The best way to know this is to have been getting small jobs on the side of your full-time job. It is easier to get a feel for this by starting as a hobbyist and part-time photographer than just graduating from school or quitting your job and starting from scratch.

Once you know these three figures, it is much easier to understand how much you need to charge to do this full-time.

Myth #4

I can do that later. After seeing what you need to do to determine your prices, you decide you are not ready to do all that work. You inside that work on your photography, and when you get to the point where you think you are prepared to go full-time, you will work on that business stuff.

We all put off working on unpleasant or tedious tasks occasionally. I understand that completely, but procrastination is the surest way to failure. If you want to go full-time and remain full-time, you must take the steps I outlined to make the switch immediately.

Let me tell you a little dirty secret about many full-time photographers. Most of them produce mediocre work. So how do they stay in business? They know what to charge and are okay with telling people their prices. They can say with complete confidence that this is their price. They know that if they lower their price, they are, in essence, paying the customer to work rather than them being paid.

When you have done the math, you know the point at which you are making or losing money.

Photography can help self esteem

Gift giving is part of our lives. We enjoy giving gifts as much as we enjoy receiving them.

I have found that photography is one of the best gifts you can give. When we get together for events we often like to remember these times with photos.

Pure Fashion’s fashion show at St. Thomas More Church in Decatur, GA.

Making the Photo

When you point your camera at someone you are saying you are important. People do not take picture for the most part of things they dislike, rather they point their cameras to those things they cherish most. While we do not announce to everyone with a megaphone that is what we are doing, the act of photographing someone is giving that person importance.

I have been hired to help a client impress their clients by having a professional photographer to take photos of them at an event. Some clients will even create a red carpet and have extra people their popping the flashes on their camera just to help create that environment that those walking on the red carpet are important.

My daughter at her fashion show. She enjoyed learning how to carry herself and how to look her best.

Just taking someone’s picture is one of the best ways to give honor, dignity and respect to another person.

When we take pictures we are taking them not just for ourselves, but to share. We want to show our friends and family who we met and what we saw.

Professional makeup artists worked individually with all the Pure Fashion models to teach them how to apply makeup that help to accentuate their beauty without making them look over done.

My daughter is having her makeup done while her friend watches.  

What I liked about this event was everyone was celebrating each other and learning from each other. They all wanted each other to look their best and it wasn’t about someone looking better than everyone.

Dressing Up

We take time every morning to go through a ritual to look our best. We learn what looks best on us. We are color coordinating clothing so we look not just out best, but the best for each situation.

Designer works with the models to show them how they can accessorize with her scarfs.

Pure Fashion teaches the model how to carry themselves. They know that the way you look and talk will help your self esteem.  The confidence you project helps to draw people to you.

Our next door neighbor and my daughter’s friend is in the program as well.

I tried taking photos of the girls walking the runway with available light, but decided I wanted the best possible light.  I wanted the photos to look their best. If they had taken this much time to pick out outfits and style their hair and put on makeup–I needed to bring my best as well.

I put four Alienbees B1600s with 7″ reflector in the corners of the room bouncing off the ceiling.  They at on 1/8 power so I was shooting at ISO 1250.  
One of the most important things to me in a photograph is expression.  Here I feel like I captured the fun everyone was having. 

Sharing the Photographs

Giving people photos after they come to your home for a party is a great way to help them and you remember those good times. People may put your photos even in the most honored spot in the American home–the refrigerator door.

Today I probably share as many photos with my friends and family through Facebook as anywhere else.

For the Pure Fashion event I wanted to share the photos but also make it easy for the parents to order prints or just about anything they like to put their daughter’s photos on. I put all the photos in an online gallery.

Here are the photos I shared with the parents.

Once they click on the image and see it larger, they can click on the “+Buy” green button. When they do that this window pops up.

They can see the photo on the left and options. If they click the tab in the top right hand corner they can choose to order products (i.e. coffee mugs, mouse pads, iPad covers, etc) or they can choose download as show below here.

I gave the parents the option to order a small resolution image for use in Social Media (Facebook, Twitter etc) or they could purchase at a higher price the higher resolution image which they can use to make their own prints.

Today I think people want the digital image at least large enough for them to share using their preference for Social Media.

Other Outlets

Since Pure Fashion was hosted by St. Thomas More Church, which is part of the Archdiocese of Atlanta. I have done work in the past for their newspaper The Georgia Bulletin.  I sent an email to the editor and asked if they were interested and they even had a writer already there.

They were very interested in the photos. Now besides having a photos made of each model so they could have a professional photograph from the event to remember it, they were going to be celebrated through the media.

Even if the model’s photo isn’t used in the publication it elevates the event and makes this a big deal. It helps to improve their self esteem.

You can bless someone’s life

One of my good friends started taking pictures and giving them to people. While he was working in Japan his son’s played baseball. They spoke almost no Japanese. He would take action photos, team photos and even individuals of each of the boys on the team.

He made prints and found some nice folios to put the photos in to give to each of the parents. He knew in Japanese culture your presentation of a gift was just as important as the gift.

The families had not ever had this done before and the response was overwhelming. Today some of those families have flown from Japan to visit them in the states.

My friend discovered that his hobby of taking photos was a blessing to those he gave the photos.

Want to be a blessing to others and improve their self esteem–take photos and share them.

Whining yourself out of jobs

My daughter dressed up for Halloween this year as Alice: Madness Returns..

Not a day goes by where I am not hearing or reading some photographer complaining about the new normal for the industry.

What is the new normal?

Here is a list of some of the changes that impacts the industry:

Instant results – Today the digital camera gives unprecedented quick feedback to the photographer. Before digital you had to wait at least 90 seconds to see an image you just took. Polaroid camera let you create a quick print.
Auto focus – The biggest area this has impacted in my opinion has been sports. It wasn’t that long ago when you had to know how to follow focus to get an in focus photograph of action sports.
Matrix Metering – The earliest SLR cameras didn’t have meters built in. Later when they were built in the photographer still had to know how to use it because just pointing at a scene would not give you consistent results. Today’s matrix metering TTL systems allow the camera to take multiple readings through the lens and using very complex algorithms giving extremely accurate exposures. Each time a new camera is introduced, it appears to be even more accurate than the previous generation.
TTL Flash – We have come a long way since in the days of Matthew Brady where they had to use flash powder to take a photograph in low light situations. You can now control unlimited number of hotshoe flashes within the camera. The accuracy isn’t quite as good as matrix metering is with available light, but this is so much better than we have ever experienced.
YouTube – Today if you want to know how to photograph just about anything you can search for it on YouTube and there will be many videos teaching you how to do this for free.  There are almost no secrets any more that give some photographers an edge over their competition.
Online Photography Databases – Flickr is just one example of online database that you can search for photos at incredibly low prices or even for free to use. You can upload images and if you do a good job with key wording your images are visible to the world. In the past you had Stock Photography Agencies that you had to use. The agencies would push those photographers whose images typically sold well. They didn’t have the time or resources to put just any photos into the system for consideration.

It is very easy to complain about your situation. It is easy to talk about how some people are causing you to loose business.

Photographers need to wake up and realize every business is going through this today. Just look at how many professions are almost gone due to the invention of the personal computer. How many secretaries lost their jobs in the 1980s and 1990s when it first came out?

The United States Postal Service has been crippled due to email. We no longer need them to send a letter to someone.

Why stop whining?

1. Complaining about your work is excusing yourself from responsibility. You are only convincing yourself it isn’t your responsibility and no one else.
2. You are annoying everyone. You may find yourself being defriended on Facebook or just not knowing they are no longer paying attention to you.
3. You are wasting time and being nonproductive.

This is a Habitat for Humanity volunteer helping a family improve their situation with affordable housing.

Take charge of the situation

1. Look for solutions – Blowing off a little steam is OK and even healthy to do. Learn to roll with the punches. You need to focus on talking through a situation to look for solutions rather than just talking in circles.
2. Be the hero and not the victim – When you are feeling frustration remember it is rooted in fear. What are you afraid of? Once you have identified your fear it is much easier to then to address what you need to do to overcome this obstacle.
3. Count to ten – When you feel that urge to complain, stop and look for a solution.


Pray

The American theologian Reihold Niebuhr wrote the Serenity Prayer that was later adopted by the Alcoholics Anonymous and I recommend for Whiners.

God, grant me the serenity to accept the things I cannot change,
The courage to change the things I can,
And the wisdom to know the difference.

According to a University of Wisconsin-Madison sociologist, 75 percent of Americans who pray on a weekly basis do so to manage a range of negative situations and emotions — illness, sadness, trauma and anger.  What is often happening with people who pray is they are considering another point of view. In the case of prayer they are considering God’s perspective.

If you are unwilling to acknowledge that your perspective is limiting, then you may never get over whining.

Photographer or Educator

Stanley teaching lighting to students in YWAM School of Photography in Kona, Hawaii.  Photo by Dennis Fahringer

The first 20 years of my career I worked on staff of a communication team. I started first working in newspapers where we had a daily deadline. I then went to work for a magazine where we covered similar stories that I worked on in newspapers but our deadline was monthly.

I then worked for a university where we had weekly newspaper and a few magazines that I shot stories.  I was juggling many different deadlines those days.

Everyone I worked with on those publications was a professional communicator. While some were more word people and others more visual, together we were all trying to tell stories in ways that were compelling and drew our audience into the story.

Today, I work mainly with business people who are not professional communicators. There is a major difference in the conversations than with the professional communicators.

Defining the project

Working on a newspaper, I always knew what the story was about before I showed up to cover it. I knew when I was sent to cover a hard news story like a fire that I was to capture the who, what, where, when, why and how parts of the story. Also, it was running in the newspaper the following day.

I had to have one photo that could tell most of the story, because often that was the only space available. I was always shooting every assignment like a photo story, so if they had room they could use more photos to tell the story.

When I get a phone call or email requesting my services from a businessperson rarely is the project defined as it was when I worked in the media.

Questions for the client (sample)

What do you need covered?
What is the goal and purpose of the photos?
Where will these photos be used?
What is the feel/mood you are going for with the project?
Where and when will this take place?
What do you need from me as a deliverable?
When is your deadline?
What is your budget?
Who is my contact?
Who do I send the invoice to?

My goal is to get on the same page with the client. Often they are not sure of what they need and looking to me for some direction.

Educating the client

Never let your persistence and passion turn into stubbornness and ignorance. 
Anthony J. D’Angelo 

This is not when you tell the client what you do and what they need to give to you, this is more about asking questions which help you and the client move towards the goal.

I am helping the client understand everything we need from them to make photos that not only they will be pleased with, but most likely have a good chance to be in my portfolio.

It is not being a photographer or educator, it is being both that leads to success.

After I establish what they would like ideally, I now must help them know what I need from them to help accomplish this goal.

I would call all this information gathering part of the Pre-Production part of the project. Sometimes this can be done very quickly in a five-minute phone call or other times we need a few meetings with a team to make it work.

What I am trying to establish before the work begins is a storyboard. I want to have in my mind what the finished product should look like. Sometimes we actually create a storyboard of a few images. I always have the picture in mind of what we are shooting for, before I take on the project.

It is very easy to take a storyboard and then work backwards to establish everything we need to make it work. We work out who will be in the photos. We work out what they should be wearing. We also establish what props and location we will use. We decide on the best time to do the photography.

We also know all the places we plan to use the photos, so we can be sure the files that are created digitally will work for each of those mediums, whether it is for web, print, billboards or video for example. Each of these will help us determine things like to shoot vertically or horizontal. Sometimes we need both and so we are prepared to shoot it both ways.

At the end of the Pre-Production process the photographer and client know all their roles. Who is responsible for being sure everything is in place.

Seeing is believing


Photographs are the most reliable, the most correct recording means, and therefore they become the most important aid in educating and obtaining instruction. – Benjamin Stone

I am always shocked at how many visual people fail to show their clients examples of what they are talking about. Go to your meeting with a few examples ready.

Send the clients examples after a meeting if a new idea or direction is taken that you were not prepared to have examples for at the time.

You need to build a small database of examples that could be on your laptop or iPad ready to show. The key is to have some sort of a way to put your finger on them quickly.

I have a document with links to all my videos and multimedia for example.  I also have a database which I can pull up a thumbnail of everything I have shot. I can search this pretty quickly to have examples in a meeting.

Conflict resolution

The first few jobs you do most likely you will forget to ask a question. This is where you will have to decide if you messed up. If you did then you may have to eat some costs to make it right with the client.

The best way to avoid these conflicts is to work with a mentor who can help revue your estimates. The best place to find someone like this is through a professional organization. I have bounced many of my estimates off of other American Society of Media Photographers (www.asmp.org) through the years.

You will get a client sooner or later that will push you to your limits. Some of these clients feel they have done their job when they have maximized the relationship with you on the project.

When they start making changes you can easily stop and listen to their request. Learn to say, “I am more than happy to make these changes for you. In order to meet your request I must _________________. Let me make the changes here to the estimate and have you sign off on this and lets make it happen.”

Sometimes I have to say that in order to just pop in and make a picture means that I may not have time to do the rest of the photos on our schedule. Sometimes I am saying this is additional work and I need to charge for that service.

The key to resolving the conflict is to articulate the situation and ask them what they would like to do going forward. You are letting them know how you are willing to resolve the issue and then they get to choose. Often the choice is a yes or no to making the changes.

Questionnaire

I recommend you creating a questionnaire that you have by the phone or something you could email to the client even to fill out. This is very important to ask all the right questions or you may have to be eating some costs later.

Today I have done this so many times that I am not even aware I am going through my list of questions. The conversation with the client feels like a conversation more than me filling out a form.

I am taking notes that I will refer to throughout our conversation and use later to help create my estimate.

Are you ready for the phone to ring?

Key to good photos: Point your camera in a different direction

You go to an event and if you are like everyone in the photo above you are all pointing your cameras in the same direction and at the same time.

By all means still get the “obvious shot.” What I want to encourage you to do is look beyond the main stage of an event.

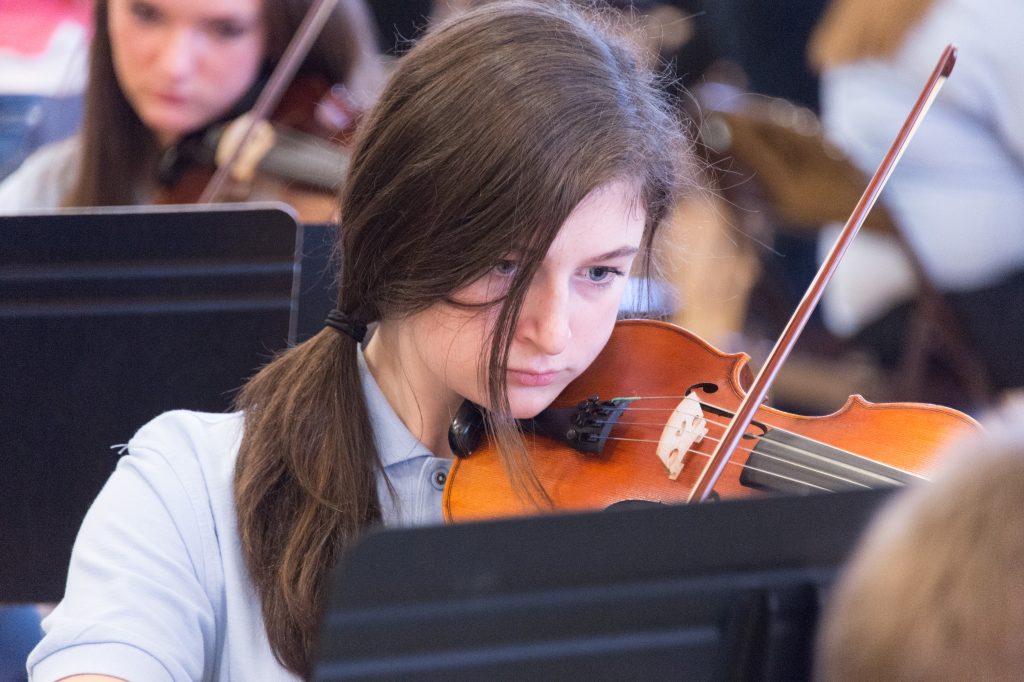
Before this middle school orchestra concert all the students arrive early to get their instruments tuned.  Here I went to the area they were tuning and got really close.

Seth Gamba is the music teacher and the last time I saw someone tuning something like he is doing was early in my career. I watched the NASCAR pit crew use a screwdriver touching the block of a running engine to tune it by adjusting the timing.

Doesn’t this photo make you want to know what he is doing.  This is quite different than the obvious conducting shot.

Warming Up

While the students are getting their instruments tuned and warmed up, I roamed around and got in close for some photos that you have to look really close to see if this is the performance or practice.

All the photos above are taken before the performance. Occasionally you can see in the background things that wouldn’t be going on in the performance.  But look at how many look like a performance shot.

The hardest part during the performance is getting a good photo due to the angles you are limited to. Hey before hand I am walking all through the orchestra and taking photos.  Can’t do that during the performance.

During the Performance

One of the things that I notice in the performance shots is the musicians are looking for the conductor as compared to before he wasn’t around.

What will the 8×10 look like?

I get a kick out of seeing the iPad being used as a camera. I keep seeing and and thinking they are already seeing the finished 8×10 print.

But how did it sound?

[youtube https://www.youtube.com/watch?v=uXkTB170_1Q]
Dorie Griggs, my wife, operated the video camera from the bleachers while I was down front shooting. If you have read this far you might as well enjoy hearing them play. By the way my daughter does the first “scream” in the performance.

Color correction

I used the ExpoDisc to get a custom white balance for the best skin tones.  Here is another blog post on how I use it.