Photographers Need To Stay On Budget

Be ready for changes

Often after you have booked a client there will be some possible changes. Just because you quoted a price does not mean you have to keep that price if the client makes changes to the scope of the project.

“I will be more than pleased to make it happen for you. Since this is a change to what we agreed on I need your approval for the changes before we proceed,” is important to say to the client. You can phrase it however you want, but you need to communicate a few things.

  1. You want them to get what they want.
  2. With changes to the original estimate there are changes to the contract.
    1. Price
    2. What is delivered
    3. Deadline
    4. Possible new expenses
  3. They must approve of the changes in writing for you to proceed.
Willingness to serve
Don’t respond with no to a client unless they are asking you to do more for the same amount of money. Just tell them you need just a minute to revise the estimate to give them an idea what they will cost and any other changes they need to know.
This is why you want to estimate on a project and not give day rates. The only thing you can do on a day rate is if you have additional expenses to meet their request, otherwise when you have the time to do more for them you must.
Give yourself time to respond
It is quite common that a client might catch you off guard and don’t feel bad about asking for a moment to consider their request.  
Sometimes the request may mean not just price difference, but to meet their request something else must come off the project due to time constraints. 
Sometimes I have to point out while we are running ahead of schedule for right now, but I will not know until the end of the project if I have time to add on this request. I will ask if they mind waiting to see if we have time. If they push then I let them know one of the situations we have scheduled might not get done.  I then give them the quote for the price change and wait to see if they want to proceed.
Bait and Switch
If you have given them a written estimate you do not have to worry about them feeling like you have them over a barrel when you give them the increased price quote. There are some people who are actually trying to get more out of you than you estimated. This makes them feel like they got their money’s worth. 
You don’t need to feel the pressure to give in to them, you just tell them the price difference and let them decide.
What happens if you forget to communicate a price difference?
You will most likely eat the cost, because you failed to communicate.
It is professional to communicate price changes before doing the work. I have watched too many freelancers turn in invoices that were higher than the quote and the relationship with the client is tarnished at best and destroyed at the worst. 
Take care of the paper work as much as you do the creative and you will have customers who will hire you again and again.

Interactive Panoramic of State and Lake in Chicago

http://www.stanleylearystoryteller.com/360Tours/Chicago2/Chicago2.html
I just got back from Chicago where I covered the Grand Opening of Chick-fil-A’s newest restaurant on the corner of State and Lake.  Be sure and click on the 360º above and drag your mouse to the top and bottom or you can just use the menu buttons to navigate. Be sure to also zoom in and out using the +/- buttons on the menu.

The far right button on the menu will make the 360º full screen.  Try that as well for really putting you there.

Maybe you have a place that you need to people to see as if they are standing onsite.  My recommendation is to use the 360º Panoramic to help put people in the place.

This is the corner of State and Lake Streets in downtown Chicago, which if you reload the page will start the 360º Panoramic and spin until you are standing on the street corner.

Maybe you have a campus that you would like people to visit and this is a way to help encourage them to see your space. On the other hand maybe you realize many people cannot travel to see your campus and you want them to have the experience of being there. Either way, the 360º Panoramic is a cool way to engage your audience.

Give me a call if you need a 360º Panoramic. 

For Video Editing: Combine Final Cut Pro X and Event Manager X

First things first

I am using Final Cut Pro X version 10.0.8 when working with video, which you get through the App store on your mac.  I love the software because you can work in real time and not wait for rendering.  That works in the background.

No matter what video editing software you use I highly recommend maxing out the RAM on your computer. I have 16 gigs of RAM on my Macbook Pro 15″.  If I had a desktop I would have even more RAM.

You need a fair amount of free space on your hard drive as well. This is why I recommend running the projects off an external drive. The program is on the main drive, but the clips and video are on my external drive.

I recommend 20% or more free space on your main drive. As you fill up the external, its performance will also slow and this is why my next recommendation will improve your experience with Final Cut Pro X.

Second

By default Final Cut Pro X will show you all  Events and Projects on all mounted storage devices. You are in essence loading all your projects on all your drives every time you open Final Cut Pro X.

Event Manager X gives you control over your Events and Projects so you can manage what you want to be visible in Final Cut Pro X’s Event Library and Project Library. So, you could have multiple external drives with various projects on them and Event Manager lets you decide what is visible.

Instead of launching Final Cut you launch Event Manager X. As you can see in the screen capture above those with a check are what will show up. Just uncheck and it doesn’t show up in Final Cut Pro.

What the program is doing in the background is moving your “Events” and “Projects” from their normal folders into “Hidden” folders.  See the example above.

Now lets say you have a few projects in the works. You finish one and send it for approval to the client. While you wait on their feedback and changes you can then close Final Cut Pro open Event Manager and uncheck that project and event for now. Then just check the event and project you want to work on next. As long as you have that “Re-open Final Cut Pro X” at the bottom, when you click on the button to move the events and projects it will launch Final Cut after it moves everything and then you only see what you are working on in Final Cut Pro.

The reason for using Event Manager X is not to make things look neat in Final Cut Pro X, it is to improve the performance of Final Cut Pro X.

Photography Composition Tip: Anchor Your Subjects

Nikon D4, 28-300mm, ISO 180,  ƒ/10, 1/500

Anchors Away

I am still in cruise mode after last week. It takes longer to do everything since I got back. You see I think I need to stop every 45 minutes and find food.

Being on the ship and see those huge anchors made me think of a simple composition technique to improve your photos.

Anchor your subjects.

Nikon D4, 28-300mm, ISO 12,800,  ƒ/3.5, 1/160

When you crop off the feet of a subject or in this case the front of the car the subject isn’t well anchored.

Just lower the camera a bit and give the subject a little room at the bottom.

See what a difference the composition is by just moving the camera a millimeter?

The reason so many of us forget to do this is we are looking too much at the subject. You need to scan the edges of the photo and correct for this problem.

Many photographers tend to have too much space above the subject and this is due to centering of the subject.

Tips for photographers who use Macs

Computers and cars have one thing in common—every so often you need to do some routine maintenance to get the best performance.

With cars about every 5,000 miles you need to take the car in for routine maintenance. I would say that once a month you need to also do some basic maintenance for your computer.

For the Mac owner I recommend just a couple of things that will improve your computer’s performance.

Disk Utility

Performing disk maintenance using Disk Utility that is included in the Mac OS X.

You can also use this even when your computer starts just fine but you want to check the disk for possible file system issues.

1. To launch Disk Utility go to your Applications Folder>Utilities>Disk Utility.
2. Click the First Aid tab.
3. Click the disclosure triangle to the left of the hard drive icon to display the names of your hard disk volumes and partitions.
4. Select your OS X volume.
5. Click Repair. Disk Utility checks and repairs the disk.

You should see improved performance when this is done.

NVRAM

Your Mac stores certain settings in a special memory area even if it is turned off.  On Intel-based Macs, this is stored in memory known as NVRAM.

Information stored in NVRAM includes:

1. Speaker volume
2. Screen resolution
3. Startup disk selection
4. Recent kernel panic information, if any

How to reset your NVRAM

1. Shut down your Mac.
2. Locate the following keys on the keyboard: Command (⌘), Option, P, and R. You will need to hold these keys down simultaneously in step 4.
3. Turn on the computer.
4. Press and hold the Command-Option-P-R keys before the gray screen appears.
5. Hold the keys down until the computer restarts and you hear the startup sound for the second time.
6. Release the keys.

After resetting NVRAM, you may need to reconfigure your settings for speaker volume, screen resolution, startup disk selection, and time zone information. If issues persist, your Mac’s logic board battery (not a portable Mac’s rechargeable battery) may need to be replaced. The logic board battery helps retain NVRAM settings when your computer is shut down. You can take your Mac to a Mac Genius or Apple Authorized Service Provider to replace the battery on the logic board.

If you have never done this you will notice major improvement in your computer.  The Disk Utility may take some time to run that first time. Running Disk Utility once a month takes less than five minutes unless something unusual has happened.

Parting Comment

I still recommend buying DiskWarrior and using this utility. It does more than just the Disk Utility.  However, just using the Repair Permissions in Disk Utility when it makes changes does improve your performance. 

Vacation Planning Guide for Photography

Nikon D4, 28-300mm, ISO 100, ƒ/5.6, 1/800,  Off camera fill-flash using the Nikon SB-900 and SB800.  The Flash is on the Pocketwizard TT5 and being triggered by the Mini TT1 on the Camera with the AC3 to control the output of the flash. Flash is +2 EV and the camera is 0 EV.

I took the past week off for a family cruise of the Caribbean on the Royal Caribbean Freedom of the Seas with my parents, sisters and all of our families.  There were fourteen of us each evening at the evening meal.

I realized from watching so many folks traveling with cameras and from my own experiences I think you need a basic checklist of what you should bring for your vacation trip.

I am going to address two types of camera kits that you might want to use for your next vacation. The two kits are the Point and shoot camera and the DSLR.

Nikon P7000, ISO 1600, ƒ/3.2, 1/160

Point and Shoot Camera kit

First let me just list what should be included in your carryon bags for this kit.

Camera
2 Batteries
Battery Charger
2 Memory cards
Lens cloth which can double for your gray card
Bag or a plan for carrying what you need

The camera is obvious, but many people travel with just one battery. I recommend always having at least one spare battery always charged with you. At the end of each day, I recommend going ahead and charging the battery you used that day and if necessary your backup if you used it.  Too many people miss opportunities due to dead battery on the trip of their lifetime.

Today I would recommend carrying large capacity cards. Check with your camera manual and get the largest capacity possible.  Today many of these cameras will take a 64-gig card. Sometimes it may make more sense for the price to buy a few 16-gig cards than one 64-gig card.  If you take enough memory cards you can eliminate the need of carrying a computer or something like a portable hard drive designed to download memory cards.

Carrying a gray cloth that is designed to clean your lens can help you keep that lens clean and help for white balancing when you need to do so. Please remember to check your lens each day periodically.  Fingerprint on the lens will deteriorate the quality of the images.

Nikon P7000, ISO 100, ƒ/3.5, 1/1250

Which point and shoot should you buy if you don’t have one?

I recommend getting something with a decent zoom on it so you can get those images of things far away. I think most people will be able to find a camera in the $200 – $500 range that gives you a great deal of flexibility that can fit in you pocket.

Here are a few models that I would consider:

Canon PowerShot SX280 HS

Canon PowerShot SX280 HS – It has a 20X zoom, which is equivalent to the DSLR 25 – 500mm. It is a 12.1 megapixel CMOS sensor. ISO 80-6400
Nikon Coolpix L610 – It has a 14X zoom which is equivalent to the DSLR 25-350mm. It is a 16-megapixel CMOS sensor. ISO 125-3200
LUMIX ZS25: Compact Long Zoom Camera – It has a 20X zoom, which is equivalent to the DSLR 24 – 480mm. It is a 16-megapixel CMOS sensor. ISO 100-6400

There is another Point and Shoot camera model in between the small pocket camera and the larger DSLR. I call these Bridge Cameras.  They are cameras with incredible zooms that make them a little larger and look like their big brother the DSLR, except you cannot change the lens.  However, with the zoom on these who would ever need another lens.

Here are just three Bridge Cameras you should seriously consider before sinking lots of cash into a DSLR.

Nikon Coolpix P520

Nikon Coolpix P520 – It has a 42X zoom, which is equivalent to the DSLR 24-1000mm. It is an 18.1 megapixel CMOS sensor. ISO 80-3200 [H2 pushed to ISO 12,800]
Canon PowerShot SX50 HS – It has a 50X zoom, which is equivalent to the DSLR 24-1200mm. It is a 12.1 megapixel CMOS sensor. ISO 80-6400
LUMIX LZ30: Long Zoom DSLR Alternative Bridge Camera – It has a 35X zoom, which is equivalent to the DSLR 25 – 875mm. It is a 16.1 megapixel CMOS sensor. ISO 100-6400


Nikon D4, 28-300mm, ISO 250, ƒ/8, 1/500


DSLR Camera Kit

Plan to carry this on with you for security reasons.

Camera
Off camera flash
Zoom or fixed lenses to cover 24 – 300mm recommended
2 Batteries
Battery Charger
2 Memory cards
Lens cloth which can double for your gray card
Bag or a plan for carrying what you need

The basic difference for the hobbyist and the professional is the need for backup on everything for the pro.  My comments for each are the same as before with the Point and Shoot cameras.

Plan for the plane’s you will fly. If you have one of those really small jets or propeller plans you can only put a very small bag on board with you. If you are carrying a lot of gear I recommend suing the ThinkTank roller bags and check them at the door of the gate.  They will give them back to you as you get off the plane. It is a little safer than checking the bag where it can get lost.

If flying internationally you really do need to watch the weight. This is where a camera vest can pay off because you can put gear in it and it doesn’t count as baggage.  Cargo paints will work great for a lens or two.

My two sisters gave me a surprise kiss during our family photos. Nikon D4, 28-300mm, ISO 12,800 ƒ/8, 1/30 with Nikon SB900 on camera with 0 EV compensation and slow-sync.

Here is a family photo that I setup and asked a person to push the button for us.

Nikon D4, 28-300mm, ISO 12,800, ƒ/8, 1/125 with SB900 direct flash for fill on slow-sync.

3.5 Easy Slide Show solutions for Mac and PC

The last time I wrote about creating slide shows, Adobe Flash worked everywhere on the web after Apple decided not to support Flash on their iPads, iPhones, or iTouch.

All the slide shows I produced early on will not work on the Apple mobile devices. So the shows needed updating.

I primarily use Final Cut and Pro X when editing videos and mixing still images. However, I have also used Adobe Premier before Final Cut doing the same thing.

While I could use Final Cut Pro X and create slide shows, these solutions are much simpler and faster, in my opinion. In addition, I can produce most of what I want and export them into Final Cut Pro X if I like.

1. Soundslides Solution for both Mac and PC

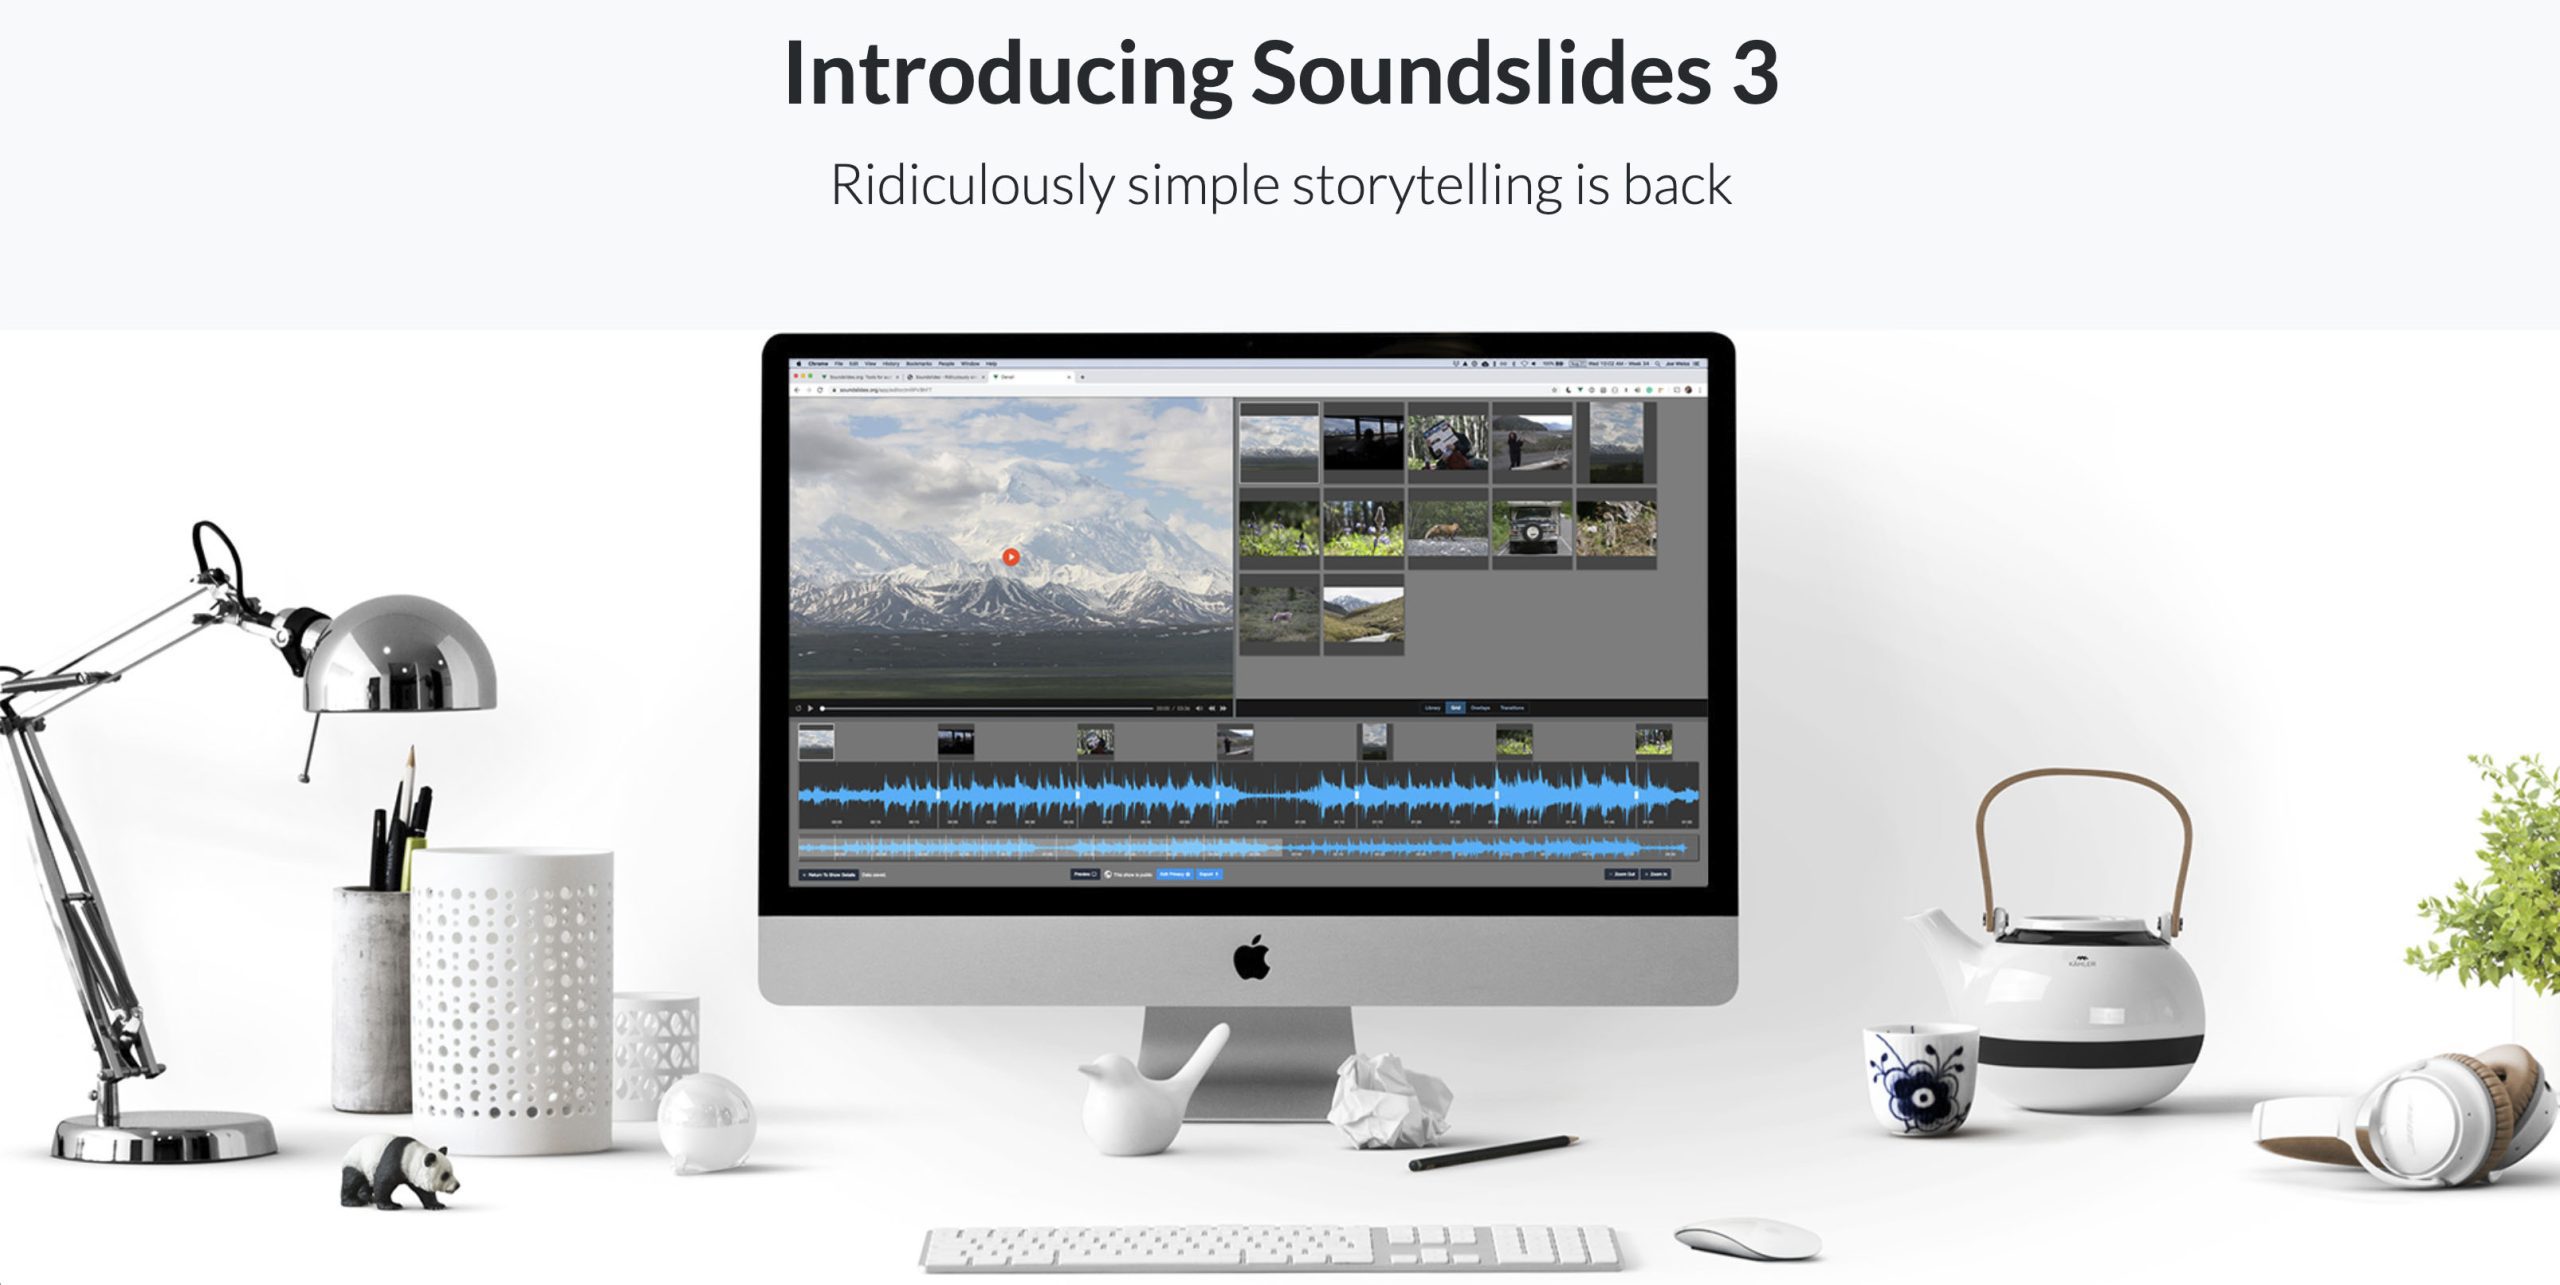
The latest Soundslides (1.9.5) version has JQuery HTML5 built into it. The beauty of the Soundslides solution is that the project will play back using Flash when available and use the HTML5 version as a fallback. The update ensures the user experience is the best it can be.

The best part of the Soundslides solution is that it is cross-platform.

You may find out as I did that some servers do not like how Soundslides is talking to the device to determine what it is before giving it a flash or html5 version. The way licenses work, they cannot create an html5 version only since it will not work on all browsers.

One more option is to use Soundslides Video converting service. The downside is you have to upload your file and then wait for them to send you a link to download it. Also, your project goes into a Que, and if you are on a deadline, this might not work.

As far as simple to use and if your office has a mix of PCs and Macs, this is a great software that is relatively easy to use. Also, having everyone using a similar software means you can quickly train everyone.


2. For the Mac

My favorite Slide Show software for the Mac that creates movie files is FotoMagico. The cost of the software is $99. One thing they offer that I don’t know any other software offering is One-to-One Coaching. Get up to speed with FotoMagico! Get tips and tricks from our tech support pros. Be more productive, and get your work done faster. Arrange a one-to-one online session with desktop sharing for $99 per session. When you are ready to output the show, FotoMagico has easy choices like YouTube, Apple Devices, and just about any other output, including 4K Cinema Projection.


3. For the PC

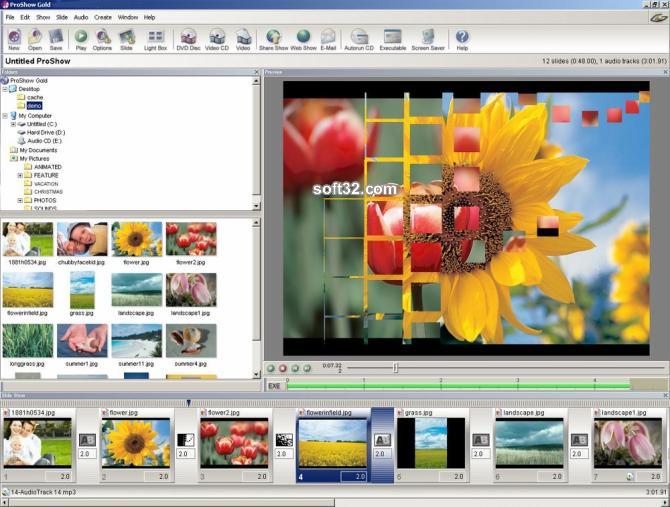
For a long time, before I switched to using Mac exclusively, I was using ProShow Gold. However, I found going from ProShow Gold to FotoMagico seamless and believe they work very similarly.

As you can see from the screen grabs, they look very similar. The outputs are identical to FotoMagico. You can create DVDs, Blu-ray, Facebook, Youtube, and more creations.


My suggestion is to output to H.264 format since this is a standard for video compression and is currently one of the most commonly used formats for recording, compressing, and distributing high-definition video.

These solutions make it very easy to combine your still images with audio. You can create a voiceover, use music and even blend it with video. In addition, the learning curve on these software packages is much easier than using Adobe Premier or Final Cut Pro X.


3.5 DigiCraft Plugin Solution

If you are looking for a plugin with Adobe Lightroom to create a slide show gallery, try DigiCrafts software. It was designed primarily for photographers to develop portfolio packages to play on Apple devices. However, I have used it when I need a click-through package.

I used this software to create small galleries of my work for my blog and website. You can click on the categories above.

Photographers: Diskwarrior and Reimage Keeps Your PC or Mac Like New

I want to help you fix all those quirks that eventually will happen with any computer.  Here are my two recommendations as must haves for your computer.

Both of these software solutions are helping you with your operating system. 

For the PC

Reimage is a unique repair service fixes your Windows Operating System – it reverses the damage already done with a full database of replacement files. Only software of its kind. It sells for $69.95 and for $30 more you can install it on three computers.

This chart does a great job of showing you what it can do. There are two things on that chart that make a huge difference: Repair at any time and private. I recommend this before taking your computer to a repair shop. The cost of the software will be less than the shop and if it works you saved yourself the trip.

If it is a hardware problem it will let you know and well you can replace something or then take it to a shop.

Some of the problems I was having with Windows 7 was the print spooler was not launching, I could not empty the trash can and when I clicked on the control panel under start I got error messages. Ran reimage and now it is as good as new.

Now I use VMware Fusion 5, which lets me run PC programs on my MacBook Pro. The only program I use this for is Quicken Home & Business to help with book keeping for my business.

The Quicken Home & Business sells for $99.  Great program for invoicing and keeping up with all my expenses.

VMWare Fusion 5 sells for $49.99.

Reimage needs a good internet connection because once it finds the problems it will download all the fixes and replace those registry and other files that have been corrupted to the factory settings.

For the Mac

DiskWarrior is the software I use to help improve the performance of my MacBook. It sells for $99. 

You will launch the program from either a DVD or from an external drive when you turn on your computer. I have it on an external drive and when I turn on my MacBook Pro I just hold down the “option” key and it gives me the option to start the computer from my external drive that is a complete copy of my laptops hard drive.

The reason for DiskWarrior to launch remotely is this is the only way for you to repair problems with the operating system at the root.

  • DiskWarrior recovers your files including your photos, music and videos.
  • DiskWarrior cures those cryptic errors reported by Disk Utility.
  • DiskWarrior uses a different approach to disk directory repair than other programs.
  • DiskWarrior is the only product that finds all of your data.
  • DiskWarrior is the highest rated and wins more awards.

There are two other programs on your mac that you can also use: Recovery and Disk Utility.

Recovery
 
OS X Lion or OS X Mountain Lion includes a built in set of utilities in the Recovery System. Restart your Mac and hold down the Command key and the R key (Command-R), and keep holding them until the Apple icon appears, indicating that your Mac is starting up. After the Recovery System is finished starting up, you should see a desktop with a OS X menu bar and a “Mac OS X Utilities” application window. Note: If you see a login window or your own desktop and icons, it is possible that you didn’t hold Command-R early enough. Restart and try again.

In order to reinstall OS X Lion or OS X Mountain Lion, you will need to be connected to an Ethernet or Wi-Fi network. The Wi-Fi menu item is in the upper-right corner of the screen. Click the icon to display all available Wi-Fi networks. Click your preferred network name and, if needed, enter a username and/or password.

Disk Utility

You can access it the same way by restart your Mac and hold down the Command key and the R key (Command-R), and keep holding them until the Apple icon appears. This will let you choose the Disk Utility.

Another way is to go to Applications folder>Utilities and select the Disk Utility.  Click on first aid and choose disk repair. This will improve performance as well.

The advantage of DiskWarrior is it goes deeper by letting you clean the hard drive at the lowest level.

Shooting Workflow for the Novice Photographer

These are the steps I went through yesterday teaching the camp photographers for WinShape Camps. These were photographers with all levels of skill. We wanted all of them to have a good starting point.

Step One: Quality set to highest

Set your camera to the biggest and best quality. For most of the people and the cameras they had setting the camera to JPEG Fine on the Nikon cameras and JPEG “L” on the Canon cameras. The reason for this choice is if there is a great shot they want to use later for poster, then it needs to be the best quality.  If you can edit RAW images I recommend this over the JPEG setting. You can go back and fix white balance if you screw that up when you shoot RAW.

You cannot up size a photo without the possibility of pixelation.

Step Two: Use Auto ISO

AUTO ISO

Since the quality of the ISO really has little impact on the quality of the image AS COMPARED to the major quality shift with film, I have my camera normally set to AUTO ISO most of the time.

I will go in to the menu and change this AUTO ISO settings.

Nikon D3S menu ISO settings
Nikon D3S ISO settings allow you not just to set the ISO you can choose AUTO ISO. I use this most of the time. You choose the range by choosing the low and maximum ISO. You also can choose the minimum ISO preference.

This AUTO ISO setting isn’t taking creativity away, but rather I have set the tolerances that I would have been having to stop and think about to do anyway. This lets me get the moment sharp and in focus, which is critical in sports.

What is the take away?

Before the digital camera, to use ISO in a creative way meant to change film stock. You also could not shoot AUTO ISO. Due to this no longer being a hindrance I now see the ISO setting the way I see aperture and shutter-speed.  It is another creative tool giving me more options to get photos that in the past were not possible.

Step Three: White Balance 

Before taking any photos of a new situation we make a custom white balance to get the best possible skin tones.

My favorite way for getting a custom white balance is using my ExpoDisc.

ExposDisc goes in front of the lens and then you use it to get an incident reading rather than a reflective reading of the light.

Notice the direction of the light hitting the subject.  You move to the same position to get the light reading below.

Point the camera toward the direction of the light that is falling on the subject. 

I have found if the subject is facing me and the light is from the side, I face the camera with the ExpoDisc on it so it is pointing towards the camera position.  The chart above is to help you understand the concept, but you can modify it.

One way you can modify it is as long as the light is the same where you are standing, then you could cheat and take a reading from where you are.  The problem that can arise is if they are lit by Window light and the camera position is in the shade then your color balance will be off if you do not take it from the subject’s perspective.

You can use a White Card and get the reading off of this to set your camera. Since every camera has a different process I recommend reading your camera manual for how to set the White Balance.

Better than the white card is a 18% Grey Card. Many of the camera stores sell this as a cloth to clean your lenses as well.

Nikon P7000 shot with -1 fill flash

Step Four: Use Flash

Many times outside you have people with poor light on their face. One of the best examples of this is baseball caps. The easiest way to fix this is to use fill flash.

Refer to your camera’s manual on how to adjust the power of your flash. I recommend starting about -1 stops under with the flash. You need to experiment with this to get the results you like. Remember for the most part most pop up flashes on cameras are only good up to about 10 feet outside.

If you use the flash where you have done a custom white balance you could do another one with the flash or just use the flash preset white balance which often is a lightning bolt icon.

Flash with high ISO

I have discovered a couple of things about using flash with a high ISO.

  1. With TTL flash and high ISO I can easily balance these so I can shoot with my 85mm f/1.4 for example.
  2. When you use flash and it is illuminating most of the scene the dynamic range of the photo is compressed. What this means is most of the time the f-stop range of exposure from the highlight to the shadow is more compressed and therefore the noise is the shadows is much less than when shot without the flash.
Nikon D3 – ISO 200 – f/1.4 – 1/160 and Nikkor 85mm f/1.4. Also off camera flash using the Nikon SU800 to trigger the Nikon SB900 flash in TTL mode. The flash is set for -1 stop compensation. In addition I also was using the Radio Popper system to be sure the signal was consistently getting from the SU800 to the SB900.

Once I discovered the affects flash has on shadow, I started to shoot with it in situations where noise was a real possibility and I wanted to diminish the affect of it. I will often shoot with the flash -1 to -3 stops under on the flash compensation setting.

Nikon D3S – ISO 6400 – f/4.8 – 1/100 and Nikon 28-300mm. Also off camera flash using the Nikon SU800 to trigger the Nikon SB900 flash in TTL mode. The flash is set for -1 stop compensation. In addition I also was using the Radio Popper system to be sure the signal was consistently getting from the SU800 to the SB900.
Nikon D3S – ISO 6400 – f/5.6 – 1/100 and Nikon 28-300mm. Also off camera flash using the Nikon SU800 to trigger the Nikon SB900 flash in TTL mode. The flash is set for -1 stop compensation. In addition I also was using the Radio Popper system to be sure the signal was consistently getting from the SU800 to the SB900.

Step Five: Starting Shutter Speeds

Sports

One of the settings I change in the AUTO ISO is the minimum shutter speed. When I am shooting sports I prefer shutter speeds of 1/2000. So I will set this and then shoot in Aperture mode.
The camera will override the shutter speed of 1/2000 and go lower if the ISO gets maxed out at ISO 12,800. If you prefer not to shoot at such a high ISO then you can choose something lower like ISO 5,000 and then shutter speed would drop from 1/2000 much sooner than it would for me.

Flourescent and Sodium Vapor

When shooting under Florescent and Sodium Vapor I normally set the minimum shutter speed to 1/100. You see both of these type of lights are really like flashes.  They are flashing about 60 times a second and if you shoot faster than 1/100 you will get color shifts due to catching the light in between cycles.

Nikon D3 – ISO 6400 – f/2.8 – 1/100 and Sigma 120-300mm f/2.8

Tips for the official photographer of an event

We went out to roam the campus shooting different situations and even did one where 500 people were in a gym listening to the speaker.

Most everyone of the photographers I had to go and talk to them about going up front and taking pictures not just of the speaker, but the audience listening.

If you stay in the back you end of with the back of the heads of the audience and the speaker is all you can see of their face.

If you are the “official photographer” then people expect you to be moving around. If you are there as a participant this can be distracting and make people wonder what you are doing.

I shot photos as well to show the camp photographers how to go to the front of the room and what to photograph.

We also talked about once the meeting is over or not yet started are the best photos. People hanging out and just enjoying each other.

More tips on photos to take to tell the story are here on my earlier blog Variety is the spice of life.

Photographer have you ever lost a password? Here is a software solution for you.

Years ago we could use the same username and password for just about everything. The upside to doing this is you only had to remember one login.

With identity theft on the rise and corporate espionage being a real threat you can no longer do this with your login accounts.

Today I have three different places I am logging into my accounts: 1) my Macbook Pro, 2) iPad and my 3) SmartPhone.  Trying to remember all those logins was getting ridiculous.

Over a year ago, I Googled looking for a solution. After reading reviews I tried a new software call 1Password.  After using this for a year I feel good about recommending it to you.

The good news is it is cross platform. If you have a PC, Mac, Android, iPhone or iPad. 1Password can remember all your passwords for you and keep them secured behind your Master Password. You remember your Master Password and 1Password will remember the rest.

I have been using this now for over a year and feel good about recommending it to you.  It has really simplified my life with having to remember passwords, account information and more details than I can remember.

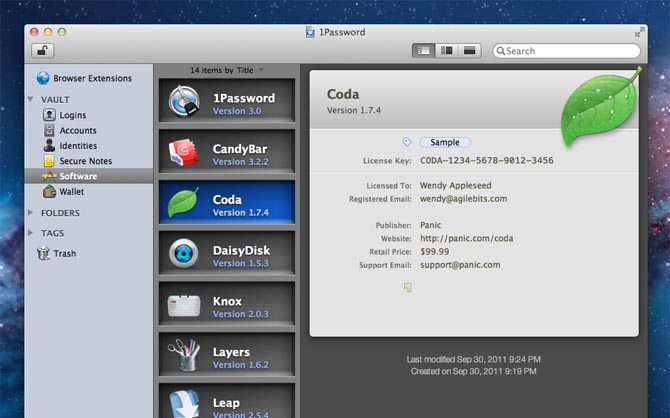
1Password Categories for saving information:

  1. Logins [web]
  2. Accounts [email, web hosting]
  3. Identities [personal information]
  4. Secure Notes [Anything you want to save as text]
  5. Software
  6. Wallet [credit cards, bank account #s, debit cards]

You can put all your credit cards into the system and when shopping online it will fill out those long forms for you most of the time.

After you install it on your device you are able to also embed the program into your browsers. Anytime you go to those secure websites where you need to sign in all you do is sign in once to 1Password and then click on the pull down menu where it will then fill out the login information for you.

Sometimes your computer can crash and with 1Password you now can have all your software license keys in one place to restore your software.

You can sync over a Wi-Fi connection or using Drop Box.

Need to generate a new password? I have certain places I go that every 90 days I must change my password. This is the main reason I was forced to come up with a better plan than I had been using. The cool thing is the software creates a gibberish password using capital letters, numbers and symbols for you and therefore making your password more secure than using your pet’s name for example.

Photographers are your clients smarter after they hired you? They should be!

“Make your boss smarter than before he or she met you. Bring new insights to the place. Then, you become indispensable.” – Jack Welch

The Power of Insight

An insight is the power of acute observation and deduction, penetration, discernment, perception called intellection. It is an understanding of cause and effect based on identification of relationships and behaviors within a model, context, or scenario.

I really enjoy covering meetings for one reason—I get to listen and pickup insights from great leaders of our time.

I realize that many of the thoughts I have are like a bunch of strings just entangled with one another looking like knots. Often an insight or eureka moment is like the untangling of the string of knots and putting them onto a spool making them now ready to be woven into a tapestry of art.

Most of the time these moments are simplifying what appears to be complex. I am often thinking after these moments how beautiful this insight is to life.

Jack Welch, the former CEO of General Electric, took the company from 13 billion a year company to a $400 billion and in 2000 was named “Manager of the Century” by Fortune magazine.

Mr Welch was one of the speakers at Chick-fil-A Leadercast and mainly was talking about how good leaders have a ‘generosity gene.’ They know when those who work for them is nourished they flourish and so too does the company.

While I am not running a $400 billion dollar company, I do believe good business practices are universal.  

The nugget I took away was this statement made by him:

“Make your boss smarter than before he or she met you. Bring new insights to the place. Then, you become indispensable.”

Now if I just make great photos and give these to my clients will this make them smarter? I don’t think so. To help make them smarter I will have to develop a relationship where I have the time to explain why certain images I believe are the best to use.

One way to do this is to provide two folders of images to your clients. You provide one folder that has all the images in them and another folder with the selects. My suggestion is you then take time to briefly state why you think these photos would be best to use.

I find myself often saying here is this photo, which is graphically very strong and captures a cool perspective of the event for you. With another photo I am talking about how this photo works best for the highlight of the coverage. It would be like picking the play of the game from all the sports photos of a game.

Often I am picking photos and explaining how the body language of a particular photo shows emotional connection that is the strongest of the collection of images.

The “eureka moment” for me was to remember to always help make my clients smarter. This means more than just dropping off photos for them.

Your client will not have time to go through all the images with you to have you walk them through your selections. Just be sure to summarize how the photo helped them further their cause and the reason they hired you to shoot something for them.

How to improve in photography

The What

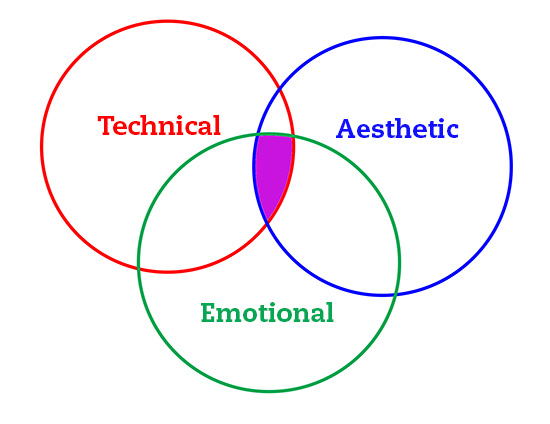
There are basically three things making up great photographs. You need the photograph to have good technical, aesthetic and emotional components to be good.

Technical—It is about the exposure, focus, and sharpness of the photograph. Good execution of lighting so you are maximizing the dynamic range.

Aesthetic—How close or far away you are from the subject and composition of the subject within the frame makes up a good deal of the aesthetic. The use of light and dark areas is very apparent in black and white photos. How you use of color is very important to get good skins tones for example.

Emotional—This is your ability to manipulate the technical and aesthetic to help capture the mood you desire. This is where you are making judgment calls about exposure [+/-].  You choose a specific lens to help you in some way achieve the results to communicate to your audience. Your composition choice will impact what you are trying to say and how you feel about a subject. How you choose to use light for the photograph can greatly impact the end product.

If all three of these elements are executed perfectly then the three concentric circles would appear as one circle and not just overlapping. This is what most of us are striving to accomplish and this is why for the most part even the greatest photos tend to have some overlap rather than perfection. Often the photographer will still see something that could have been improved upon to make the photograph better.

Your goal is to increase the overlap in all three circles. If you have just two overlapping like technical and aesthetic you will have well composed images that are technically perfect that are also lifeless.

As you can see then most every photo could be better for the most part, because it is almost impossible to overlap these completely.

I think one of the best professions to compare photography is music. We are both working with the physics of wave patterns, just one is visual and the other is sound.

When listening to a the best of the best musicians you are most often impressed at how effortlessly the musician performs. The physical challenges of stretching the body to perform those notes either by singing or moving of the hands on the instrument take years to build the muscle memory so that it isn’t apparent. You are just enjoying the performance. This is how great photos are made.

The photographer will work for years on being sure that in any situation they are able to technically get the photo. They are able to be in the right place to capture the aesthetic of composition and light. They have such a knowledge of the subject that they are able to capture the emotion of the moment as well.  When done to perfection you are unaware of the performance and just enjoying the image.

The Who

Who you seek out for guidance to master the technical, aesthetic and emotional components of the photograph will determine how long until you are a master photographer.
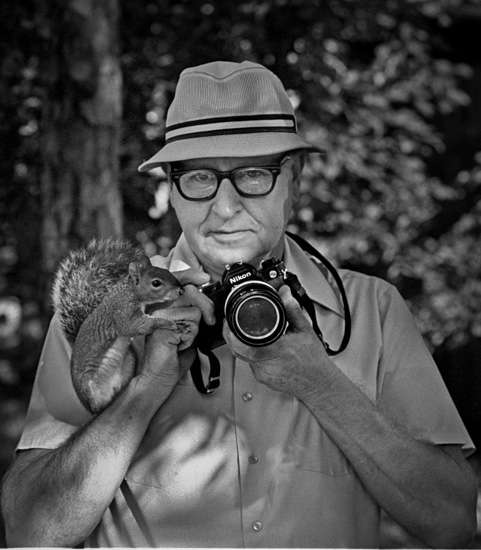
Frank Miller was one of my many mentors through the years.

Mentors

You need to study under someone who is a master. While you might start out with someone a little better than you, sooner or later you need to go to that seminar or workshop to have someone look at your work and give you the personal attention you need to address your weaknesses and strengths.

It is quite common for photographers to move through stages of mentors. Maybe you are drawn to photography and it takes you a while to find the subject for which you are best suited. Therefore it is quite common to start working with a landscape photographer and end up later working with a portrait photographer. This will have you seeking out different mentors.

Clients

You need someone to pay you for your work if you are to make this a profession. Learning to listen to a client’s needs will help you refine your craft.

You will be problem solving and trying a mix of things that will help your client. In turn they are helping you grow.

Yourself

You need to take the time to reflect on your work. A great deal of your growth will come from observation of your work and others. Over time you will be able to self evaluate your work.

Some of the self evaluation will be deciphering what went wrong and other times it will be what went right.

I am often observing my competition and evaluating their strengths and weaknesses. Many photographers I observe are great because they are playing to their strengths. Often they have become experts in a particular field and this knowledge helps them make better photographs than others.

I know of many sports photographers who were former professional athletes. They know what to look for that makes one athlete better than another and capture this in ways those of us who never competed cannot see.

The more you understand your strengths and weaknesses you will be able to distinguish your work from everyone else.

Putting it all together

When you are able to walk into just about any situation and come away with a photograph that all the technical, aesthetic and emotional is well executed then you are a master of the craft. This doesn’t mean you don’t have room for improvement, it means you will always be able to come away with a professional level image that engages the audience.

When other photographers are not seen as a threat but as your peers you have a good understanding of what distinguishes you from others. You are aware of your strengths.

I have grown to understand that those at the top of the profession are fully aware of the increasing competition and are not complacent. They are proactively looking for ways to continuously improve and by doing so are leaders in the industry rather than the followers.