Preserving Memories: The Power of Hooks in Family Photography

L/R Front Row: Suzanna Hummel, Carl Monauni, Doris Griggs, LeRoy Martin Griggs, [unknown], Richard Zvonar
L/R Back Row: John Hummel, unknown], Jerry King, [unknown], [unknown], [unknown], [unknown], Doris Nordstrom, [unknown], Harold Nordstrom

In this fast-paced digital age, capturing moments has become more accessible. With the click of a button, we can freeze a moment in time and immortalize it in a photograph. As photographers, we often find ourselves engrossed in the art and craft of capturing images, but have we ever paused to consider what happens to these photographs after we are gone? How can we ensure our family cherishes and preserves these memories for generations?

Bill Fortney

Meet my dear friend, Bill Fortney, a passionate photographer who understands the significance of leaving behind a legacy through photography. Bill embarked on a remarkable project that is a powerful example of how photographers can create hooks to captivate their families and future generations.

Bill began by scanning his family’s unique recipe cards, capturing the essence of generations-old culinary traditions. He recognized that these recipes were not just about food; they were a connection to the past and a bridge to the future. With unwavering dedication, he meticulously compiled these recipes into a captivating coffee table book. Each page showcased the original handwritten recipe alongside a typed version, a photograph of the relative who contributed the recipe, and a short biography or story. The hook was simple but powerful: keeping family recipes alive for generations.

Doris Griggs’s handwritten recipe. She created a recipe book to give Dorie, her daughter, and my wife for her wedding shower gift.

But Bill didn’t stop there. He expanded his vision to include a comprehensive collection of family photos, each carefully labeled with the names and ages of the relatives captured in the frames. These photos were not mere snapshots; they were windows into the lives of loved ones, telling stories and preserving memories. The idea was to create a connection between past and present, enabling the next generation to see themselves in the faces of their ancestors and fostering a sense of shared heritage.

The magic of Bill’s approach lies in the intention behind it. By going beyond the mere act of capturing photographs and thinking deeply about his audience, especially his family, he crafted a legacy that would resonate with them. He understood that photos, devoid of context, could easily be forgotten or lost. Instead, it was the hooks he created—the family recipes, the stories, the connections—that breathed life into the images and made them more than just pictures on paper.

Another of my friends did something similar, and their coffee table book became a treasured heirloom, passed down from generation to generation. When a new couple in the family welcomed their first child, they were presented with a copy of the book, rich with family photos and stories. As their child grew, they began to see the unmistakable family resemblances in their children’s faces, forging connections that transcended time and reinforcing the importance of their shared heritage.

The moral of Bill’s story is powerful: photographs alone, without a hook for the next generation, may fade away into obscurity. As photographers, we have a unique opportunity to shape our legacy and leave a lasting impact. We must capture images for ourselves and consider our audience, particularly our family if we want our photographs to be cherished and preserved long after we are gone.

The far-right couple is my wife’s parents, LeRoy Martin Griggs & Doris Griggs

So, think beyond the present moment the next time you snap a picture. Consider the stories accompanying it, the memories it holds, and the connections it can create. Weave together the threads of your family’s history, develop hooks that engage and captivate, and watch your legacy come alive through photography’s power.

Professional Group Photos: Speaking to Core Values and Building Your Brand

In today’s highly competitive business landscape, building a solid brand and establishing a positive company culture is essential for long-term success. However, one often overlooked aspect of this process is the use of professional group photos. While some may see them as mere decorations or team-building exercises, professional group photos can potentially convey your company’s core values and significantly contribute to brand development. This blog post will explore how professional group photos can help speak to your company’s core values and build your brand.
Caring Works

1. Visual Representation of Company Culture

Professional group photos provide an opportunity to represent your company culture visually. They capture the essence of your team, showcasing the people who contribute to your organization’s success. A well-executed group photo can reflect your company’s camaraderie, diversity, and inclusivity, highlighting the values that set your organization apart. You can attract like-minded individuals who align with your company’s culture and core values by showcasing a cohesive and positive team dynamic.
Mayor Shirley Franklin with the Georgia Tech Dance Team.

2. Building Trust and Credibility

In the digital age, where face-to-face interactions may be limited, professional group photos help humanize your brand. When potential clients or partners visit your website or social media profiles, seeing the faces behind the organization can build trust and credibility. Group photos create a sense of authenticity, demonstrating that your company comprises real people working towards a common goal. This personal touch can significantly enhance your brand’s reputation and make your organization more relatable.

Georgia Tech Volleyball Team

3. Reinforcing Brand Identity

Every successful brand’s unique identity sets it apart from the competition. Professional group photos can be a powerful tool in reinforcing your brand identity. By carefully selecting the location, attire, and overall composition of the photo, you can align the visual elements with your brand’s values and aesthetics. For example, a tech startup aiming for a modern and innovative image may opt for a contemporary urban setting and casual attire. On the other hand, a financial institution striving for professionalism and trust may choose a more formal location and clothing. Consistency in these visual cues will reinforce your brand identity and help your company stand out in a crowded market.

10, 20 & 30 year work anniversaries for Chick-fil-A Staff celebration at the Delta Museum

4. Employee Engagement and Pride

Including your employees in the process of taking professional group photos can foster a sense of belonging and pride within the organization. Employees who feel valued and included are more likely to be engaged and motivated. In addition, you empower your team members and enhance their connection to the company by showcasing their individual and collective achievements through group photos. This increased engagement can lead to higher productivity, improved teamwork, and better retention rates.

Global Strategic Supply Chain Group Photo

Conclusion

Professional group photos are far more than just snapshots of your team. When approached strategically, they become powerful tools for speaking to your company’s core values and building your brand. Through the visual representation of your company culture, building trust and credibility, reinforcing brand identity, and fostering employee engagement, professional group photos can significantly impact your organization’s success.

My Top Lenses: A Photographer’s Guide to Choosing the Right Lens

[NIKON Z 9, NIKKOR Z 24-120mm f/4 S, Mode = Aperture Priority, ISO 5000, 1/200, ƒ/4, (35mm = 44)]

Choosing the right lens for the situation is crucial for a photographer to capture the best possible shot. Different lenses are suitable for different scenarios, and it is essential to understand what each lens can do and how it will affect the final image.

[NIKON D4, 28.0-300.0 mm f/3.5-5.6, Mode = Aperture Priority, ISO 12800, 1/50, ƒ/5.6, (35mm = 180)]

My most used lens is the Nikon 28-300mm ƒ/3.5-5.6 VR, which I use for most of my event work. This lens’s wide zoom range makes it versatile for capturing different angles and perspectives. It also has a built-in vibration reduction system that helps me capture sharp images, even in low-light conditions.

[NIKON Z 9, NIKKOR Z 14-30mm f/4 S, Mode = Aperture Priority, ISO 400, 1/50, ƒ/8, (35mm = 14)]

The Nikon 14-24mm ƒ/2.8 is my go-to lens for photojournalism, where I like to get close and still capture the context. Also, I use this with real estate and architecture photography. This lens has a wide-angle perspective that allows me to capture sweeping vistas and intricate details of buildings. It also has a fast aperture of ƒ/2.8, which is helpful in low-light situations. I sold this lens and replaced it with the mirrorless Nikon 14-30mm ƒ/4. With today’s high ISO cameras combined with the Denoise software, I cannot think of when I will need the ƒ/2.8 to justify double the price.

The Nikon 24-120mm ƒ/4 is another versatile lens I use for various situations. It has a constant aperture of ƒ/4 throughout its zoom range, making it useful in low-light conditions. I particularly like this lens for portraits as it has a flattering focal length and can create a shallow depth of field. This lens has replaced my 28-300mm since I switched to the mirrorless Nikon Z6 and Nikon Z9 cameras.

[NIKON Z 9, NIKKOR Z 100-400mm f/4.5-5.6 VR S, Mode = Aperture Priority, ISO 16000, 1/250, ƒ/5.3, (35mm = 350)]

The Nikon 100-400mm ƒ/4.5-5.6 VR S is my choice for events and sports photography. This lens’s long zoom range allows me to get up close to my subjects while maintaining a safe distance. It also has a fast autofocus and vibration reduction system that helps me capture sharp images of fast-moving subjects. This lens with 24-120mm is the two lenses I use all the time for event work.

[NIKON D5, 35.0 mm f/1.4, Mode = Aperture Priority, ISO 250, 1/200, ƒ/1.4, (35mm = 35)]

Regarding specialty lenses, the Sigma 35mm ƒ/1.4 is my favorite for creative and artistic shots. This lens has a wide aperture of ƒ/1.4, creating a shallow field depth and a beautiful bokeh effect. The Nikon 85mm ƒ/1.8 and ƒ/1.4 are excellent portrait photography choices. When I upgraded from the 85mm ƒ/1.4 D, I chose the 85mm ƒ/1.8 for the F mount. I liked the lighter size and didn’t see much difference between it and the ƒ/1.4 to justify carrying that extra weight. I will upgrade to the Z mount in the coming year.

[NIKON D750, 85.0 mm f/1.8, Mode = Aperture Priority, ISO 3200, 1/80, ƒ/1.8, (35mm = 85)]

In conclusion, choosing the right lens for a particular situation is essential to capture the best possible shot. Understanding what each lens can do and how it will affect the final image is critical to making the right choice. Whether it’s a versatile all-purpose zoom lens or a specialty lens designed for a specific type of photography, having the right tools can make all the difference in your photography.

How using strobes outside can improve your photography.

As a photographer, you know that lighting can make or break a shot. When shooting outside, the sun can be your friend or your enemy. Midday sun can create harsh shadows on the face, making it challenging to capture the perfect shot. That’s where strobes come in. By using a strobe with a softbox, you can create consistent, beautiful lighting that will help you capture stunning outdoor shots.

Strobes are powerful flashes that can supplement or replace natural light. They are instrumental when shooting in bright sunlight because they help to control shadows on the face. By placing the strobe at a 45-degree angle to the left or right of the camera and 45 degrees above the subject’s eyes, you can create a flattering modeling effect that will enhance your subject’s features.

Photo by: Dorie Griggs

But strobes aren’t just helpful in controlling shadows. They can also help improve color rendering on cloudy days. When shooting on an overcast day, colors can appear muted and dull. By using a strobe with a softbox, you can bring out the colors in your shots and create a more vibrant, dynamic image.

Another advantage of using strobes outside is that it can reduce editing time. While tools like Adobe’s Lightroom and Photoshop can be used to lighten faces and darken or lighten backgrounds, getting the shot right in the camera will save you lots of time in post-processing.

No Images found.

In my recent shoot, I used a strobe with a softbox to give me a consistent look with all the photos. By placing the light at a 45-degree angle to the left or right of the camera and 45 degrees above the subject’s eyes, I created a flattering modeling effect that enhanced my subject’s features. The result was a series of stunning, professional-grade photos that my client was thrilled with.

If you want to capture stunning, professional-grade photos, consider using strobes outside. By controlling shadows, improving color rendering, and cutting down on editing time, strobes can help you capture the perfect shot every time. Contact me today to book your graduating senior photos!

Event Photography: Being Prepared for Any Lighting Condition

Georgia Aquarium. The photo is processed with Lightroom using the new Denoise tool. [NIKON Z 9, NIKKOR Z 14-30mm f/4 S, Mode = Aperture Priority, ISO 20000, 1/250, ƒ/4, (35mm = 17)]

As an event photographer, you must be prepared for anything that may come your way. From outdoor sunlight to a meeting room with a projector and all the lights down, you must be ready to capture the moment in any lighting condition. This past week, I had an event that took me to the Georgia Aquarium, where many locations were “NO FLASH ALLOWED” areas but were dark. It was a challenging but exciting experience that required me to be on my toes throughout the event.

Stage Lighting 6287º K +39 Magenta [NIKON Z 9, NIKKOR Z 100-400mm f/4.5-5.6 VR S, Mode = Aperture Priority, ISO 3200, 1/250, ƒ/5, (35mm = 220)]

One of the most significant challenges I faced during the event was the funky color lighting from room to room. The stage lighting wasn’t typical Daylight, Tungsten, or Fluorescent color, but it gave me 6287º Kelvin with +39 Magenta with Daylight LED screens projecting the speakers and their powerpoints. This required me to constantly adjust my camera’s white balance to achieve the correct colors in each shot.

Additionally, there were areas where “NO FLASH ALLOWED” signs were posted, which meant I had to rely on ambient lighting to capture the shots. The dark environment made it challenging, but I could capture some stunning images with the correct camera settings.

Using on-camera flash with the MagMod Sphere, the image is processed with Lightroom and using Denoise Tool [NIKON Z 9, NIKKOR Z 100-400mm f/4.5-5.6 VR S, Mode = Aperture Priority, ISO 12800, 1/200, ƒ/5, (35mm = 100)]

To add to the challenges, there were rooms where the lights were dimmed entirely, and the only light source was from the projector on the screen. As a result, I had to use my flash to light up the speakers and their surroundings, which required me to adjust the settings on my camera and coordinate it to match the ambient lighting.

Another challenge was the outdoor sunlight. So I am shooting from ISO 64 to ISO 25600 and having to use flash at times to help with overhead lighting of the sun and canned room lights.

Johnny Clayton Taylor Jr. is an American lawyer, author, board member, and public speaker who is the president and Chief Executive Officer of the Society for Human Resource Management. [NIKON Z 9, NIKKOR Z 100-400mm f/4.5-5.6 VR S, Mode = Aperture Priority, ISO 5000, 1/250, ƒ/4.8, (35mm = 145)]

As an event photographer, you must be prepared for anything coming your way. From funky color lighting to dark environments, “NO FLASH ALLOWED” areas, and direct sunlight, you must be ready to adapt to any lighting condition. You must also be quick on your feet, adjust your camera settings, and use the right equipment to capture the perfect shot. It’s a challenging yet exciting job that requires patience, skill, and creativity.

Eeva Ruuska, the Americas Operations Manager at Riskline, leads a regional team of analysts to provide worldwide political, security, and travel intelligence. [NIKON Z 9, NIKKOR Z 100-400mm f/4.5-5.6 VR S, Mode = Aperture Priority, ISO 6400, 1/250, ƒ/4.8, (35mm = 150)]

Finding Your Passion Through Personal Photography Projects

Whether wheeling over a swamp forest or whistling plaintively from a riverine park, a Red-shouldered Hawk is typically a sign of tall woods and water. It’s one of our most distinctively marked common hawks, with barred reddish-peachy underparts and a strongly banded tail. In flight, translucent crescents near the wingtips help to identify the species at a distance. These forest hawks hunt prey ranging from mice to frogs and snakes. The photo was taken on April 28, 2023.

Photography is a creative art form that allows individuals to express themselves through their unique perspectives. One of the best ways to find your passion as a photographer is by embarking on a personal project. A personal project is a photography series you work on over time, usually focusing on a particular subject or theme. It’s an opportunity to explore your creativity, improve your skills, and create a body of work that reflects your style and vision.

Personal projects allow you to experiment with new techniques, equipment, and subjects without the pressure of a client’s expectations. They allow you to pursue your interests and explore your surroundings, whether that’s your neighborhood, city, or nature. One of the best things about personal projects is that they can be as simple or complex as you like, and you can work on them at your own pace.

Red-shouldered Hawk juveniles in Chatham Greenway in Roswell, Georgia, on May 11, 2021.

Finding a personal project close to home is a great way to start. You don’t need to travel far or spend much money to find interesting subjects to photograph. Some of the most exciting personal projects focus on what we see daily but perhaps don’t notice or appreciate.

One example of a personal project that can be done from home is photographing birds in your backyard. Observing and documenting their behavior, breeding patterns, and interactions can make for a fascinating series. One particular bird species that is interesting to follow is the Red-Shouldered Hawk. Watching a couple build their nest, lay their eggs, and rear their young can provide a unique insight into the lives of these beautiful creatures. With patience and observation, you can capture some truly stunning images that reflect the wonder of nature.

Red-shouldered Hawk and three juvenile hawks in Chatham Greenway in Roswell, Georgia, on May 5, 2021

Not only do personal photography projects help you find your passion, but they can also help you showcase your skills to potential clients. Creating a solid body of work that reflects your unique style and vision can attract clients who appreciate your creative approach and want to work with you.

In conclusion, personal photography projects are a valuable way to explore your creativity, find your passion, and showcase your skills to potential clients. Whether photographing birds in your backyard or exploring a new city, there’s no limit to the subjects and themes you can pursue. So why not find a personal project that speaks to you and start exploring today?

Remember, as you document your journey, share your photos and process them on social media. This is a great way to connect with other photographers, gain inspiration, and receive feedback. With a bit of dedication and hard work, your project could be the start of a lifelong passion for photography.

The Impact of AI on Photography: Is It Worth the Price?

Artificial Intelligence (AI) is having a significant impact on the field of photography. It has revolutionized how we edit photos, saving us time and effort. However, it can also take up a significant amount of computer time. So let’s explore how AI affects photography and whether it warrants a price change for photographers to charge their clients.

One of the most significant impacts of AI in photography is the ease with which we can now edit our photos. AI-powered tools like Adobe Lightroom’s Denoise or DXO PureRAW 3 can automatically remove image noise, saving us hours of manual editing. Similarly, Topaz AI Photo can enhance details and colors automatically, allowing us to achieve stunning results with minimal effort. These AI tools make it possible for photographers to focus more on the creative aspects of their work rather than spending endless hours on post-processing.

However, AI comes with a cost. The computer time required to execute AI algorithms can be significant, especially when working with large files. This can result in long wait times for photographers, who may need to process thousands of images. While the result is often worth the wait, it is essential to consider the time and resources required to use AI in photography.

Using tools like Lightroom’s Denoise or DXO PureRAW 3 can still take a significant amount of time, with each image taking up to six minutes for 45.7 NEF files. When working on large projects with hundreds or even thousands of photos, this processing time can quickly add up, leading to long wait times for the photographer. While AI-powered post-processing offers many benefits, including improved image quality and greater efficiency, it’s essential to consider the time and resources required to use these tools effectively.

As a photographer, it is up to you to decide whether to increase your fees to reflect the increased computer time required for AI processing. If you are providing a higher-end quality service that includes AI-powered post-processing, it may be worth adjusting your prices to reflect the added value that AI provides. However, it is essential to communicate the reasons for the price change to your clients so they understand the importance of your service.

In conclusion, AI significantly impacts photography, providing powerful tools that allow us to create stunning images with minimal effort. However, it is also essential to consider the time and resources required to use AI and to adjust our prices accordingly. Ultimately, the decision to charge more for AI-powered post-processing will depend on the individual photographer’s business model and the value they provide to their clients.

The Learning Curve: Why It Takes Time to Master Something New

Kevin Moss is standing in front of the older Dwarf House before renovation in Hapeville, Georgia.

Learning something new is always daunting, whether adapting to newly renovated equipment in a restaurant or getting to grips with a brand-new camera. Recently, I had the pleasure of visiting Chick-fil-A’s first freshly renovated restaurant, the Dwarf House, in Hapeville, GA. I had the chance to speak with Kevin Moss, the operator of the Dwarf House, who shared his experience with me. After a nine-month renovation, the restaurant finally reopened in February 2022. However, it took Kevin and his team over a year to feel comfortable with all the new equipment and design.

The Dwarf House had remained unchanged since its major renovation in 1967. But, as Kevin Moss pointed out, he would often ask some of the Grand Opening team how to use new equipment. They were often surprised that a seasoned Chick-fil-A operator didn’t know how to use something that had been around in many other Chick-fil-A restaurants for a few years. But, again, this emphasizes that experts need time to learn and adapt to new changes.

Similarly, I had a similar experience when I purchased my Nikon Z9 camera in December 2021. Going through the menu on the back of the camera was like walking through the newly renovated Dwarf House. The camera was packed with new features and functions I had no idea how to use. As a result, I found myself constantly referring to the manual and looking for videos and blogs that explained how to use certain functions.

Nikon Z9

From a psychological standpoint, learning something new requires cognitive effort and attention. When accustomed to a routine, our brains become wired to execute tasks without conscious effort. However, when faced with something new, our brains must allocate more cognitive resources to process and perform tasks, leading to overload and confusion. This is known as cognitive load, which can initially be overwhelming.

It is natural to feel less efficient initially when trying to learn something new. However, investing time and effort into learning new technology or processes is essential. The rewards of mastering a new technology or process are immense. Not only will you be more efficient and productive, but you will also be able to explore new possibilities and push beyond your previous limitations.

As Kevin Moss realized, it takes time and practice to master new technology fully. Similarly, I had to try to learn and adapt to my new camera. However, once you persevere and master the latest technology or process, you can achieve far beyond where you were before the change.

In conclusion, learning something new is always a challenging but rewarding task. Recognizing that feeling overwhelmed and less efficient is a natural part of the learning process is essential. However, investing time and effort allows you to master new technology or techniques and achieve personal and professional growth. Kevin Moss’s experience at the Dwarf House and my own experience with the Nikon Z9 demonstrate that even seasoned professionals must adapt and learn continuously to stay relevant and competitive. So, embrace the challenge, and you will undoubtedly come out more knowledgeable, adaptable, and efficient on the other side.

Adobe Lightroom’s Solution for Managing Large DNG RAW File Sizes

With the release of DXO PureRAW 3 and Lightroom’s new Denoise in the last couple of weeks, many photographers are enjoying the impressive results. However, some are struggling with the new DNG RAW file sizes. For example, I have seen my Nikon Z9 NEF files go from 34 MB to as large as 200 MB in DNG format. As a result, I began to investigate if there was a way to reduce the file size without compromising image quality.

When shooting RAW, you have several choices, ranging from uncompressed RAW to the Nikon Z9 NEF HE*, a high-efficiency file. But what if you want to keep using the DNG format? Well, Adobe Lightroom has a solution that can help.

Lightroom has a feature called Lossy DNG compression, which allows you to reduce the size of your DNG files while maintaining image quality. This compression technique works by removing some of the image data that is considered unnecessary, resulting in smaller file sizes. In addition, the compression is done in a way that is not visible to the naked eye so that you won’t notice any degradation in image quality.

Using Lightroom’s Lossy DNG compression is easy. When you import your photos into Lightroom, you can choose to convert them to DNG files and enable the lossy compression option. Alternatively, you can select your existing DNG files and convert them to Lossy DNG files.

It’s worth noting that Lossy DNG compression is irreversible, so keeping your original files as backups is essential. However, the compression technique can save you considerable disk space, which is especially useful for photographers who take many photos.

In conclusion, if you’re struggling with large DNG RAW file sizes, Lightroom’s Lossy DNG compression technique is an effective solution that can help you save disk space without sacrificing image quality. So give it a try and see how much space you can save!

How do you convert RAW images into lossy DNG?

The following steps explain converting existing RAW images to lossy DNG using Lightroom.

  1. In Lightroom, press the Shift + G key to enter the grid view
  2. Select the photos you wish to convert to DNG
  3. Go to Library > Convert images to DNG
  4. Make sure you select the right preferences in the dialogue box that appears.
  • Only convert RAW files – Select this checkbox to convert RAW files
  • Delete original file after conversion – Select this checkbox to delete original RAW files.
  • File type – Select a lowercase extension
  • Compatibility – Choose the latest version, Camera Raw 7.1 and later
  • JPEG preview – Medium size preview will do just fine; by selecting a full size, the conversion may take longer
  • Embed fast load data – This allows images to load faster in the Develop module, so it is a good idea to have this option enabled
  • Use Lossy Compression – Select this checkbox to convert a RAW file to a lossy DNG file
  • Embed Original RAW file – Leave this box unchecked. This option is provided to have the original RAW file in your converted DNG file, but this will increase the storage size of the file significantly. If you want the original RAW files, save them as a backup.
  1. As a final step, click Ok to convert to lossy DNG. Be prepared, for it may take a long time for the conversion to complete.

I am still keeping my NEF file, this is a way to save on space that the Denoise process creates massive DNG, and I want this to be smaller.

Say Goodbye to Noise with Adobe Lightroom Classic’s New Denoise Feature

[NIKON Z 9, NIKKOR Z 100-400mm f/4.5-5.6 VR S, Mode = Aperture Priority, ISO 22800, 1/250, ƒ/8, (35mm = 165)]

If you’re a photographer who shoots in low-light conditions, you’re no stranger to the problem of noise in your images. Noise is the visual distortion that occurs when shooting at high ISOs, making your photos look grainy and reducing their overall quality. Fortunately, Adobe Lightroom Classic’s latest release, version 12.3, introduces a new Denoise feature to solve this problem.

The Denoise feature in Lightroom Classic uses advanced algorithms to analyze and reduce the noise in your images. It’s designed to be applied to images shot at high ISOs. The new feature is called Denoise or also Enhance.

Cropped to 100% [NIKON Z 9, NIKKOR Z 100-400mm f/4.5-5.6 VR S, Mode = Aperture Priority, ISO 22800, 1/250, ƒ/8, (35mm = 165)]

Adobe’s recommendation is to apply it right away before doing other adjustments. I just applied it to all that needed it and got a cup of coffee before editing all the images.

The default Amount is set to 50, but you can use the slider to tone down or amplify the amount of Denoise in an image. To reset the slider to the default of 50, double-click on the circle. 

To showcase the effectiveness of Lightroom Classic’s new Denoise feature, I took some photos at a high ISO above 20000. As you can see in the examples the Denoise feature does an excellent job of reducing noise without sacrificing too much detail.

[NIKON Z 9, NIKKOR Z 100-400mm f/4.5-5.6 VR S, Mode = Aperture Priority, ISO 25600, 1/250, ƒ/8, (35mm = 195)]

Lightroom Classic’s new Denoise feature is an exciting addition for photographers who regularly shoot in low-light conditions. It’s a powerful tool that can help improve the quality of your images and save you time in the editing process.
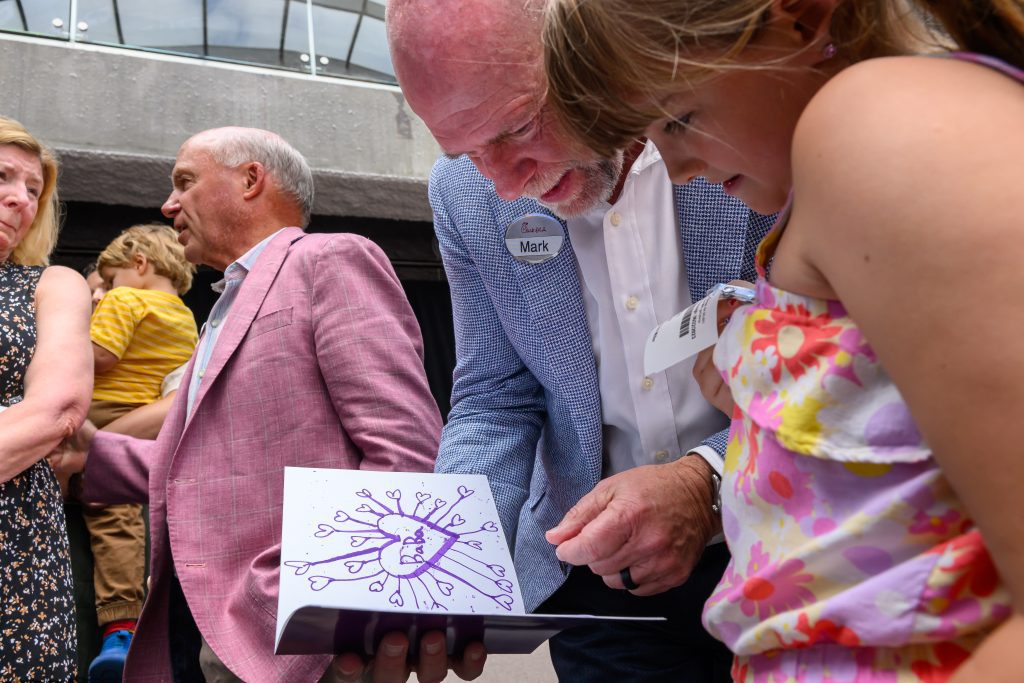
[NIKON Z 9, NIKKOR Z 100-400mm f/4.5-5.6 VR S, Mode = Aperture Priority, ISO 20000, 1/250, ƒ/8, (35mm = 400)]

In conclusion, if you want to reduce noise in your images, try Lightroom Classic’s new Denoise feature. It’s a valuable tool that can help take your low-light photography to the next level.

Photographing Red-Shouldered Hawks in Your Backyard: Tips for Non-Professional Birders

Red-shouldered hawks are busy building their nest in our backyard tree, 60 feet off the ground. Did you know that April and May are the peak months for nest building? [NIKON Z 9, VR 120-300mm f/2.8G + 2X, Mode = Aperture Priority, ISO 2200, 1/250, ƒ/8, (35mm = 600)]

As a professional photographer with a background in sports photography, I’ve always been interested in capturing fast-paced action. Recently, I’ve been taking on a new challenge: photographing Red-Shouldered Hawks nesting in my backyard. While I’m not a professional birder and don’t have the patience to be a full-time wildlife photographer, I’ve learned a few things that have helped me capture some fantastic shots. Here are some tips for photographing Red-Shouldered Hawks in your backyard, even if you’re not a professional birder.


photo by: Dorie Griggs

First and foremost, having the right gear makes a huge difference. One of the things I’ve invested in over the past couple of years is a gimbal head to hold my Sigma 120-300mm ƒ/2.8 lens with a 1.4X or a 2X converter. This head allows for more stability and improves the sharpness of the images.

[NIKON Z 9, VR 120-300mm f/2.8G + 2X, Mode = Aperture Priority, ISO 4000, 1/2000, ƒ/8, (35mm = 600)]

In addition, it’s essential to get as close as possible to your subject. However, these Red-Shouldered Hawks are building a nest 60+ feet up in a tree, so having a long glass is crucial. While the longest lens I own gets me to just 600mm, it’s still better than trying to capture these birds with a 70-200mm lens.

Another critical factor is camera technology. I recently upgraded from my Nikon D5 to the Nikon Z9, which has 47 megapixels compared to the D5’s 20 megapixels. This allows for more cropping and greater detail in the final image.

[NIKON Z 9, VR 120-300mm f/2.8G + 2X, Mode = Aperture Priority, ISO 4000, 1/2000, ƒ/8, (35mm = 600)]

Lastly, using the right software can make a big difference in post-processing. Lightroom’s new Denoise feature is a game-changer, rivaling my previous software, DXO PureRAW 3.

When capturing the shots themselves, there are a few tips to remember. First, it’s essential to use a fast shutter speed to freeze the action, and for most shots, I recommend a shutter speed of 1/2500. Operating a motor drive setting can also help capture those quick action shots. While Nikon has introduced the Pre-Release Burst, which buffers images while the shutter button is depressed, it doesn’t work with RAW pictures, so I don’t use it.

[NIKON Z 9, VR 120-300mm f/2.8G + 2X, Mode = Aperture Priority, ISO 2200, 1/250, ƒ/8, (35mm = 600)]

Overall, photographing Red-Shouldered Hawks in your backyard can be a challenging but rewarding experience. With the right gear, camera technology, and software, even non-professional birders can capture stunning shots of these fantastic birds. So get out there, experiment with your settings, and see what photos you can catch!

In conclusion, whether you are a professional or an amateur photographer, trying something new and taking on a new challenge is always exciting. Photographing Red-Shouldered Hawks in my backyard has been a fun and rewarding experience, and with the right equipment and a little patience, it can be for you too. So, keep these tips in mind, and you’ll be on your way to capturing stunning shots of these magnificent birds.

Lights, Camera, Action: Finding the Sweet Spot for Non-Profit Video Length

Image sourced from https://wistia.com/learn/marketing/optimal-video-length

When it comes to non-profit videos, finding the right length is crucial to keep viewers engaged and motivated to support your cause. While keeping your credits short is essential, recent research suggests that longer videos can improve watch time and boost your content in the algorithm.

To increase engagement with your video, it’s crucial to grab your audience’s attention right from the beginning, regardless of whether it lasts for 2 minutes or 12. Failing to deliver your message promptly may result in your audience quickly clicking away. At the same time, some research suggests that human attention spans have diminished to just 8 seconds. Therefore, it is recommended to try to hook your audience within the first 8 seconds for social media video content and within 20 seconds for most other types of video. If you don’t hook your audience by then, you’ve probably lost them.

However, that doesn’t mean you should make your videos longer just for the sake of it. The key is to find the sweet spot where you can deliver all the necessary information without padding your video. Ideally, videos should be 7-15 minutes long, as this range performs best on different channels, according to the Social Media Examiner.

Another source Maestro says, “Videos between 2 and 6 minutes lose viewers rapidly. Videos longer than 6 minutes but shorter than 12 minutes maintain a relatively steady viewership, making this range the ideal length for longer content. After 12 minutes, viewer engagement again begins to decline more rapidly.

PBS Space Time is an excellent example of a popular channel that frequently posts videos in this range but also features longer videos of up to 20 minutes. However, for social media channels like Instagram or Facebook, keeping your videos under 60 or 120 seconds is crucial to capture users’ attention and convey your message effectively.

To make the most of your video content, delivering valuable information, creating visually engaging content, and having a clear message and call to action are essential. Remember, the primary goal is to inspire viewers to support your non-profit, so make sure your video reflects your organization’s brand and mission.

For optimal viewer engagement, limiting videos to under 2 minutes is recommended. Additionally, it’s important to note that audience engagement tends to decrease significantly after the 2 to 3-minute mark. However, if your content requires a longer duration, a target of 6 to 12 minutes could be more appropriate.

In conclusion, finding the right video length balances delivering valuable information and engaging your audience. These comments are about how an audience will see them on something like YouTube or Vimeo. If you are showing them in a meeting, you already have a captive audience like you would have at a movie theater. People will give you more time in these situations. While longer videos may improve watch time, keeping your videos within the recommended 7-15 minutes range will ensure your audience stays engaged and motivated to support your non-profit cause.