Create drama with lighting

How do you get the photo on top verses the one below?  Read on.  When you light everything and use a white background this is what you typically get on the bottom. TIP: to get a clean white background, be sure the background is 1 stop greater than the subject. Also slightly angle the background so it isn’t perpendicular to the camera or you will get a light flare caused by the background. (Figure 1)

I like to light parts of a scene and not all of it.  If you light everything as done in the photo above it gives a sterile or even feeling of the after life and living in heaven. If I want that look then I might use this lighting setup.  The other advantage of even lighting the subject can move and spin and the light will look the same and you don’t worry about shadows in the wrong places.

Figure 1 was done using this setup.  There are three lights on the background and two on umbrellas lighting the statue. (Figure 2)
Using the two umbrellas like in Figure 1 I now just used 1 light on the background, but now with a blue gel.  Because it takes very little light to affect the white background the two lights on the subject are spilling over to the background and washing out the blue color. (Figure 3)

This is the lighting setup for figure 3. (Figure 4)
By just changing the background from a white background to a black background and everything else the same as in Figure 3, now the blue pops. The reason is the black sucks light as opposed to reflecting light like the white background. (Figure 5)

I personally like to have more drama as in this photo of the golfer with the blue background fading out to black around the edges. 

As you can see everything is the same, There are actually two changes: 1) White to Black Background and 2) 4 times the light through the blue gel.  Just remember to get the gel to look the same color as you see it, it must be 2-stops brighter on the background than the light on the subject assuming you expose for the subject. (Figure 6)
Just changing the gel and leaving everything else the same I can now decide which color I like best. (Figure 7)

Here is what the setup looks like in figure 7. (figure 8)

Changing back to the white background I again get contamination from the front lights and it goes pink instead of red. (Figure 9)

For me this photo is too pink and there is pink light on the subject.  This happens when you are not controlling your lights. Learn to control the lights by not lighting everything up like you do with umbrellas.

Figure 9 setup. (Figure 10)

This is shot on the white background.  I changed the setting on the background to -2 stops under the setting of the subject. I removed the umbrellas and put 10 degree grids on the lights. (Figure 11)

Here is the setup for figure 11.  Everything goes black except for where the light is hitting.  This is how you can control the light and not light the whole room. (Figure 12)

You don’t need to use gels to get a dramatic effect, but the more you learn not to light everything but just parts of the photo is when your can direct the audiences attention in the photo.  There is more than just to lighting parts of the photo, you can ratio the light throughout the photo and have some parts not totally black, but slightly darker than the subject.  This way you still see those other aspects of the scene, but they are secondary to the main subject. It is like have two or three sentences in a paragraph and you direct the reader to who the main subject is and the the supporting roles.

Here the the light powered down for the white background for figure 11. (Figure 13)

Just changed the red gel to blue and left everything the same as in figure 11. (Figure 14)

You can see all I changed is the gel to blue from red to get figure 14. (Figure 15)
Here you can see I have the power way up, actually 2 stops greater than the subject. This is for figure 5 photo. (Figure 16)
A tip to make your gels last longer. Cut them to the size you use for your strobes and then take gaffers tape and wrap the edges. When you use them on the lights be sure after checking them with the modeling light to turn the modeling light off.  They will last longer and not melt or catch fire. (Figure 17)
Some of my gels I have labeled.  Here I have the gel on left labeled 3200 Kelvin and 81B. This lets me know I can put this over a strobe to match incandescent light bulbs. The one on the right is 30G letting me know for many fluorescent lights I can balance my strobes to color match the florescent.  (Figure 18)

Use dark objects to learn how to light

If you like this image I will walk you through the steps to get here. (Figure 1)
I started here and got the exposure to pretty close to the tones in the carving. (Figure 2)
By just adding one light off to the right I got the next image. (Figure 3)
I liked the result, but wanted a little more color in the bowl than I have in this photo. (Figure 4)
Here you can see that the statue is back lit naturally, but can see the first light to the right that I added and the second fill light I added just next to the lens on the left. (Figure 5)

The reason I chose a dark object to light is because it is much more difficult, but also shows you how the light dramatically improves the object.  It works similarly with a lighter object, but the results are harder to see sometimes.

I had the object back lighted to be sure you understand the light I am adding truly helps.  This is like having people looking at the camera and it is the best angle, but the sun is behind them.  By just turning on the flash you get a better result, but there is little to show the shape of the object as compared to getting the flash off the camera.

One flash off camera give nice shaping to the face. (Figure 6)
By adding a fill light just beside the lens on the left, we help not only fill in the shadow side, the photo transforms from an almost black and white look to a color feel. (Figure 7)

Now for all the photos above the exposure compensation was used at -2 stops under what the auto exposure was reading.  I had my flashes under exposed or 0.  The reason is the camera wants to make the statue a neutral gray when it is actually darker.  To compensate I under exposed to fool the meter to get what was correct.

I am using the Mini ColorChecker by x-rite so you can see the color as shot in each situation with this series.  This will not just help you see proper exposure, but the color space for each photo. (figure 7)
I wanted you to see you can just use a reflector to help improve the photo, but please pay attention to not just the shadows being improved, pay attention to the colors. (Figure 8)
Shot with fill and you can see not just exposure but color temperature will be different with reflector or flash. (figure 9)
Here with one flash to the right of the camera and one behind the statue you can see ho it improves the tones and the color space.  This is why I prefer using strobes over reflectors alone for portraits.  Another major benefit with strobes over a reflector, is the reflector gives a constant light source which will cause most folks to squint. (Figure 10)
This is the final result. Shot with Nikon D3s and 85mm f/1.4. (Figure 11)
This was the setup for Figure 11. By the way, I shot this with my Nikon P7000 with the flash on for fill. (Figure 12)
I thought the light behind the golfer was a little distracting, so I moved it to the left out of the photo 180 degrees opposite the main light to the right.  The Nikon TTL system is balancing the background -2 Stops under to the flashes which are normal of 0 setting. (Figure 13)
This is the setup for Figure 13.  Again I shot this on the Nikon P7000 with the pop up fill flash to help the statue and the camera gear to have some definition. (Figure 14)

Practice lighting with some objects that are dark or even black. See if you can change the mood of the situation by just positioning the lights in different places. Maybe you use the X-Rite Mini ColorChecker to see if you are setting the camera’s white balance correctly to get the best color.  If you shoot in Raw you can correct this later, but if you shoot in JPEG you can change it later, but the results are noticeably poor.

Light diagrams for dancers (Part 2)

 
We liked the lights in the photo to give that backstage feel and decided to rotate some dancers through and go with the best one rather than changing things a great deal.

I like giving my clients options. We tried a few different looks with different dancers. You get a different look by swapping dancers in the same lighting scheme. If we had more time, you could have tried a few more outfits to give you more options.

Photographers need to understand that by shooting vertical and horizontal photos of the same subject, the client now has options that help them do much more from the time they invested with the photographer. More important than the options is the best photo looks even better when they see you tried to get more.

If a photographer only shows one image from the shoot, then a client will wonder why you didn’t try something more. By offering them a variety, they see how the photographer tried different things, but the subject didn’t make it happen. Type, of course, is why you sometimes pay for a professional model who can give you the best expression and body language options as the photographer is trying to do with camera angles, composition, and lighting. 

2
Lighting Diagram for the photo above

These photos are not all that different in lighting, but the difference is in the dancer, the way they pose, and the expression they bring to the moment.

Which one of these do you like the most? Can you tell me why you like it better than the other photos?

Business

Just like you vary the lights and the poses and do everything to give the client choices, do this in your estimates.

I try to offer some options whenever possible. The client may choose the cheapest package, but by providing the opportunity where you had unlimited funds, you could do this; the client appreciates your creativity and willingness to be flexible.

Sometimes I must give an even cheaper package and show that it lacks what they need to show them I can be flexible on price, but they might have to lose something.

I hope you remove the concept of going the 2nd Mile and give superior service by providing the client more options.

Sometimes the subject’s attitude, in combination with the composition and lighting, can create the mood you are looking for.  [NIKON D3S, 28.0-300.0 mm f/3.5-5.6, Mode = Manual, ISO 200, 1/160, ƒ/16, (35mm = 112)]
4
Lighting diagram for the photo of the dancer on the bar
We got a different look with very little change by just bringing the dancer forward and moving the grid to highlight her face.
6
Lighting diagram of a dancer in front of the bar

High Key Portraits – How to guide

high key portrait
This is called a “High Key Portrait” because of the white background.

The toughest part of doing “High Key Portraits” is getting the lighting just right. Before I address that let me tell you why I like using them at times.  In this case the model wanted some head shots for acting career. It is easier to light her very evenly and let her move around and then capture “moments.”

Setting up for this type of lighting requires a few “know hows.”  First setup the background so it isn’t perpendicular to the camera.  A slight angle is needed. If you don’t do this you will have more photos with a flare. 

Place two strobes on either side slightly behind where the subject will be and angle them at 45 degrees to the background. 

High Key diagram
Notice background and placement of the lights.

Place two strobes with shoot through umbrellas 45 degrees to the subject.  The closer they are to the subject, but not in the frame will create the softest lighting.

Meter the main strobes (umbrellas) and get them even in output of light. Choose an f/stop that give you the desired depth-of-field that you like.  Then set the background lights evenly and 1.5 to 2 stops greater.  Be sure they evenly light the background.

Take a few test shots.  If you look on your histogram and you have the blinking highlights function on, then the background should all blink and the subject should be fine.

I would suggest using a lens shade for this to cut down on the flare that is possible from all the lights. 

Spacing is important for group photos

2
When you have groups space the people so that if you have a second row they are staggered in between the front row.

When taking group photos, arrive early. You need to scout the location, maybe setup risers, set your lights and then wait.  When the group arrives you can ask everyone to lineup by height and start in the middle back with the tallest person. As you add people alternate them on either side of the middle.

While you might not have a set of risers there are many places you can get a similar effect.  Look for stairs a sloped area outside or if you don’t find one get up higher and shoot down on the group.

The key is to have the photo already sketched out in your mind or even on paper.  You also have to take charge right away.  I have even jokingly taken a few shots before they get into place fully.  Since the flashes go off the folks think I have already really started.  Well I have–I have taken charge and gotten their attention.

I do make a little joke and then they all laugh.  I might even snap another one for fun.  The problem with large groups is people have conversations with each other. You need their attention and also need those talking to stop.  They make it difficult for others to hear your instructions. 

3
Use steps or risers for larger groups so that the people on the back rows are not blocked by the height of those in front of them.

One thing these photos show is how more uniform everyone is in their dress the more of a “group” they become.  Even the introduction of color with the hoods creates a little more of individuality in the photo.

4
For the group photos I used this setup.  The lights were about 30 feet from the group.  The further the light is from the group the light value from the front row to the back is more even.  The closer the light is to the group the greater the risk is of the front row being much brighter than the back row.
1
Before and after group photos I like to shoot candid photos.  Most clients love to have this moments for their files.

Photographers need to choose their vehicle wisely

Sienna
Toyota 2007 Sienna that I own.

Getting to and from assignments is very important. You need a reliable vehicle in this industry and you need space to put cases of camera gear.

My favorite vehicle that I have ever owned is the Toyota Sienna.

interior
With the back seat folded down and into the floor makes a lot of room for gear.

I have owned other minivans, which are great because you can park them in a garage. Other minivans I had to take the back seats out to then use the space for my camera gear.

What I like about the minivan I have is the back seats fold down into the floor and then I can pack most all the gear I would ever need in the back and still have seating for four people. You can fold down the middle seats as well and gain more space without removing them and if you need a lot of space they come out.

However, the reason I like the seats that disappear in the back is I don’t break my back taking them out. Another good thing is once I arrive somewhere I can unload and then use the van to take the clients around if needed. Great for those out of town shoots where you might want to go to a restaurant with the crew at the end of the long day of shooting.

interiorseats
What I like about the seats that fold into the floor, is once you have unloaded you can just pull up the seats for your clients to go to lunch or dinner.

When you plan to do photography as a career your vehicle choice can make a huge difference. It is like having kids, the sports car just will not cut it for the family guy and neither does the small sports car for the photographer work.

Most commercial photographers have lighting gear, backgrounds, extension cords and more to carry on a shoot.

Take a look here at some of the lighting gear I carry in this video.  It is quite common to have four or five cases this size on photo shoots.

What vehicle do you use and why?  Comment below.

Joplin Tornado brings back memories

Satellite loop courtesy of Jonathan Finch - click to enlarge
Here you can see my first major tornado that hit my last semester in college at East Carolina University.

I started my career in the 80’s and one of the first disasters I saw and covered for my college paper was a F4 tornado.  There were 16 deaths and 153 injuries. The tornado was up to 3/4 of a mile in width. Portions of East Carolina University were severely damaged. 300 homes were leveled, most in Greenville, NC.  My good friend Jesse Riggs lost family members that night.

No matter how many times you see disasters each time I feel a numbness come over me for the loss of life and property.  You are sad for those who are having to rebuild their lives.

1
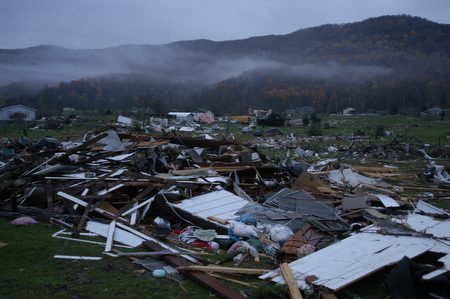
On November 10, 2002, a tornado destroyed 50 homes. At least seven people were killed in the Morgan County community of Mossy Grove in eastern Tennessee. I was looking for an overall perspective up the mountain when I shot this photo.
2
The tornado cut a swath about a mile wide and a mile long.  The hard part when covering these disasters is showing items to give a sense of scale and what is destroyed.  Here I wanted to show the cars overturned for scale and what happened.
3
What always amazes me is the quickness of the national media on covering these events.
4
What I realized over the years covering these events is that the national media always took the time even in a disaster to get the best lighting for a shot.  Notice the hair light above the reporter in addition to the main light.  This helped to separate the reporter from the early dawn background.
5
Just hours before a tornado destroyed this community
6
The national media all find similar angles to show the destruction to their viewers.  Here you can see three networks all lined up for their early morning news shows.  I chose to shoot this to show how a nation was mourning for the folks.

Tent Lighting

cube
Lighting cube shot with Panasonic Lumix DMC-TZ5.  It triggers the studio strobes with it’s built in flash.  The pre-flash fires and sets the exposure and then second flash takes the picture.

If you are doing product photography you need to know how to do tent lighting.

You may remember as a child taking some chairs and throwing a sheet over them and getting inside to play. If you used a white sheet you have a pretty good idea what tent lighting does—it diffuses the light.

If you already own a white tent with a white bottom then you can just set this up and you are pretty much good to go.

You can buy a cube tent like I have. I use the Interfit 4 foot cube tent. Here is a link for you Click Here

The basic idea the white material diffuses light passing through it and bounces light off of it inside back on the subject.

You need at least 2 lights to get a really even light and often I use 4. I put two lights on either side then one on top and one on the bottom. I like to literally wrap my subject in light. The best objects to see the results of tent lighting are black. You can see detail all around the object.

By the way, I used a point and shoot Lumix camera and the flash on the camera set off my studio strobes and there you have it—a perfectly lit object.

binoculars
Simple shot of binoculars which are black and give you example of how evenly the light is around the object using the tent lighting. 

straight flash
Example of flash built into Panasonic Lumix.

How to Take a Good Group Photo in 15 Minutes or Less

The key to group photos is planning — and how big you plan to use the photo can make a big difference in your planning. We don’t hang wristwatches on the wall, because their faces are so small you cannot tell time with them. In most family rooms, you could have a three-inch face clock and tell the time. In a classroom, you might need a 10-inch face. The clock face size is a good rule of thumb for determining whether someone will be recognized in a wall print at a normal viewing distance.

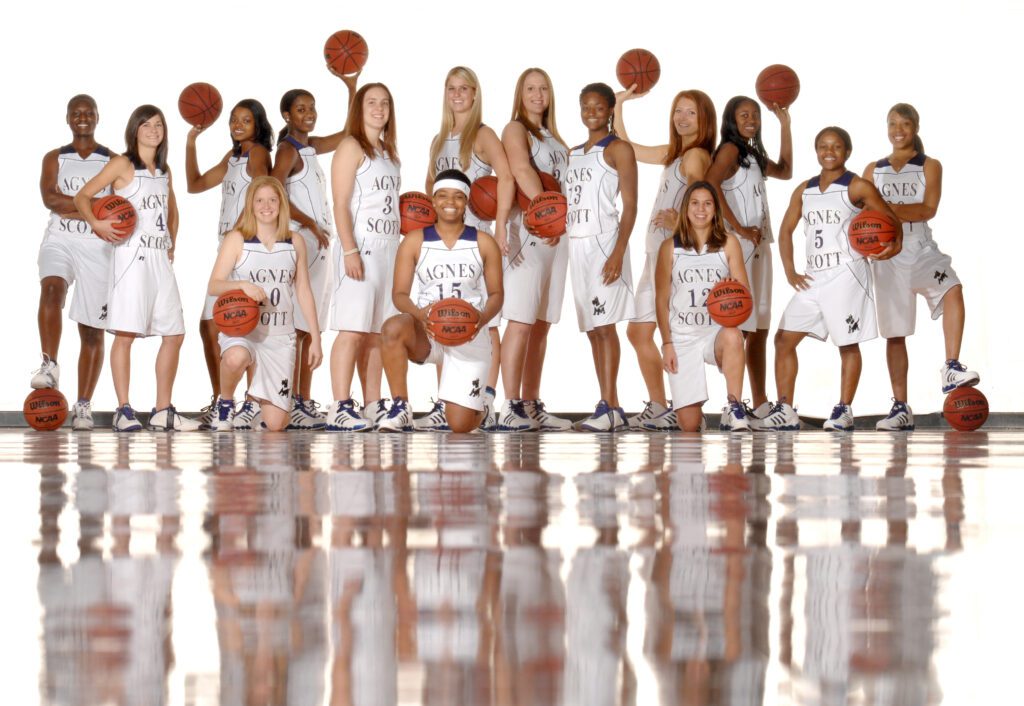
Agnes Scott Basketball [NIKON D2X, Sigma 120-300 mm f/2.8, Mode = Manual, ISO 400, 1/200, ƒ/16, (35mm = 202) + 4 Alienbee B1600s]

The more you show in a photograph other than people’s faces, the larger the photo needs to be to recognize the people, because their face size will diminish. If your group photo is more for identification, then getting everyone close together where you can see their faces should be the primary goal. Then you can run the photo in a publication and people can tell what everyone looks like.

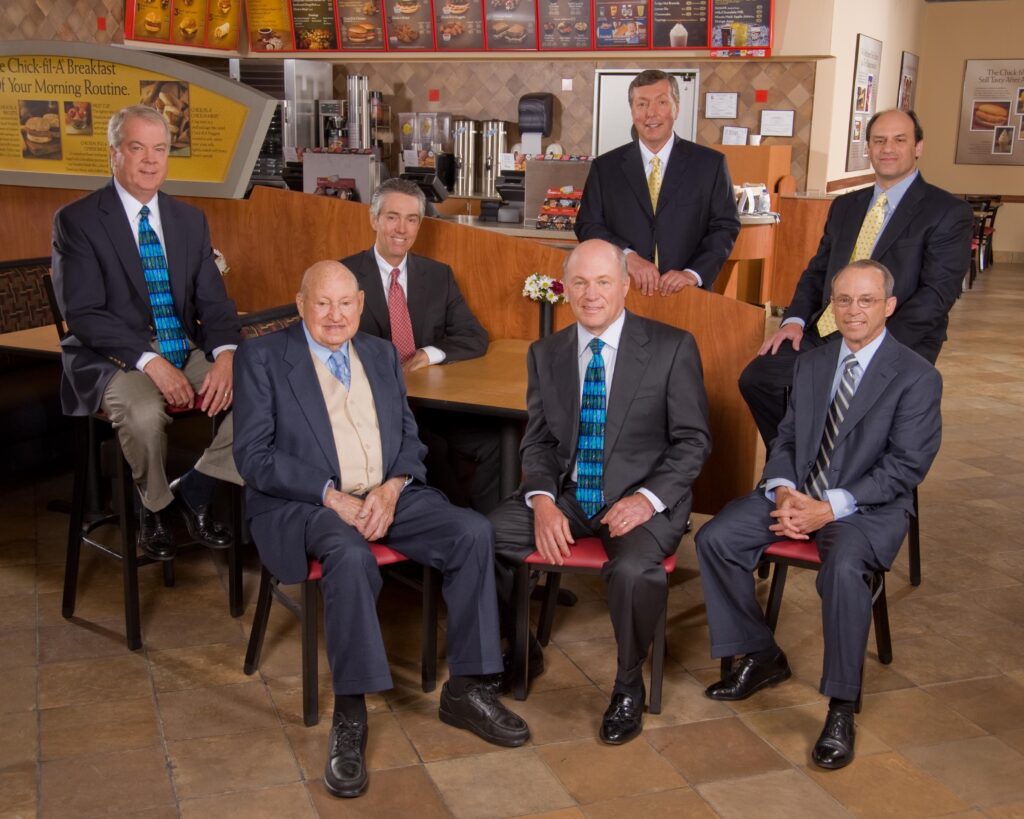
Truett Cathy, Dan Cathy, Bubba Cathy Perry Ragsdale, Steve Robinson, Buck McCabe, & Tim Tassopoulos

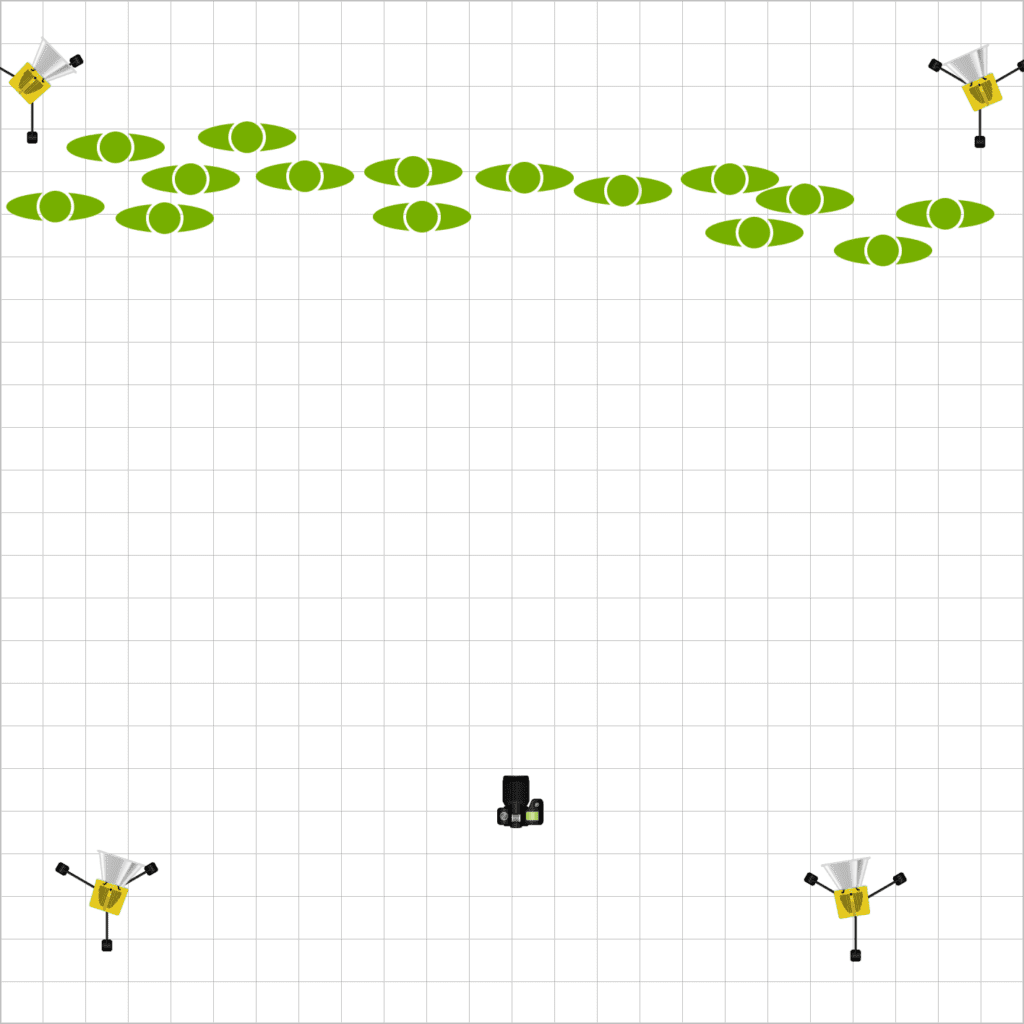
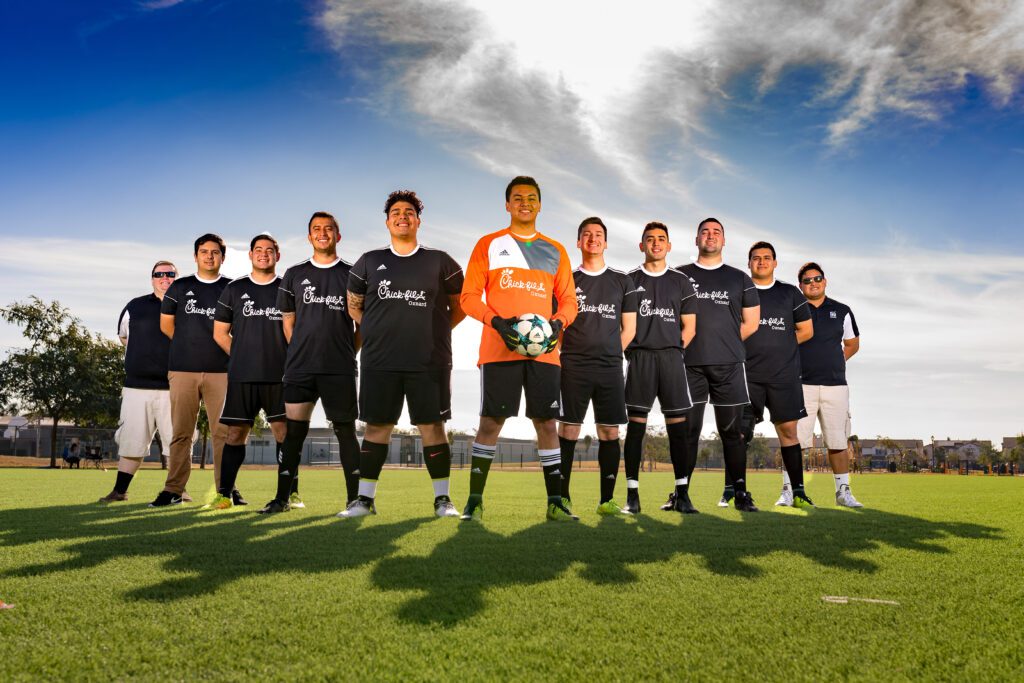
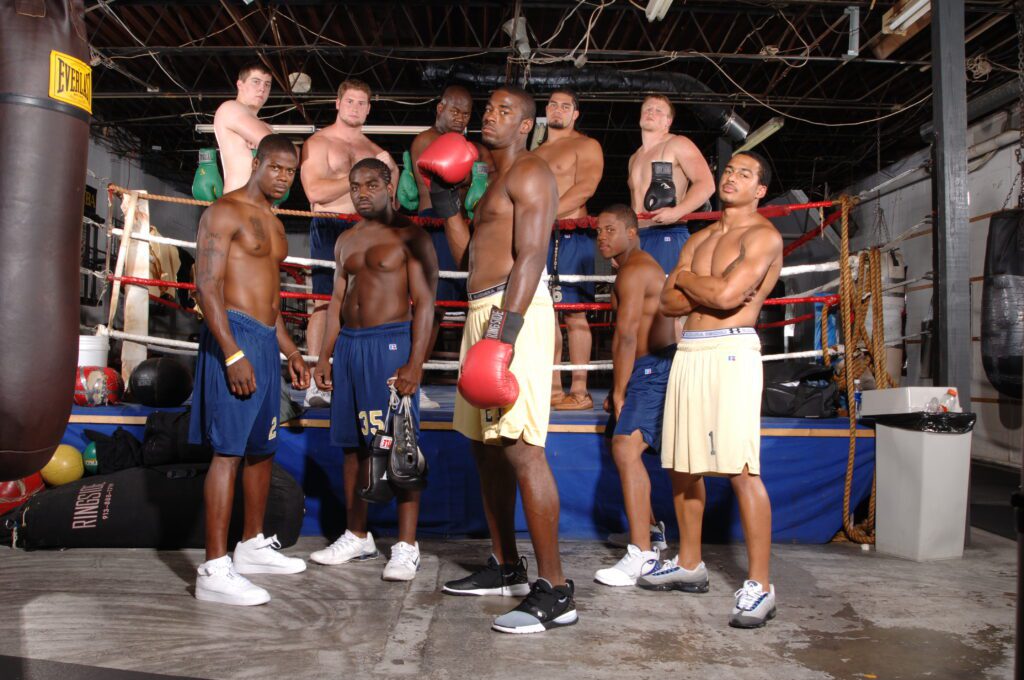
On the other hand, if your photo is more about creating a mood for a poster of, say, a hip-hop band, then you will shoot much looser and space the people out and let their body language help establish the mood. For these concept/mood photos, I like to spread people out and put people at different heights (relative to their faces). I like to think in triangles. If you were to connect the dots (faces) between people, do they make triangles? Create depth by having some people closer to the camera and others further away. This will give it a more three-dimensional feel.

Matt Ellenberg supports a Soccer Team for his employees. Matt Ellenberg | Operator Oxnard FSR Chick-fil-A | Oxnard, CA

If you go to the music store and look at CD covers of music groups, you can see some of the leading work done in the industry. Try copying some of these until you get the hang of it and can come up with your own concepts.

If you pre-plan and have a good idea and have taken into consideration people’s sizes, you will move pretty quickly through the process. If you don’t, it goes slowly and your photo may fall apart — because you will lose the attention and interest of the people in the photo.

In scouting locations in advance, you are not only choosing a location because of the scenery; you are also ensuring you are there at the best time of day for a group photo. Having the sun right behind the group isn’t the best technical photo. Sometimes, a location won’t work simply because the group isn’t available at the right time of day to make the photo.

Nikon D2X, 24-120mm, ISO 100, ƒ/16, 1/200–4 Alienbees shooting through white umbrellas

I have found that if you have done your homework, you can pretty much make any group photo in 10 to 15 minutes. You may get to the location earlier, but the people in the photo should be able to be placed into position immediately — and then you are just looking for good expressions.

One last thing that can make a great impact on the quality of your photo: either have a laptop computer or TV on location to view the images as you shoot. Virtually all digital cameras will plug into a TV and let you see the image big enough to assess the smallest details — enabling you to move people only inches and improve the final product.