
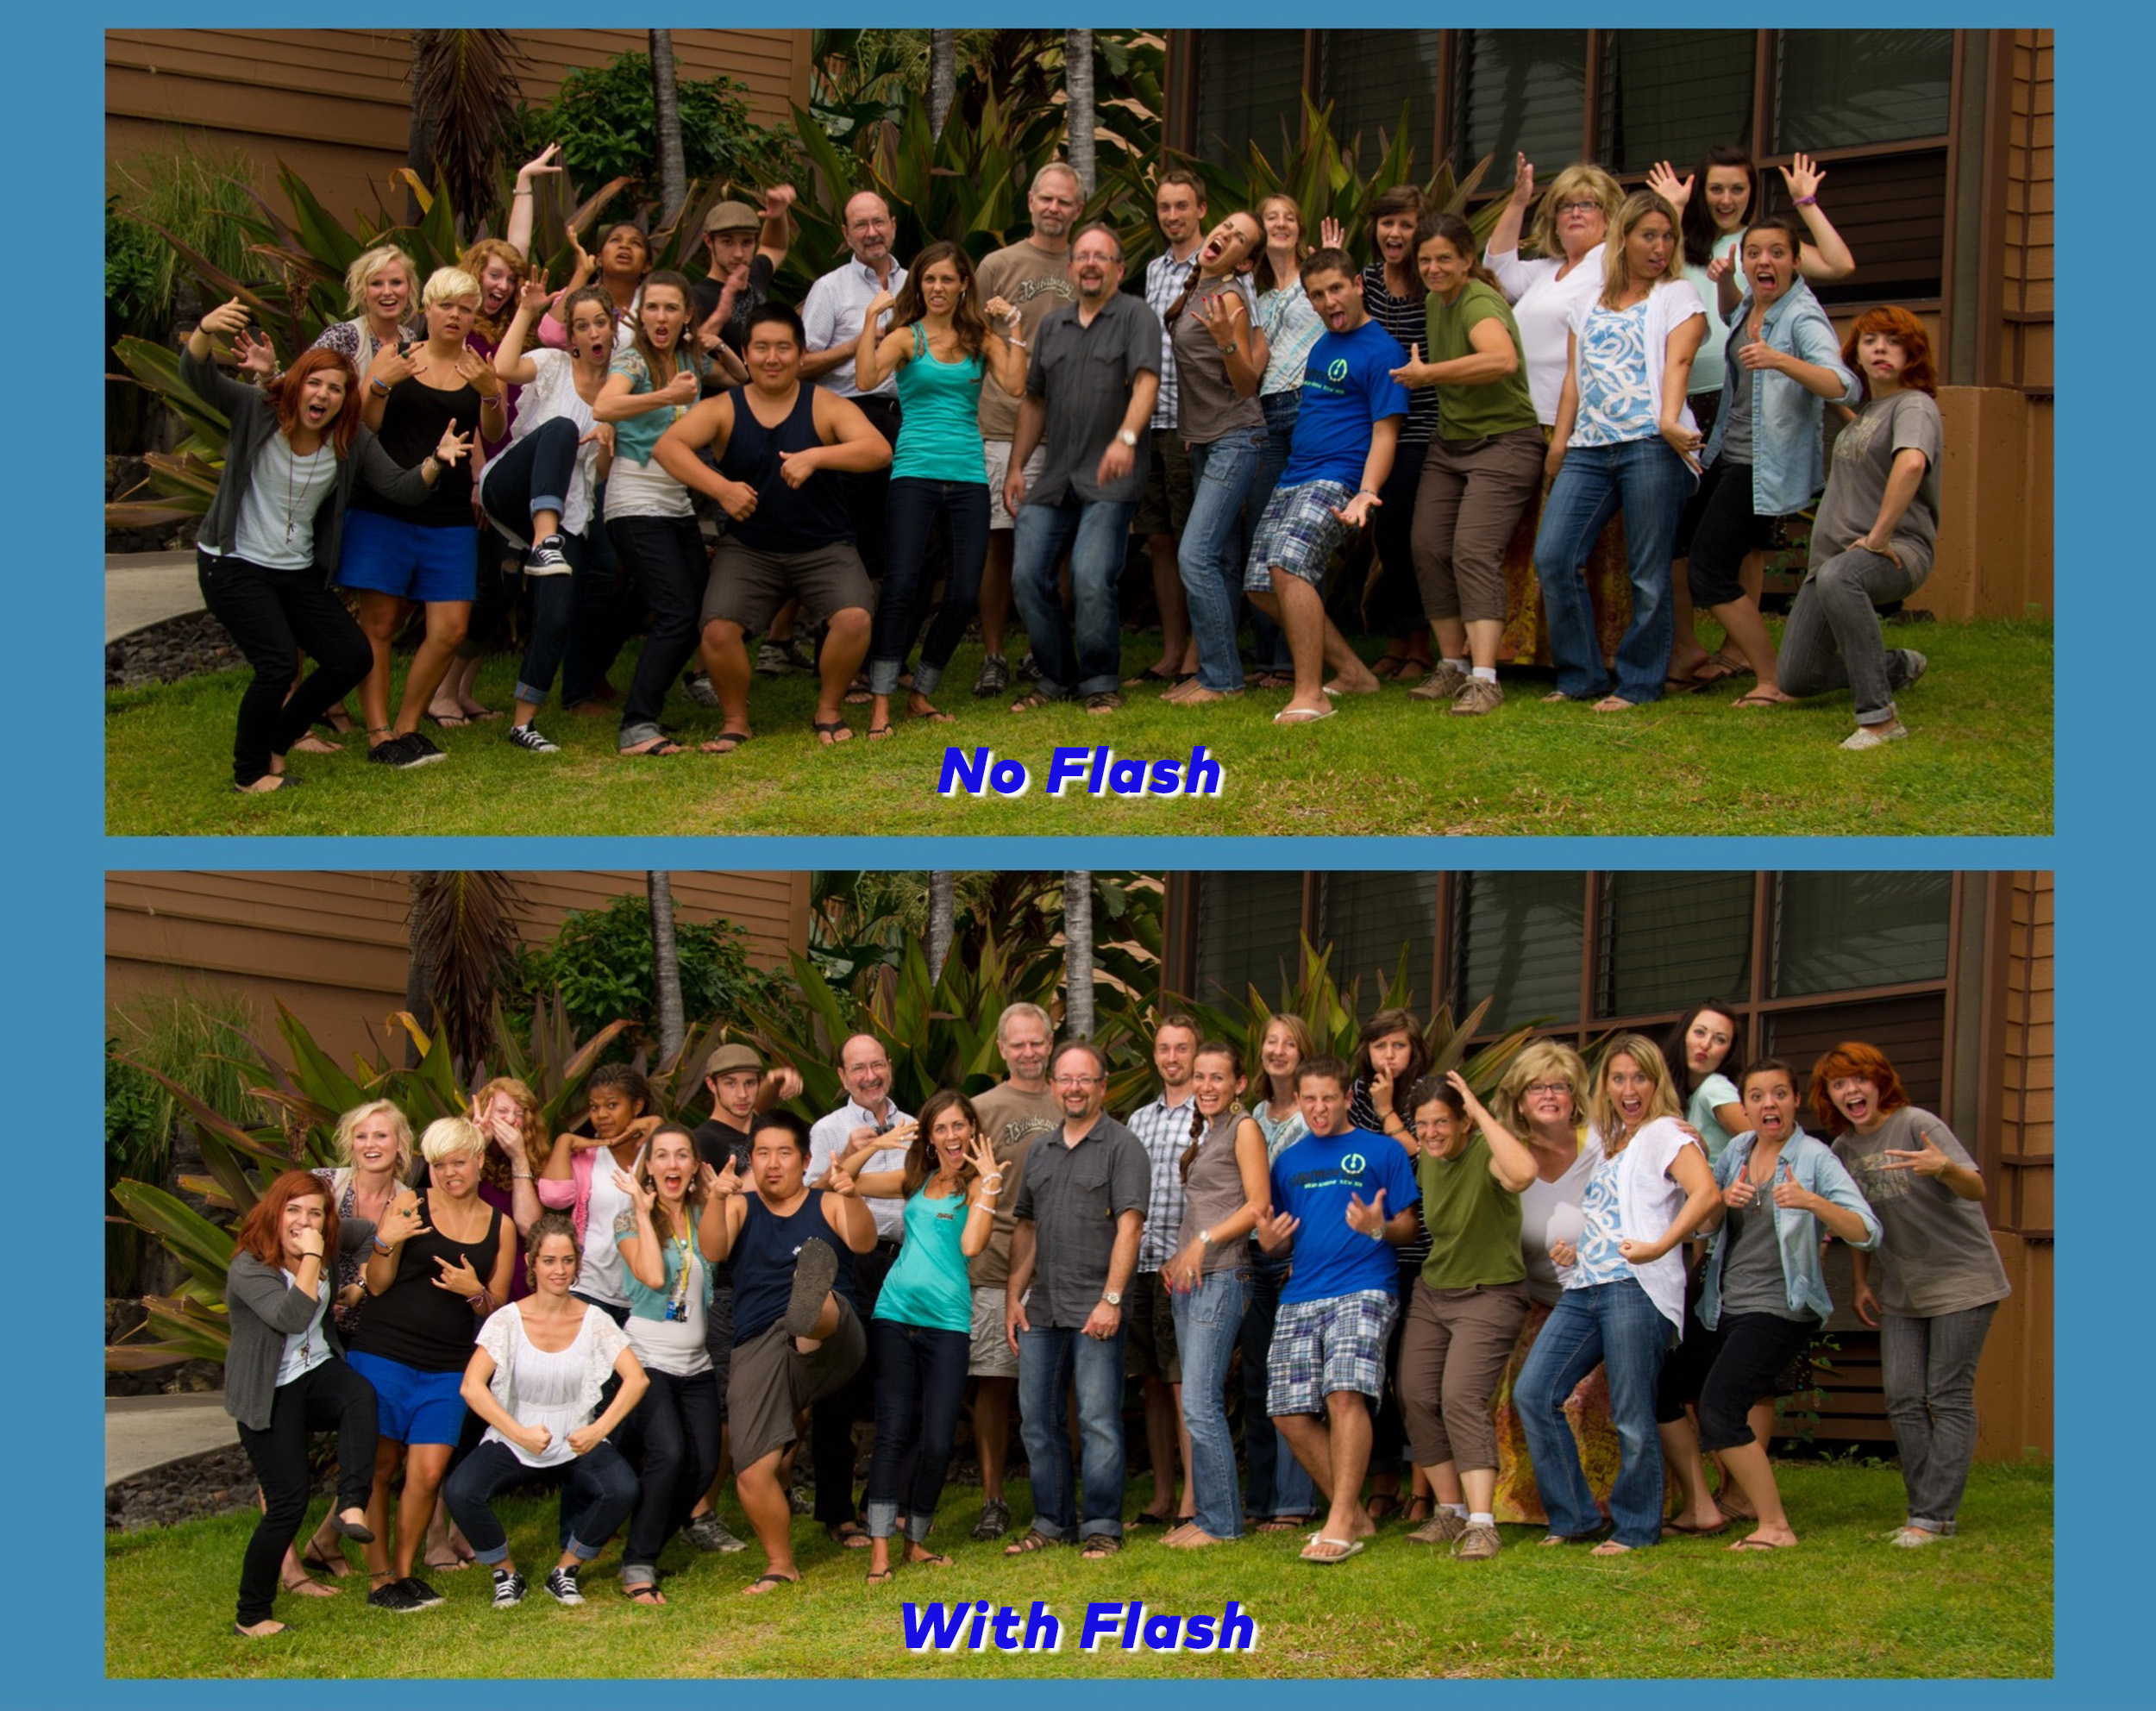
Can you tell the difference between the two photos? Look at the eyes and see how many people had raccoon eyes without the flash.
In the world of photography, light is everything. As a professional photographer, I often edit client photos and notice one common theme: ineffective lighting. This is where using a flash can make all the difference. Let’s dive into why you should embrace the flash and how it can elevate your photography.
The Importance of Flash in Photography
Flash isn’t just for dark rooms or night shots; it’s a powerful tool that can enhance your photos in various lighting conditions. Here are a few reasons why incorporating flash can benefit your photography:
- Consistency: Natural light can be unpredictable, changing from one moment to the next. A flash provides a consistent light source, ensuring your photos are evenly lit.
- Detail Enhancement: Flash helps to highlight details that might be lost in shadows or low light. It can bring out textures and colors, making your subject stand out.
- Professional Look: Using a flash can give your photos a polished look. It helps to avoid common issues like graininess and blurriness in low-light conditions.
Tips for Using On-Camera Flash
Whether indoors or outdoors, an on-camera flash can significantly improve your photos. Here are some tips to get you started:

Indoor Photography
- Bounce the Flash: Aim your flash at the ceiling or a wall to bounce the light. This diffuses the light, creating a softer, more natural look.
- Use a Diffuser: Attach a diffuser to your flash to spread the light evenly. This reduces harsh shadows and glare.
- Adjust Flash Power: Most modern flashes allow you to adjust their power. Experiment with different settings to find the right balance for your scene.


Outdoor Photography
- Fill Flash: Use your flash as a fill light to brighten up shadows, especially in bright sunlight. This technique helps to avoid the harsh contrasts that can occur in the midday sun.
- Backlighting: When shooting with the sun behind your subject, use flash to illuminate their face and avoid silhouettes.
- Control Ambient Light: Use flash and ambient light to create a balanced exposure. You can adjust your camera settings to control the background light and use the flash to light your subject.
Getting the Flash Off-Camera
While an on-camera flash is convenient, getting the flash off the camera can significantly enhance your photos. Placing the flash at a 45º angle to the left or right of your camera is a great starting point. Here’s why this technique is beneficial:
- Depth and Dimension: Off-camera flash creates more interesting shadows and highlights, adding depth and dimension to your photos.
- Control: You have greater control over the direction and quality of light, allowing you to shape it to suit your subject and scene.
- Separation: Off-camera flash helps to separate your subject from the background, making it stand out more prominently.


Standing Out from Smartphone Photography
Smartphones have made incredible strides in computational photography, but there’s no substitute for a well-placed flash. Using a flash, especially off-camera, can produce results that smartphone cameras can’t match. Here’s how:
- Precision Lighting: While smartphones can enhance images through software, they lack the precision and control that a dedicated flash provides.
- Creative Flexibility: Off-camera flash allows for creative lighting setups that give your photos a unique look, something smartphones struggle to replicate.
- Professional Quality: The quality of light from a flash can’t be replicated by a smartphone’s tiny LED light. Flash lighting can highlight details and create a professional finish that separates your photos.
The Importance of Test Shots
Always take a test shot before diving into your photo session with Flash. Here’s why:
- Before Adding Flash: Be sure the photo needs the flash help.
- Avoiding Mistakes: A test shot helps you spot potential issues with your lighting setup, such as overexposure, harsh shadows, or unwanted reflections.
- Fine-tuning: It allows you to adjust your flash power, positioning, and camera settings to get the perfect shot.
- Confidence: Taking a test shot gives you confidence that your lighting is right, so you can focus on capturing the best possible image.
In conclusion, flash can significantly improve indoor or outdoor photos. By understanding how to use on-camera flash effectively and experimenting with off-camera flash setups, you can achieve the quality and creativity that sets your work apart from smartphone photography. Remember, always take a test shot to ensure your lighting is spot-on. Embrace the flash, and watch your photography skills shine!