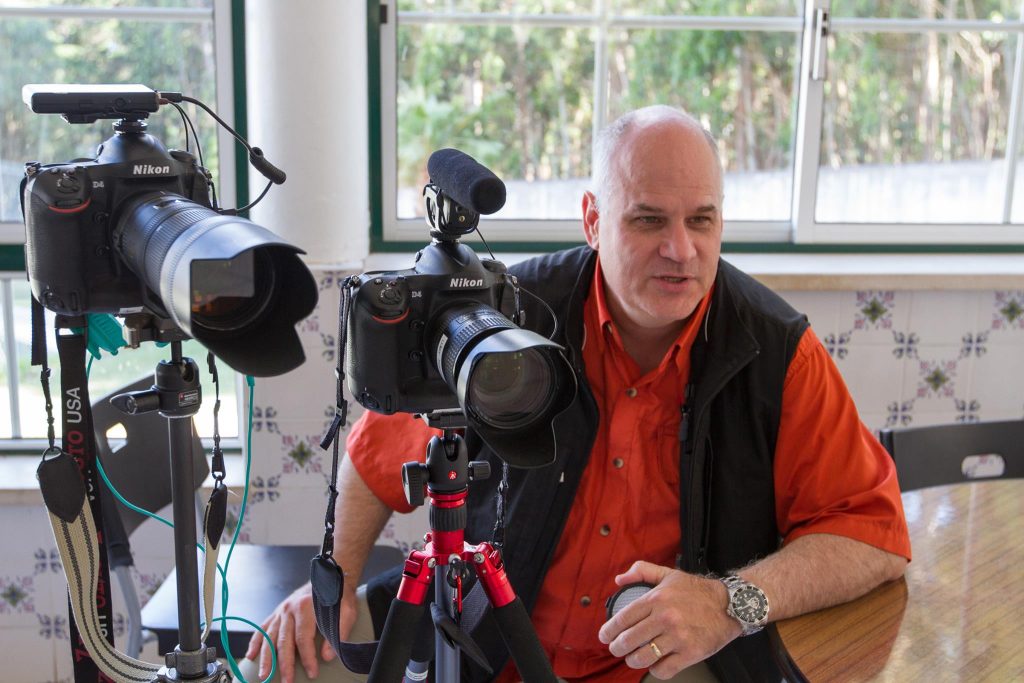
Last night, armed with my Nikon Z9 and the NIKKOR Z 24-120mm f/4 S lens, I was fully prepared to capture every essential shot with little need to swap lenses. This versatile setup delivered exceptional results, meeting the varied demands of the event without missing a beat.
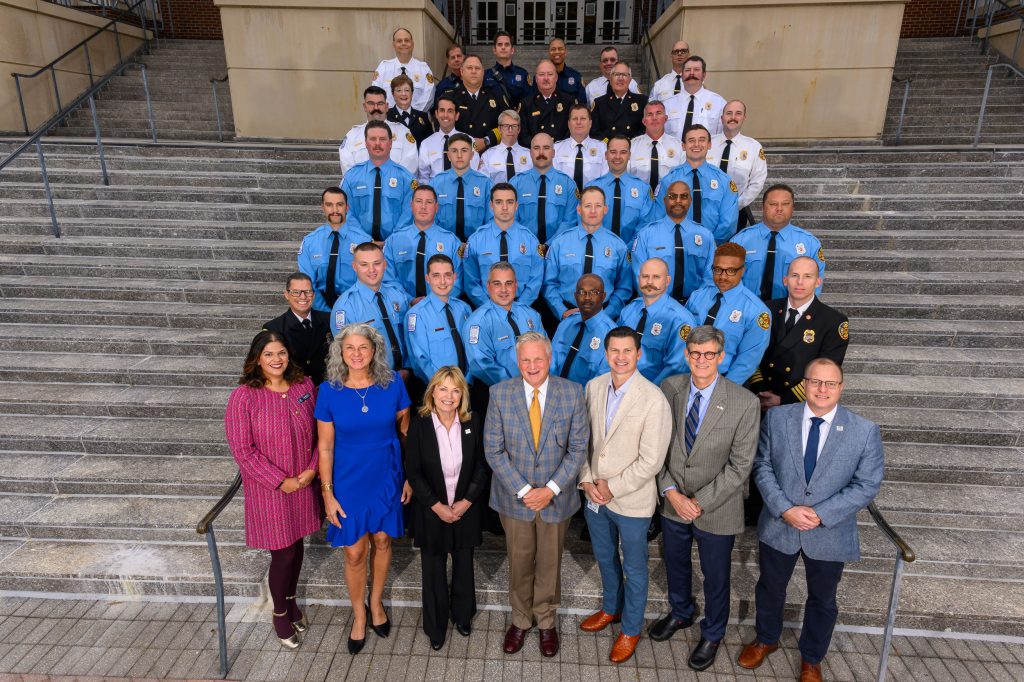
RFD New Fire Officer Swearing-In Ceremony
[NIKON Z 9, NIKKOR Z 24-120mm f/4 S, Mode = Manual, ISO 400, 1/125, ƒ/8, (35mm = 24)]
Why the NIKKOR Z 24-120mm f/4 S Lens Shines for Events
With its dynamic zoom range, the NIKKOR Z 24-120mm f/4 S lens allowed me to seamlessly cover everything from intimate close-ups to broader shots that captured the energy of the gathering. This range hits a sweet spot for event work: 24mm lets you pull in more context with a wide-angle perspective, while 120mm lets you zoom in close for detailed or candid moments—perfect for portraits and storytelling shots. This range in a single lens meant I was equipped for most situations, whether catching someone’s genuine smile across the room or framing a large group.
I also packed my NIKKOR Z 14-30mm f/4 S lens, expecting to need a wider view for some shots. However, I only found myself switching to it once, and even then, I could have easily achieved the shot with the 24-120mm. That slight flexibility toward the wider end might be excellent for specific venues or super-tight spaces, but for most event photography, the 24-120mm simply does it all.
Illuminating the Scene: Flashpoint XPlor 600 HSS TTL for Groups
For the group photos, I used my Flashpoint XPlor 600 HSS TTL studio strobes to ensure every shot had consistent lighting. I set up two powerful flashes, which didn’t disappoint. Combining the Z9’s fast, reliable performance with the XPlor 600’s High-Speed Sync (HSS) capability meant I could freeze action even in lower light, capturing everyone sharply with balanced lighting across the frame. The result was crisp, professional-looking group shots where each subject was evenly lit, with no distracting shadows or hot spots.
Keeping It Simple While Moving: Godox V860IIN and MagMod Gear
When moving through the event for more candid and spontaneous shots, I switched to the Godox V860IIN, a compact and reliable flash that’s easy to handle for handheld shooting. I paired it with the MagMod Sphere to soften the light, providing a natural, flattering glow without harsh edges. Additionally, I used the MagMod Pro Correction Gel 1/4 CTO, a game-changer for avoiding the overly warm background tones that can sometimes appear in dim lighting. The gel brought my light’s color temperature closer to natural, ensuring the room lighting and my flash worked harmoniously without turning the background orange.
Why the Nikon Z9 & NIKKOR Z 24-120mm f/4 S Lens Combo Delivers
The versatility of the Nikon Z9 paired with the 24-120mm f/4 lens allows me to be agile. Here’s why this combination is so effective:
Zoom Range: The 24-120mm focal length covers the primary ranges for event photography. It’s wide enough for medium-wide shots and long enough to capture intimate details, allowing me to work efficiently without constantly switching lenses.
Consistent f/4 Aperture: The constant aperture means I don’t have to worry about exposure shifts while zooming, allowing me to focus on the shot rather than adjusting settings. And with the Z9’s low-light capabilities, f/4 was plenty for most situations.
Reliable Autofocus: The Z9’s autofocus is fast and dependable, so I could trust it to lock on accurately, even when shooting in challenging lighting or with quick-moving subjects.
Battery Life and Handling: Both the Z9 and the 24-120mm lens have impressive battery life, making them ideal for long events. With a solid, ergonomic build, this setup feels balanced and doesn’t wear me out, which is key for all-night shooting.
Wrapping Up
Last night, the 24-120mm flexibility and the dependable lighting gear proved I had everything I needed. The setup covered every angle, group, and moment without missing a beat. Whether you’re just starting in event photography or looking to refine your kit, consider the Nikon Z9 and the 24-120mm f/4 lens—the ultimate combination to capture an event seamlessly, with the quality and precision every client expects.
[NIKON Z 9, NIKKOR Z 100-400mm f/4.5-5.6 VR S, Mode = Aperture Priority, ISO 25600, 1/400, ƒ/5.6, (35mm = 400)]
Capturing high school football under the Friday night lights is all about preparation, precision, and a solid workflow. Here’s how I approach it, from setting up at the stadium to the final image uploads.
Preparation and Setup
I arrive early to set up and ensure my Nikon Z9’s settings are dialed in. I start by creating a custom white balance with an ExpoDisc to capture the colors accurately under stadium lighting. This step is essential for achieving true-to-life tones, especially with inconsistent lighting.
Gear and Initial Setup
Camera: Nikon Z9
Lens: NIKKOR Z 100-400mm f/4.5-5.6 VR S, perfect for action shots across the field
White Balance: Custom setup with ExpoDisc
Using AI background mask
Workflow Steps
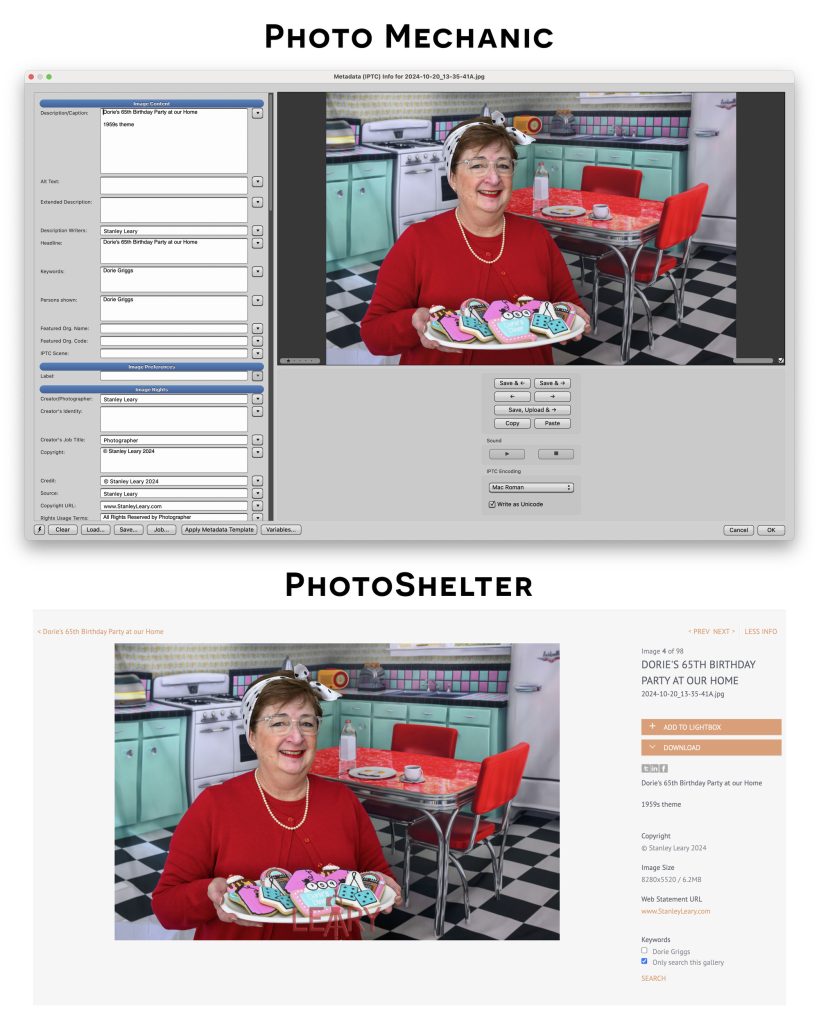
Ingest Photos: I load all photos into Photo Mechanic to cull and add metadata. This allows for quick organization and eliminates unnecessary shots.
Editing in Lightroom: I import the best images into Lightroom after culling. I adjust backgrounds using AI masking to reduce distractions, allowing the players to stand out more. I also use AI Denoise for cleaner images, which is invaluable under low light.
Export and Sharing: After editing, I export the images to JPEG. I upload the finished files to my PhotoShelter account via Photo Mechanic, resizing select pictures for social media sharing on Facebook and Instagram.
[NIKON Z 9, NIKKOR Z 100-400mm f/4.5-5.6 VR S, Mode = Aperture Priority, ISO 25600, 1/400, ƒ/5.6, (35mm = 130)]
Shooting Tips for High School Football
Stabilize and Track: Use the NIKKOR Z 100-400mm f/4.5-5.6 VR S lens for sharp, action-packed shots, leveraging the Nikon Z9’s focus tracking to keep up with fast-paced plays.
Stay Dynamic: Anticipate the action and adjust positioning around the field for varied angles.
Lighting Adjustments: Dial-up ISO as needed; the Z9 handles higher ISO settings well. However, consider making background edits to mitigate distractions.
With a streamlined workflow and attention to detail, each game becomes a storytelling canvas, capturing the energy and excitement of high school football.
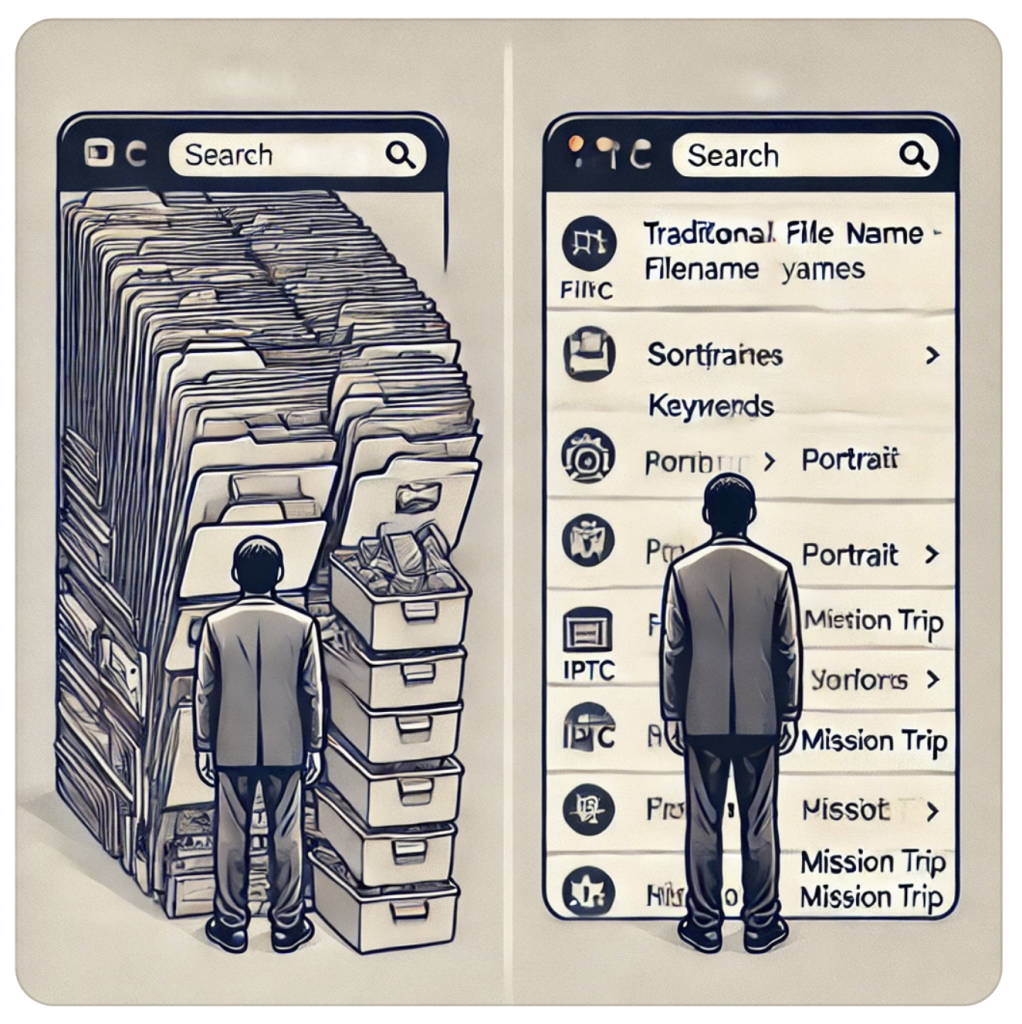
As a professional photographer, efficiently organizing and identifying your photos is critical to streamlining your workflow and maximizing productivity. Whether managing your archives or sharing a collection with a client, the method you choose for organizing images can make or break your efficiency. Many photographers start by naming files and sorting them into folders, but there’s a much better system available: IPTC metadata.
In this post, I’ll explore why using IPTC metadata to tag and identify your images is far superior to relying solely on file names and folders. I’ll also share ideas for incorporating photos or graphics to make your metadata work visually intuitive.
What is IPTC Metadata?
IPTC metadata refers to information embedded directly into the image file itself. This can include captions, keywords, photographer information, copyright details, location data, and more. Unlike file names and folders external to the image, IPTC metadata remains with the image no matter where it goes, ensuring your photos are constantly organized, searchable, and protected.
1. Consistency Across Platforms
Have you ever moved a batch of photos from one folder to another, only to lose track of where things are? One significant benefit of IPTC metadata is that it stays with your image across platforms. Whether the image is stored on your local hard drive, uploaded to a cloud service, or shared via a client portal, the metadata goes with it. This means your images can always be identified—no matter where they end up.
2. Granular Searchability
Metadata lets you attach keywords, descriptions, and other identifying information directly to your images, making them far more accessible to search and retrieve later. If you need to find photos of a specific event, subject, or location, you can search by the metadata fields instead of trying to recall file names or folder locations.
3. International Standardization
IPTC metadata follows global standards, meaning it works across different software, platforms, and industries. Whether you’re using Adobe Lightroom, PhotoMechanic, or another editing tool, IPTC metadata is recognized. This standardization is a massive advantage in professional settings where collaboration and consistency are essential.
4. Context Preservation
File names only hold so much information; folders often become vague or repetitive. With IPTC metadata, you can store critical context about an image, such as the names of people featured, location data, or even a short story behind the shot. This helps you and clients or collaborators who need to quickly understand the image’s backstory.
5. Managing Large Collections
For photographers managing thousands of images, manually renaming and sorting files into folders can quickly become overwhelming. IPTC metadata enables you to batch tag and organize photos faster and more accurately. Met metadata makes an image’s details readily searchable without complex file structures.
6. Intellectual Property Protection
Another considerable advantage is the ability to embed copyright information directly into your photos. With IPTC metadata, you can include your name, copyright date, and usage restrictions, ensuring that anyone using the image can quickly identify its creator. This is particularly important in today’s fast-paced digital world, where photos are frequently shared online.
7. Enhanced Client and Team Collaboration
Clear organization is vital to smooth the process when sharing an extensive photo library with a client or team. IPTC metadata allows clients to search for images based on keywords or descriptions rather than manually sifting through hundreds of files. This leads to quicker image selection and a more seamless collaboration process.
Conclusion
While organizing images with file names and folders can work for small collections, using IPTC metadata elevates your workflow to a professional level. It provides consistency, powerful searchability, standardized organization, and intellectual property protection—all in one comprehensive system. By embedding this information into the image file, you’re future-proofing your photo organization and making your work more accessible to clients and collaborators.
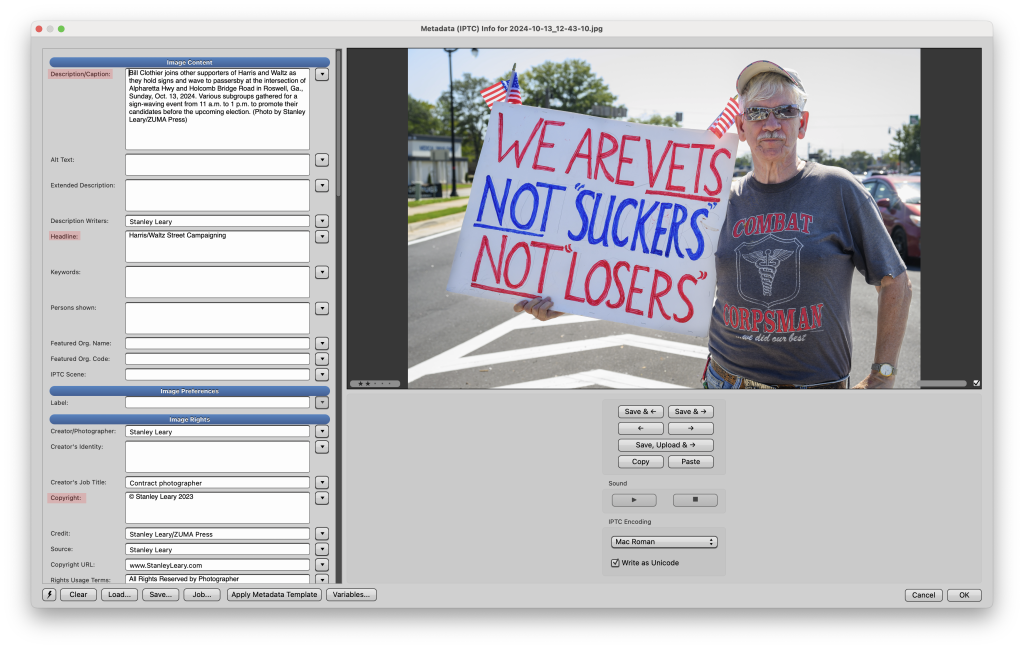
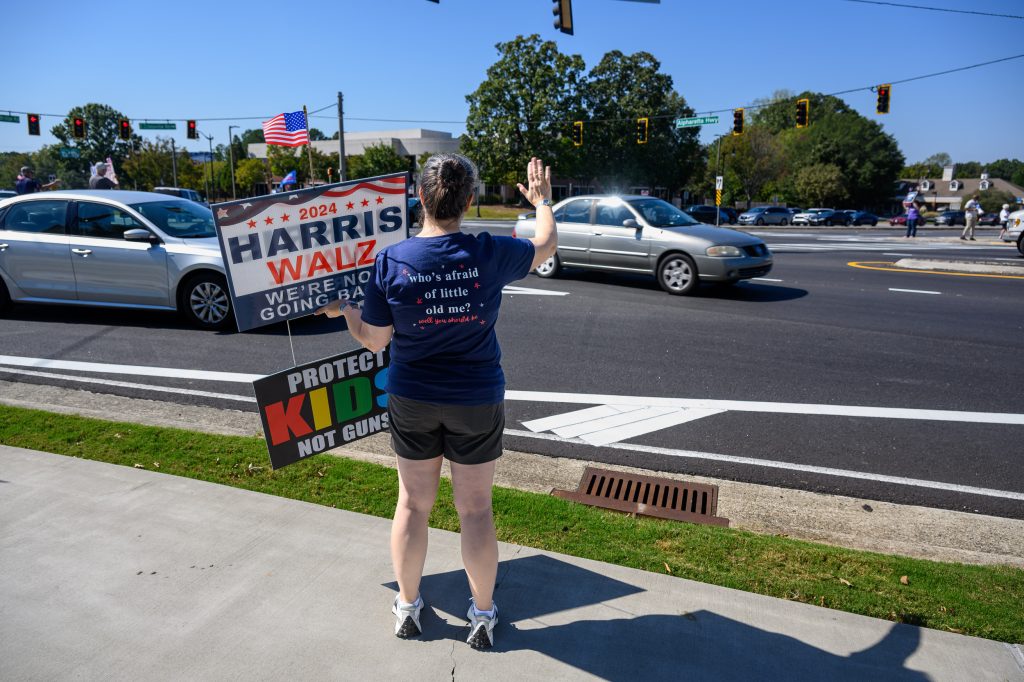
Caption: Bill Clothier, left, and Gary Dichtenberg, right, join other supporters of Harris and Waltz as they hold signs and wave to passersby at the intersection of Alpharetta Hwy and Holcomb Bridge Road in Roswell, Ga., Sunday, Oct. 13, 2024. Various subgroups gathered for a sign-waving event from 11 a.m. to 1 p.m. to promote their candidates before the upcoming election.
This morning, on her way to work, my wife Dorie called to give me a heads-up. She had spotted a crowd of about 30 to 50 Harris/Waltz supporters gathering at the corner of Holcomb Bridge Road and Alpharetta Highway. Since it’s just a short distance from our house, I knew I had to check it out. I grabbed my gear, put on my photojournalist hat, and set out to capture the event.
As a contributor to ZUMA Press, one of the largest independent press agencies, I had the opportunity to take some photos of the street campaign and quickly moved them to the wire service. You always feel satisfied when you see your work on the ZUMA Press homepage, knowing it’s being marketed to media outlets worldwide.
The Ethics of Photojournalism
When I say I “put on my photojournalist hat,” I’m talking about more than just picking up my camera. A lot goes into making sure the coverage is not only professional but ethical. As a member of the National Press Photographers Association (NPPA), I hold myself to the highest standards of journalism ethics.
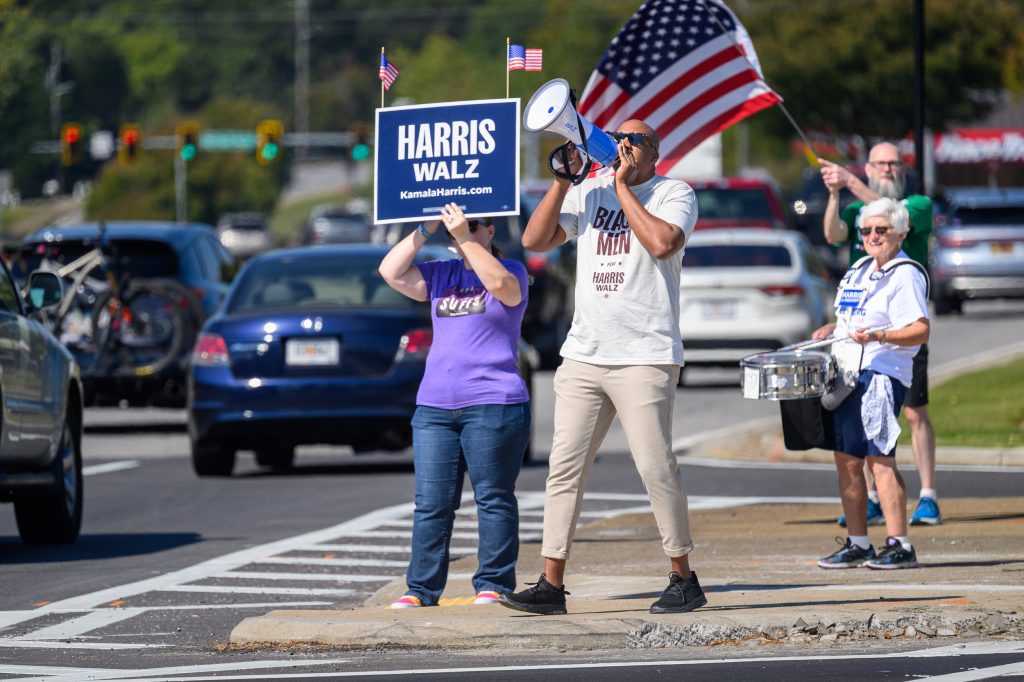
Supporters of Harris and Waltz hold signs and wave to passersby at the intersection of Alpharetta Hwy and Holcomb Bridge Road in Roswell, Ga., Sunday, Oct. 13, 2024. Various subgroups gathered for a sign-waving event from 11 a.m. to 1 p.m. to promote their candidates before the upcoming election.
Here are a few key ethical considerations I kept in mind while covering this event:
Accuracy and Context: It’s essential to ensure that the images I take accurately represent the event without distorting the facts. Whether the crowd is large or small, it’s important to frame the shot in a way that tells the story truthfully.
Independence: Staying neutral is key. I’m not there to support any political candidate or push a particular narrative. My goal is to document what is happening, without influencing or interfering with the event.
Respect for Subjects: Even in public spaces, I remain respectful of the individuals I photograph. I ensure that my actions don’t infringe on anyone’s dignity or privacy.
For anyone interested in the specific guidelines, NPPA’s Code of Ethics is a great resource and serves as a constant reminder of the responsibility we have as visual storytellers.
Crafting the Visual Story
When it comes to capturing a political event like this, my goal is to shoot a variety of images that can give viewers a comprehensive sense of what it was like to be there. This is something I often talk about in my blog.
Supporters of Harris and Waltz hold signs and wave to passersby at the intersection of Alpharetta Hwy and Holcomb Bridge Road in Roswell, Ga., Sunday, Oct. 13, 2024. Various subgroups gathered for a sign-waving event from 11 a.m. to 1 p.m. to promote their candidates before the upcoming election.
Here are some of the different types of shots I typically focus on during events like this:
Wide Shots: These provide a sense of scale and show the crowd in its entirety. Readers or viewers need to understand the size and energy of the event.
Medium Shots: These are great for capturing the dynamics between the participants, like small groups talking, handing out signs, or engaging with passersby.
Detail Shots: Whether it’s a close-up of a campaign button, a sign, or a passionate expression on someone’s face, details help to humanize the story and draw people in.
Each of these shots plays a role in telling the overall story. It’s not just about the crowd size or the location; it’s about the people, their motivations, and their engagement with the event.
Bill Clothier joins other supporters of Harris and Waltz as they hold signs and wave to passersby at the intersection of Alpharetta Hwy and Holcomb Bridge Road in Roswell, Ga., Sunday, Oct. 13, 2024. Various subgroups gathered for a sign-waving event from 11 a.m. to 1 p.m. to promote their candidates before the upcoming election.
The Importance of Captions
A photo without context can easily be misinterpreted, which is why writing strong, accurate captions is a critical part of the job. Captions should provide:
Who: Identify key individuals in the frame, if possible.
What: Describe what’s happening in the scene.
When: Date and time are crucial to help provide context.
Where: Mention the location, especially if it’s relevant to the event.
Why: If relevant, provide insight into why the event is taking place.
Supporters of Harris and Waltz hold signs and wave to passersby at the intersection of Alpharetta Hwy and Holcomb Bridge Road in Roswell, Ga., Sunday, Oct. 13, 2024. Various subgroups gathered for a sign-waving event from 11 a.m. to 1 p.m. to promote their candidates before the upcoming election.
For example, if I take a photo of a group holding signs, the caption might read:
“Supporters of the Harris/Waltz campaign gathered on October 13, 2024, at the corner of Holcomb Bridge Road and Alpharetta Highway in Roswell, GA, to rally support for their candidates ahead of the upcoming election.”
Writing captions with care ensures that the images maintain their journalistic integrity and are more likely to be used by reputable outlets.
Bill Clothier joins other supporters of Harris and Waltz as they hold signs and wave to passersby at the intersection of Alpharetta Hwy and Holcomb Bridge Road in Roswell, Ga., Sunday, Oct. 13, 2024. Various subgroups gathered for a sign-waving event from 11 a.m. to 1 p.m. to promote their candidates before the upcoming election.
Conclusion
Covering the Harris/Waltz Street campaign near my house today was another reminder of the importance of ethical, responsible journalism. It’s not just about the photos I take, but about how I take them and how I present the story to the world.
Reflecting on the images I captured today, I’m reminded of my unique privilege to document moments like this and share them with a global audience. Every event tells a story; as a visual storyteller, it’s my job to tell it truthfully and ethically.
Supporters of Harris and Waltz hold signs and wave to passersby at the intersection of Alpharetta Hwy and Holcomb Bridge Road in Roswell, Ga., Sunday, Oct. 13, 2024. Various subgroups gathered for a sign-waving event from 11 a.m. to 1 p.m. to promote their candidates before the upcoming election.
Storytelling is at the heart of meaningful communication. Whether you’re working for a nonprofit, a business, or a community organization, a well-produced storytelling video can amplify your message and connect with your audience profoundly and emotionally.
In this post, I’m excited to walk you through the critical steps in producing a storytelling video for your organization. These steps are based on years of experience helping organizations craft stories that change lives. Check out the video embedded below for a more in-depth look!
1. Know the Story Before the cameras start rolling, you must understand the organization’s heart. What is their mission? Who is their target audience? And most importantly, what story needs to be told to move that audience?
Taking the time to research the organization’s core values and message is essential. This step will guide the rest of the production, ensuring the video feels authentic and focused.
Key Questions to Ask:
What is the organization’s mission and vision?
Who are they trying to reach with their story?
What is the message that will resonate most with the audience?
2. Pre-production Planning Planning is where the magic starts. You’ll need to create a detailed outline or script, identify the key people in the story, and determine where and when to shoot. A smooth pre-production process sets the tone for the entire project.
Considerations for Pre-production:
Craft a story outline or script that aligns with the organization’s message.
Identify the key individuals whose stories will be shared.
Plan logistics: schedule the shoot, book locations, and gather necessary equipment.
3. Capture Real Stories Once filming begins, it’s time to focus on authenticity. Real stories from real people make storytelling videos powerful. Instead of scripting every line, encourage your subjects to speak from the heart. Their personal experiences are what will resonate with the audience.
Tips for Capturing Authenticity:
Let the subjects share their stories naturally—don’t force them into a script.
Create a relaxed environment where people feel comfortable sharing their experiences.
Capture emotion through candid, real-life moments.
4. Use Visuals to Enhance the Story Visual storytelling goes beyond just recording people talking. The environment, lighting, and supporting footage add to the story’s emotional impact. Consider how visuals can enhance the narrative.
Visual Elements to Consider:
Show more than just talking heads—film the environment, the work, and the people in action.
Use thoughtful lighting and composition to emphasize the emotional tone.
Capture different angles and scenes to create a visually engaging story.
5. Craft the Sound Good sound design and music are critical to bringing the story to life. Clear audio ensures your message is understood, while carefully selected music can set the emotional tone without overpowering the story.
Sound Considerations:
Use high-quality audio equipment for clear dialogue.
Choose music that supports the story’s mood and helps evoke the right emotions.
6. Weaving the Story in Post-production In the editing phase, you’ll bring all the elements together. The video’s pacing, how shots flow into one another, and the placement of interviews and supporting visuals all contribute to a compelling story.
Editing Tips:
Focus on pacing that keeps the viewer engaged.
Consider how each visual and audio element supports the overall story.
Don’t be afraid to trim footage if it distracts from the core message.
7. Deliver with Purpose Every storytelling video should have a clear purpose. Whether raising awareness, inspiring action, or educating the audience, the video must lead the viewer toward a specific goal.
Final Steps:
Make sure the video aligns with the organization’s overall goals.
Add a solid call to action—this could be a prompt to donate, get involved, or learn more.
Conclusion Producing a storytelling video is about more than just putting footage together—it’s about connecting with your audience on a deeper level and communicating a message that can inspire change. By following these steps, you can create videos that leave a lasting impact on both the organization and its audience.
Check out the embedded video below for a behind-the-scenes look at the storytelling process and to see these tips in action. Happy storytelling!
As a photographer, I always look for tools to enhance my work while keeping my setup simple and efficient. This past weekend, I had the opportunity to put the MagMod Sphere to the test during an event that included both outdoor and indoor settings. The results were impressive, and I can confidently say this flash attachment is the way to go for on-camera event photography.
I am standing on the porch, which means they were pretty much silhouetted [extremely dark], so by using the MagMod Sphere, it is bouncing off the porch’s white ceiling and directly at them, making it easier to show this bride/groom and daughter with those who showed up for the party in the background. [NIKON Z 9, NIKKOR Z 24-120mm f/4 S, Mode = Aperture Priority, ISO 10000, 1/25, ƒ/5.6, (35mm = 24)]
The Benefits of the MagMod Sphere
The MagMod Sphere is designed to transform harsh flash light into a soft, diffused glow. This is particularly useful in event photography, where you must adapt quickly to varying lighting conditions.
Here are a few reasons why I believe the MagMod Sphere is an essential tool for photographers:
Easy Attachment: The magnetic design makes it incredibly easy to attach and detach. Depending on the available light, I could quickly switch between using the Sphere and shooting without flash during the event.
Soft, Even Light: The diffusion provided by the Sphere allows for a soft light that reduces harsh shadows and creates a more flattering look for subjects. I noticed a significant difference in the quality of my flash shots compared to when I shot with direct flash.
Compact and Lightweight: The Sphere is lightweight and doesn’t add much bulk to your gear. This is crucial when walking around an event space, where you must be agile and quick.
Versatile for Different Settings: Whether I was shooting outside during the day or indoors with mixed lighting, the MagMod Sphere adapted beautifully. If the available light was sufficient, I could quickly turn off the flash and capture natural, ambient shots without hassle.
The sun was setting, and it was much darker under the porch. I used the MagMod Sphere but pointed the flash straight at the couple. In the post, I used the gradient mask on the lower half to darken the banister. [NIKON Z 9, NIKKOR Z 24-120mm f/4 S, Mode = Aperture Priority, ISO 3600, 1/80, ƒ/5.6, (35mm = 52)]
Speeding Up Your Workflow in Lightroom with the MagMod Sphere
In addition to its advantages during shooting, the MagMod Sphere can significantly streamline your post-processing workflow in Lightroom. Here are a few reasons why:
Consistent Lighting: The soft, diffused light from the MagMod Sphere creates a more uniform exposure across your images. This consistency means less time spent adjusting individual photos in Lightroom, allowing you to edit in batches more efficiently.
Reduced Post-Processing: Because the Sphere minimizes harsh shadows and helps achieve more flattering skin tones, you won’t need to spend as much time correcting or retouching in post. This translates to faster edits and more time for other projects.
Easier Color Correction: The quality of light from the Sphere can lead to more accurate colors in your photos. This makes color correction easier and quicker in Lightroom, as you’ll spend less time adjusting white balance and saturation.
Fewer Exposures to Adjust: When using the MagMod Sphere, your images are less likely to have extreme highlights or shadows. This means fewer exposures to fine-tune during editing, speeding up your workflow.
Streamlined Preset Application: If you use presets in Lightroom, consistent lighting can make it easier to apply your favorite presets across multiple images without needing to tweak settings for each photo.
By using the MagMod Sphere, you improve the quality of your images during the shoot and set yourself up for a more efficient editing process later. This means more time doing what you love—capturing moments—while minimizing time spent behind the computer.
No Flash Example [NIKON Z 9, 35mm f/1.4G, Mode = Aperture Priority, ISO 2000, 1/250, ƒ/1.4, (35mm = 35)]
Real-World Application
During the event, I relied on the MagMod Sphere for various shots. For example, outside, I used the flash to fill in shadows on faces, which helped create a balanced exposure. Indoors, I used it to illuminate subjects without overwhelming them with light.
I will share some examples of my work: shots taken with the MagMod Sphere and those taken without flash, showcasing how the quality of light can significantly affect the final image.
Challenges with Off-Camera Flash
While off-camera flash can yield stunning results, it can be impractical in an event setting. Even with an assistant, it’s easy for guests to cast unwanted shadows, disrupting the event flow. Using the MagMod Sphere as an on-camera flash solution helped me avoid these pitfalls while providing the necessary lighting.
Flash is mixing with the available light. [NIKON Z 9, NIKKOR Z 24-120mm f/4 S, Mode = Manual, ISO 25600, 1/160, ƒ/4.5, (35mm = 36)]
Tips for Using the MagMod Sphere in Event Photography
Assess Available Light: Before you start shooting, evaluate the lighting conditions. If the available light is good, don’t hesitate to turn off the flash for a more natural look.
Use Flash as Fill Light: In bright outdoor settings, use the flash to fill in shadows rather than overpowering the ambient light.
Experiment with Angles: Slightly angling your flash can change how the light falls on your subject, so don’t be afraid to play around.
Keep It Simple: The MagMod Sphere is designed for quick changes. You can do so in seconds if you need to switch back to natural light.
Capture the Moments: Focus on candid moments and interactions. The Sphere allows you to illuminate your subjects without drawing too much attention.
Conclusion
Incorporating the MagMod Sphere into my event photography this past weekend was a game-changer. It allowed me to navigate different lighting conditions effortlessly while maintaining the quality of my images. If you’re looking for a versatile, efficient, and effective flash attachment for event photography, the MagMod Sphere should be at the top.
In the fast-paced world of photography, efficiency is critical, primarily when culling your images. With countless photos taken during a shoot, quickly sorting through them can feel overwhelming. Fortunately, combining the power of Photo Mechanic and Adobe Lightroom can streamline this process significantly. Here’s how to leverage both tools for faster image culling, whether starting fresh or working with images already in Lightroom.
Getting Started with Photo Mechanic
Photo Mechanic, developed by Camera Bits, is a fast and efficient tool for photographers to manage their images. It’s perfect for the initial ingest and culling process. Here’s how to begin:
Ingesting Images into Photo Mechanic
Open Photo Mechanic and select Ingest from the top menu.
Choose your source—a memory card or a folder on your hard drive or external drive.
Set your destination folder for the images.
Start the ingest process. This will import your photos and allow you to review them instantly.
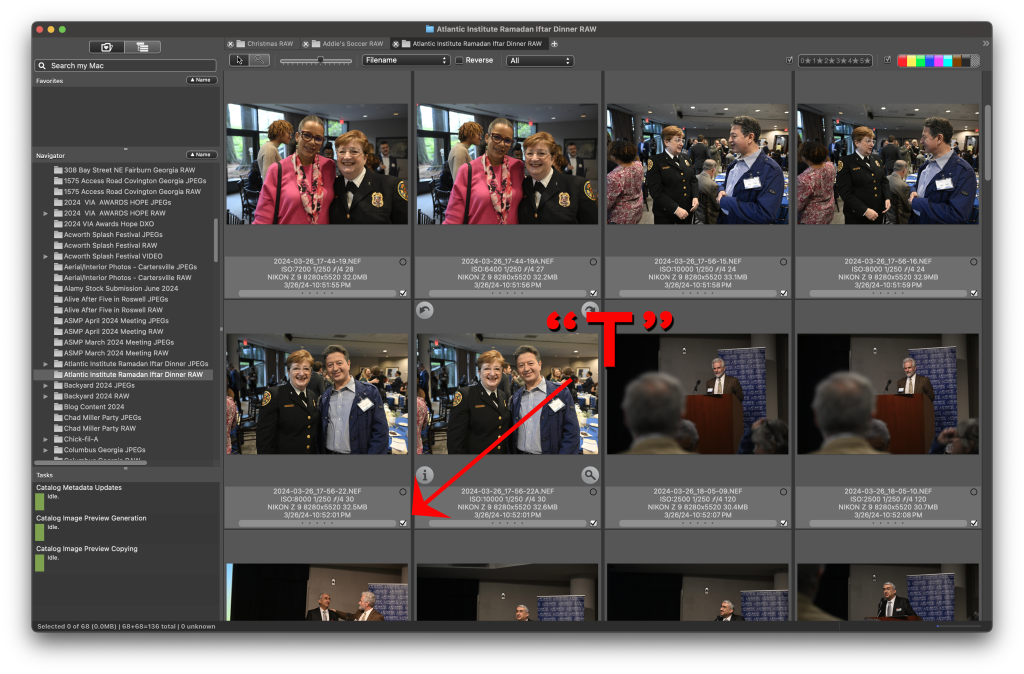
Culling Your Images
Once your images are ingested, you can quickly sort through them:
Use the arrow keys to navigate through your pictures.
Press “T” to tag the images you want to keep. This is a quick way to mark your favorites without interrupting your flow.
For images you don’t want to keep, use the arrow keys to move on.
Deleting Unwanted Images
To delete images you don’t want:
Navigate to the top pull-down menu in Photo Mechanic.
Select “Untagged” from the middle menu. This will filter out all the tagged images, showing only those you’ve rejected.
Press ⌘ + A to select all untagged images, then hit ⌘ + ␡ to delete them.
Using Photo Mechanic this way, you’ll have quickly culled your images before pictures stepping into Lightroom.
Syncing Changes with Lightroom
If you’ve already ingested your images into Lightroom, you can still use Photo Mechanic for a fast cull:
Open Photo Mechanic and navigate to the folder where your images are stored.
Use the same tagging method as above to mark the keepers.
After you’ve tagged and deleted the unwanted photos, return to Lightroom.
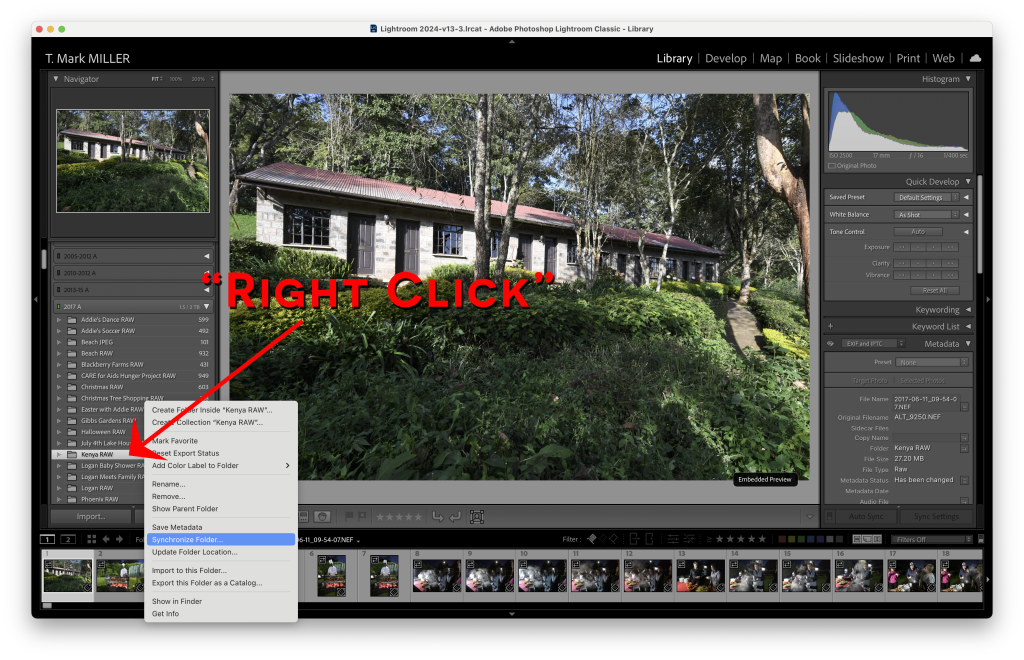
Synchronizing Folders in Lightroom
To update Lightroom with the changes made in Photo Mechanic:
Go to the Library Module in Lightroom.
Locate the folder on the left panel containing your images.
Hover over the folder name, right-click (or hold the Control key and click) to bring up the context menu.
Choose “Synchronize Folder”.
In the dialog that appears, click “Synchronize”. Lightroom will automatically highlight any changes, updating your catalog accordingly.
Conclusion
Using Photo Mechanic with Lightroom can drastically reduce the time spent culling through your images. By ingesting images first into Photo Mechanic, you streamline the culling process, allowing you to focus on your best shots before they even enter Lightroom. Even if you start with Lightroom, Photo Mechanic can enhance your workflow, making tagging and deleting unwanted images easier.
Embrace this powerful duo and watch your productivity soar, giving you more time to focus on what you love most—creating stunning photography!
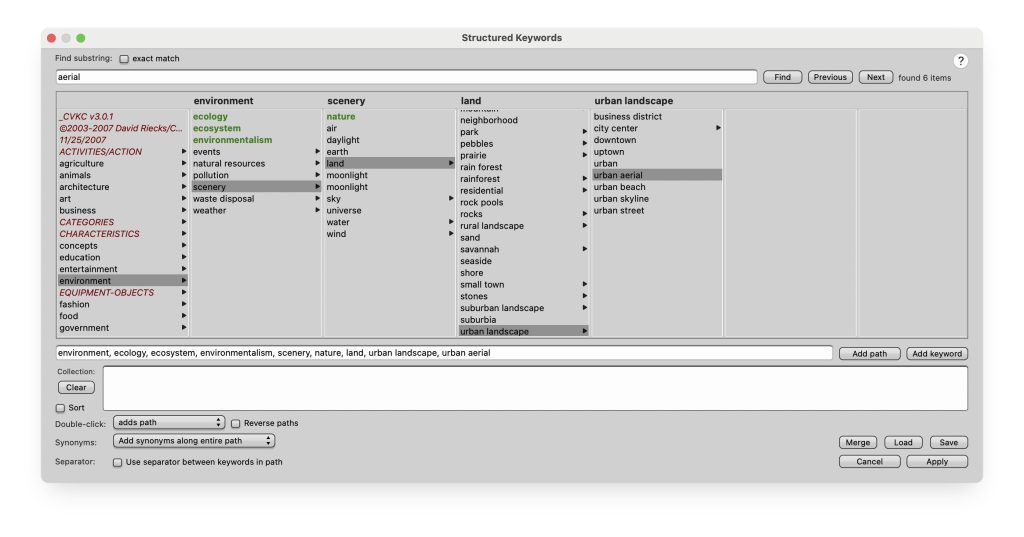
For nonprofits, compelling storytelling is not just about the images themselves but also about making those images easy to find, share, and reuse. Properly managing your photo library requires a thoughtful approach to metadata. Keywords are essential for helping your team, donors, and supporters discover the right images, but they are only part of the equation. In this post, I’ll walk you through creating a custom keyword list for your nonprofit and explore the additional fields you should use to optimize your photos.
Step 1: Define the Purpose of Your Keywords
Before diving into the keyword list, it is essential to understand how your photos will be used. Are they primarily for social media, newsletters, annual reports, or fundraising campaigns? The purpose will help shape your keywords to ensure they align with your nonprofit’s goals.
Audience Focused: Are your target audiences donors, volunteers, or beneficiaries? Keywords should reflect the type of people you want to engage with the photos.
Project-Based: If your nonprofit works on specific projects or campaigns, these should be included in your keyword list. Think about the different causes or events your photos represent.
Step 2: Categorize Your Keywords
Create different categories of keywords to ensure a comprehensive tagging system:
Who: People involved (e.g., staff, volunteers, partners, beneficiaries).
What: The action or event captured in the photo (e.g., fundraiser, community outreach, educational workshop).
Where: Locations, whether it’s the name of the city, a specific venue, or the broader region.
When: Keywords like seasons, years, or notable events in the nonprofit timeline.
Why: The causes behind the image include “environmental sustainability,” “poverty relief,” and “child education.”
This organized approach ensures your photos are easily searchable and usable across various platforms.
Step 3: Create a Consistent Format
Your keywords need to be standardized to make sure everything is clear. Please decide on formats for locations (e.g., city name, country name), abbreviations, and singular vs. plural forms of words. For example, decide whether to consistently use “volunteer” or “volunteers” throughout your library.
Pro Tip: Create a reference document where all team members can see the list of accepted keywords and how they should be used.
Beyond Keywords: Other Important Metadata Fields
While keywords are essential, there are several other fields you should use to enhance the searchability and utility of your photos.
1. Title
A brief, descriptive title can be just as helpful as keywords. The title should summarize the content in a few words, such as “2023 Annual Gala Event” or “Community Garden Volunteer Day”
2. Description
A more detailed description adds context to the photo, describing who is in it, what’s happening, and why it’s significant to your nonprofit. This field is crucial to ensure that anyone searching your archives can understand the image without needing the whole backstory. For example:
“Volunteers distributing meals to homeless individuals in downtown Atlanta during our summer outreach program.”
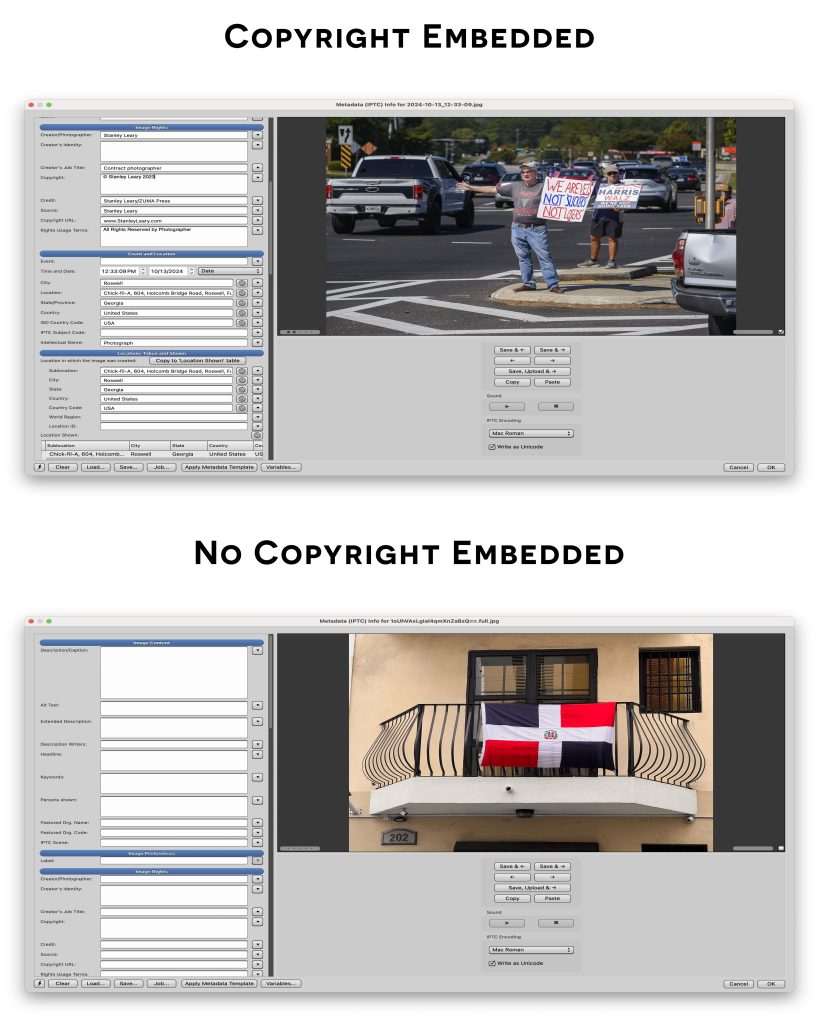
3. Copyright Information
Don’t overlook the importance of crediting the photographer or your organization for the images. This field ensures that your nonprofit’s work is appropriately attributed whenever the image is shared externally.
4. Date Created
The date field ensures that you can quickly locate photos by the time they were taken. This is especially useful for annual reports, event recaps, or when tracking the progress of ongoing projects.
5. Location (GPS or Geotagging)
GPS coordinates or general location fields are handy if your nonprofit works in multiple regions. It allows for filtering by location, which can be helpful for localized campaigns or reporting on geographic impact.
6. Usage Rights
If your photos come with specific usage restrictions (e.g., for internal use only, not for social media), having a field to track usage rights will help prevent misuse or accidental distribution of sensitive images.
7. Tags for Accessibility
Consider accessibility metadata, such as alt text or descriptions for people with visual impairments. Including this information in your metadata ensures that your content is inclusive and accessible to all audiences.
Who Should Be Adding Metadata and Why It Matters
Now that we’ve covered the importance of keywords and other metadata fields, the next question is: who should be responsible for adding this information? Metadata is critical to ensuring your photo library remains organized, discoverable, and valuable. Let’s look at the roles that might be responsible and why their involvement is crucial.
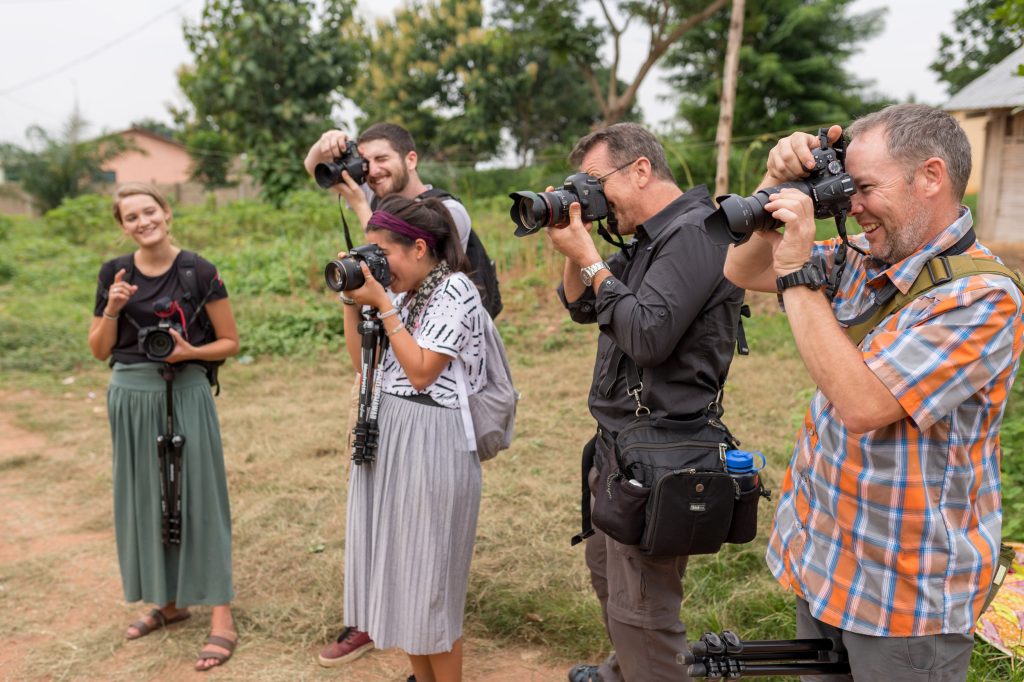
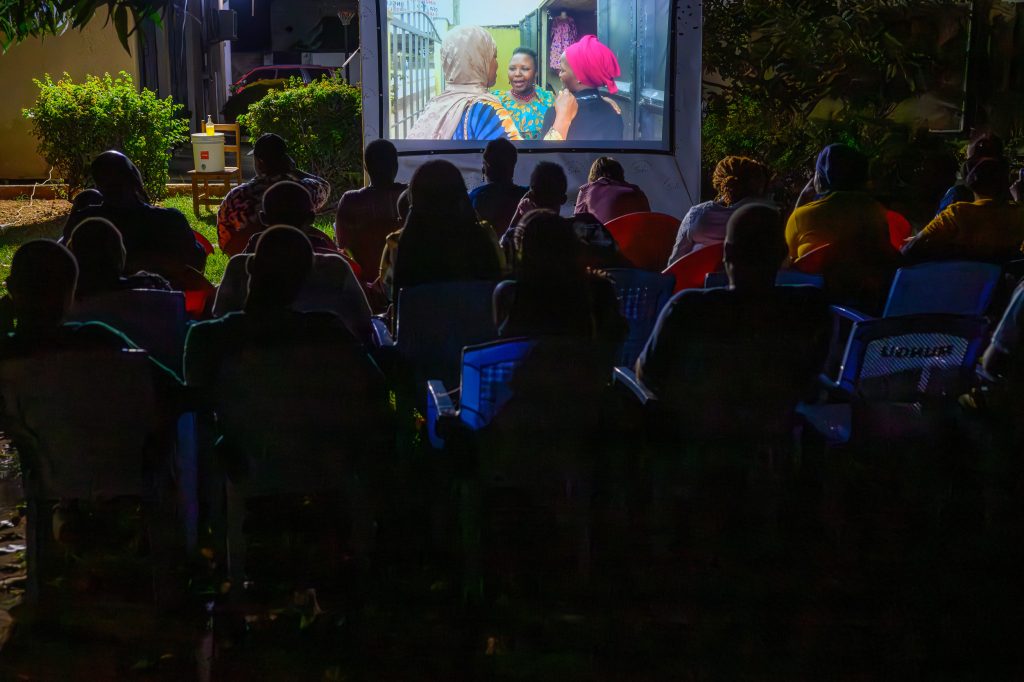
Storytellers Abroad Multimedia Missions Workshop in Togo, West Africa.
1. Photographers
If you’re working with professional photographers—whether staff or freelancers—they should be responsible for adding some of the initial metadata, particularly technical and location-based information. As the creators, they are best positioned to include accurate details like the date, location (GPS data), and any specific copyright information. It’s also helpful for photographers to add essential keywords or titles that reflect the context of the shoot.
Why Photographers? Photographers are often the first point of contact with the images. Adding accurate metadata during the upload or post-production process ensures that the files are well-organized and saves time for anyone using the photos later.
2. Content or Media Managers
Content managers, communications staff, or media librarians typically manage your nonprofit’s digital assets. They should refine and expand the metadata added by the photographer, ensuring it aligns with your nonprofit’s broader communication strategy. This includes adding campaign-specific keywords, titles, and descriptions that make the images relevant and accessible to the organization.
Why Content Managers? They understand the organization’s messaging, audience, and goals. Content managers ensure consistency across all assets, enabling seamless integration of visuals into newsletters, social media, or reports. They can also ensure that metadata standards are upheld, keeping the library organized and usable long-term.
3. Project Leaders or Department Heads
Sometimes, it’s beneficial for department heads or project leaders to review or add metadata related to specific initiatives. For example, if a photo is part of a health outreach program, the person leading that project might add critical context that only they would know, such as names of participants, key milestones, or grant-related information.
Why Project Leaders? They bring subject matter expertise that can add depth to the metadata. By providing specific details related to the project or initiative, they ensure that the photos accurately represent the impact of your nonprofit’s work.
4. Marketing and Social Media Teams
Once photos are uploaded and fully tagged, marketing teams often add metadata fields related to social media or future campaigns. They might adjust tags to fit SEO best practices or add campaign-specific terms that increase the discoverability of images for fundraising, advocacy, or donor engagement.
Why Marketing Teams? Metadata helps ensure that the right images surface for different platforms or purposes. If social media visibility is essential, the marketing team can ensure that keywords are aligned with trending hashtags or relevant calls to action for specific audiences.
Conclusion: Metadata as a Shared Responsibility
The task of adding metadata should fall on more than one person. It is a shared responsibility that involves photographers, content managers, project leaders, and marketing teams. Each role brings its unique perspective, ensuring that your nonprofit photos are fully optimized for both internal use and external storytelling.
Having a well-structured approach to who adds what metadata keeps your library organized and maximizes the impact your photos can have. With the right keywords, descriptions, and contextual information, your nonprofit can tell its story, engage supporters, and showcase your meaningful work.
Crediting photographers
Crediting photographers for their work is not just a professional courtesy—it’s a vital practice, especially for nonprofits. Here’s why it’s important:
1. Respecting Intellectual Property Rights
Photographers retain intellectual property rights over their images, and proper credit acknowledges their ownership. This respect for their work is legally essential, ensuring nonprofits aren’t infringing copyright laws.
2. Building Trust and Professional Relationships
By giving credit, nonprofits foster strong relationships with photographers. Whether the photographer is a volunteer, staff member, or freelancer, showing appreciation through credit helps maintain goodwill and encourages future collaboration.
3. Maintaining Transparency
Nonprofits rely on public trust, and crediting photographers is part of demonstrating transparency. By attributing the source of their images, nonprofits show that they respect and value the contributions of all their partners, including creatives. This enhances the organization’s reputation and professionalism.
4. Incentivizing High-Quality Work
When photographers are credited for their work, they are more likely to provide high-quality images, knowing their name and talent will be recognized. This is particularly important for nonprofits, as compelling imagery is crucial for effective storytelling and engagement.
5. Supporting the Creative Community
Nonprofits often align with missions that support fairness, community, and collaboration. Crediting photographers aligns with these values, as it acknowledges the creative contributions of individuals and helps support their livelihoods, especially when working with freelancers or smaller creative teams.
6. Ensuring Proper Attribution in Public Use
Many nonprofit photos are shared widely across social media, websites, reports, and news outlets. Crediting the photographer ensures that, as the images get distributed, the creator continues to receive recognition for their work. This also helps avoid any misrepresentation or confusion about who took the image.
In summary, crediting photographers not only upholds legal and ethical standards but also strengthens professional relationships, ensures transparency, and encourages the creation of quality visuals—all essential for the success of a nonprofit’s storytelling efforts.
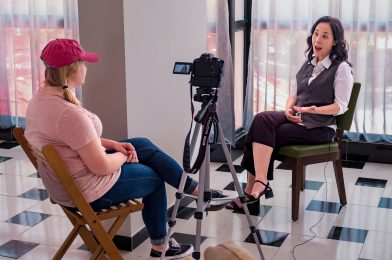
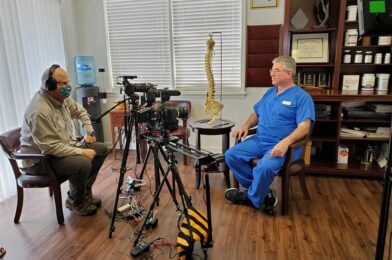
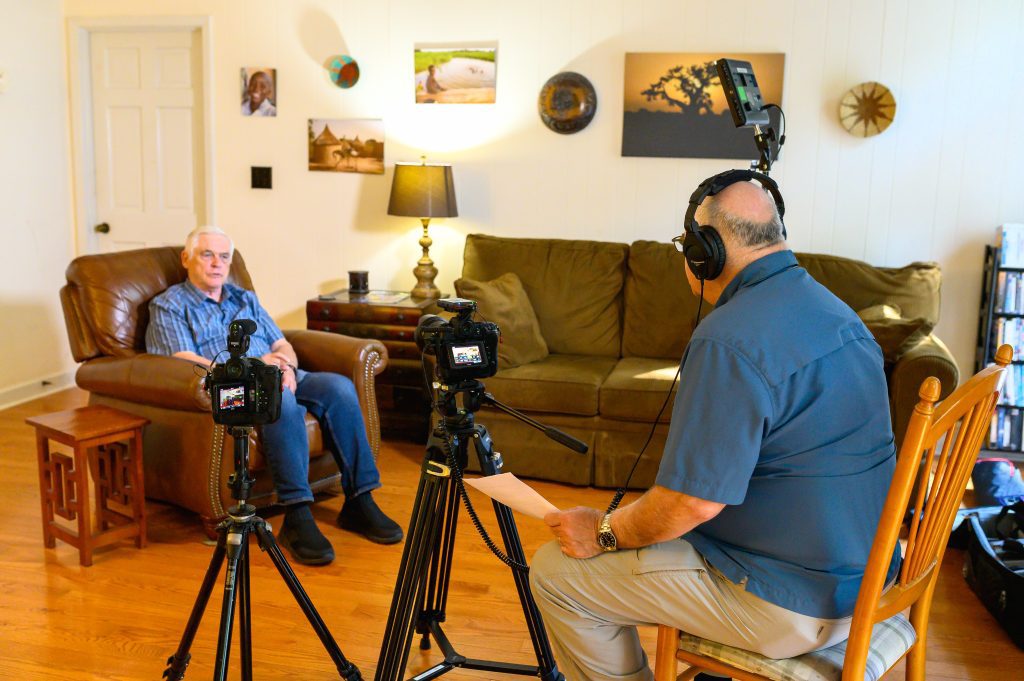
During the pandemic, Stanley set up and interviewed Chiropractor Dr. Charlie Weiss of Holcomb Bridge Chiropractic in Rowell, Georgia.
Nonprofits often struggle to decide between using volunteers or hiring professional communicators such as producers, photographers, and videographers. While it may be tempting to use volunteers to save money, relying on professionals can significantly impact the effectiveness and sustainability of a nonprofit’s mission, especially regarding communication strategies.
Stanley is doing a two-camera interview in Lisbon, Portugal.
Why Nonprofits Should Use Professionals in Communications:
Impactful Storytelling: Professional communicators bring a high level of expertise in crafting stories that resonate emotionally with audiences. This is critical for nonprofits, as compelling stories help donors connect with the cause more deeply. Organizations like Charity Water have used professional storytelling to engage supporters with authentic, emotionally charged narratives, which have led to higher donor trust and more significant contributions.
Consistency in Branding: One of the critical aspects of maintaining donor trust is having a consistent and professional brand image. Volunteers, while passionate, may not have the experience needed to maintain uniform messaging across platforms. Professionals are trained to handle multi-channel strategies and create brand guides that ensure the nonprofit’s identity is cohesive, which enhances long-term donor relationships.
Efficiency and Focus: Professionals are equipped with the tools and knowledge to handle the complexities of media production efficiently. From pre-production planning to post-production editing, they streamline the process, ensuring deadlines and resources are effectively utilized. On the other hand, volunteers may lack the necessary time and expertise, leading to delays and suboptimal outcomes.
Audience Engagement: Nonprofits need to engage their supporters through various media channels. A professional photographer or videographer can capture high-quality content that tells a story visually, engaging audiences in ways that statistics alone cannot. This engagement often leads to higher donations, as supporters can see the direct impact of their contributions.
Avoiding Risk: Without trained professionals, nonprofits risk producing content that could be perceived as amateurish or even misleading. Poor-quality media can damage a nonprofit’s reputation, making it appear untrustworthy. Moreover, volunteers may not always understand the nuances of sensitive storytelling, which could inadvertently lead to legal or ethical issues, further undermining the organization’s credibility.
Stanley’s interview setup with Dr. Jack Sorg for the Moldova Medical Short-Term Missions Team
Risks of Not Using Trained Communications Professionals:
Brand Dilution: Inconsistent messaging and visuals can dilute the nonprofit’s brand, making it harder to differentiate from competitors. Without professional oversight, the organization’s voice may lack clarity, causing confusion among supporters and stakeholders.
Lost Donor Engagement: Volunteers might need to gain the skills to create media that effectively capture the attention of potential donors. This could result in less engagement on social media, fewer website visits, and, ultimately, a decline in fundraising.
Long-term Costs: While volunteers may seem cost-effective initially, the long-term costs of ineffective communication—such as lower donor retention or decreased fundraising—can outweigh the short-term savings. Correcting poorly executed media projects can be more expensive than getting it right the first time with professionals.
Conclusion: For nonprofits, communication is more than just delivering a message; it’s about connecting with donors and supporters. Hiring professional photographers, videographers, and producers ensures this communication is done effectively, increasing monetary donations and volunteer involvement. While volunteers are invaluable in many areas, the role of skilled professionals in nonprofit communications should not be underestimated, as it is a crucial part of building a sustainable and prosperous organization.
With over two decades of experience organizing the Southwestern Photojournalism Conference and creating mission Storytelling Abroad Workshops, I’ve seen firsthand professionals’ vital role in nonprofit communications. From 1990 to 2024, I worked with both amateurs and professionals, particularly in mission photography. Through this, I firmly believe that organizations should prioritize hiring professionals for storytelling, especially for projects to raise funds or build public engagement. Professionals bring expertise, consistency, and the ability to craft impactful narratives. Once these critical stories are in place, volunteers can work alongside them, learning and contributing to internal projects. This approach ensures the highest quality in external-facing communication while nurturing the next generation of storytellers.
Capturing the journey of resilience and growth: Hannah Strayer interviews Samweli Chacha in front of the home he built through hard work and dedication to farming. With the invaluable support of Apollo Mazengo, Samweli’s agriculture teacher, this conversation is made accessible through Swahili translation, showcasing the power of education and community.
I first met Hannah Strayer in 2015 during our Storytellers Abroad Missions Multimedia Workshop in Romania. At the time, she was already deep into her missionary journey. Hannah had a passion for photography, and this workshop introduced her to the world of storytelling, where words and visuals come together to create compelling narratives.
During the 2015 Storytellers Abroad Workshop in Romania, Hannah Strayer received guidance from storyteller coach James Dockery while Jon Franz worked diligently on his project beside them.
Her enthusiasm for storytelling led her to attend several more ABWE’s Storytellers Abroad workshops, traveling to places like Nicaragua, Peru, and Togo. With each experience, Hannah grew in her craft, eventually attending language school to learn French in preparation for her move to Togo, West Africa, where she would serve as a full-time missionary media specialist.
However, Hannah didn’t join a large missions team with on-field mentors. To continue improving her skills and gaining valuable feedback, she kept participating in more workshops, working closely with coaches who helped refine her storytelling abilities.
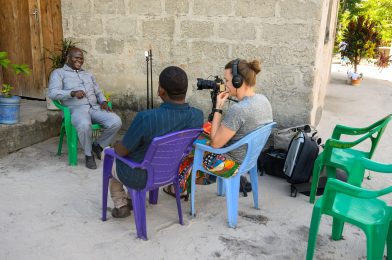
Hannah Strayer conducts a video interview with Samweli Chacha, capturing his story with the help of missionary Aaron Boon, who translates from Swahili to English for the storytelling project in Tanzania on September 7, 2024.
One of the stories we worked on in Tanzania revolved around a key challenge facing missionaries there: securing visas from the government. A vital part of that solution was the new farm established by the local missionary team. The farm helped with visa renewals and trained pastors in farming techniques, providing them with the tools to support their families while leading their churches.
One of the pastors we featured was Samweli Chacha, who attended The Biblical Center for Pastors. He was thrilled to discover the bonus of learning agriculture alongside his studies. His story is familiar in Tanzania, where many pastors are called to lead churches with little formal education. Often, pastors need a secondary job to support themselves, and without proper income, they may have to abandon their role in the church to care for their families.
Samweli’s story is a testament to the holistic approach the missionaries are taking—addressing both spiritual and financial needs.
Watch the video to see how these efforts are making a difference for Samweli and other pastors striving to serve their communities in Tanzania.
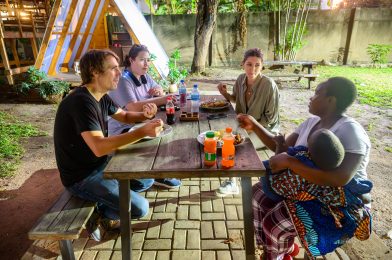
Alicia Sparkman and Jordan Timpy sit down with missionary Brittany James and Mama Daniel for the first time, sharing a meal and uncovering the layers of Mama Daniel’s story. In this heartfelt two-hour conversation, even Brittany learned new details about Mama Daniel’s journey, deepening the connection and setting the stage for the powerful video to come.
In collaboration with the Tanzania Missionary Team, our journey started by defining the ultimate goal of our visit through the Storytellers Abroad Missions Multimedia Workshop. Like many organizations I’ve worked with, their initial desire was to showcase the breadth of their efforts. In this case, they ran six different programs, all worth highlighting.
However, after they detailed all their activities, I asked, “Once people hear this, what do you want them to do?”
That’s when we honed in on the fundamental objectives for the video. The mission team needed ongoing support to keep their families in the field, funding for their main property, and their newly acquired farm, which they hoped would offset operational costs. Additionally, they wanted to raise money for scholarships to extend their outreach further.
Our workshop focuses on creating 70% inspirational and 30% informational videos. We acknowledged that some videos flip that ratio, but our approach emphasizes the human element—evoking emotion before providing information.
One of the key programs they wanted to highlight was the Dar Health Initiative, which addresses various aspects of community health, including education and prenatal care. This led us to an incredible story about Pendo Saidi and her son Daniel, a woman the missionaries had helped through this initiative. The missionaries worked closely with mother and son, providing health care and emotional and spiritual support.
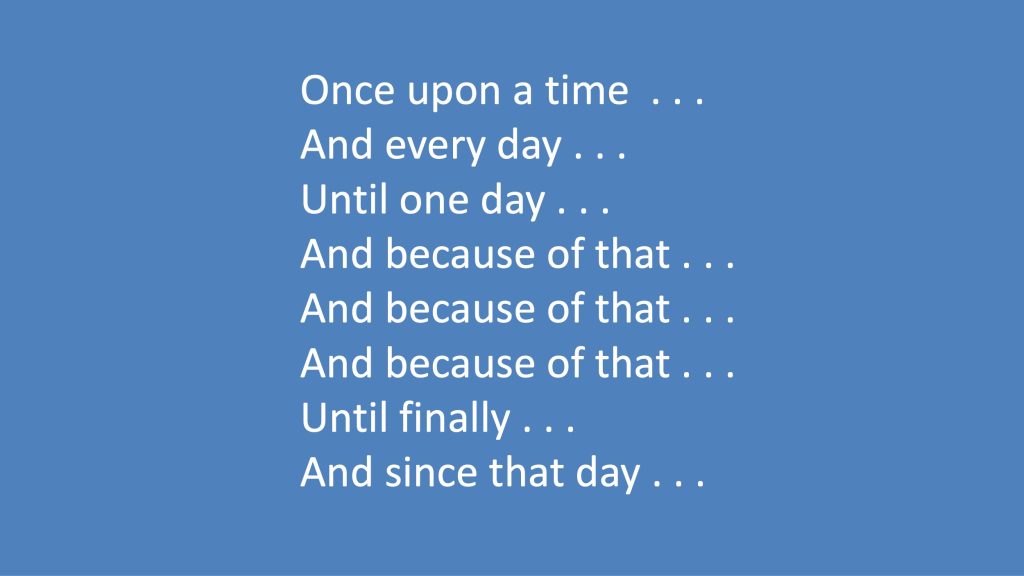
The Story Spine is very much like the ingredients of a cake; the baker still has to make the cake.
After understanding the story, I crafted a Story Spine, or outline, for Alicia Sparkman, one of the participants creating her first video in the workshop. She teamed up with veteran storyteller Jordan Timpy to bring this story to life. Together, they sat down with Pendo Saidi and missionary Brittany James, uncovering more about their journey.
The story immediately touched everyone involved, moving Alicia and the rest of the team to tears. Pendo Saidi’s life—marked by loss, as her husband left her because of Daniel’s condition—could easily be an epic on its own. However, we had a clear focus: The story wasn’t just about Pendo Saidi. It was also about missionary Brittany James’ role in Daniel’s healthcare and Pendo Saidi’s spiritual growth.
While we captured many profound moments, we made the tough decision to trim certain parts, including the emotional scene where Pendo Saidi forgave her husband for abandoning the family. Though it was a powerful moment, keeping it would have extended the video beyond the ideal length for engagement.
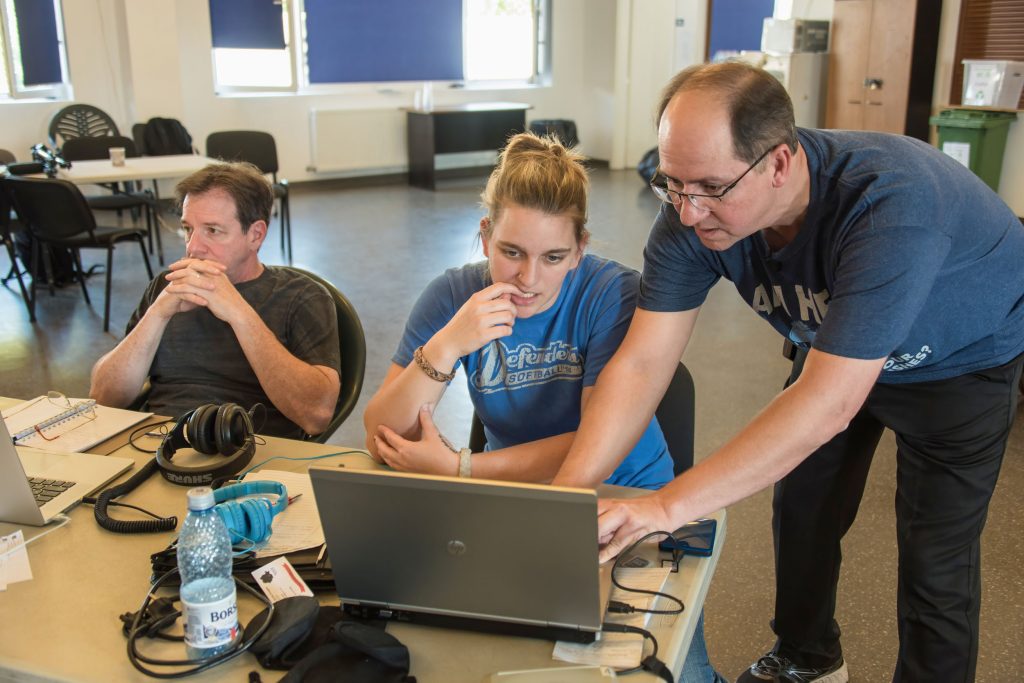
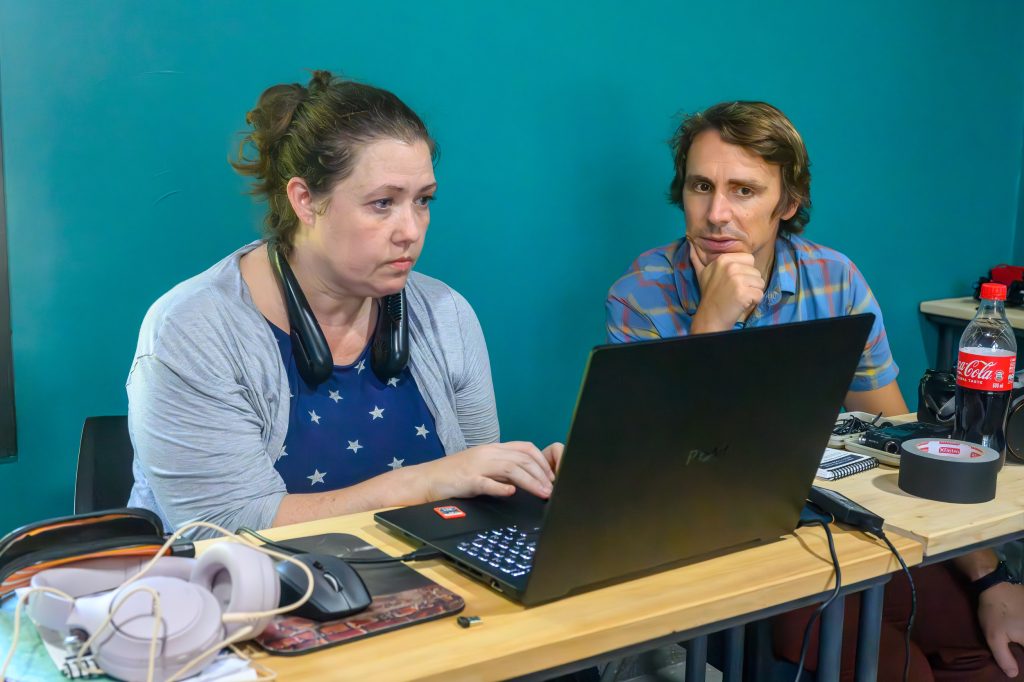
Alicia Sparkman works on her video in Adobe Premiere with veteran storyteller Jordan Timpy’s guidance. In our workshops, there’s a lot of back-and-forth with coaches, significantly when cutting content. It’s tough for newcomers to let go of great material, but learning to make those tough decisions ultimately strengthens the story, making it more impactful.
For videos like these, shorter is often better. Based on current trends, most viewers tend to lose interest after the two-minute mark. While more complex stories can stretch to five minutes, we aim for concise, emotionally engaging content.
Our workshop kicked off on Friday with dinner, introducing us to the nationals at the heart of the stories. By Thursday night, we were screening our final videos for the missionaries, the community, and the nationals.
Gathered together for a special evening, missionaries and the communities they serve watched as we unveiled the three stories we created to help them in their marketing. Surrounded by friends and families, the nationals who shared their powerful testimonies took center stage, bringing their inspiring journeys to life on screen—a heartfelt celebration over dinner, united by stories of faith and transformation.
Alicia had the benefit of working closely with Jordan all week, receiving personalized guidance on how to cut unnecessary material and focus on completing a compelling story within our short timeframe. There were many tear-filled moments along the way as we navigated the emotional weight of this story.
Now, I invite you to watch the finished video. I believe it achieves the objectives we set out to accomplish. Let me know what you think, and feel free to share if it resonates with you.
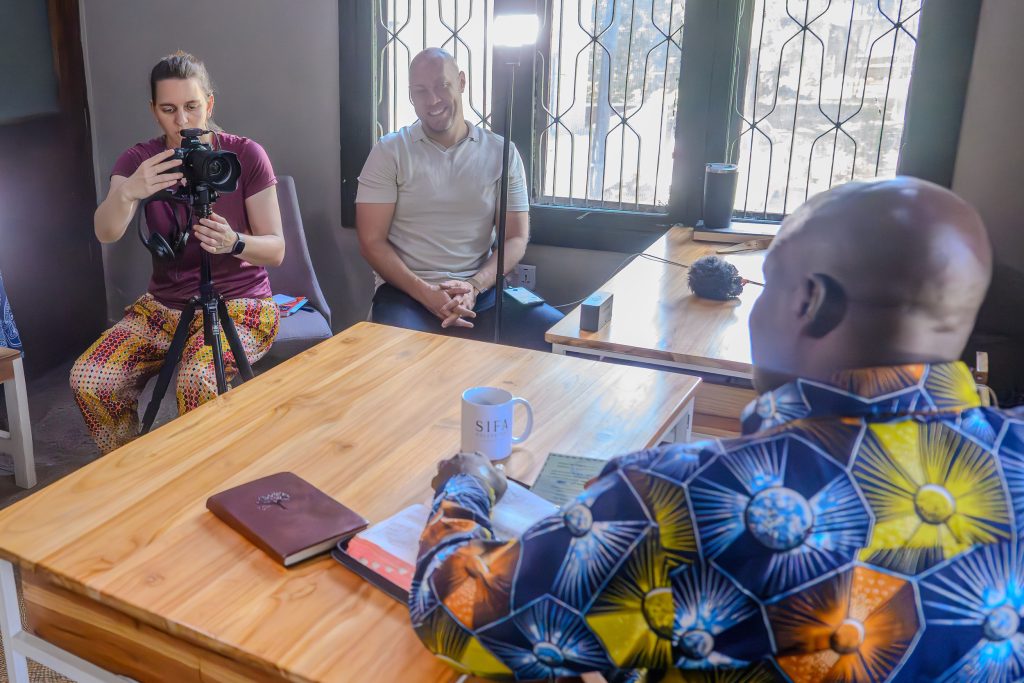
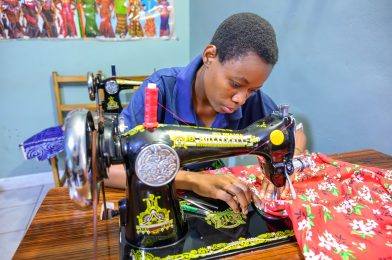
Raysham, hard at work on her sewing machine, is part of the SIFA Program that empowers women to become successful business owners, investing back into their communities. Faith-driven and gospel-centered, SIFA equips women with the tools to transform lives in Dar es Salaam and East Africa.
“Please, God, don’t send me to Africa.”
That’s what Ken Robinson had been saying since feeling a call to missions as a teenager. Yet, just a couple of weeks ago, Ken found himself in Dar es Salaam, Tanzania, with me and six others as part of the Storytellers Abroad Missions Multimedia Workshop.
This is Ken in Santiago, Chile, working on his video in his first ever video and workshop.
Ken’s journey into multimedia began in 2019 when he took a leap of faith and joined our workshop in Santiago, Chile. That’s when I first met him. As an IT professional, Ken has always been deeply connected to technology. He even volunteers at his church, helping with IT and media every Sunday. The technical side of multimedia came naturally to him, but when it came to working with people, that was a different story.
Ken is the kind of person who’s comfortable behind the scenes, ensuring that PowerPoint slides run smoothly and the Wi-Fi is working. Stepping into the world of storytelling, especially getting up close to his subjects, was out of his comfort zone.
Ken & Cassie are polishing his video on Jamilah.
During the Tanzania workshop, we paired Ken with Cassie Timpy, a veteran storyteller, as his coach. Cassie’s mission was to push Ken out of the background and into a more personal space with his subject, Jamilah. Ken had some understandable apprehension, mainly because he was a man telling the story of a single woman. I intentionally paired him with Cassie for this very reason.
As Ken sat down with Jamilah, alongside missionaries Shantelle Meta and Steph Boon, he began to listen and understand her story. Slowly but surely, Ken’s hesitations started to fade. His excitement for the project grew, but Cassie kept encouraging him to move physically closer to capture better, more intimate footage. It was a challenge, but Ken embraced it despite the discomfort.
The result is a touching and powerful video about the SIFA Threads program, one of the many initiatives run by ABWE missionaries in Tanzania to spread the Gospel.
I invite you to watch Ken’s video, Sewing Threads of Hope, and learn more about the incredible work happening through SIFA Threads and how it brings hope to the lives of many in Tanzania.