

In the fast-paced world of photography, having an efficient digital workflow is essential for maximizing productivity and ensuring the quality of your work. In this guide, we’ll walk you through a streamlined process for processing your Nikon Z9 RAW images using the powerful combination of Photo Mechanic Plus and Adobe Lightroom.
Step 1: Initial Ingest with Photo Mechanic Plus
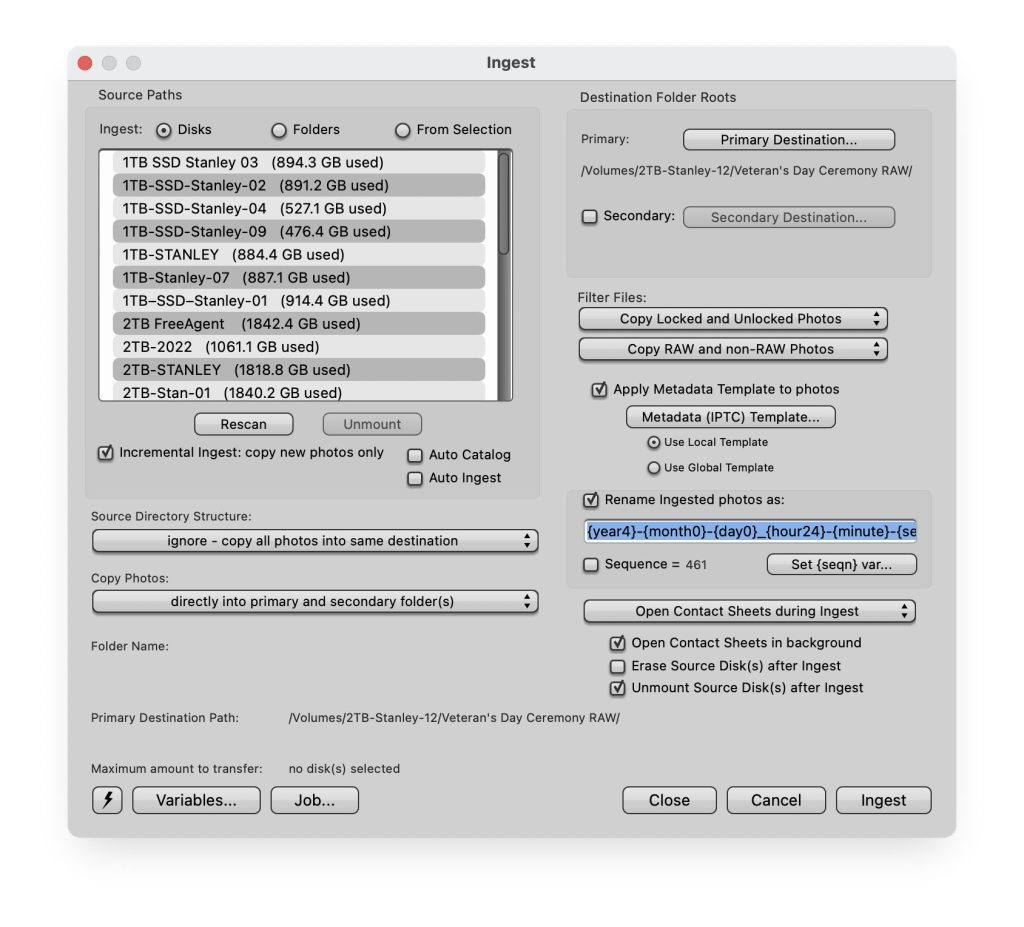
The journey begins with ingesting your RAW images using Photo Mechanic Plus. During this phase, take advantage of the opportunity to rename your files and add basic metadata. However, the real magic happens when you delve into the IPTC fields. Fill in essential information like your name, address, and copyright details. If your camera captures GPS data, utilize the location function for precise IPTC information, allowing you to know exactly where each photo was taken.
Step 2: Culling and Selection
Once ingested, the culling process begins. We weed out any images that aren’t worth keeping, ensuring that only the best make it to the next stage of your workflow. This step helps you maintain a refined collection and saves valuable time during subsequent processes.
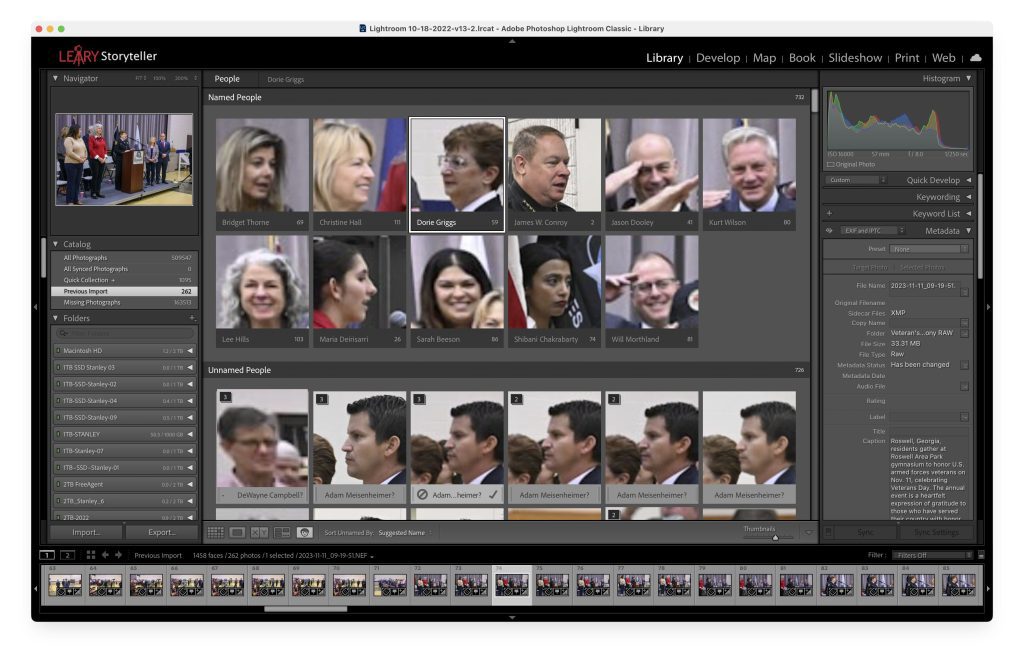
Step 3: Improved Metadata with Face Recognition in Lightroom
Now, it’s time to move to Adobe Lightroom Classic. Use the shortcut “O” in the Library Module to activate face recognition. Lightroom will automatically search for faces in your images. Assign names to each face by clicking below the photo. Speed up the process by right-clicking and asking Lightroom to find similar faces. AI technology assists in quickly identifying and naming recognizable faces, enhancing both speed and accuracy.
I also adjust exposure, color if needed, burning and dodging, and any other improvements to get the most out of the RAW image.
Step 4: Exporting with Enhanced Metadata
After completing the face recognition process, export your images from Lightroom. Include names as keywords and in the people field to maintain comprehensive metadata. This step sets the stage for a more organized and searchable photo library.
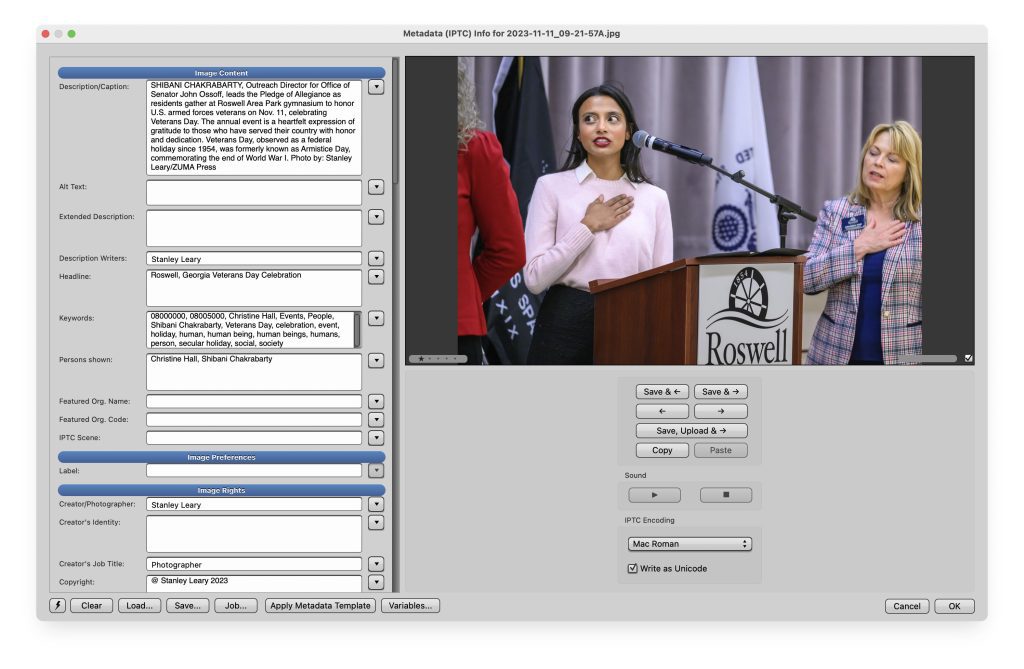
Step 5: Fine-Tuning and Captioning in Photo Mechanic
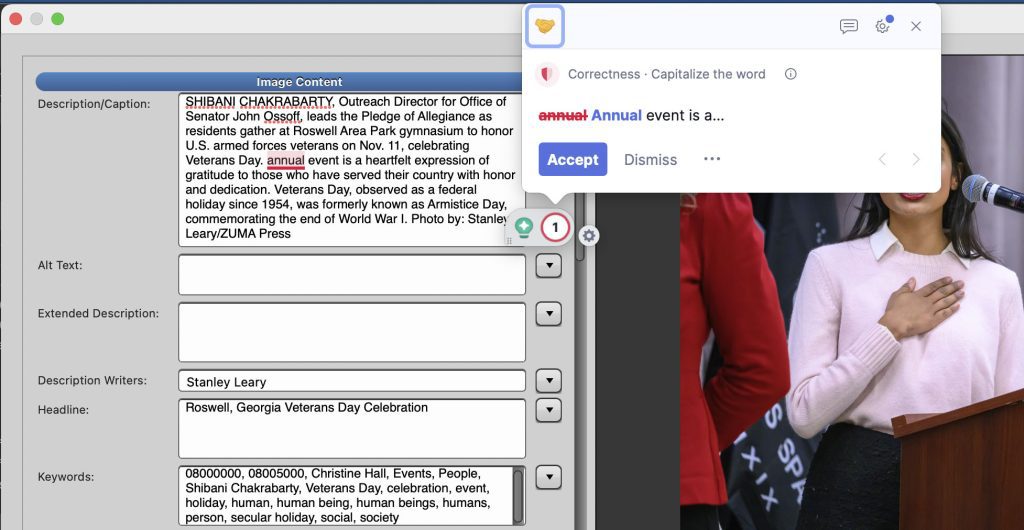
For those working with wire services like ZUMA, the next step involves exporting the selected images from Lightroom and opening them in Photo Mechanic. Here, the focus shifts to choosing top picks and crafting captions. Embrace the power of AI with tools like Grammarly, a cloud-based typing assistant. Grammarly reviews spelling, grammar, punctuation, clarity, and engagement, ensuring your captions are polished and error-free. Consider leveraging Chat GPT for caption assistance, but always double-check for accuracy.
Step 6: Final Checks and Publication
Before finalizing your work, run your captions through Grammarly to ensure a professional and polished presentation. Use Grammarly as a virtual copy editor, refining your writing before publication. This meticulous approach guarantees that your images and captions meet the high standards expected in the competitive world of photojournalism.
You can create a seamless and efficient digital workflow for processing your Nikon Z9 RAW images by integrating Photo Mechanic Plus, Adobe Lightroom, and AI tools like Grammarly. This streamlined process allows you to focus more on capturing compelling moments and less on the intricacies of post-processing.