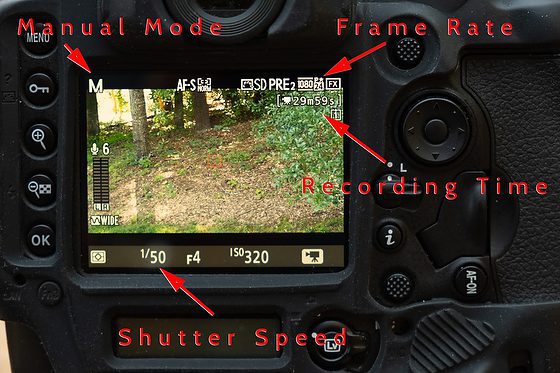
The first thing we need to address is setting your camera when shooting video. Your camera’s options for video can limit your choices. Also, please remember that the higher the resolution and frame rate, the more powerful computer you will need with even more free space for editing.
Resolution
Full HD – 1920×1080 is now a common setting on newer DSLRs
High Definition (HD) – 1280×720, an efficient balance between broadcast quality and storage space / render time. ESPN broadcasts in this setting.
Other HiDef DSLR settings – 2K, 4K, and 6K DSLR video resolutions are available but overkill for web distribution channels. Great to shoot in and then downsize when you export a project.
Frame Rate
-
- 60 FPS – use for a slow motion effect
- 30 FPS – Standard video “look.”
- 24 FPS – Cinematic “look” that is used in motion pictures
While there are many other resolutions like 2K, 4K, 6K, and even 8K, I believe they are overkill for web distribution. Even my friend Ben Smallbone whose credits include the movies: Priceless, Taken, and Steve McQueen: American Icon, to name a few of his movies told me that when it came to distributing their films to movie houses all over the country, they said not to give them anything bigger than 2K.
There are two resolutions in the video, just as there are two resolutions with stills. You have the 1) capture setting and the 2) exported resolution.
While you can shoot at 4k for similar reasons you would shoot RAW, your computer must be top of the line to process the 4K files. Unless you want to crop in on your video in post-production, I believe there is little to gain for the average project to shoot higher than the Blue Ray Full HD 1920×1080 resolution.
Frame Rate – I recommend 24 Frames per Second
Here is a good video showing why 24 fps is an industry standard for movies.
24 FPS is the Cinematic Look that is used in motion pictures. There are reasons to shoot other FPS, and one worth mentioning is to shoot super high rate to slow down for that “Slow Motion” effect.
Shutter Speed – I recommend 1/48 or 1/50
As a rule of thumb, you want the denominator of your shutter speed to be approximately double the number of frames per second that you are recording. For example, when shooting at 25fps, your shutter speed should be 1/50 of a second. If you have the 24fps and do not have a 1/48, then pick the closest frame rate, like 1/50 or 1/60.
Manual Mode – Shoot this rather than Aperture, Shutter or Program mode
If anything on the camera is automatic, your exposure can change when something changes in the frame, like your subject moves a little. The camera may think the lighting has changed, and it hasn’t. Shoot manual mode and manual focus as well.
Look – use Neutral
You can pick a picture color mode in the video, just like stills. There are modes on most cameras like Standard, Vivid, Monochrome, Portrait, and Neutral. If your camera doesn’t have a Neutral setting, then pick Standard.
When we cover your post-production, you can do more with a Neutral setting than with Vivid. More on that in later posts on making videos with your DSLR.
AUDIO RECORDING SETTINGS
Watch this video if you own a Canon to set your audio levels
Watch this video if you own a Nikon. While this is Nikon D7100, you need to find the menu item on your Nikon. Very similar.
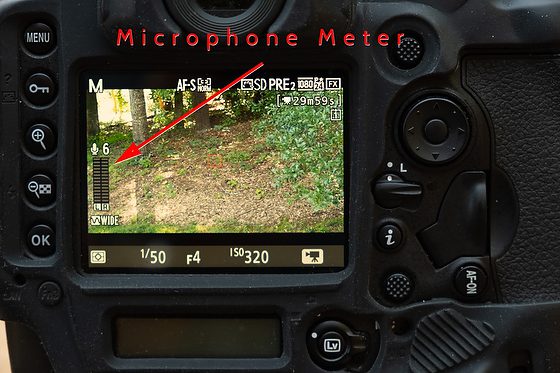
You want to have your recording levels set manually and not automatic for the same reasons for the video. When someone stops talking, the Auto level will increase the volume and introduce noise.
Most levels on cameras or a separate recording device like the Zoom Digital Audio Recorders have a way to show you it is too loud.
Most video editors agree that the overall audio level of your audio mix (all of your audio combined) should be normalized between -10db to -20db. I level my videos around -12db with occasional peaks to -8db.
What this means for me on my Nikon D5 is I want the level to peak right up to the last line before it goes red. I have a person talk for a while and then set the sound recording level before recording.
I recommend doing a test video for sound. Set your video settings to get good exposure and audio levels for good sound. Record 30 seconds to a minute and then download to your computer and play using Quicktime or other video software that came with your computer.
For testing, sound play something on your computer like the music you downloaded. After setting your speakers for proper volume when listening to your music, play your video. You must change your recording levels if you have to adjust the volume to hear the recording. The biggest problem is if it is too quiet or if too loud and giving you distortion.

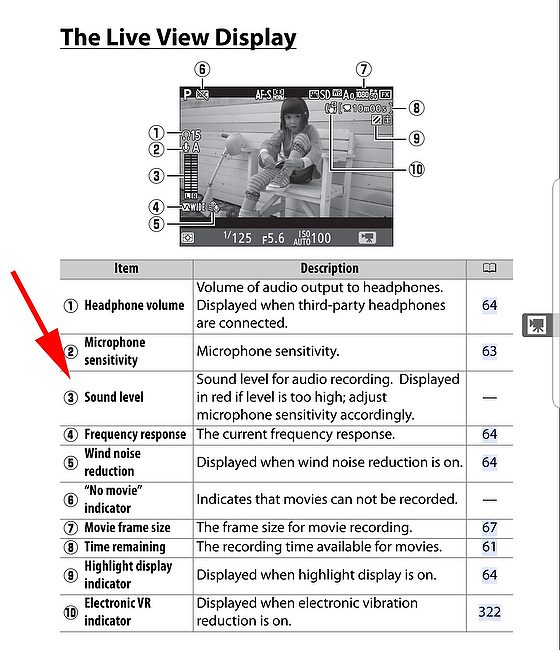
Headphone Volume
Be very careful that you are not using the headphone volume as a way to see if the audio level is set correctly. Use the levels for audio the same way you use a histogram. Once you put those levels, adjust your headphone volume to where you can hear adequately.
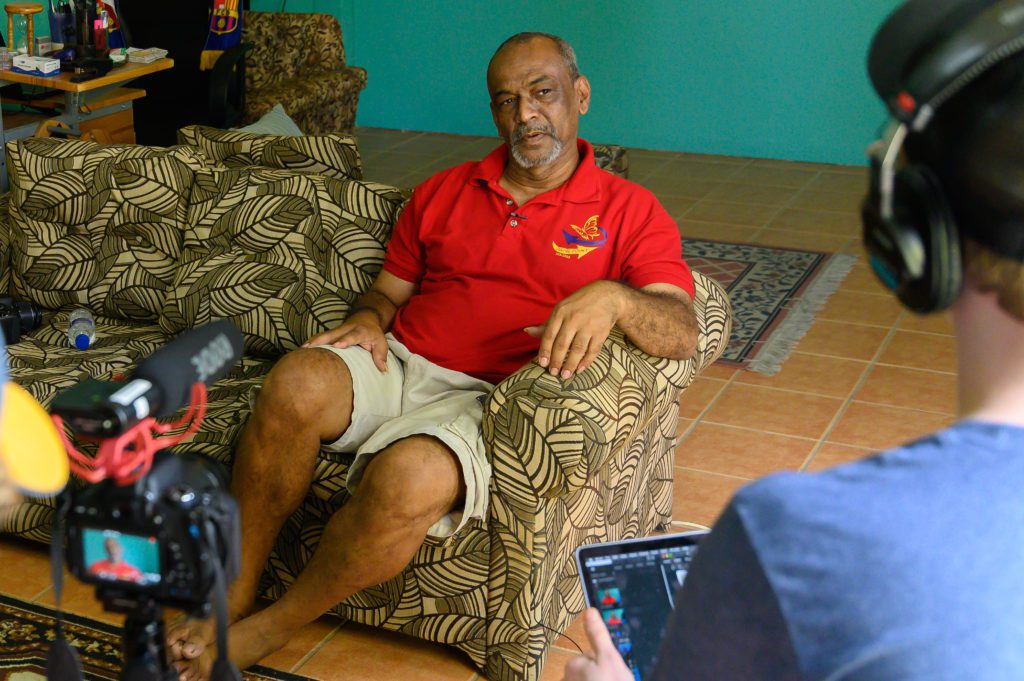
PICKING A LOCATION TO DO AN INTERVIEW
When picking a location, you need to pay attention to two things: 1) Sound in the location and 2) lighting/visual.
I recommend turning on your microphone, putting your headphones on, and listening to the environment. Are you trying to do an interview next to a waterfall or water fountain? That will prove to be difficult to impossible.
Finding a quiet location would be “ideal,” but not always possible.
Make finding the perfect location weighs sound quality over visual.
When doing an interview, you need to do a few things every time.
FILL THE FRAME
When doing an interview, you must carefully choose good composition and background. Pay attention to everything inside the frame.
Get tight on the person you are interviewing.
KILL THE NOISE
Once you put the microphone in place and have your headphones on, you can hear all the ambient sounds. This is where everyone is quiet for a moment while you listen.
Let’s say you hear the ceiling fan or the air conditioner running. I would turn these off for the interview.
Move to a quiet location if you cannot turn off something like a waterfall or water fountain.
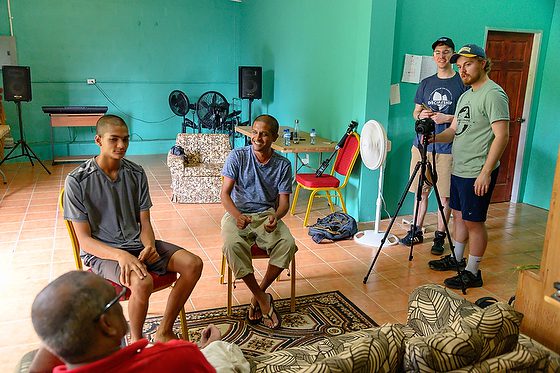
STEADY THE CAMERA
Use a tripod or put the camera on a table. Just keep your primary camera for the interview still. If you have a second camera to use, you can maybe put that camera on a slider or fluid head that will let you move the camera during the interview.
I believe you always need one locked camera on a tripod for the interview.
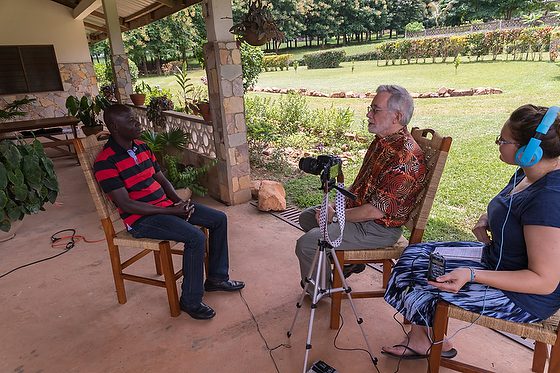
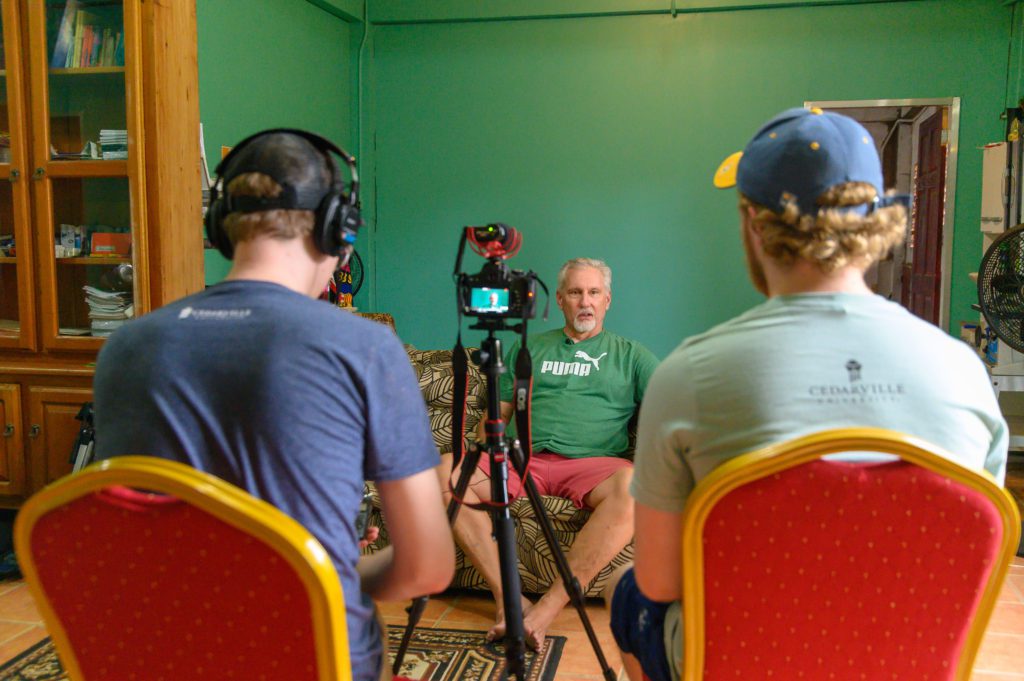
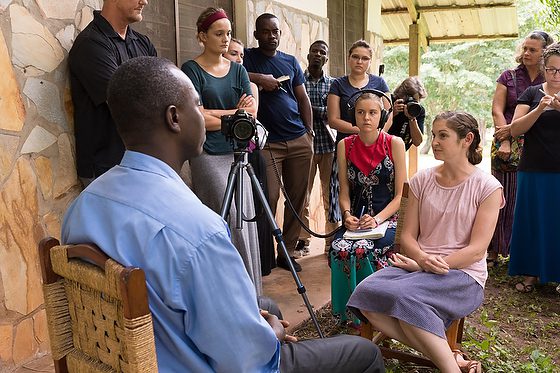
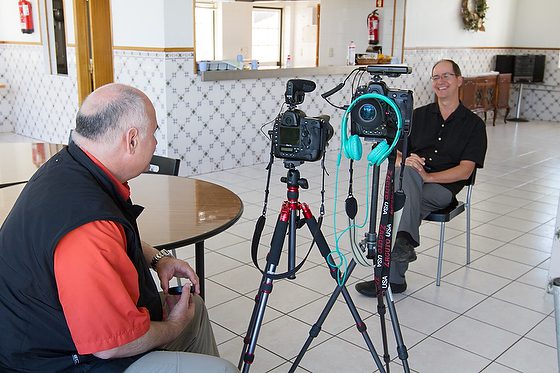
LIGHT THE SUBJECT
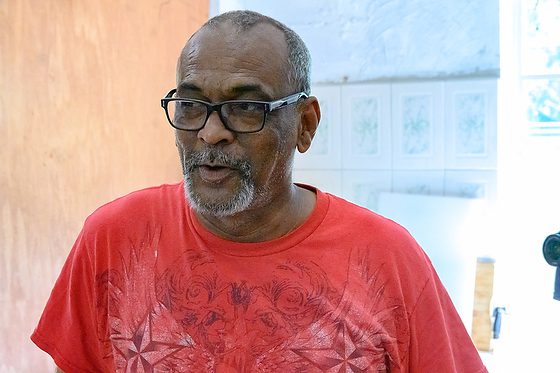
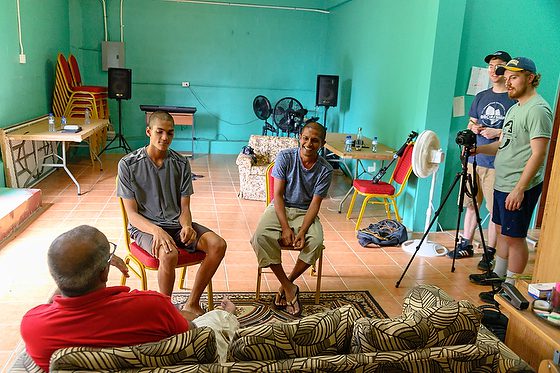
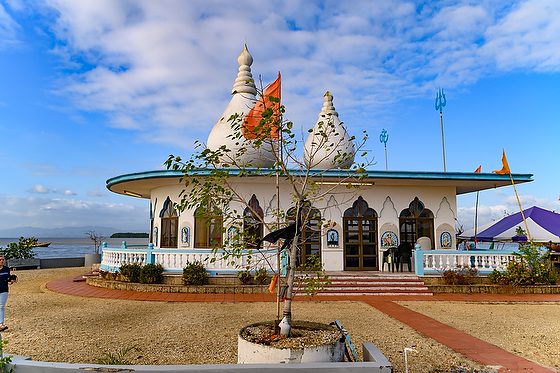
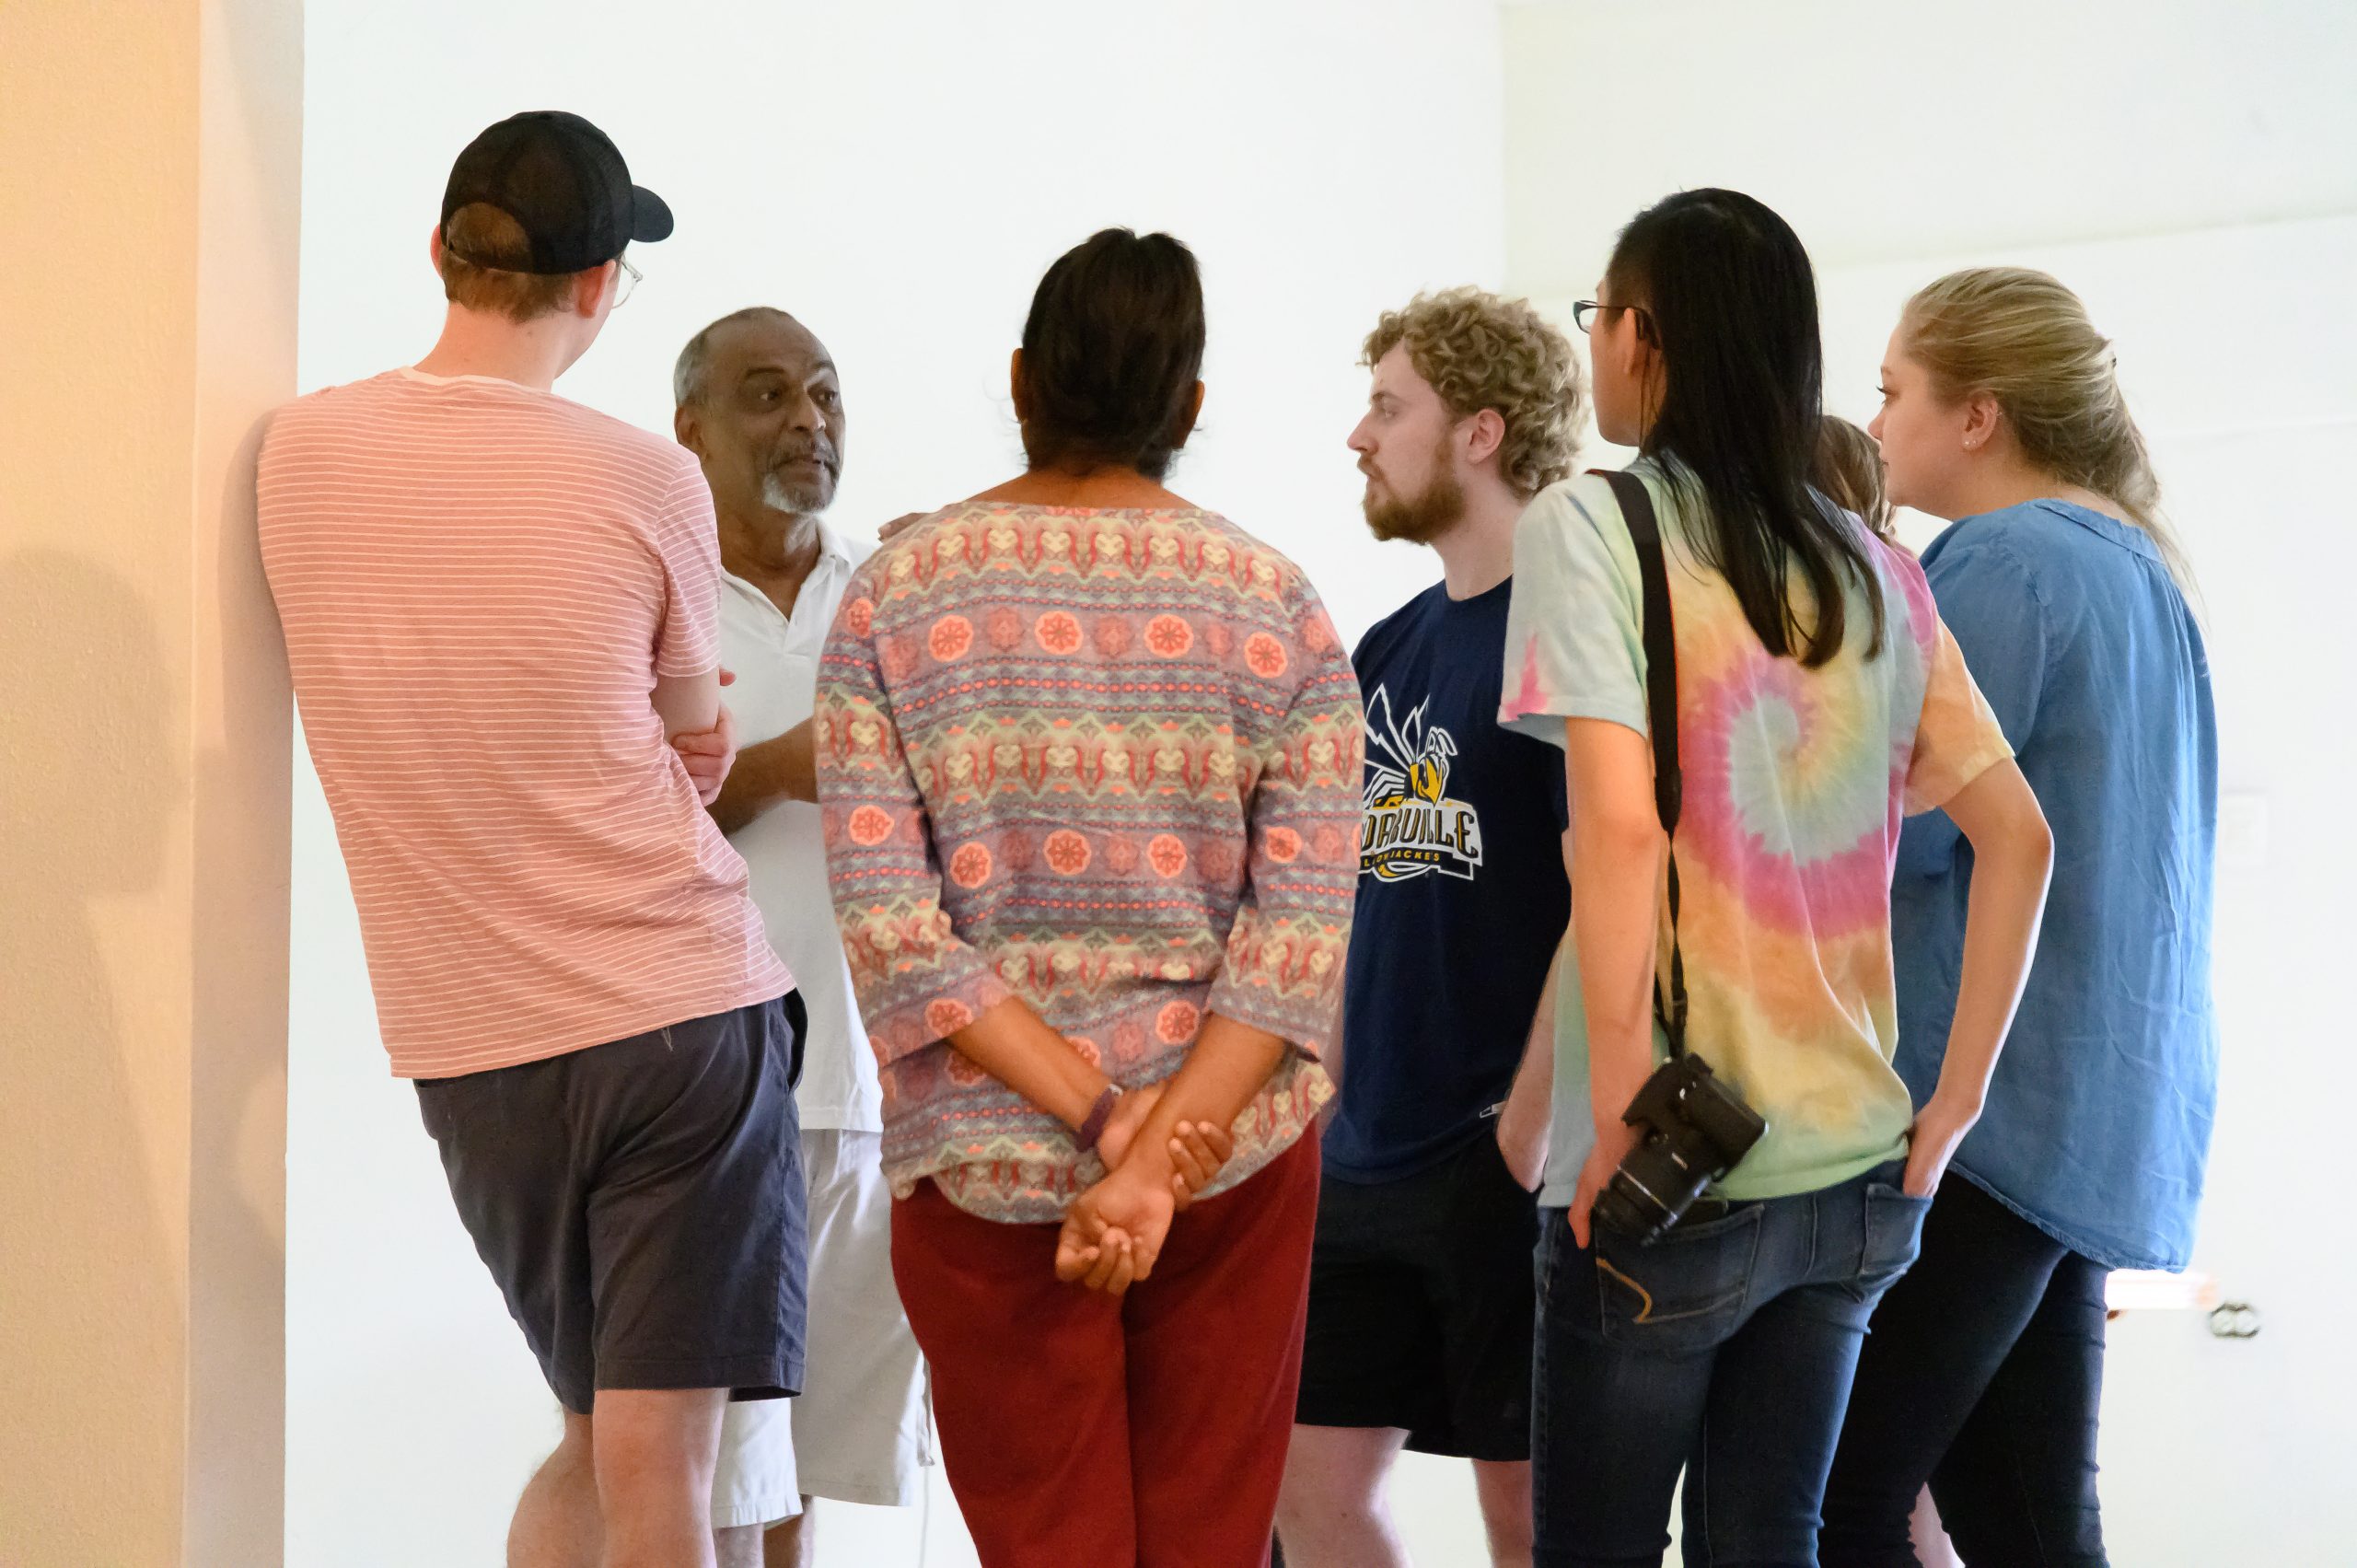
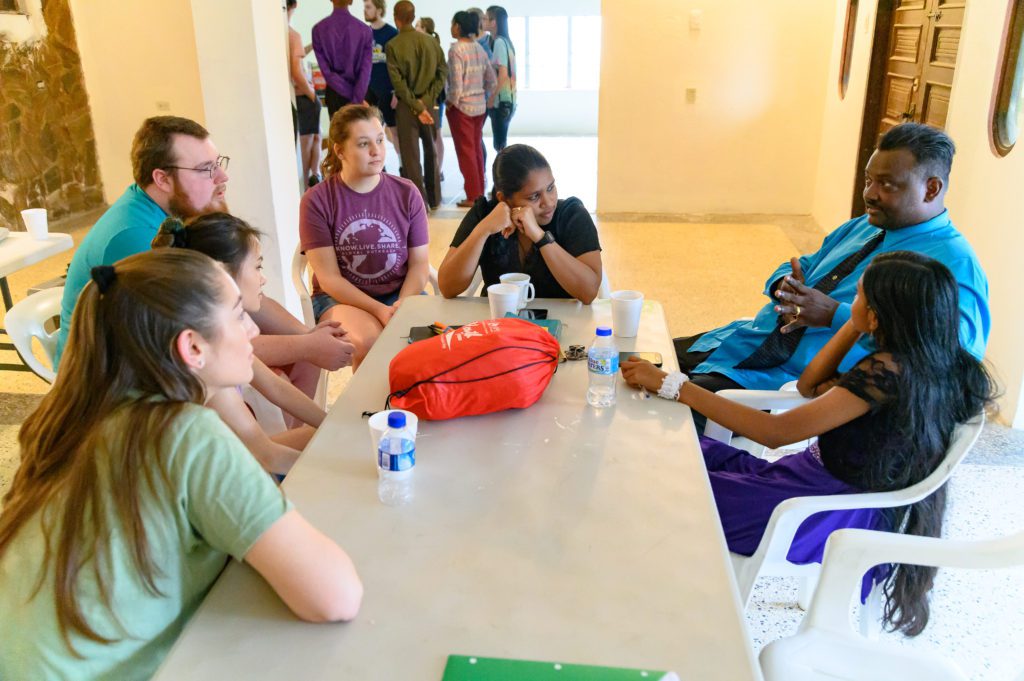
I suggest finding a great place with light, so you don’t have to use lights. I find the open shade on the side of a building works as well as porches, as you see in these two photos of interviews we were doing in Togo, West Africa.
AUDIO IS KING
There are times for different microphones, just as for additional lenses. You need to know the difference between a lapel, camera & shotgun microphone.
SHARPNESS IS QUEEN
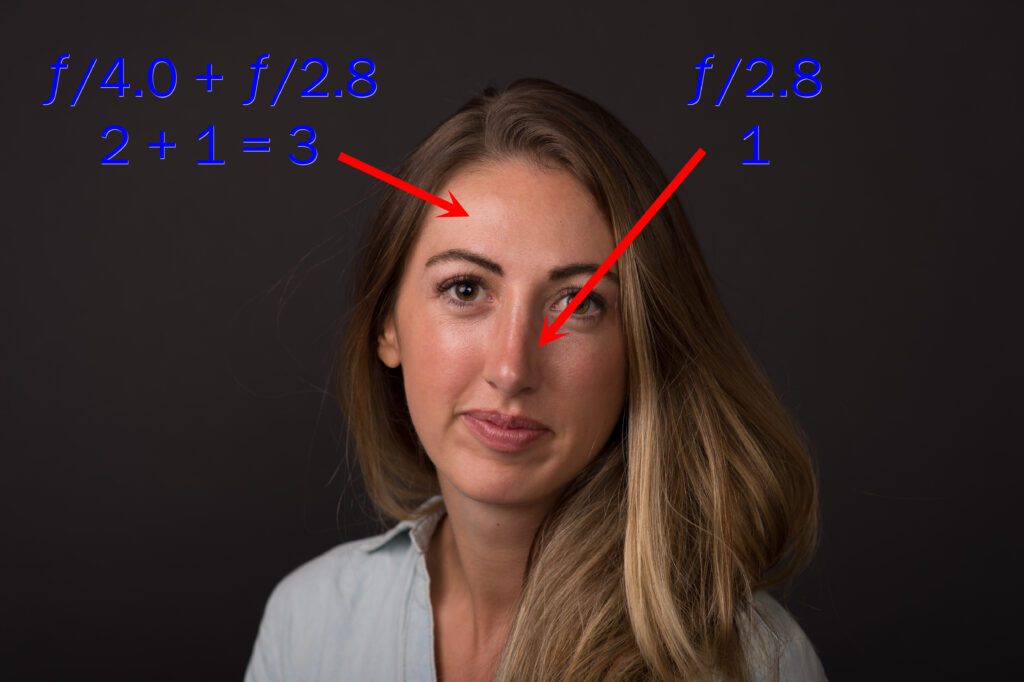
Sharp focus is critical. I advise against shooting ƒ/1.4 for video unless this is your second camera perspective. Have a depth-of-field that is forgiving if the person moves during the interview.
Use manual focus and not Auto-Focus.
LOCK DOWN THE LENS
Don’t zoom in and out on your primary camera. You can do some of this with a second camera, but be sure at least one camera is locked down, and you have a solid framed shot that is in focus and has enough depth-of-field that the person can move a little and still be in the direction.
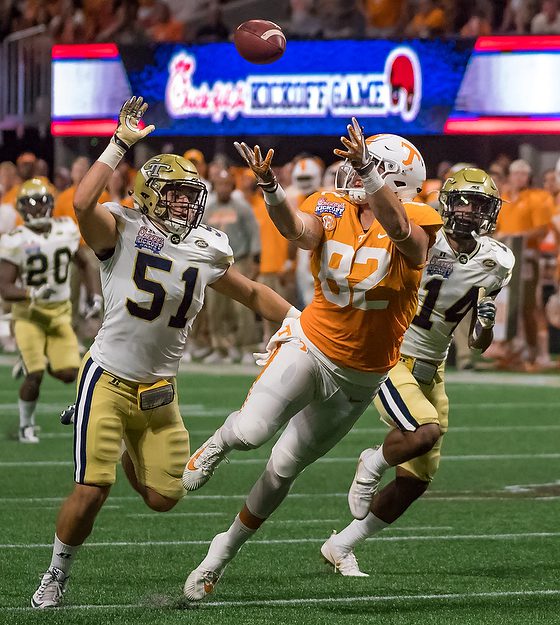
Georgia Tech vs Tennessee
Scoring a touchdown is about knowing where your goals are in the game.
Before the football team steps onto the field, they will practice for many months together. When they execute a play, they know what they are doing and trying to accomplish to win the game.
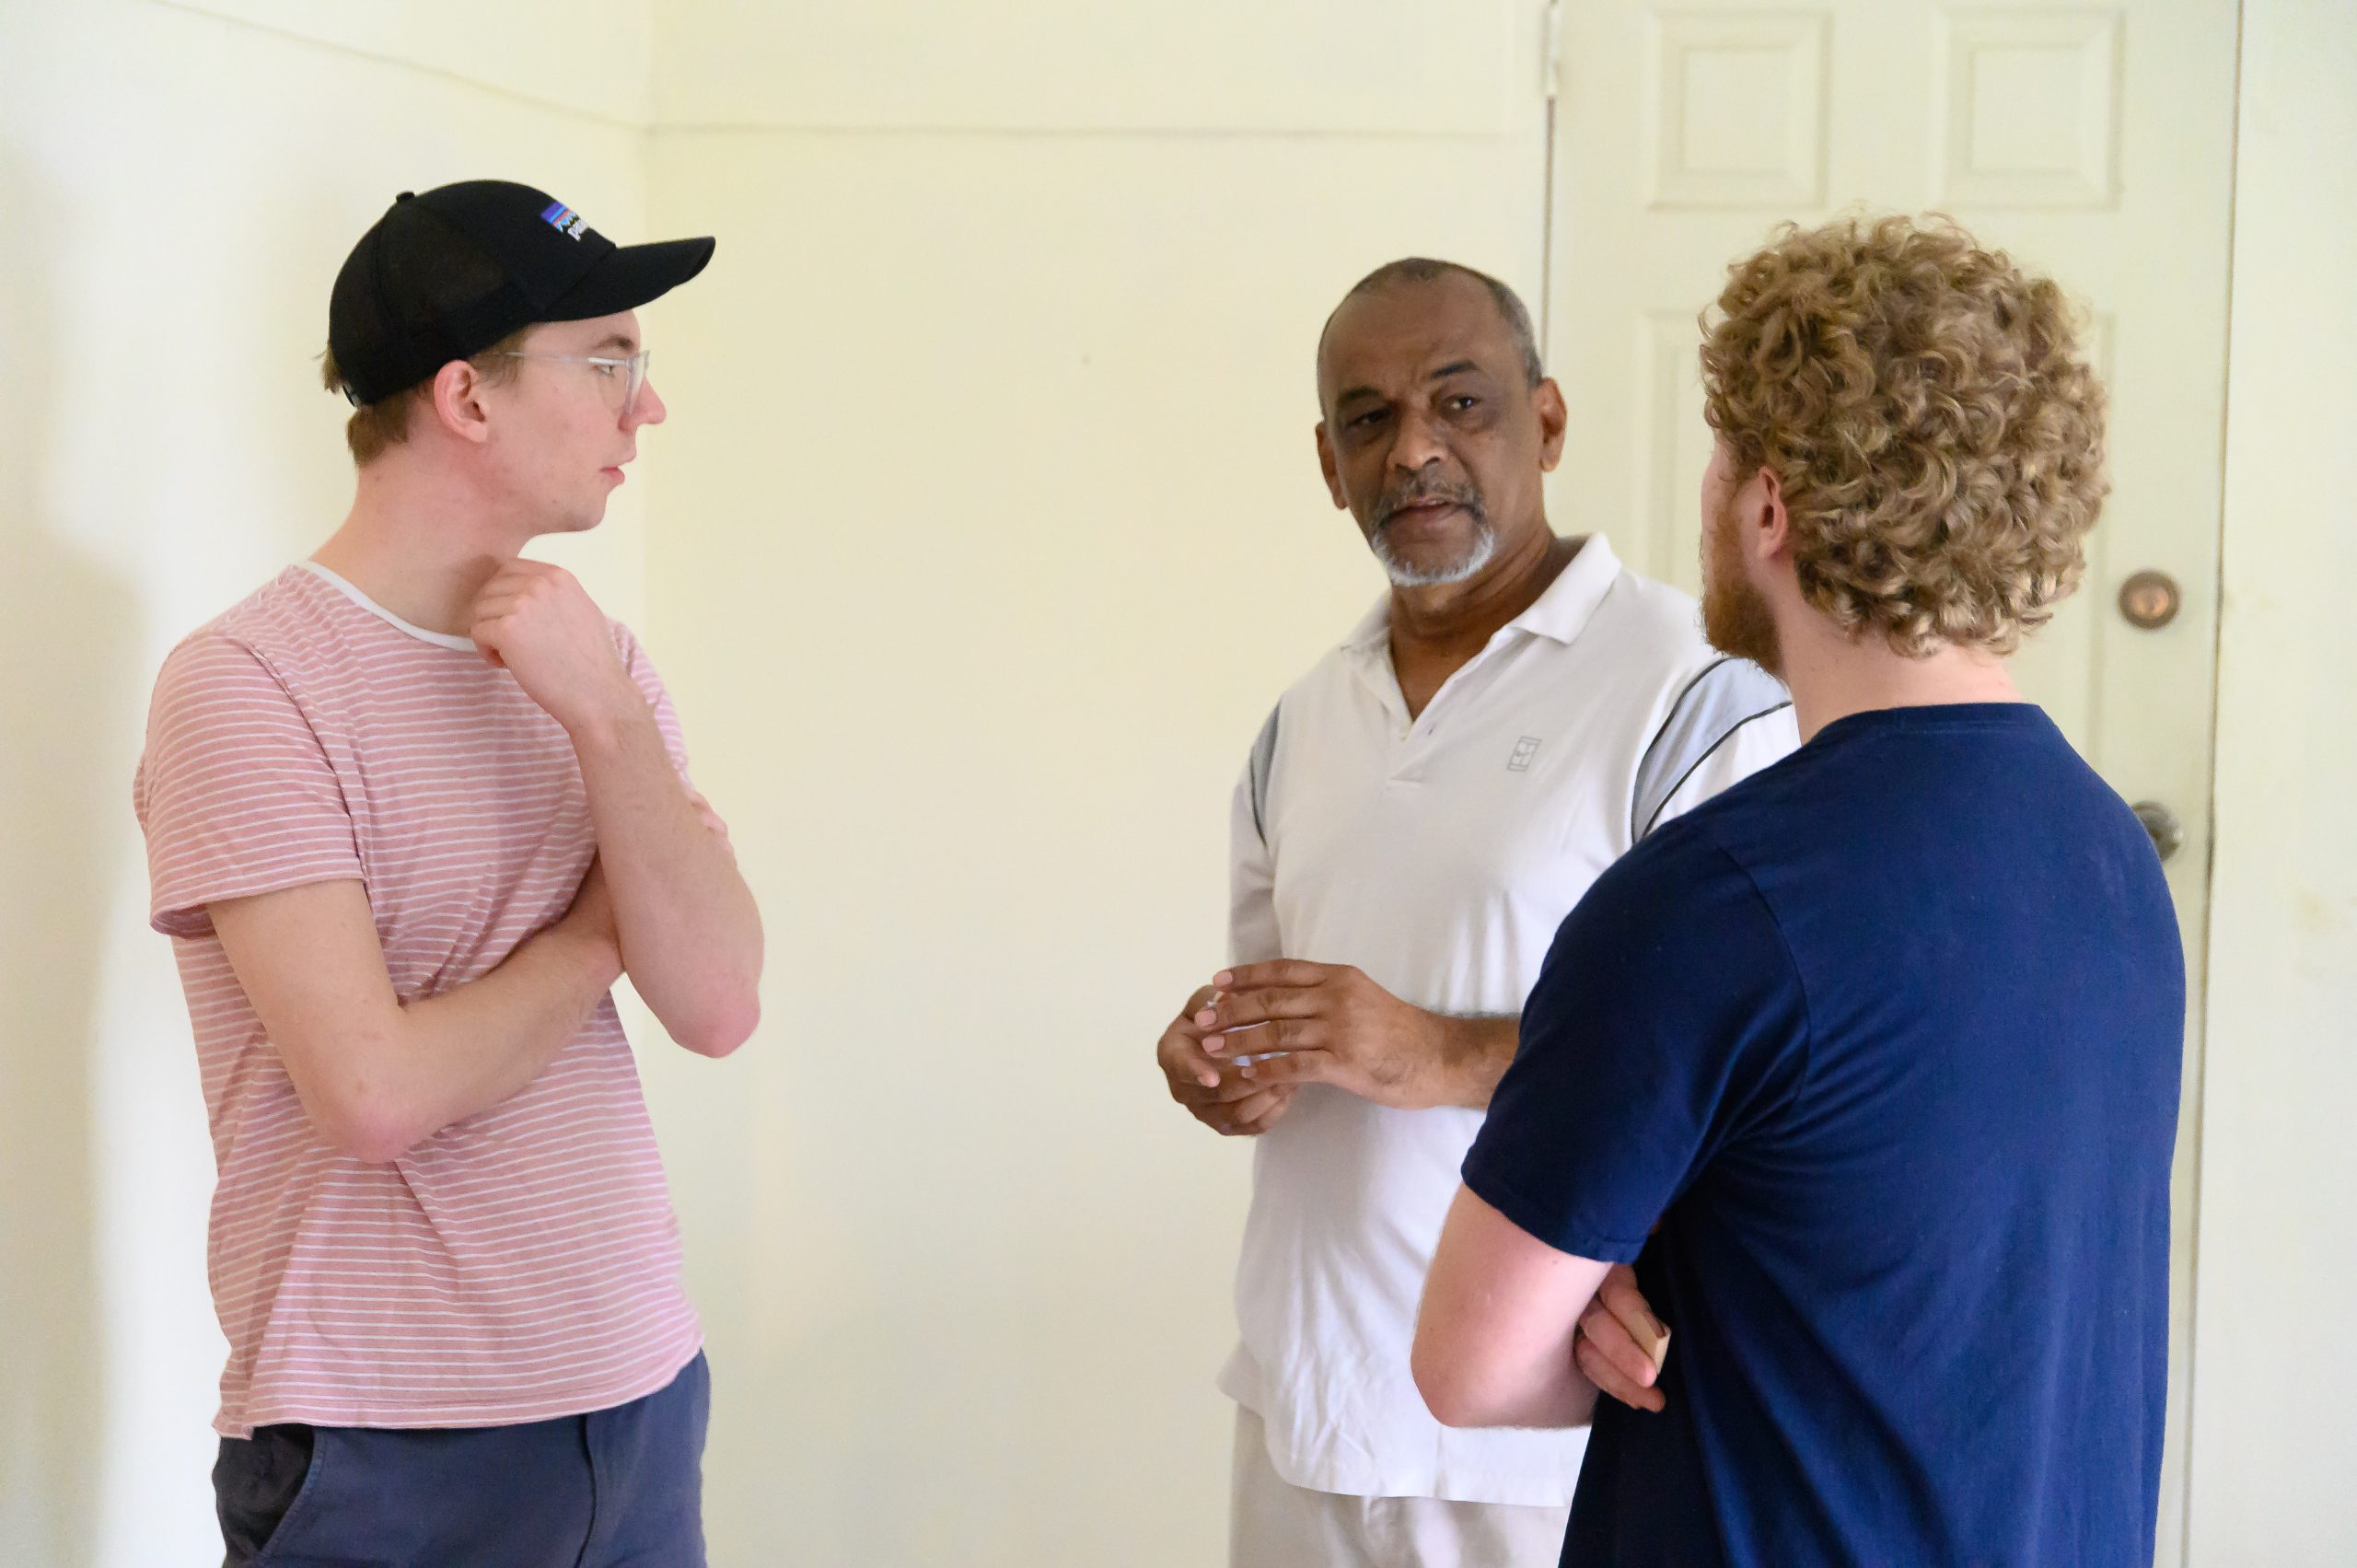
Before you turn the camera on and start your interview, you must practice. You need to interview your subject, and from what you learn, you formulate your questions so that the responses help convince the audience of what you want them to know, just as a lawyer does to convince a jury of what they want them to learn about their client.
You do not want to sit down, turn the camera on, ask the subject, “What is your story?” and expect them to give you a brief, well-thought-out presentation.

GET TO KNOW YOUR SUBJECT
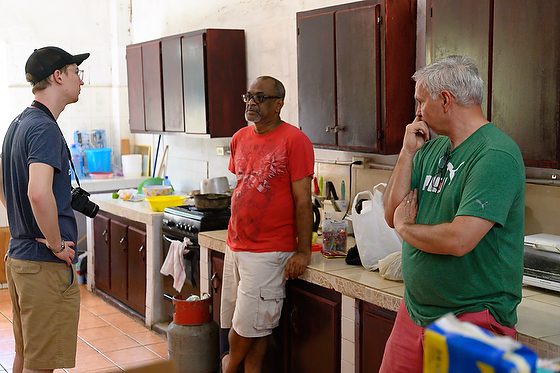
Even before you sit down and talk to the subject for the first time, do all the research you can on the subject. Sometimes there have been other interviews with the person you can read or watch.
Other than learning about the subject being the person, learn all you can about the story’s topic. If they are a coffee farmer, then learn all you can talk about coffee.

The more you know, the better questions you will ask. I like to say you are peeling an onion. Each question gets you closer to the core of the onion.
You are not just asking questions to find out everything about the subject. You are trying to find the thread that will keep someone interested in them as you reveal more and more about them to the audience.
The Bourne films are a series of action spy thriller movies based on the character Jason Bourne, a CIA assassin suffering from extreme memory loss who must figure out who he is.
To keep the audience’s attention and pull them into your story, you may often hold out on the juicy part of the story towards the end as they did in the Jason Bourne movies.
YOUR GOAL
You know you are ready for the on-camera interview when you have your storyline figured out from your informal discussions.
Like a lawyer who calls witnesses and interviews them to reveal in their own words the content that will help build the storyline so that the jury has no choice but to make the right call. Like a lawyer, you may need to put different people on the witness stand to help build your story.

Now it is pretty standard that even when you have done all your homework, in the camera interview, subjects can surprise you with new content that improves or even complicates the story.
Be flexible and be sure you are listening to what they are saying.
Ideally, it would be great if someone could tell you what you need and leave out all those trails that lead nowhere. I have found time and time again that towards the end, I have asked them to summarize what we just talked about, and they often, in one take, say precisely what I need.
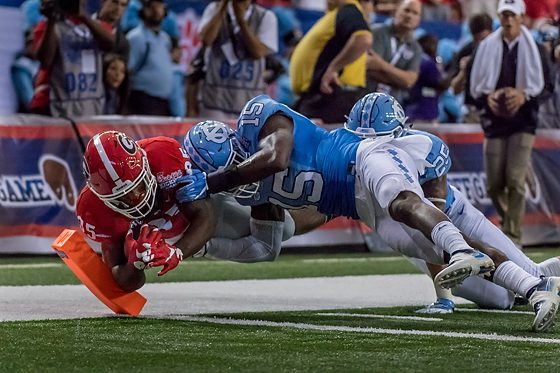
You see it can be just like the football game. The players have practiced so many times that often the coach just calls the play and you get the touchdown.
TWO CAMERAS
When I do my interviews, I always try to use two cameras. There are many benefits like:
- Backup of the interview if one camera fails.
- Different looks using a slightly wide shot and a tight shot
- Helps with editing
Let me talk briefly about how much two cameras can help with editing. Almost all the time, you need to edit someone’s comments. This means you cut something out, and when you do it, the person’s head will jump on the video and give us the telltale sign that you just cut something.
Now, if you have two cameras, you can switch camera angles, and it doesn’t tip the audience that you cut something. It will just look like you went to a different angle.
Now, if you have a slightly wider shot that includes the hands when the person is quite talkative with their hands and not just their mouth, it is good to include them.
Besides cutting out a long comment that doesn’t add to the storyline, there are times you need to rearrange their remarks. Maybe the last thing they said would make the most substantial lead for the story.
Again having that second camera lets you change angles, and it will look like they started with this thought.
In the end, you will help the subject sound more coherent and look like this was just a straight take and more accessible for the audience to absorb.
REASONS TO REDO THE INTERVIEW
The first time you interview someone, tell them you may need to come back the next day or two for a second interview.
Unless you are a seasoned pro, most people will not catch everything happening in real-time and will notice missing information during the post-processing editing time.
If this happens, I highly recommend having the subject redo the parts that you liked for several reasons.
- They often have changed clothes
- Matching the lighting and camera angles is difficult
- Matching the sound can be difficult as well
You may even want to play the video parts you liked and have them rehearse a few times before you redo them. I have found that often the person realizes they can even say it better now that they have heard themselves.
I must tell you this funny story about a seasoned photographer learning to do a video for the first time. He thought of locations he wanted to use as the background for his subject’s interview.
We realized that we failed to tell people to do their interviews in one place while teaching. While in a still photo, that would make sense to show your subject in the different locations, when it came time for editing, the sound didn’t match, the lighting was so different, and when you finished editing the content and put the takes in the logical order of how it best told the story the guy was jumping all over the city back and forth.
It was so funny. Just imagine the evening news where it was the same person instead of going to Washington to listen to the correspondent there and then to the West Coast correspondent or maybe an East Coast correspondent. That was what it looked like.
If you do an excellent job with the interview and have a well-thought-out storyline told by the subjects, you should be pleased with the results. If this is all the audience saw and heard, it will work.
One strategy for editing almost any type of production is to do a “radio” edit. Focusing your cuts and the assembly of your timeline on the dialog [AUDIO] places the story’s content as the highest priority.
Once you have this done, you will work on getting visuals to supplement the audio—more on that in the next part of Shooting Video with your DSLR.
SOME MORE TECHNICAL TIPS
I recommend a magnifier for your LCD. It would help if you were sure your shot was in focus.
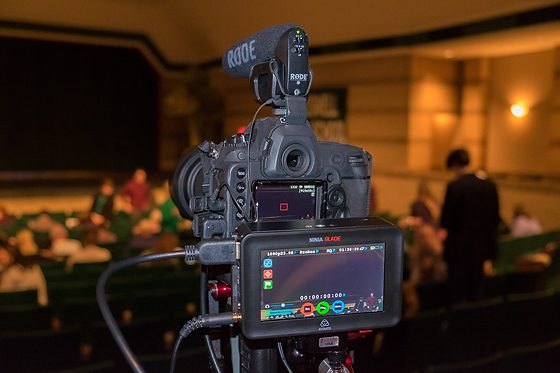
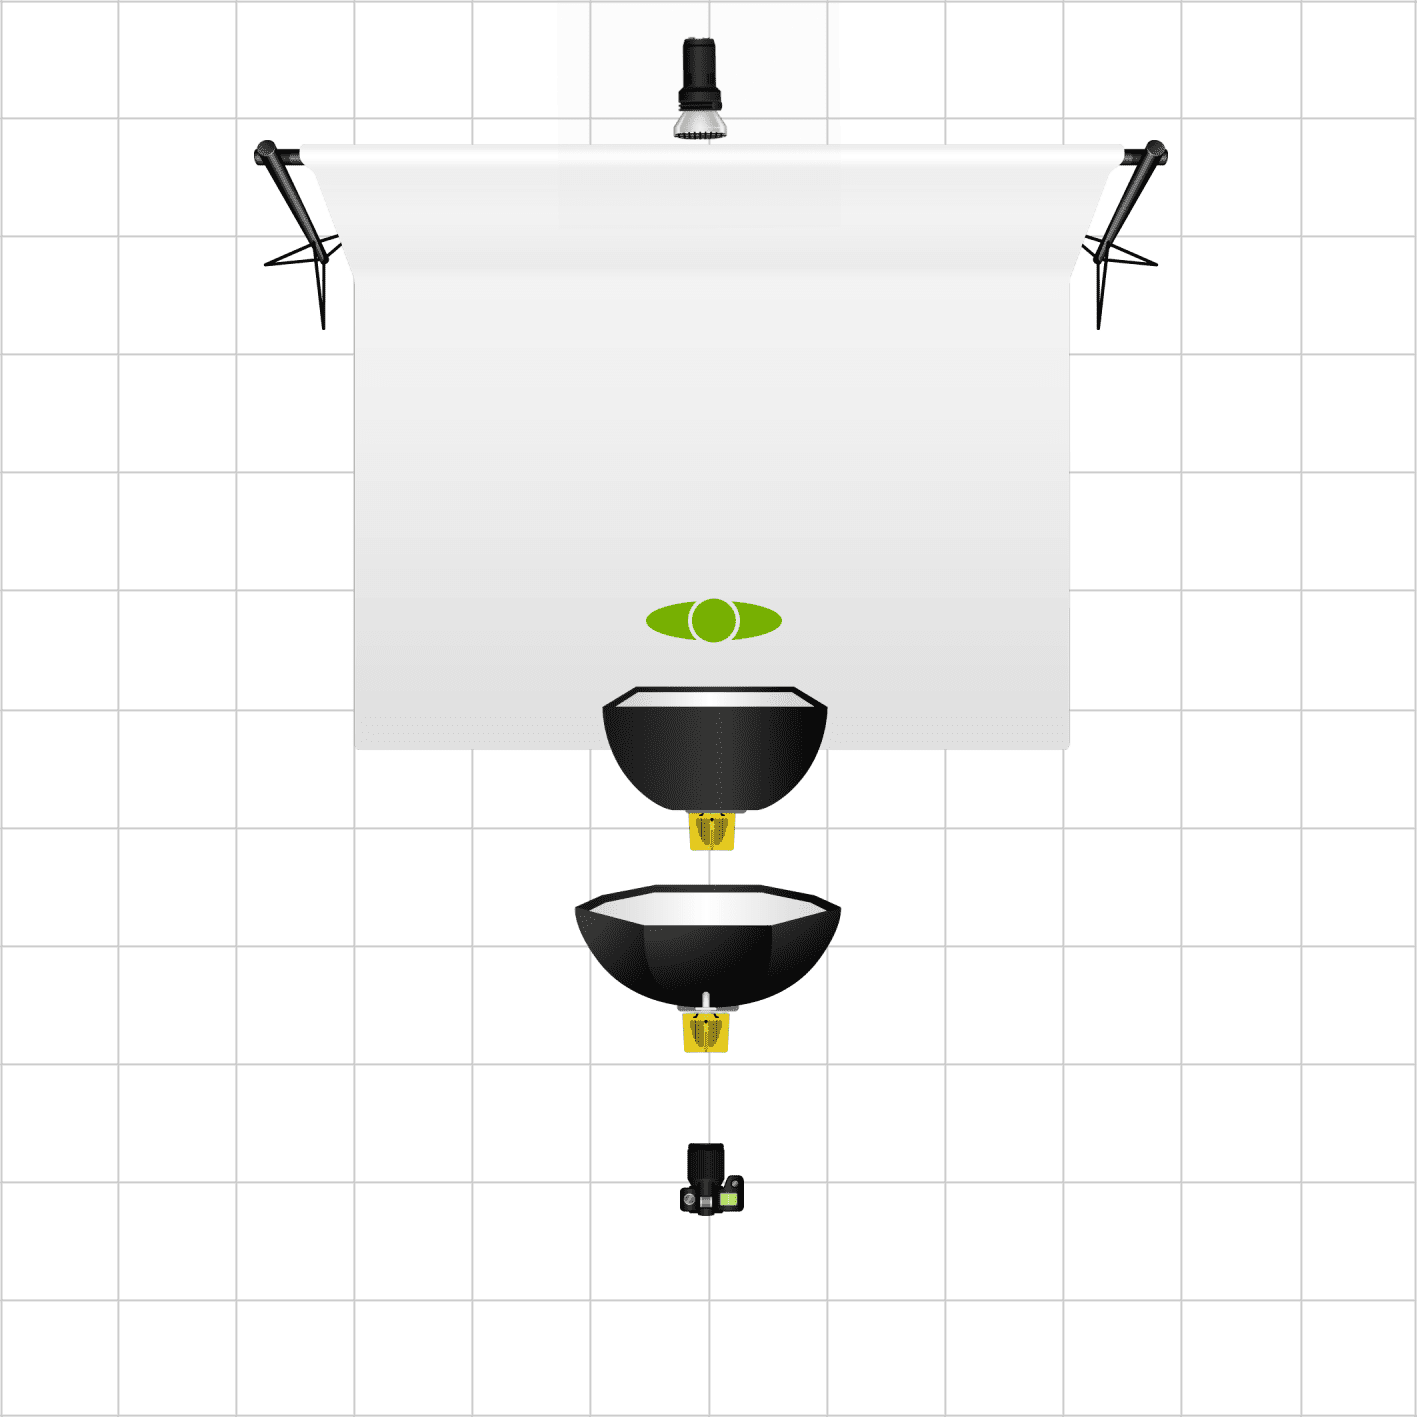
Another option is using a video monitor. The advantage of an external monitor is not just a bigger picture for focusing and exposure control, but with some monitors like this Atomos Ninja Blade 5″ HDMI On-Camera Monitor & Recorder is recording for more extended periods than the time limits on most DSLR cameras. You are only limited to the size of the hard drive you use.
Atomos Ninja Blade 5″ PRODUCT HIGHLIGHTS
Key Features
– 325DPI, 5″ IPS 1280 x 720 capacitive touchscreen monitor/recorder.
– Waveform RGB & luma parade, vectorscope with zoom, and test pattern generator.
– Adjustable gamma, contrast and brightness.
– HDMI input and output.
– Real-time monitoring, playback, playout to a PC or Mac with QuickTime, and edit logging.
– Focus peaking, 0-100% zebra, and two modes of false color monitoring.
– Records 10-bit, 4:2:2 in ProRes or DNxHD.
– S-Log / C-Log recording.
– Trigger REC/STOP from camera (Canon, Sony, ARRI, Panasonic, RED, JVC)
– Timecode from camera. [Nikon has no timecode]
– 2.5″ HDD/SSD media storage.
It records up to 1080 30p/60i resolution via HDMI to an available HDD or SSD using either Apple’s ProRes or Avid’s DNxHD codecs. Recording at 10-bit with 4:2:2 color sampling, this unit provides a monitoring and recording solution in one compact battery-powered unit.
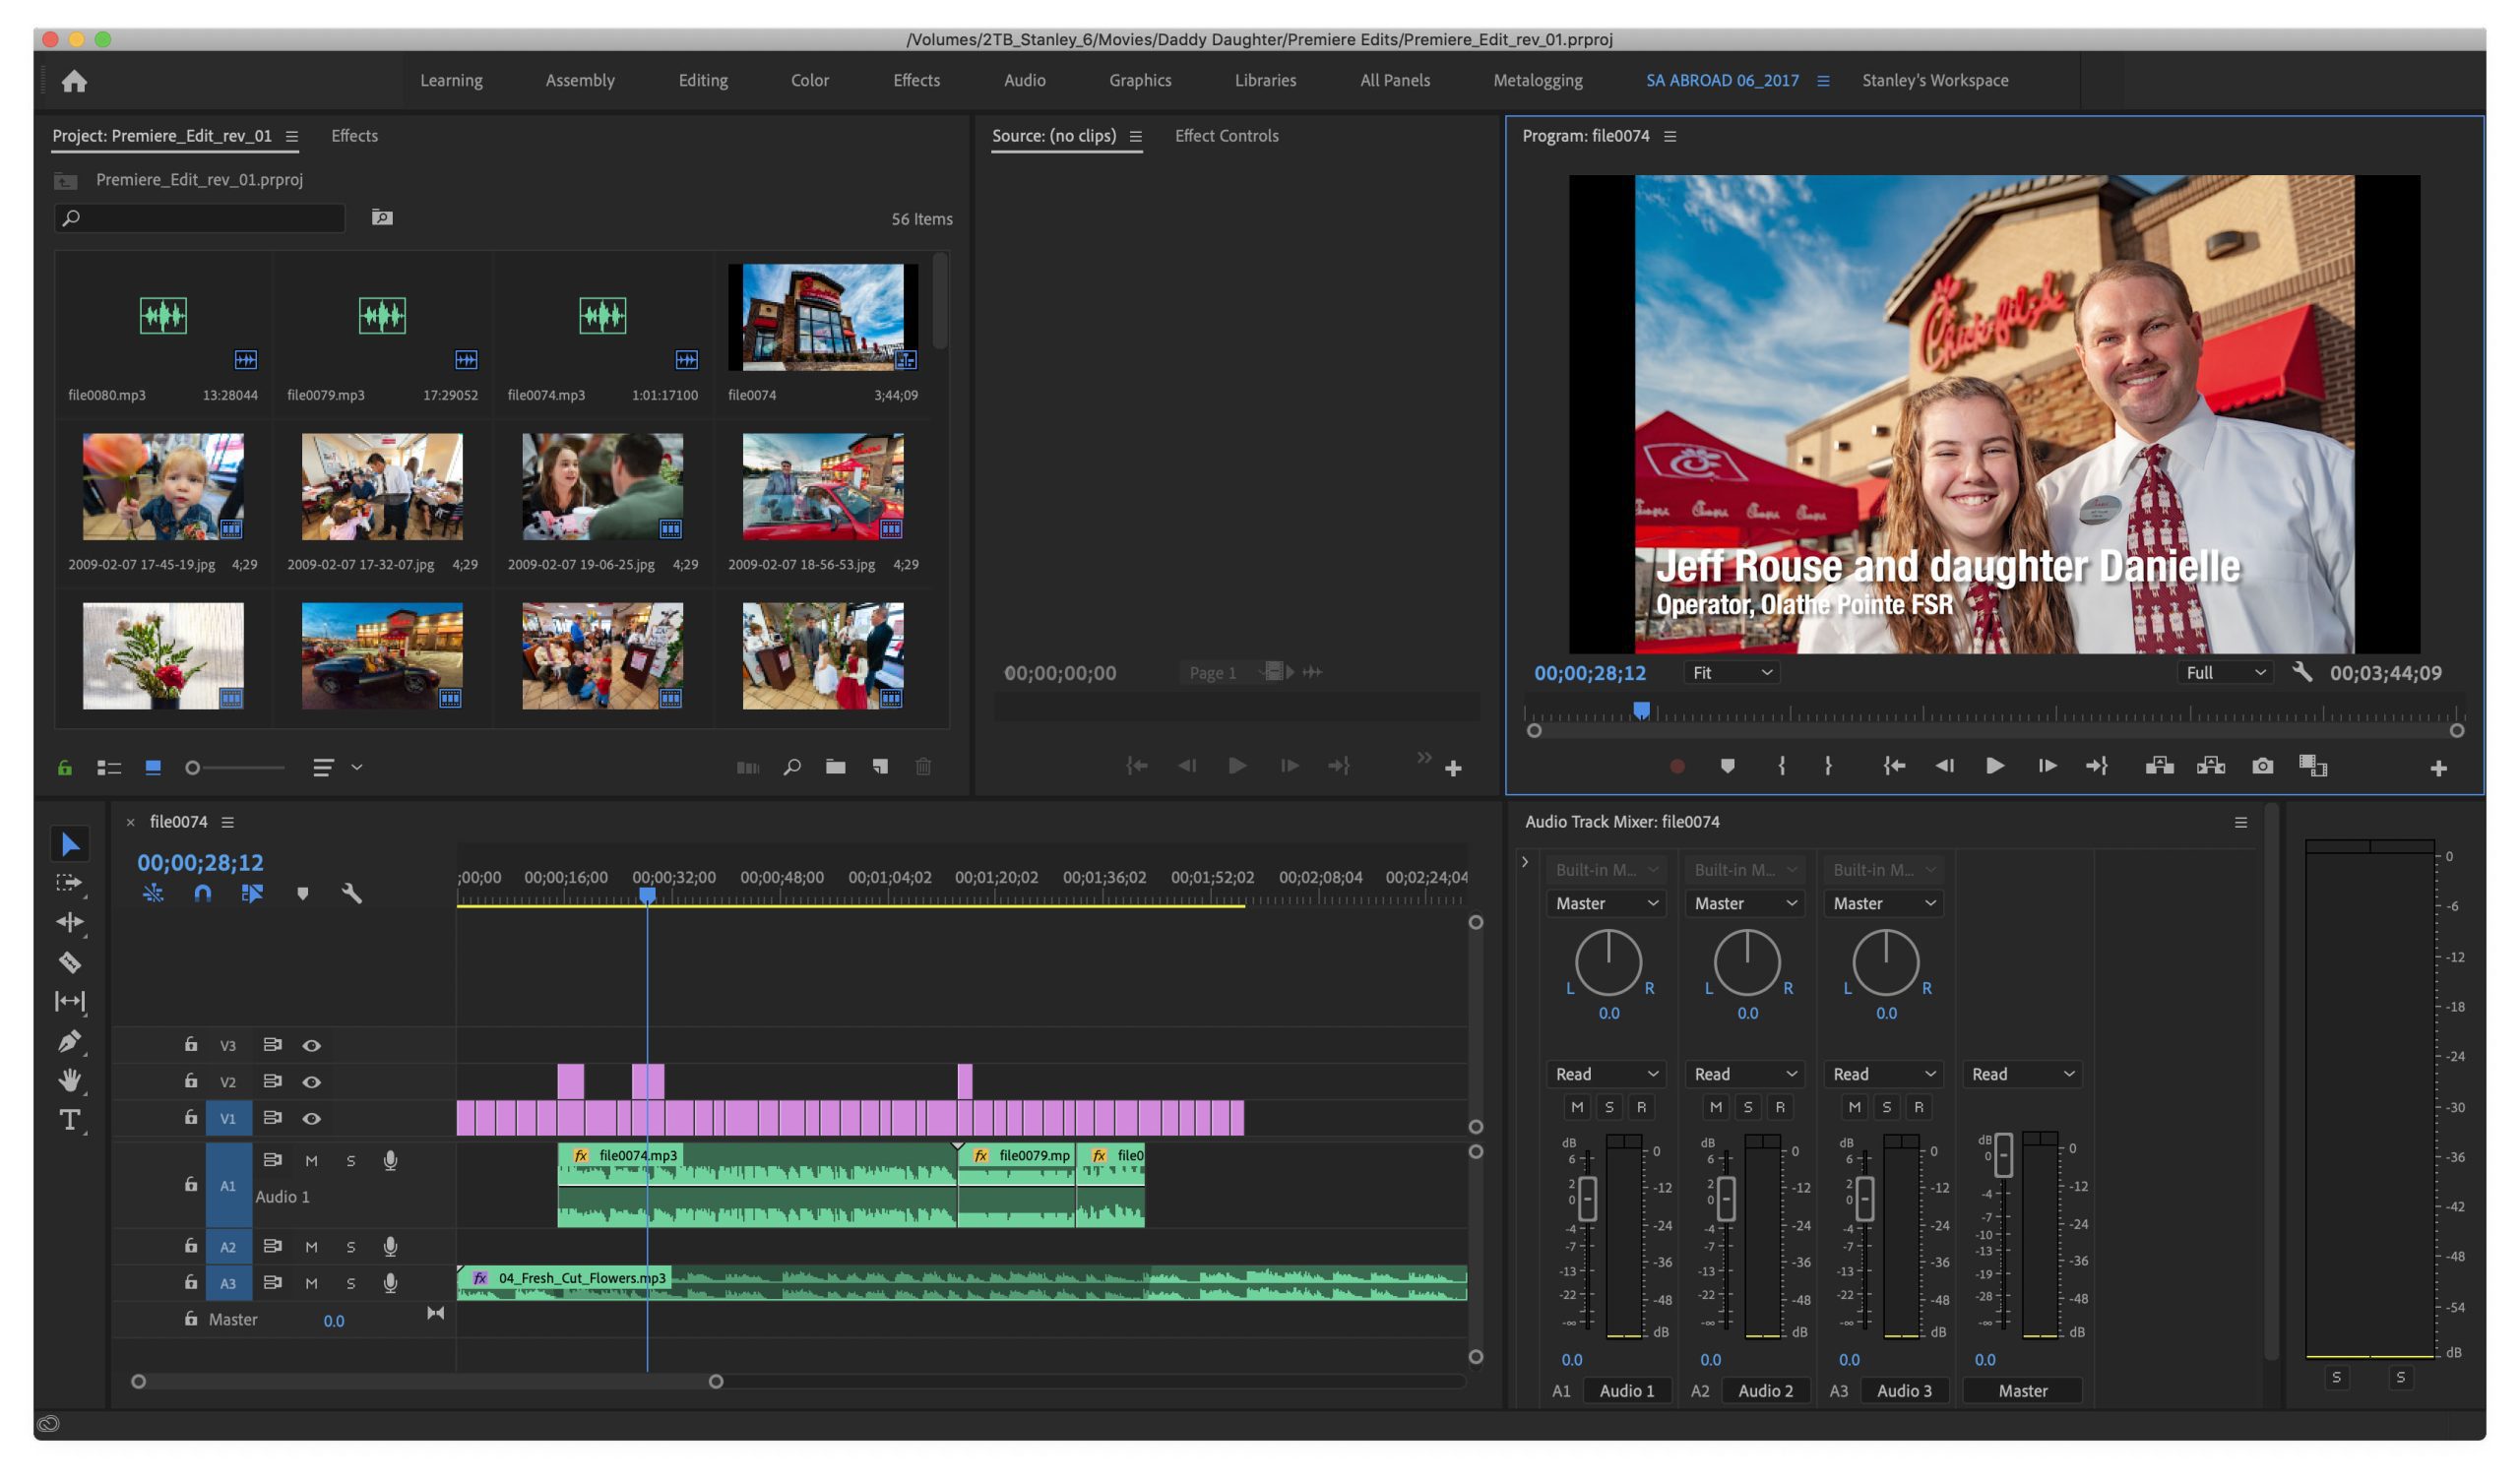
ADOBE PREMIERE PRO CC TIPS
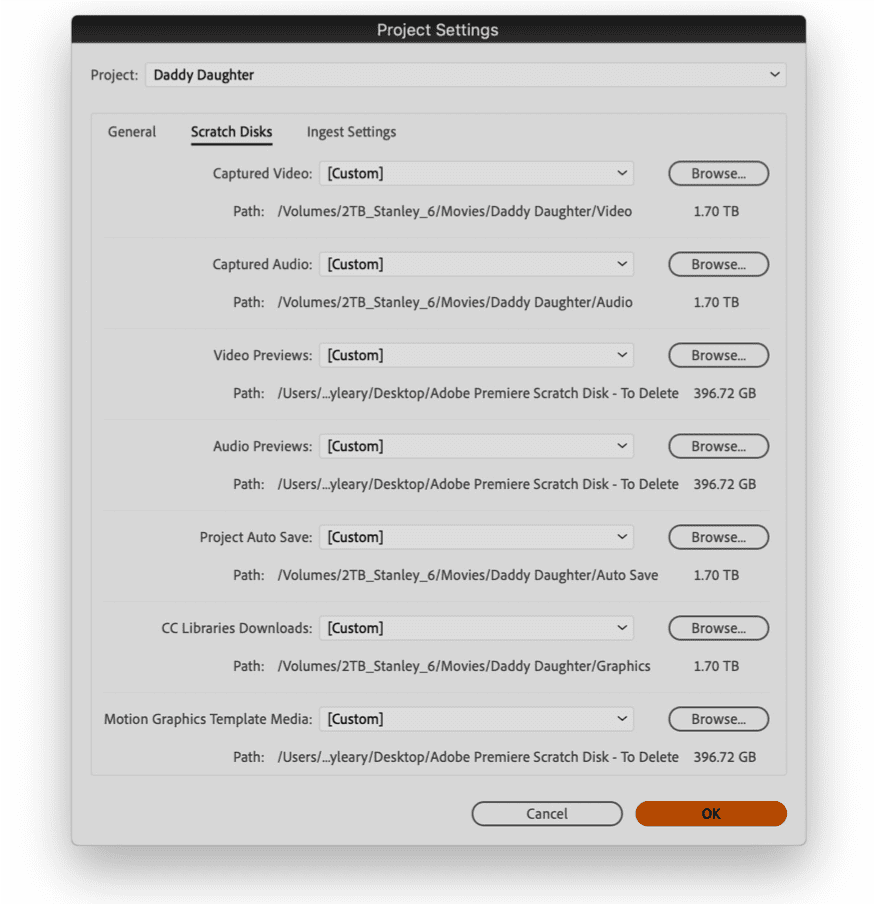
Before opening Premiere, create these folders inside one folder on your computer or external hard drive.
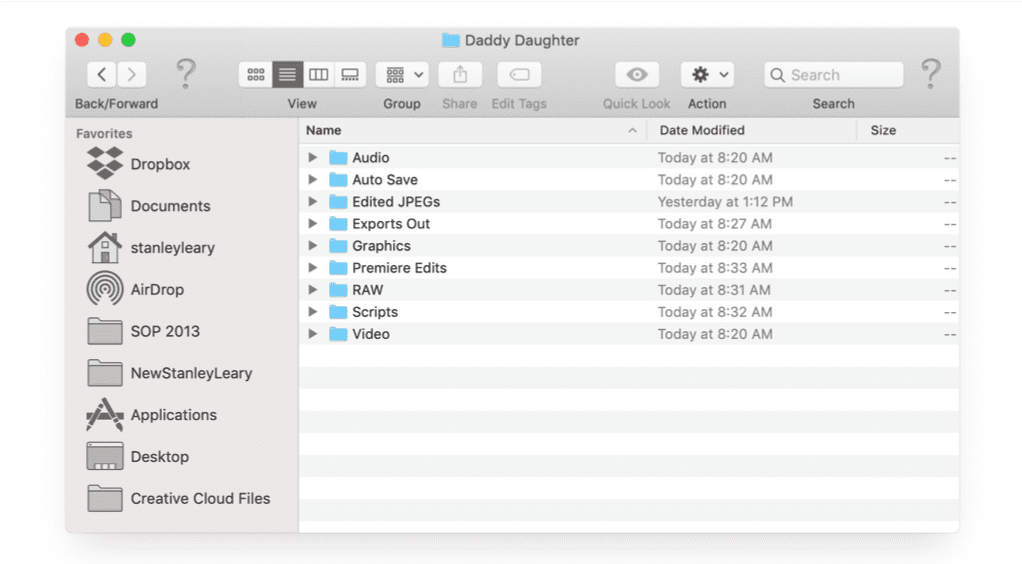
Open Premier and choose NEW PROJECT
1. Name your project: PREMIERE_EDIT_rev_01 putting it in the folder you created called “Premiere Edits.”
2. Scratch Disks tab – Using the 6 Browse… buttons, point each of the six sources to the Project Folders you created using a screenshot on the next slide
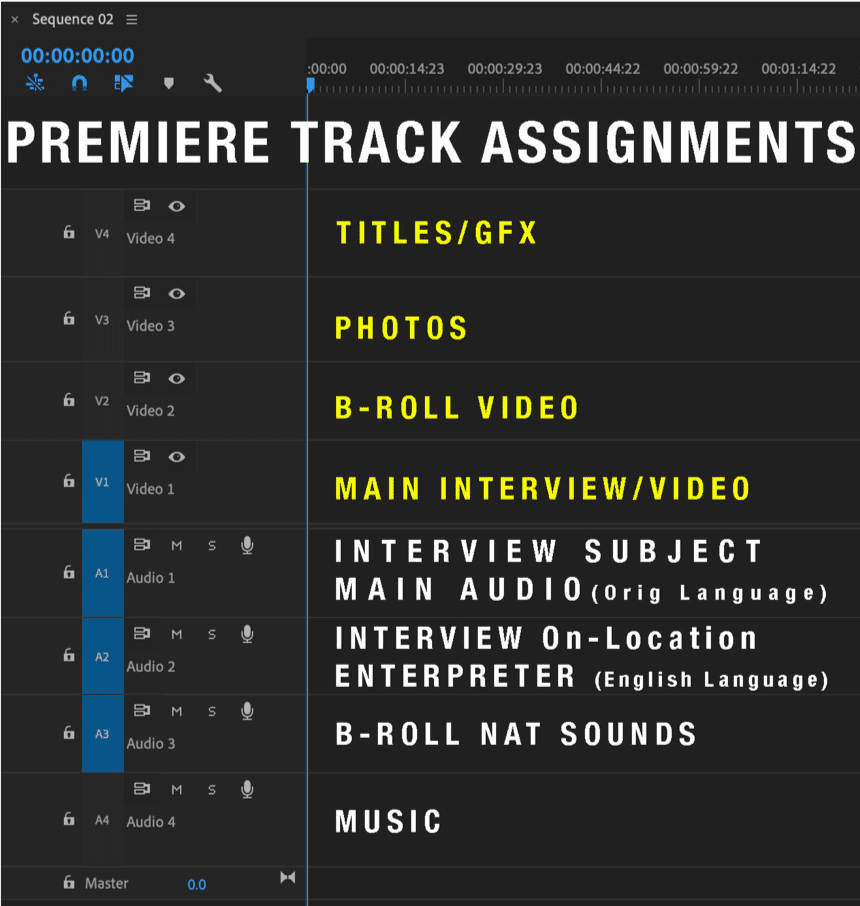
These are suggestions for what to put on each track. Storytellers Abroad use this as our format to make it easier when a coach sits with a person working on the story. We are all using a similar setup. Helps cut down on confusion.
These are the export settings we use as well.
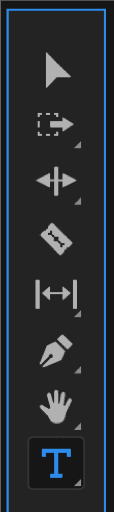

To add text to a project, click on the Type tool in blue to the left.
Then click on the picture in the Program Window on the video and start typing.
You can drag the type to where you want and if you want to make modifications to the class, go to the top menu bar to Windows>Essential Graphics.
This is how you gain access to change your Font, Size, Color, and things like drop shadow and more.

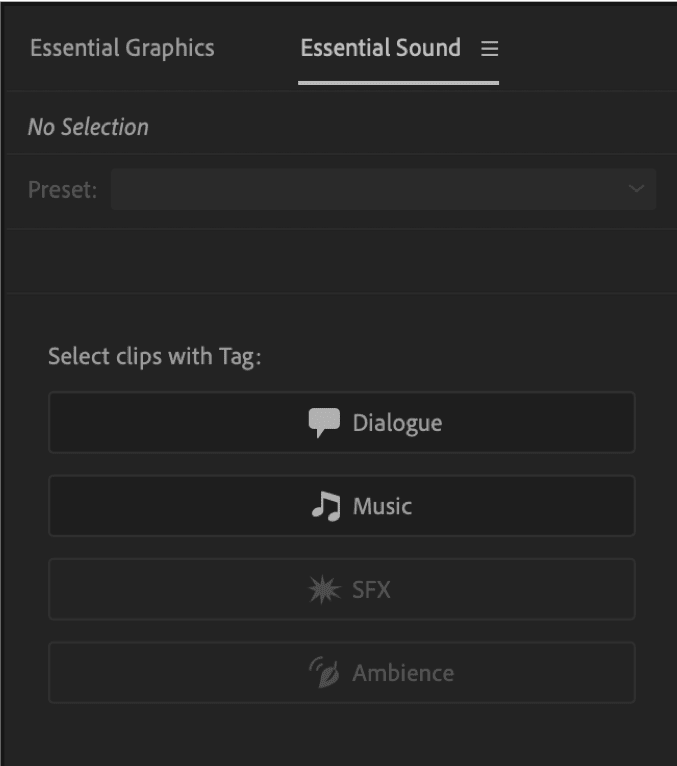
Select all the interview Audio only. Then go to the Essential Sound and click on Dialogue. This will tell the software that this is the Dialogue, not ambient sound or music. This will now be the most important sound in the video.
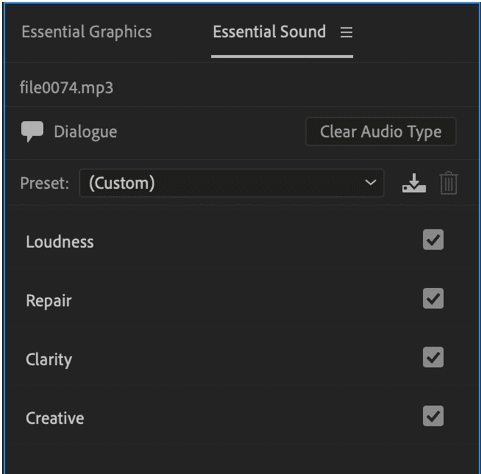
There are now four selections within the Essential Sound for the Audio Interview, which the software is now called Dialogue.
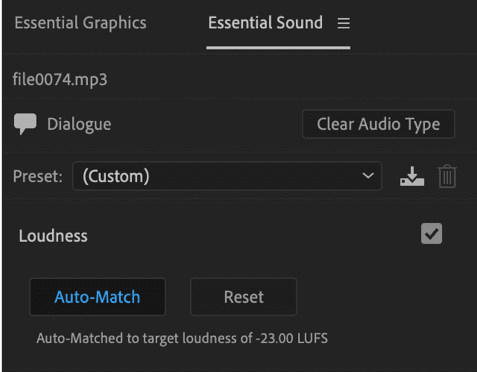
When you click on the word Loudness, Repair, Clarity, or Creative, it opens up more controls.
Click on Loudness and then click on Auto-Match. It will set all the volumes for the interview to the standards.
Listen to the interview now. If you have problems with noise, air conditioner hum, or something else, then click on “Repair” and try each option here one at a time. Go with the default at first and then stop if that is good for repair. If not, use the slider to see if less or more can help. If either work, then you can stop again. If not, unclick that option and try the next.
Often you have to play with all of these in some combination to clean up the sound. There are ways to do more, but this usually fixes the most common issues.

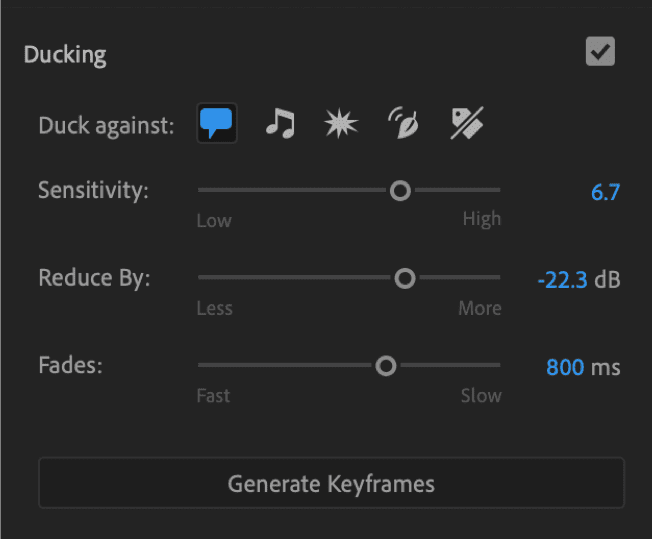
Now pick the music or ambient sound and click on either music or ambient sound. When you do, you can then select “Ducking.”
When you click on it, be sure you have the Dialogue icon highlighted. This will say to the software this is the most critical sound, which is your interview.
Click on Generate Keyframes.
Then play the sequence. How does that sound? Does the music or ambient sound not overpower the interview? Is it OK or too loud or soft?
Play with the Sensitivity, Reduce By & Fades to tweak this to your preference. Then click on Generate Keyframes. Do this over and over until satisfied.
Some great tips I have found through the years.
Keyboard Short Cuts
Keyboard Shortcuts Used: (Cmd for all Ctrl on Mac)
Arrow Keys – Navigate Timeline One Frame at a Time
Shift + Arrow Keys – Navigate Timeline 5 Frames at a Time
Up, Down Arrow – Jump to beginning and end of clip
Ctrl+K – Cut at current playhead
D – Select clip at current playhead
Del – Delete Selected Clip
Shift + Del – Delete Selected Clip, and Bring Forward Clips back
I,O – Set in and Out Points Respectively
; – Delete Selection With In and Out Points
‘ – Delete Selection With In and Out Points, and Bring forward Clips Back
Shift + T – Go in to Edit “Edit Point” Mode
Edit Mode + Ctrl + Arrow Key – Move the edit point backwards or forwards
Ctrl + R – Speed and Duration on Selected Clip
G – Audio Gain on Selected Clip
J,K,L – Shuttle through timeline Backwards, Stop, and Forwards Respectively
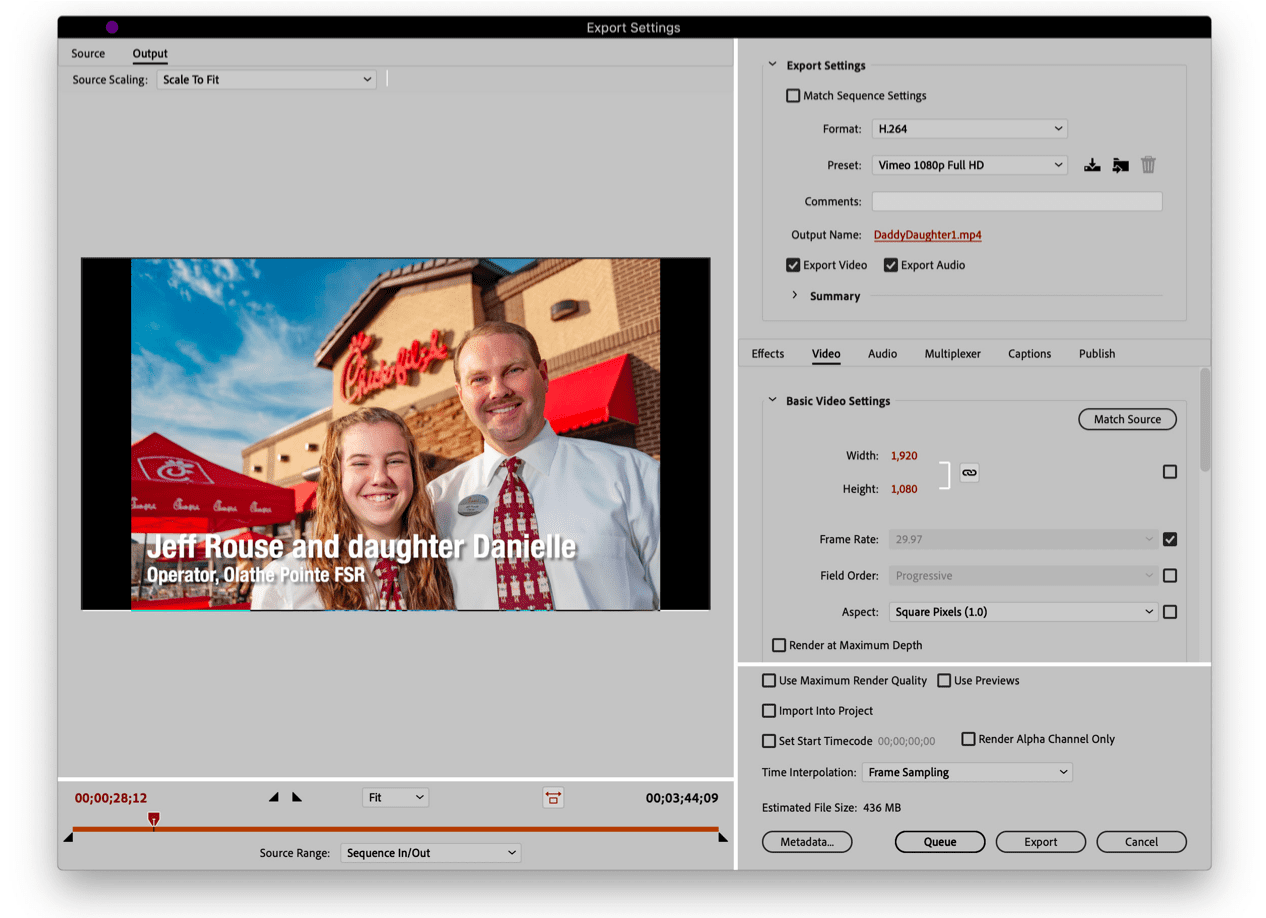
Be sure the Sequence has a blue line around the box. The go-to File>Export>Media
The above picture will show up but with Black Background. Copy these fields:
- Format: H.264
- Preset: Vimeo 1080p Full HD
Double Click on Output name. Put in the Export Out folder you created with Your Name.
Click on Export at the bottom.
How to Create Captions and Subtitles in Adobe Premiere Pro CC (2018)
- Create a new caption by going up to file->new->caption.
- Choose whether you want closed captions, CEA-608/CEA-708/Teletext, or open captions.
- Click on the program monitor captions and drag them to the sequence.
- Drag caption over to sequence
- To edit, open up a captions panel. If it’s not open, go up to Window->Captions.
- Click on the Captions in the sequence. Go where it says “type caption text here” and enter it.
- Type in some text from the audio of the video.
- You can adjust the font up next to Font.
- You can increase the size from the Size number.
- To remove the background, we will go up to the opacity droplet and reduce the droplet to 0. Make sure the background is selected in the three options to the left.
- To add an edge, you must first go up to the top right and increase the edge.
- You can then come back and click on the edge switch and go to the color square to increase it.
- You can align the caption with the X and Y markers above the text.
- Now we can align the caption with the audio. To do this, go to the timeline where the caption is placed. There will be a black bar with the text near the bottom of this layer. Drag the end to where the audio for that caption ends.
- When your next audio starts, click the plus button and type in your following set caption; drag the caption line to where the audio stops.
- Repeat by clicking the plus sign and adding additional captions to your audio.
There you have it. That is how you create captions and subtitles in Adobe Premiere Pro. Now all you have to do is render your footage, and you will be ready to go!