
|
Getting your Trinity Audio player ready...
|
 |
| Photo by: Maile Powell |
The first assignment I gave the students this week with one light gave us excellent Rembrandt lighting. The downside to this type of lighting is sometimes you need to fill in those shadows.
This week’s second assignment for the students in my photo class is a 3:1 Lighting Ratio.
 |
| Nikon D4, Nikon 85mm ƒ/1.8G, ISO 100, ƒ/5, 1/200 |
Here is the setup

Assignment Description:
3:1 lighting ratio. This photo uses classic lighting.
Items:
Octobox closest to subject
This light is your leading light. Set a light reading with just this first. The light should be 45 degrees off the axis of the camera and 45 degrees above the subject’s eyes.
Subject
Your subject should have the main light lighting only part of the face, and the shadows should be just a little to show the 3:1 ratio.
(D)SLR
Choose the lowest ISO. Ideally, on a full-frame camera, a lens is close to 85mm, and on the cropped sensor, it a 50mm. S t your shutter speed to the sync speed for your camera [in your camera manual] or slower. M camera was 1/250, but I shot at a slower speed of 1/200.
Octobox behind the camera
The second light is your fill light and get just a reading of this 2nd. B sure it is 1/2 the power (1 f/stop less) than the leading light. After this is done, get a 3rd light reading of both lights, which will be the setting for the camera. It can be level with the eyes, but you may have to move up with glasses to avoid glare.
First, set the leading light, and here is what that will look like:

Due to using such a large softbox, the shadows are not as severe as in our first assignment using the grid light. So e of the light is bouncing off a white wall a few feet to the model’s left or right of the camera position.
Turning the leading light off after finding out your setting, you need to take a reading and get the fill light to 1 stop less than the main light. For example, the main light was ƒ/4, so the fill light should read ƒ/2.8.
The photo below is what it looks like without the main light on. You can see a little darker, but no actual shaping of the face as the main light is 45º to the side.

When you combine them, you get the first photo of the model we started.

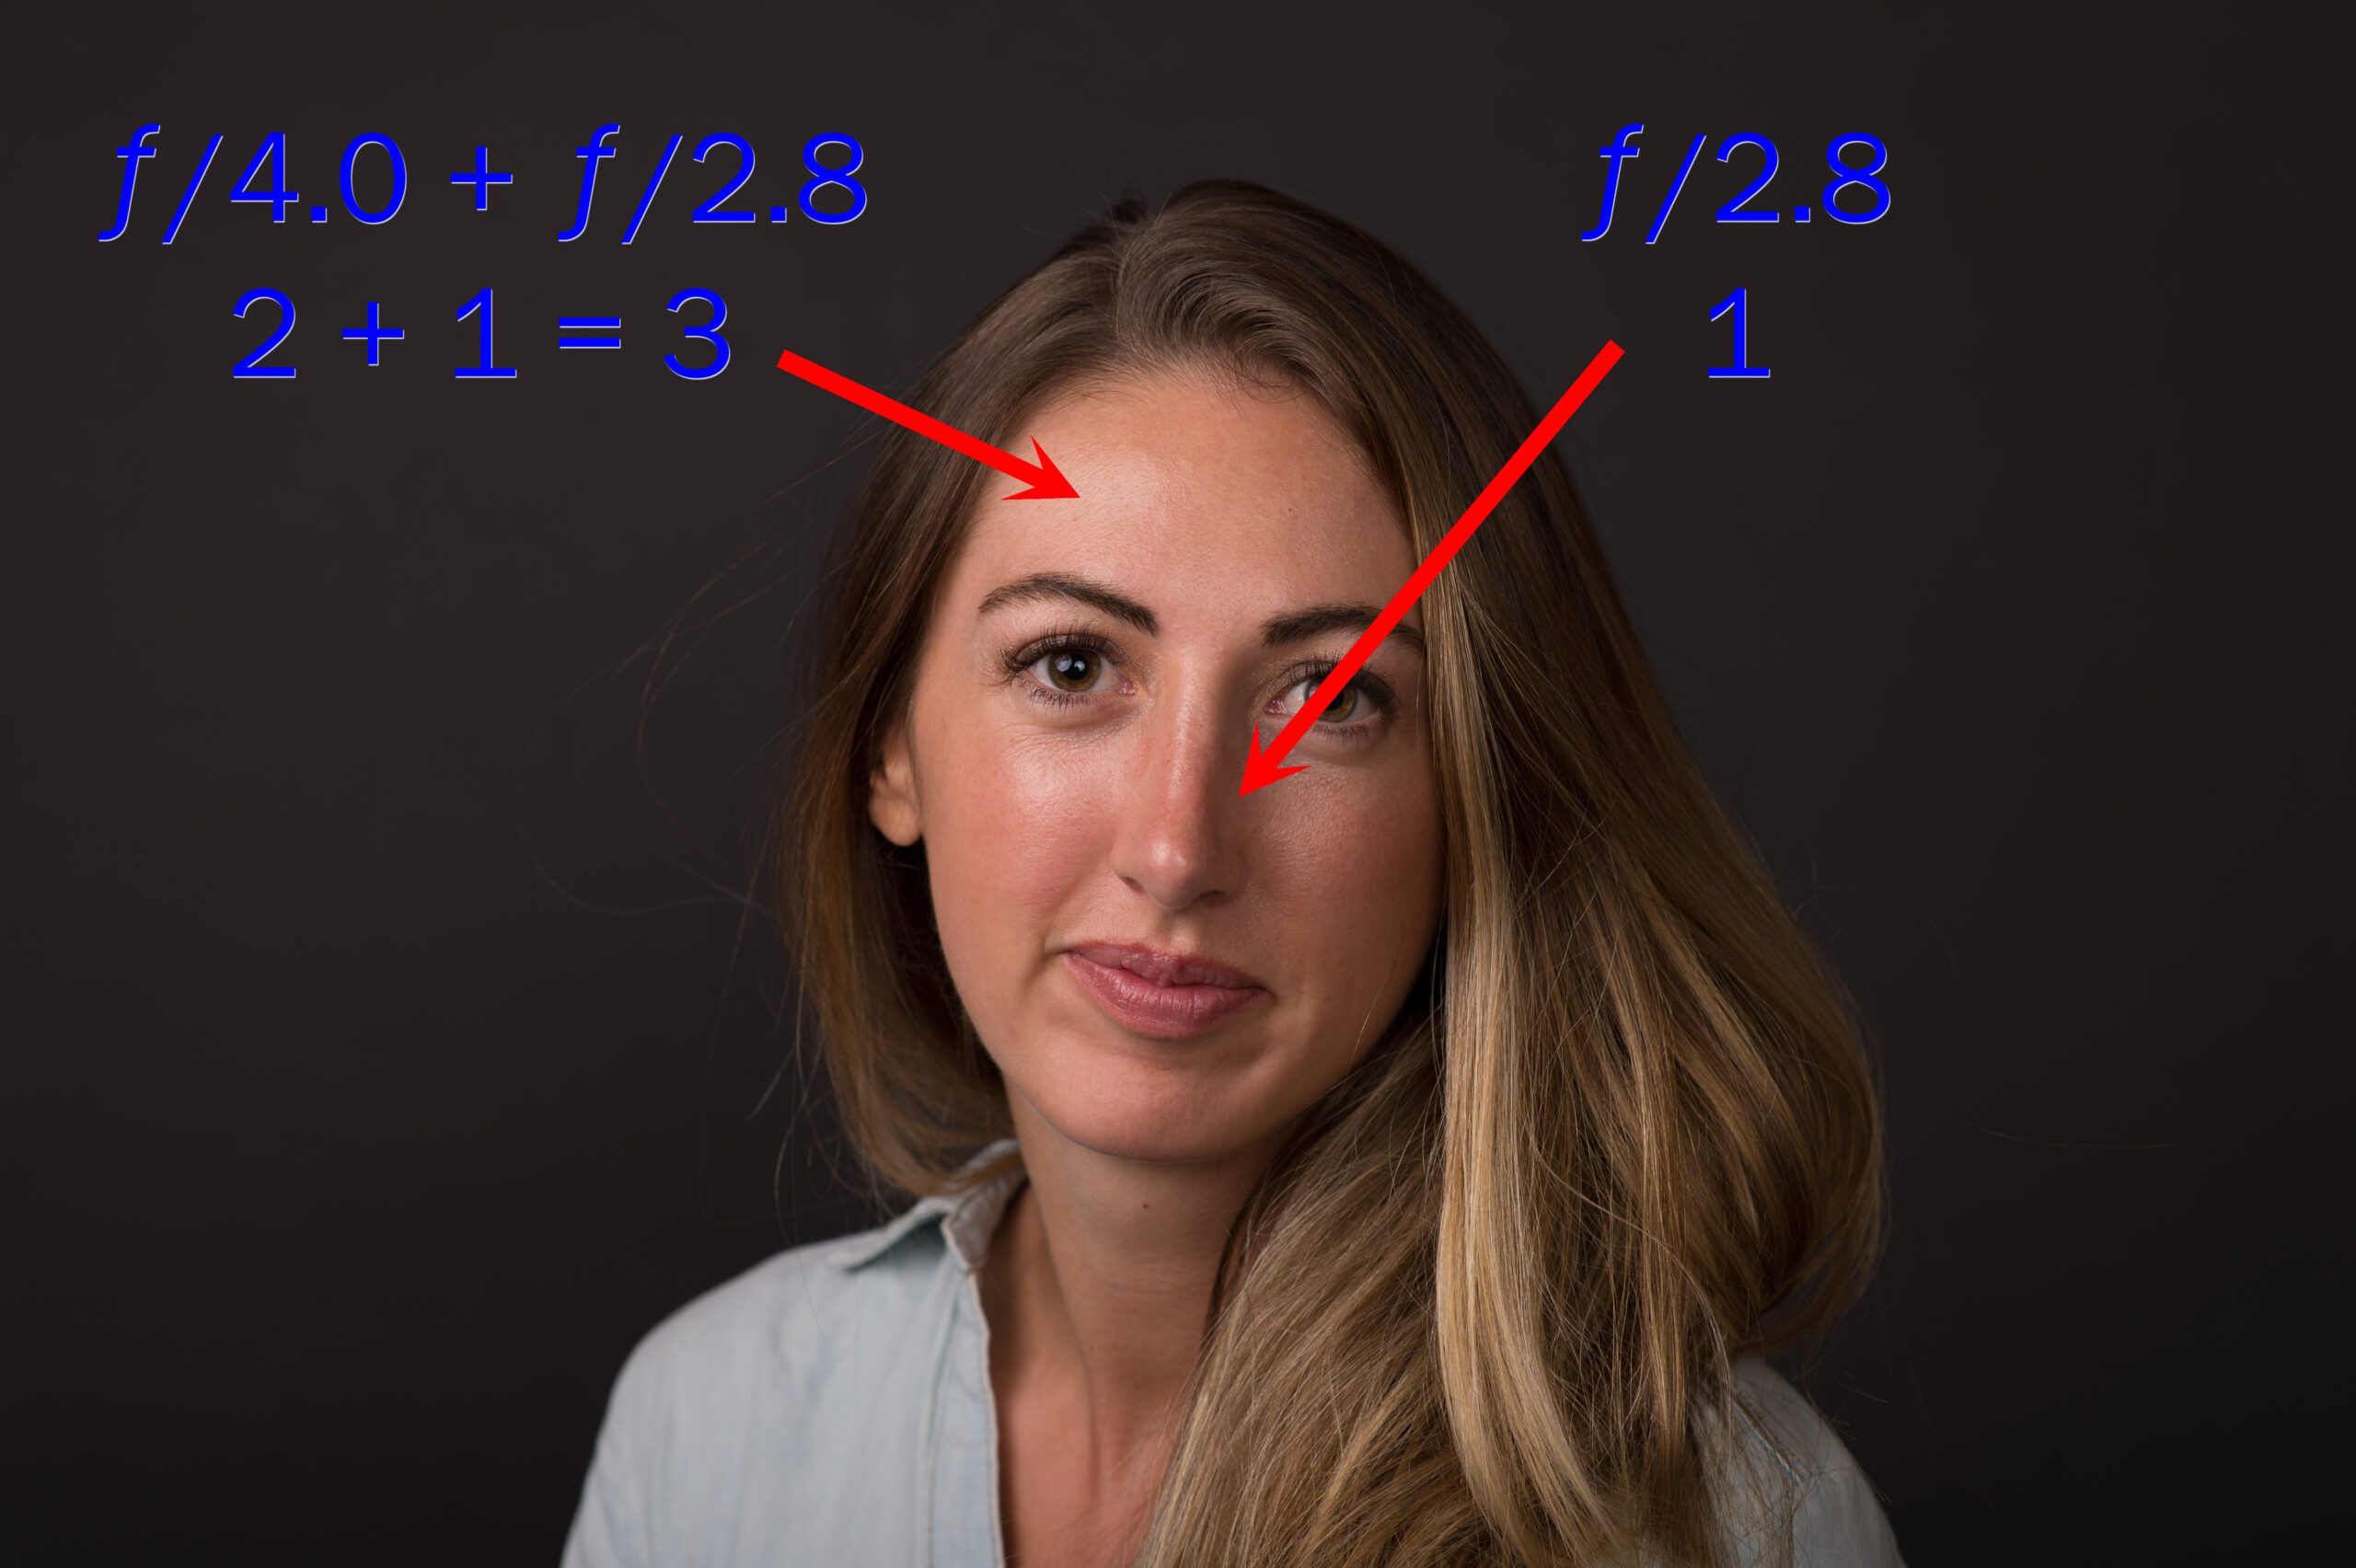
The main light is twice as bright as the fill light. So to show this using math, we would say the main light has a value of 2, and the fill light has the value of 1.
Where both the main and fill light fall on the face is getting the combined value of the 2 + 1 = 3. Ho ever in the shadows, only the fill light hits those; therefore, the value is only 1.
So the bright areas get 3 and the shadows 1 giving you a 3:1 lighting ratio.
Now I showed the students how they could add a background light. I put a blue gel over it to show them they can also color the background.
