Warning Signs for Becoming a Professional Photographer

Reading Time: 4 minutes
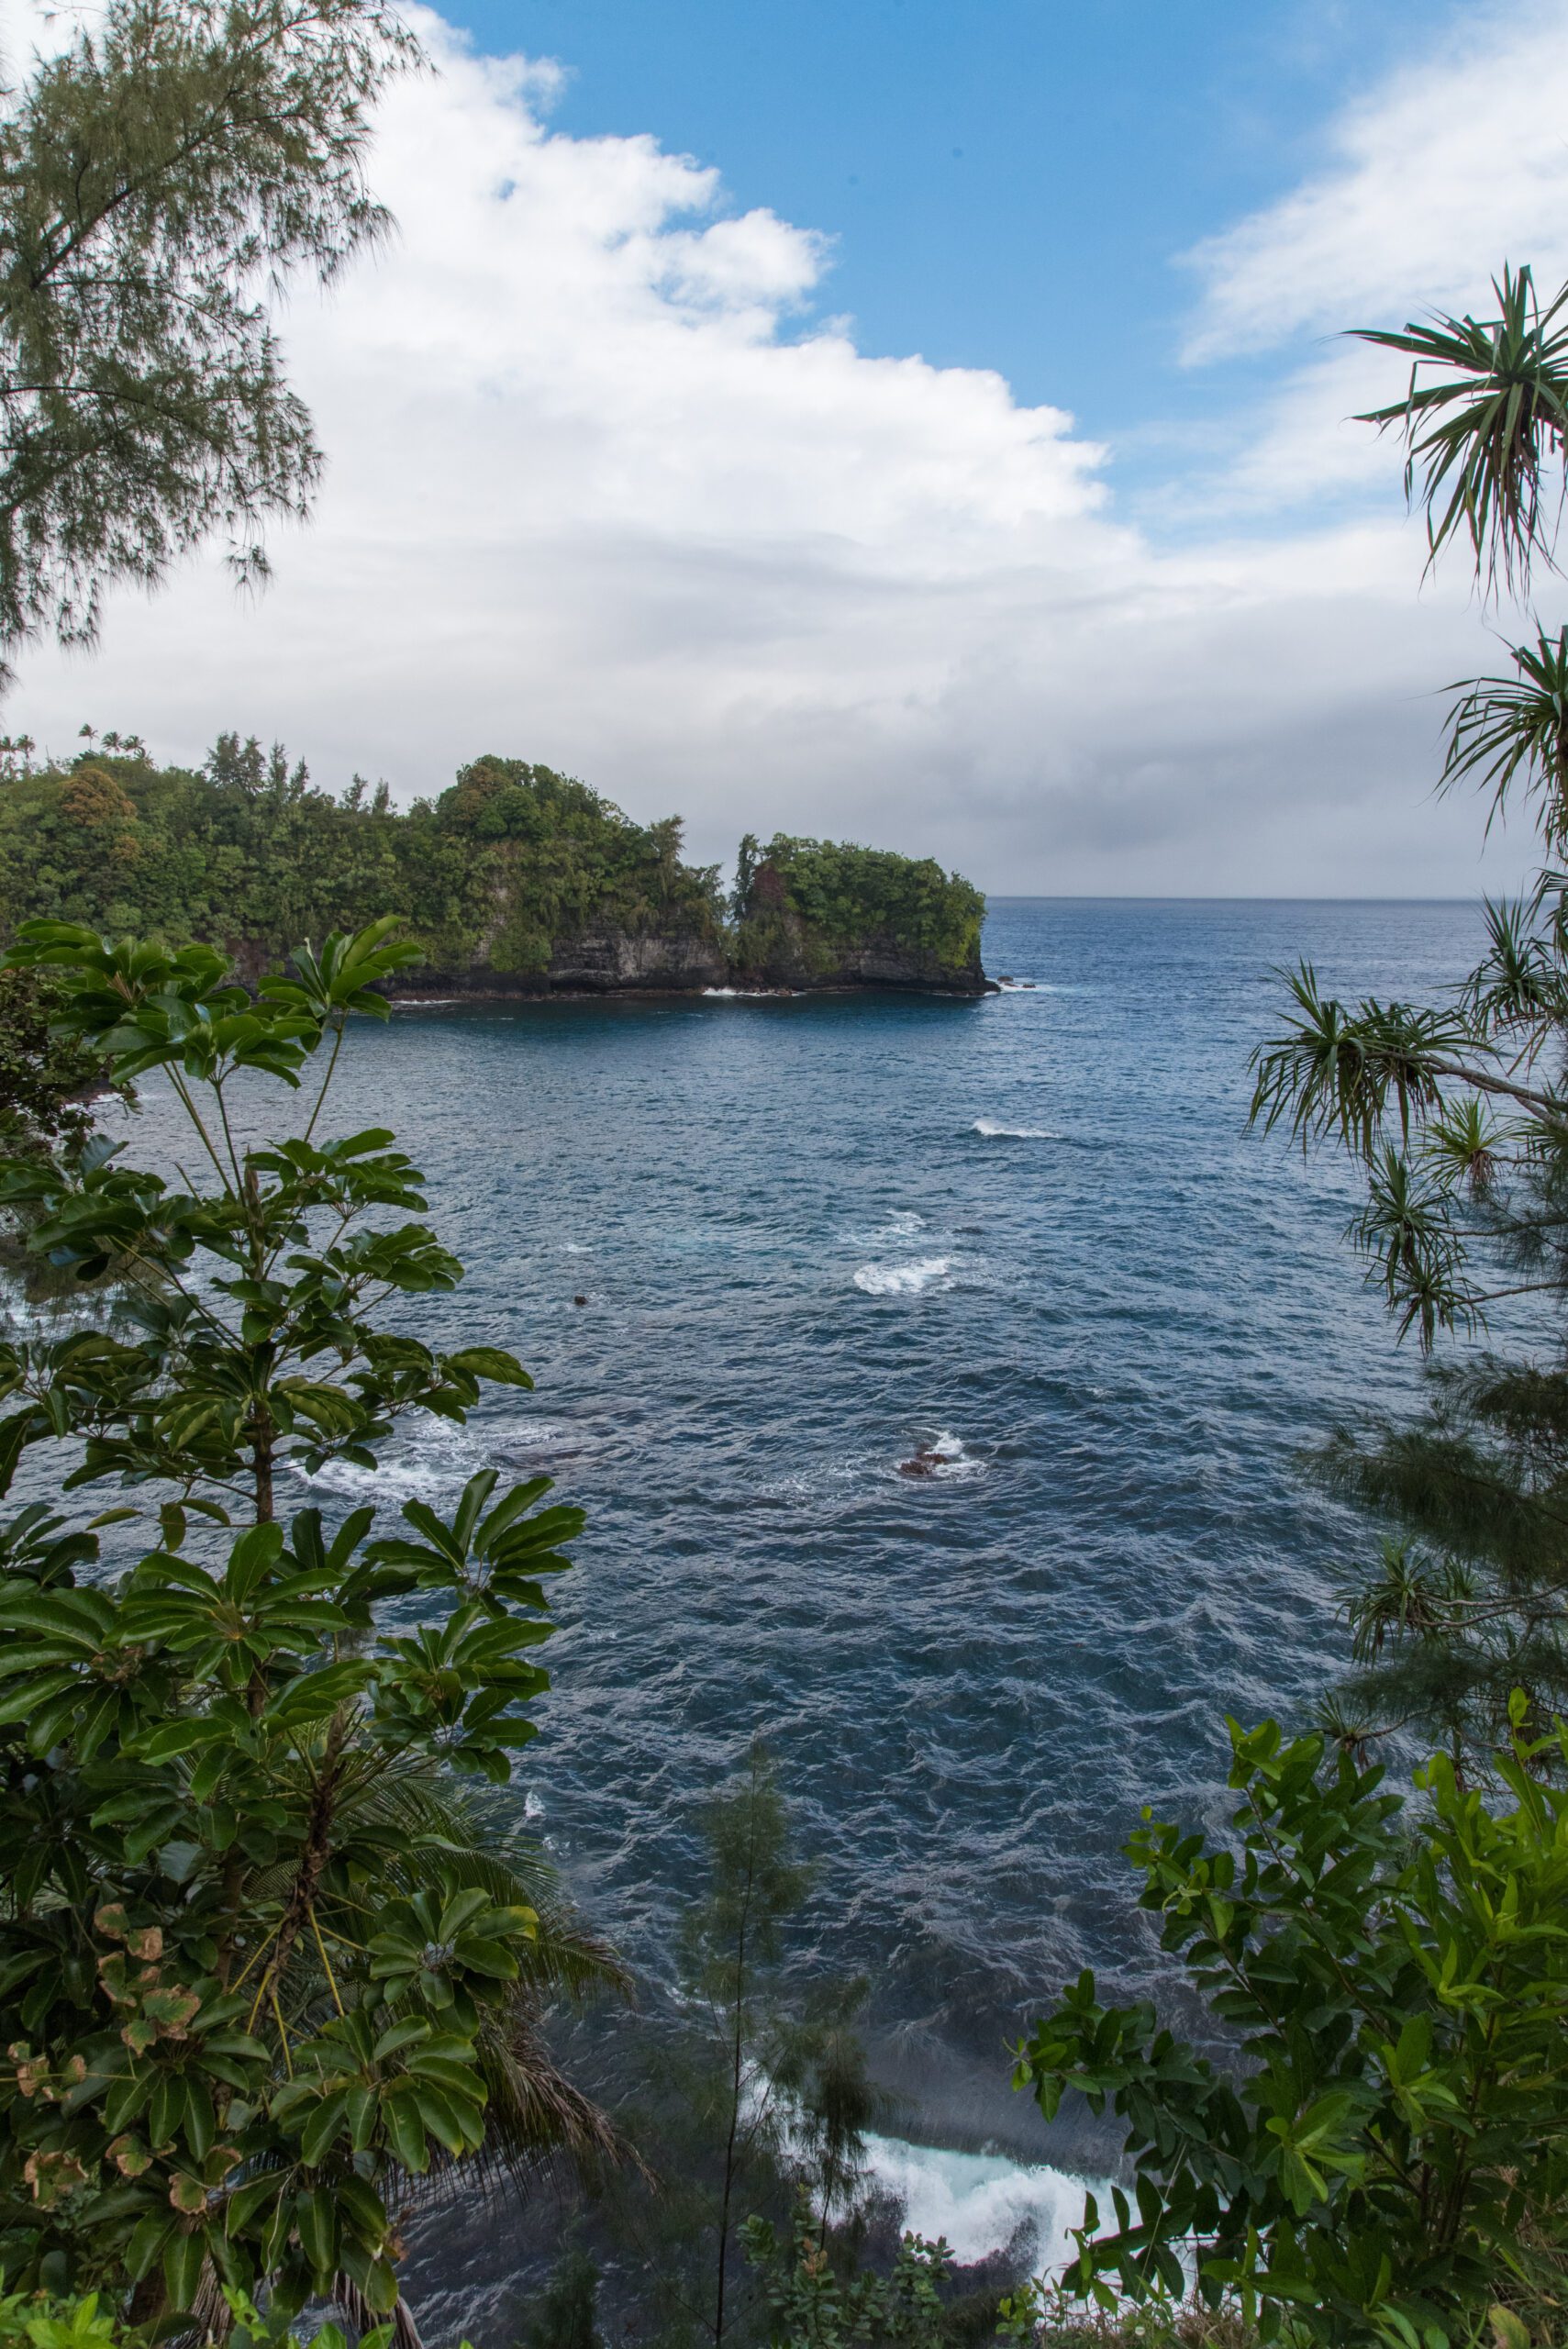
[Nikon D750, Sigma 24-105mm f/4 DG OS HSM Art Lens, ISO 1600, ƒ/18, 1/500]

While taking my drive around the Big Island of Hawaii last week, I turn onto the 4 mile scenic route
of Old Mamalahoa Highway just outside of Hilo, Hawaii. About halfway on the road we came across this beautiful view of a bay area.

This was next to the Hawaii Tropical Botanical Garden. What a wonderful exotic part of the Big Island. Through the years the views have been changing. More and more fences are going up alongside these views with signs of warning.

Nikon D750, Sigma 24-105mm f/4 DG OS HSM Art Lens, ISO 12800, ƒ/18, 1/500

You see the entire Island is a volcano. The rocks are quite porous and can easily break off. One of the years when I visited a large section of the Volcanoes National Park broke off and fell into the sea. It was about the size of a football field. Some people died when that happened.

Nikon D750, Sigma 24-105mm f/4 DG OS HSM Art Lens, ISO 800, ƒ/4, 1/500

Scenes like this of Rainbow Falls in Hilo, Hawaii are one of the things drawing people into thinking that if this is what a photographer does then sign me up.

The lure of what photographers get to take photos of is what draws way too many people into this industry and then without warning many people have the ground fall away underneath them and they often do not survive the industry.

Nikon D750, Sigma 24-105mm f/4 DG OS HSM Art Lens, ISO 100, ƒ/4, 1/640

There are signs when you go to the Black Sands beach telling you to not touch the turtles and to stay 15 feet away and that includes when taking pictures.

Photographers it seems need a lot of signs to tell them what not to do, because they seem to just take unnecessary risks.

Signs are now going up

I think slowly people are getting the message that being a photographer isn’t as easy as it seems. There are now warning signs all over the industry.

My friend called me while I was in Hawaii. I had asked if he could help me with a project and be a shooter for me. He was sick when I asked and was going in the next day to work and would check with his boss.

He was calling to let me know half of the staff was laid off. My friend was now very available to help me.

Just in the past few months other icons also were slicing their staffs.

More and more of my friends no longer had staff jobs.

Shortly after Sports Illustrated laid off the staff of photographers even my friend Brad Smith the director of photography lost his job with a few others.

What this means

If you want to be a teacher, lawyer, fireman and most any other profession you just go and study and become that professional. You graduate from a degree program and apply to be a staff employee somewhere.

Well that has majorly changed in photography. When I graduated from college I was hired by a newspaper. While there are some staff jobs, the number of them is drastically less than just a few years ago. Not only are there fewer staff jobs there are fewer newspapers.

You’ve probably heard that by 2020, 40% of the U.S. workforce will be independent workers. Today, there are already 53 million Americans (34% of the workforce) that fall into this category. That number is growing based on a number of factors. Some from employers who see this as a better choice and many employees who want more control over their lives as well.

Chauncy Lennon, who runs JPMorgan’s workforce initiatives said:

“The workforce of the past was organized around company. The workforce of the future is organized around the worker. If we can’t find the right people, it’s going to hurt our bottom line.”

Freelancing vs Staff

You need to know a lot more about the business side of your profession than if you were a staff employee. You need to understand the Cost of Doing Business and your business needs to solve a problem for someone or you are just not going to be in business very long at all. Here is a great blog for you to follow about the business side of photography http://blog.photoshelter.com/category/business/.

Nikon D750, Sigma 24-105mm f/4 DG OS HSM Art Lens, ISO 100, ƒ/4, 1/1000

Just like these cowboys trying to rope a cow, it takes a lot of practice before you can turn pro.

Lighting Assignment: Combining Studio Strobes with Available Light

Reading Time: 4 minutes
Nikon D750, Sigma 24-105mm f/4 DG OS HSM Art Lens, ISO 2500, ƒ/10, 1/50

This last shooting assignment I have given my class this week is to take a studio strobe out and make a photo where this complements the light already in the scene.

Before they shot in the field, I did two different shoots. Here is the second shoot I did with them, where we left the classroom, and I showed them how to talk to folks and get them to pose for an environmental photograph. So again, this is an environment that tells us something about the person.

Here we see the guy doing his job as a barista at the local coffee shop.

Nikon D750, Sigma 24-105mm f/4 DG OS HSM Art Lens, ISO 2500, ƒ/10, 1/60

I first made this photo of him working and showed it to the class. I showed them the light on the subject and didn’t make him pop. Then, as he continued to work, I took another photo with the studio strobe to make him pop.

Nikon D750, Sigma 24-105mm f/4 DG OS HSM Art Lens, ISO 2500, ƒ/10, 1/60

The setup was like this for the shot:

I put a 10º Grid and a neutral density filter on the flash, which was still pretty bright. I used the grid to keep the light from spreading everywhere and lighting up the scene too much.

Then I just had him turn to face the camera for the first photo.

Nikon D750, Sigma 24-105mm f/4 DG OS HSM Art Lens, ISO 100, ƒ/4, 1/500

We heard sawing nearby, so we checked it out and saw if we could get another person in their work environment. Here is the first photo.

Nikon D750, Sigma 24-105mm f/4 DG OS HSM Art Lens, ISO 100, ƒ/11, 1/80

After adding the flash, I took this photo and adjusted the shutter speed to where I didn’t blow the background away.

When I first talked about the assignment, we walked outside the studio, and I took these photos to give them a sense of it.

Nikon D750, Sigma 24-105mm f/4 DG OS HSM Art Lens, ISO 100, ƒ/10, 1/250

After making this photo, I then added a flash.

Nikon D750, Sigma 24-105mm f/4 DG OS HSM Art Lens, ISO 100, ƒ/10, 1/250

Then I added a CTO Gel, an orange-colored gel, to the light. I then took a custom white balance and reshot the photo.

Nikon D750, Sigma 24-105mm f/4 DG OS HSM Art Lens, ISO 100, ƒ/22, 1/250

I also underexposed the background by 1 1/2 stop by turning the strobe up in power but keeping everything else the same. Unfortunately, this adjustment meant I had to close down the aperture from ƒ/10 to ƒ/22. The change made the background darker since the light didn’t affect it.

Nikon D750, Sigma 24-105mm f/4 DG OS HSM Art Lens, ISO 100, ƒ/18, 1/250

I then added a CTB to the light and did a custom white balance. The background went orange with a blue gel on the flash and corrected the white balance to give a good skin tone.

Make this your assignment as well. Here are the directions that I gave to the class:

LightingMixed Lighting This assignment aims to demonstrate that when you are out of the studio, you can use your strobes to improve an otherwise dismal situation. Whatever you choose, you must provide two photos.   

  1. Photo without strobes. In other words, your subject needs light to make it look better. You want to make this the best exposed as possibly you can do. (the same as with strobes)
  2. Photo with the strobes.

 Some Blog Posts to help get your juices flowing and walk you through the steps: 

Super Simple off-camera flash portrait 

Tips for Off Camera Flash for +/- exposure problems

Off-camera flash and gels for the sky  

Grading:

  1. 20% for proper exposure
  2. 20% for focus
  3. 20% Showing rules of composition
  4. 20% Demonstrating each technique
  5. 20% for expression

Lighting setup 2 assignment for my class: 3:1 Lighting Ratio

Reading Time: 3 minutes
Photo by: Maile Powell

The first assignment I gave the students this week with one light gave us excellent Rembrandt lighting. The downside to this type of lighting is sometimes you need to fill in those shadows.

This week’s second assignment for the students in my photo class is a 3:1 Lighting Ratio.

 
Nikon D4, Nikon 85mm ƒ/1.8G, ISO 100, ƒ/5, 1/200

Here is the setup

Assignment Description:
3:1 lighting ratio. This photo uses classic lighting.

Items:

Octobox closest to subject
This light is your leading light. Set a light reading with just this first. The light should be 45 degrees off the axis of the camera and 45 degrees above the subject’s eyes.

Subject
Your subject should have the main light lighting only part of the face, and the shadows should be just a little to show the 3:1 ratio.

(D)SLR
Choose the lowest ISO. Ideally, on a full-frame camera, a lens is close to 85mm, and on the cropped sensor, it a 50mm. S t your shutter speed to the sync speed for your camera [in your camera manual] or slower. M  camera was 1/250, but I shot at a slower speed of 1/200.

Octobox behind the camera
The second light is your fill light and get just a reading of this 2nd. B sure it is 1/2 the power (1 f/stop less) than the leading light. After this is done, get a 3rd light reading of both lights, which will be the setting for the camera. It can be level with the eyes, but you may have to move up with glasses to avoid glare.

First, set the leading light, and here is what that will look like:

Due to using such a large softbox, the shadows are not as severe as in our first assignment using the grid light. So e of the light is bouncing off a white wall a few feet to the model’s left or right of the camera position.

Turning the leading light off after finding out your setting, you need to take a reading and get the fill light to 1 stop less than the main light. For example, the main light was ƒ/4, so the fill light should read ƒ/2.8.

The photo below is what it looks like without the main light on. You can see a little darker, but no actual shaping of the face as the main light is 45º to the side.

When you combine them, you get the first photo of the model we started.


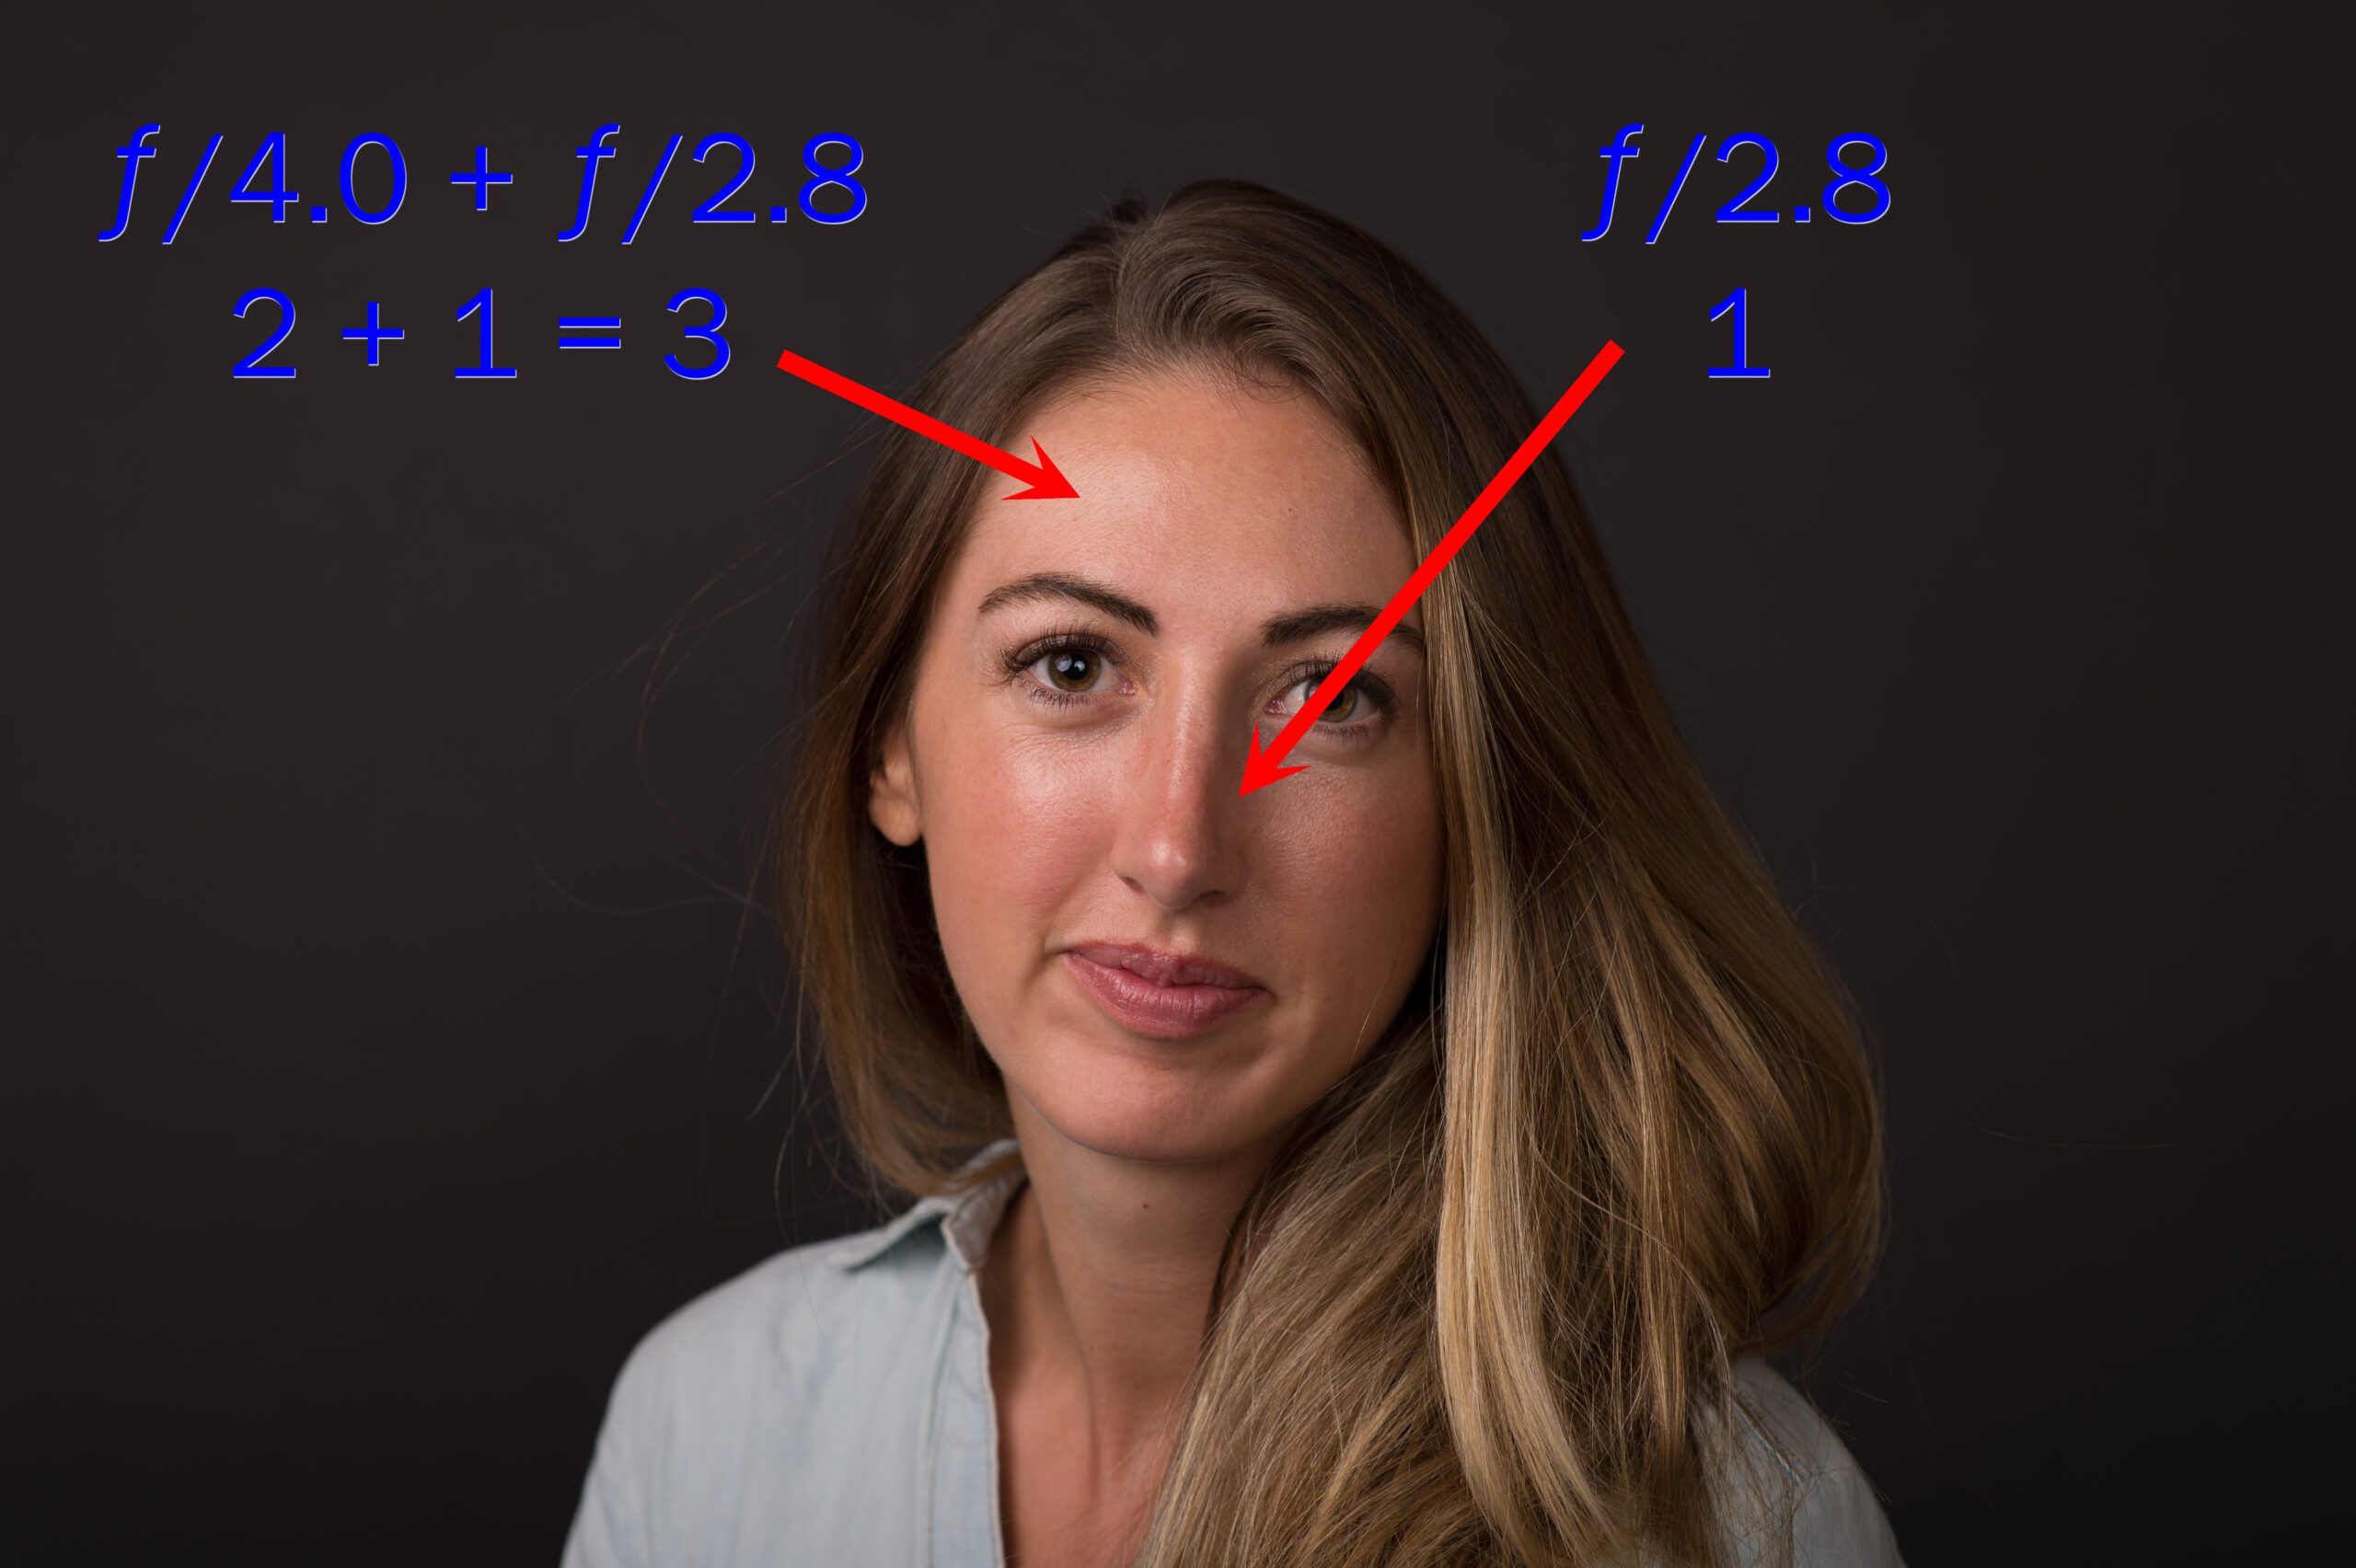
The main light is twice as bright as the fill light. So to show this using math, we would say the main light has a value of 2, and the fill light has the value of 1.

Where both the main and fill light fall on the face is getting the combined value of the 2 + 1 = 3. Ho ever in the shadows, only the fill light hits those; therefore, the value is only 1.

So the bright areas get 3 and the shadows 1 giving you a 3:1 lighting ratio.

Now I showed the students how they could add a background light. I put a blue gel over it to show them they can also color the background.

Seeing Rembrandt lighting and then creating it

Reading Time: 3 minutes

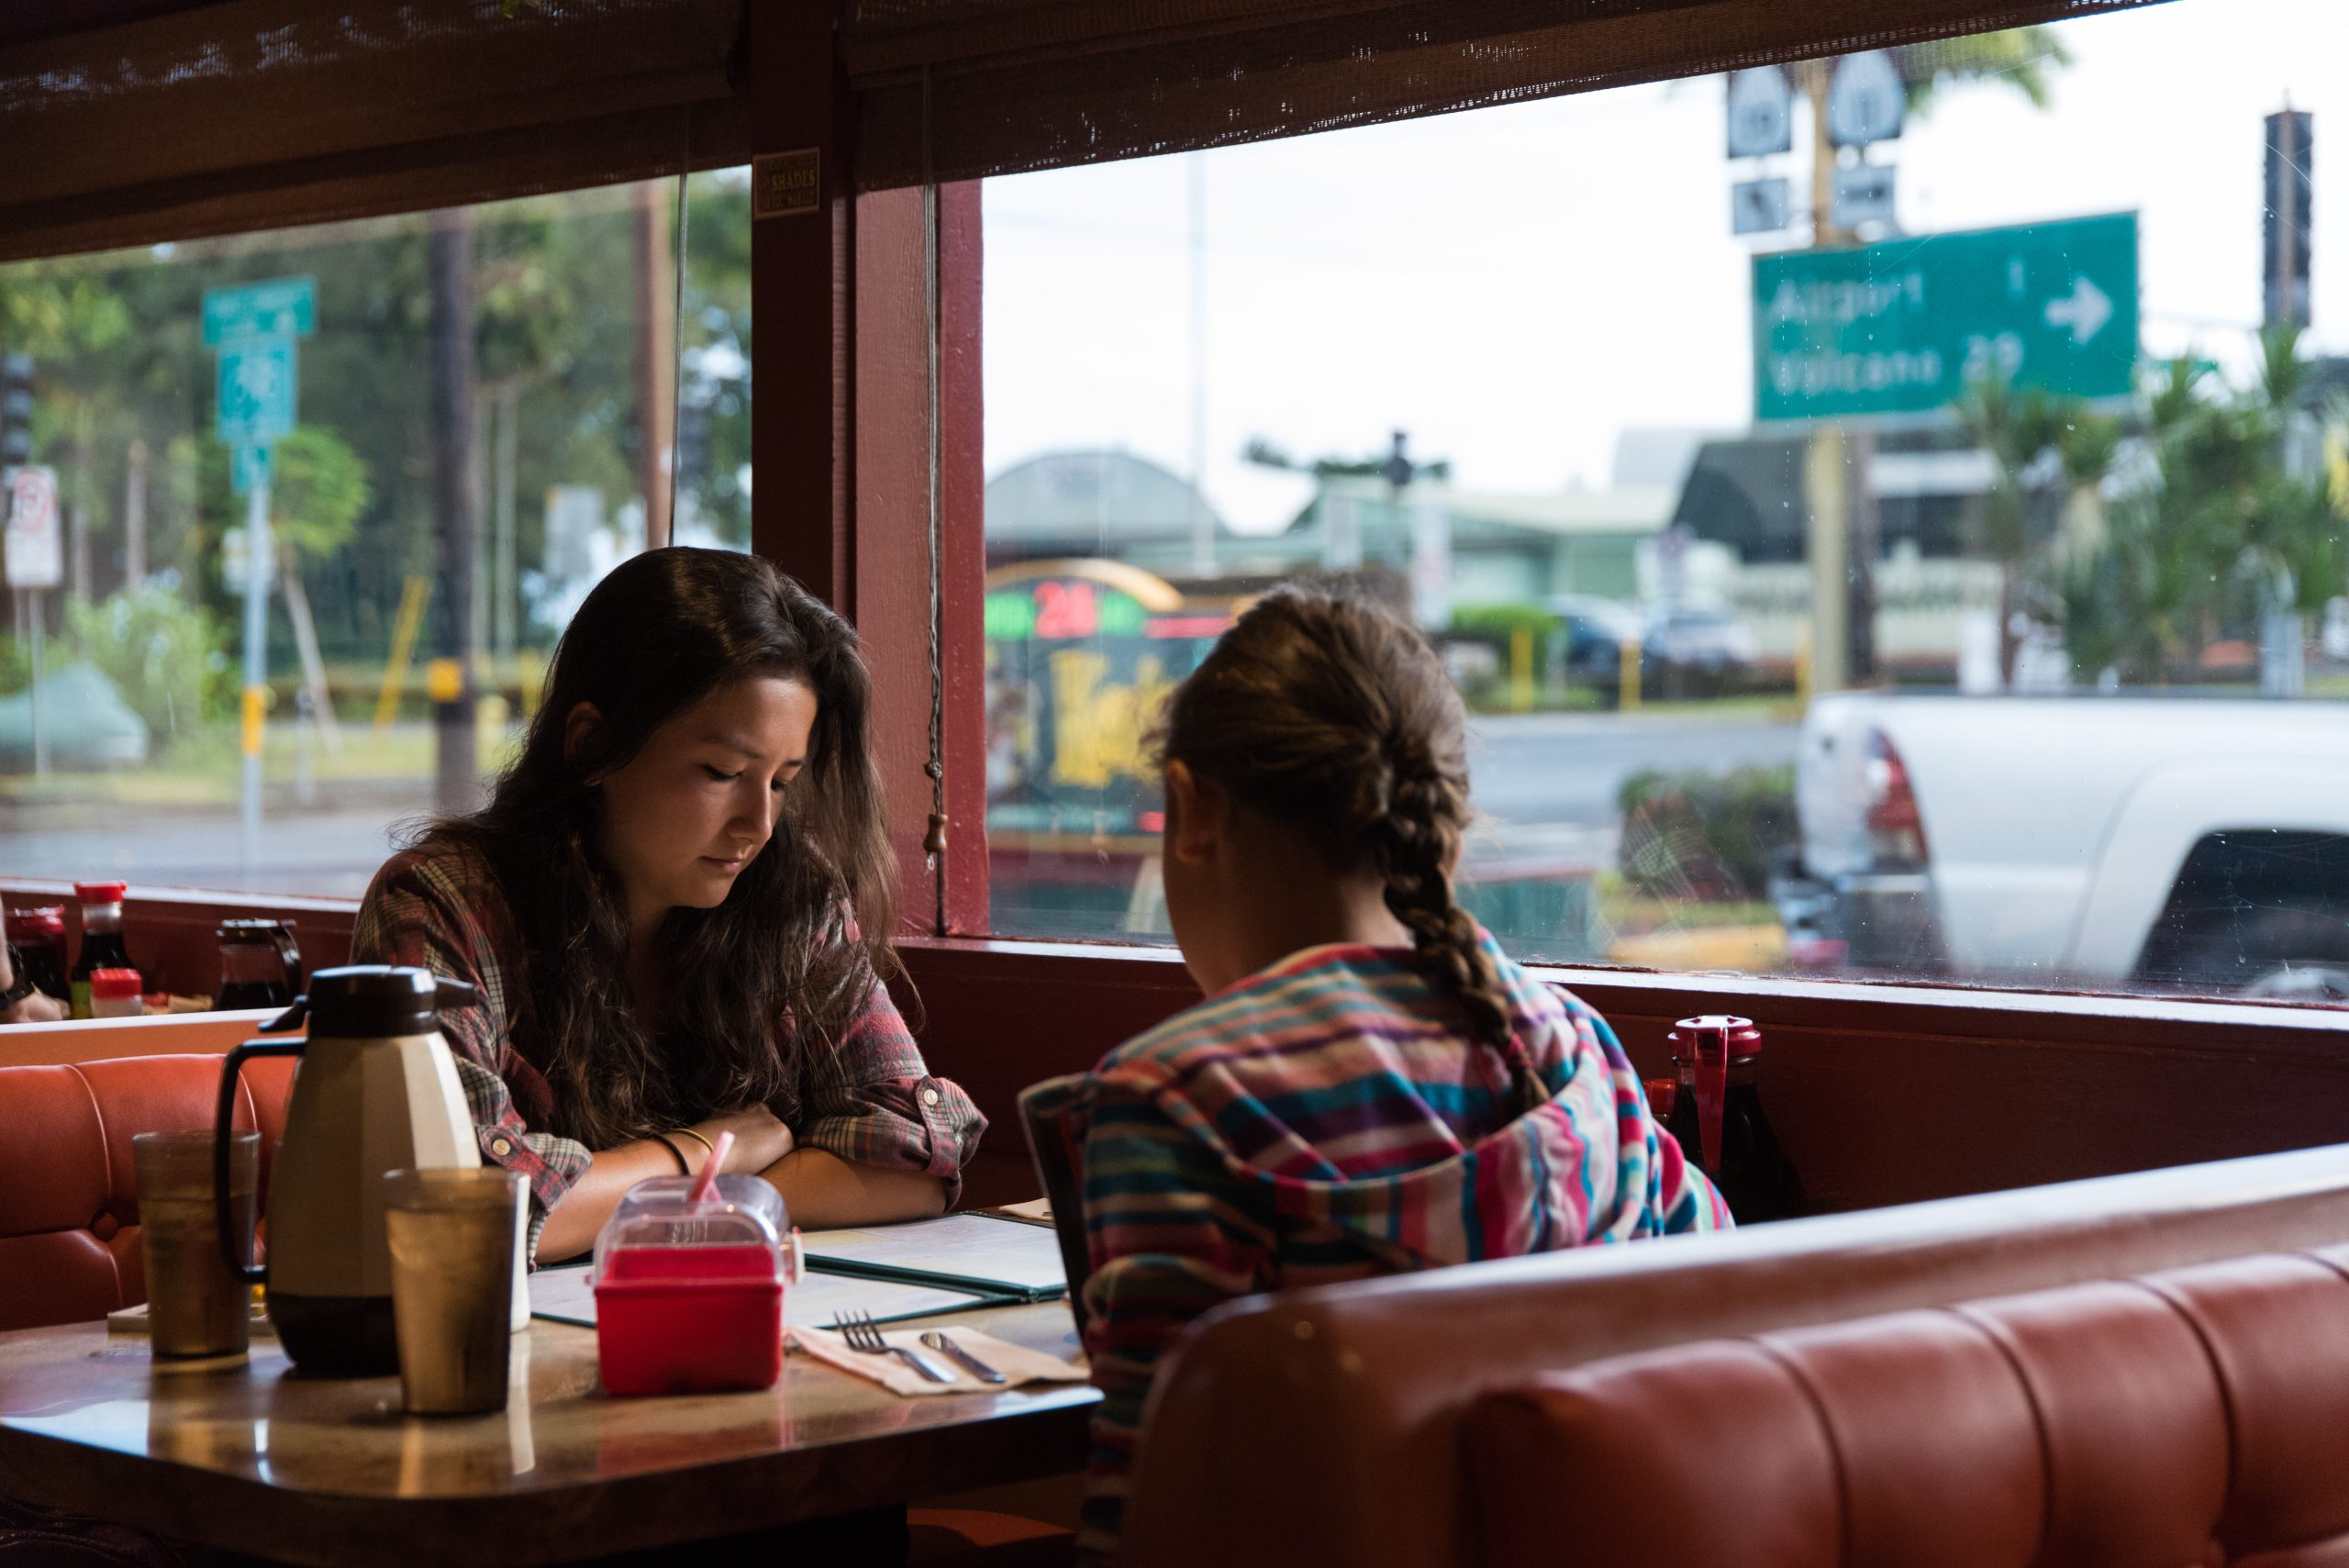
This morning, while eating breakfast at Ken’s House of Pancakes in Hilo, Hawaii, I noticed what appeared to be a mother and daughter together. After analyzing the photograph, I noticed that it caught my eye due to the lighting on the mother’s face.

We refer to Rembrandt lighting, named after the famous painter known for employing this lighting technique in many of his paintings.

There is a little triangle of light on the dark side of the face when the light is 45º to the subject’s side and 45º above the subject.

Tomorrow, the students in the class will learn how to create the triangle on a person’s cheek to create Rembrandt lighting. Rembrandt lighting is my first lesson in lighting, which I think is a great place to start.

Nikon D4, AF NIKKOR 85mm f/1.4D, , ISO 200, ƒ/8, 1/200–four Alienbees

To create this triangle, students will use a setup similar to the one shown here. For this shot, I used four lights. The students will only use one.

They will use just one light with a spot grid on it.

Here is the assignment they will get tomorrow. How about you try it yourself?

Rembrandt Lighting Assignment

I gave the class an assignment on making a Rembrandt light portrait using just one light with a 10º or 20º spot grid.

Most of the class has never even turned on a studio strobe before.

Here is the assignment:

Description:
Rembrandt’s portrait uses one grid light

Items:

Subject
Please get the best possible expression. For example, it would be best if you saw a triangle on their cheek. Be sure the triangle includes lighting that highlights their eyes.

Monobloc with 10 or 20-degree grid
You may use any power setting you choose. Ensure the skin tone is displayed correctly and adjust the white balance accordingly.

Camera
Choose the lowest ISO setting for your camera. For example, use a portrait lens with a focal length of 85 mm to 100 mm; if you don’t have a full-frame camera, a 50mm lens will be sufficient.

Backdrop
You may also use a black background. No other lights are to be used in this assignment.

Here is one of the students’shotst from the past:

Photo by: Lauren R. Tercero

Success is most often in the nuance of the details

Reading Time: < 1 minute
 
Nikon D4, Sigma 24-105mm f/4 DG OS HSM Art Lens, ISO 2500, ƒ/6.3, 1/18000

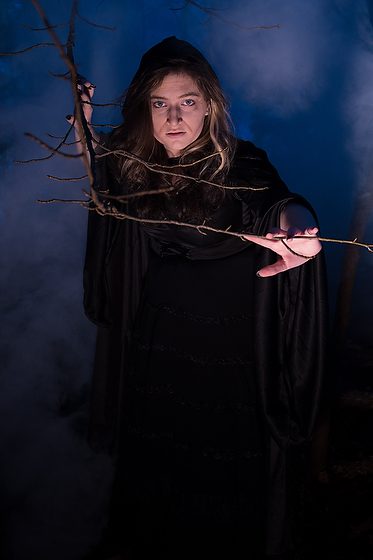
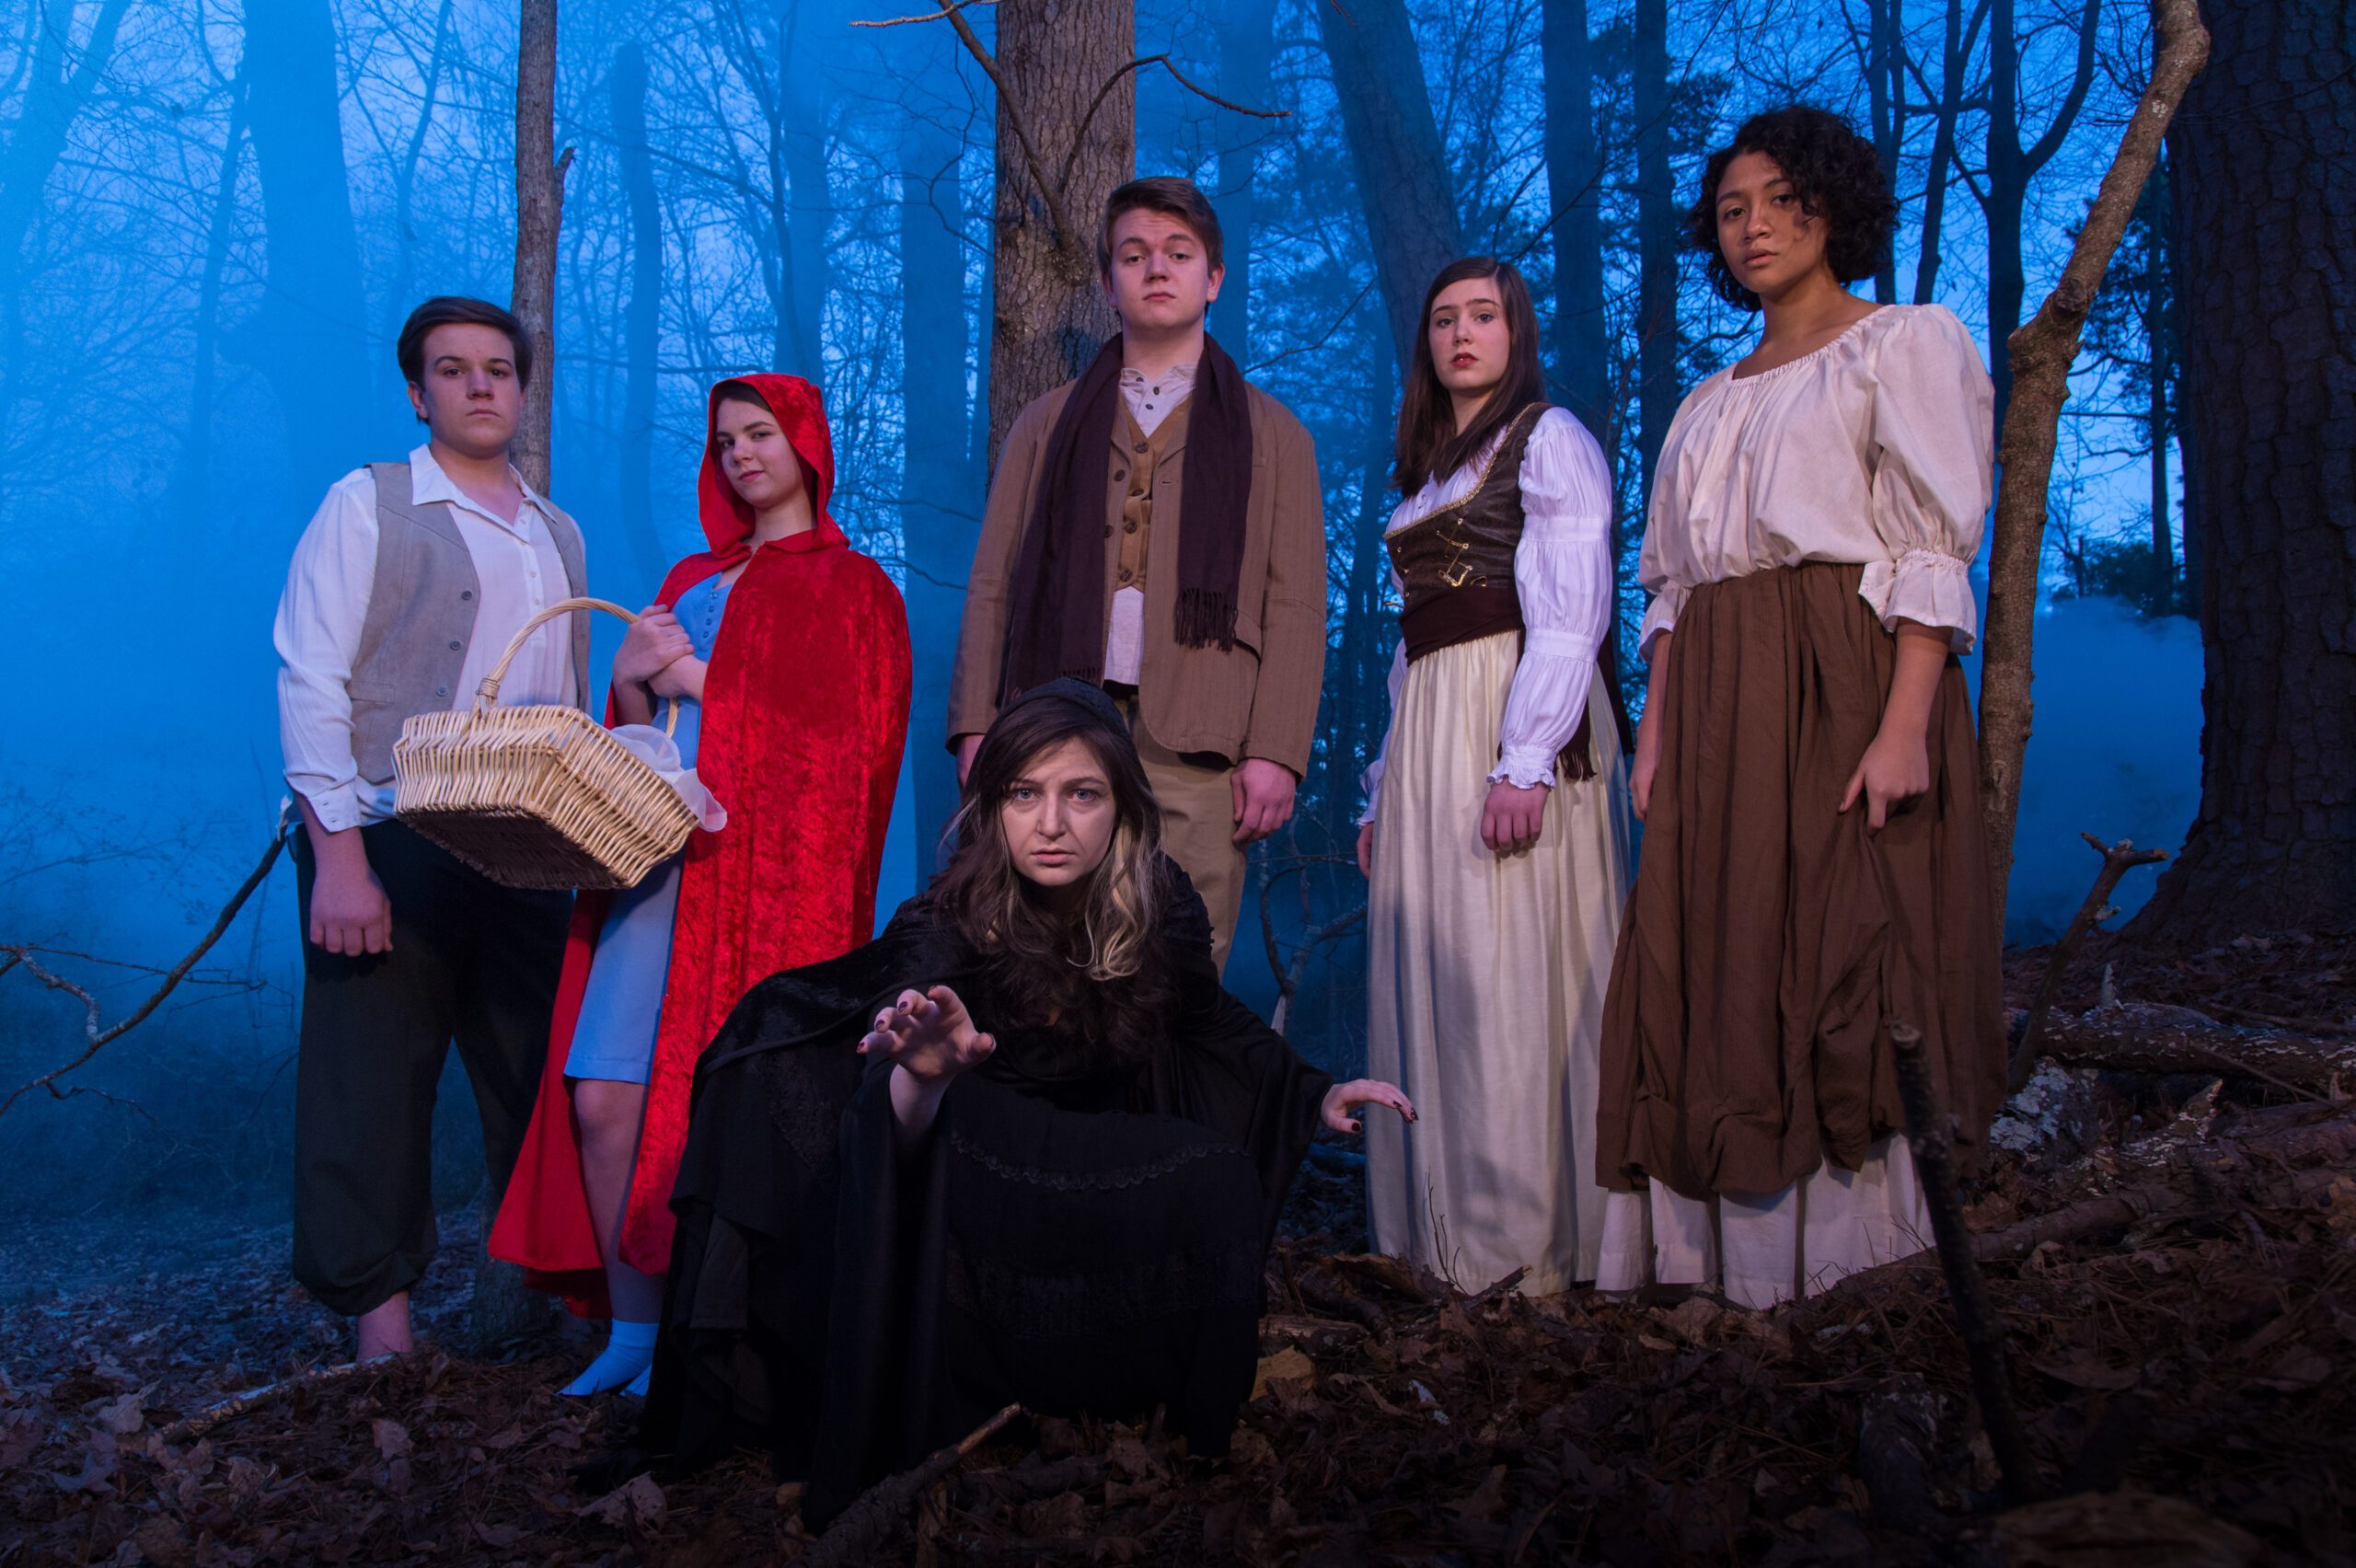
The success of a photo is often in the nuance of the details. For this photo shoot, it was essential that I not only have the subjects in their costumes and makeup but that I was lighting the subjects during the daylight to look like nighttime.

I wanted to create a mood that said “spooky.” So, to help take it to that level, we got a fog machine to help make this look above.

Now, look at the photo without the fog to see how important details are in a photo shoot.

Nikon D4, Sigma 24-105mm f/4 DG OS HSM Art Lens, ISO 2500, ƒ/7.1, 1/15000

For me, the difference isn’t minor but rather quite prominent in the impact of creating the “spooky” mood I was going for in the photo.

We often talk about moving the camera, so slighting to the left or right can make a difference.

If you are creating something like I did here versus capturing your subject, you can plan and think of all the tiny nuances you can control to make your photo successful.

Why I chose my Nikon D4 over my D750

Reading Time: 2 minutes

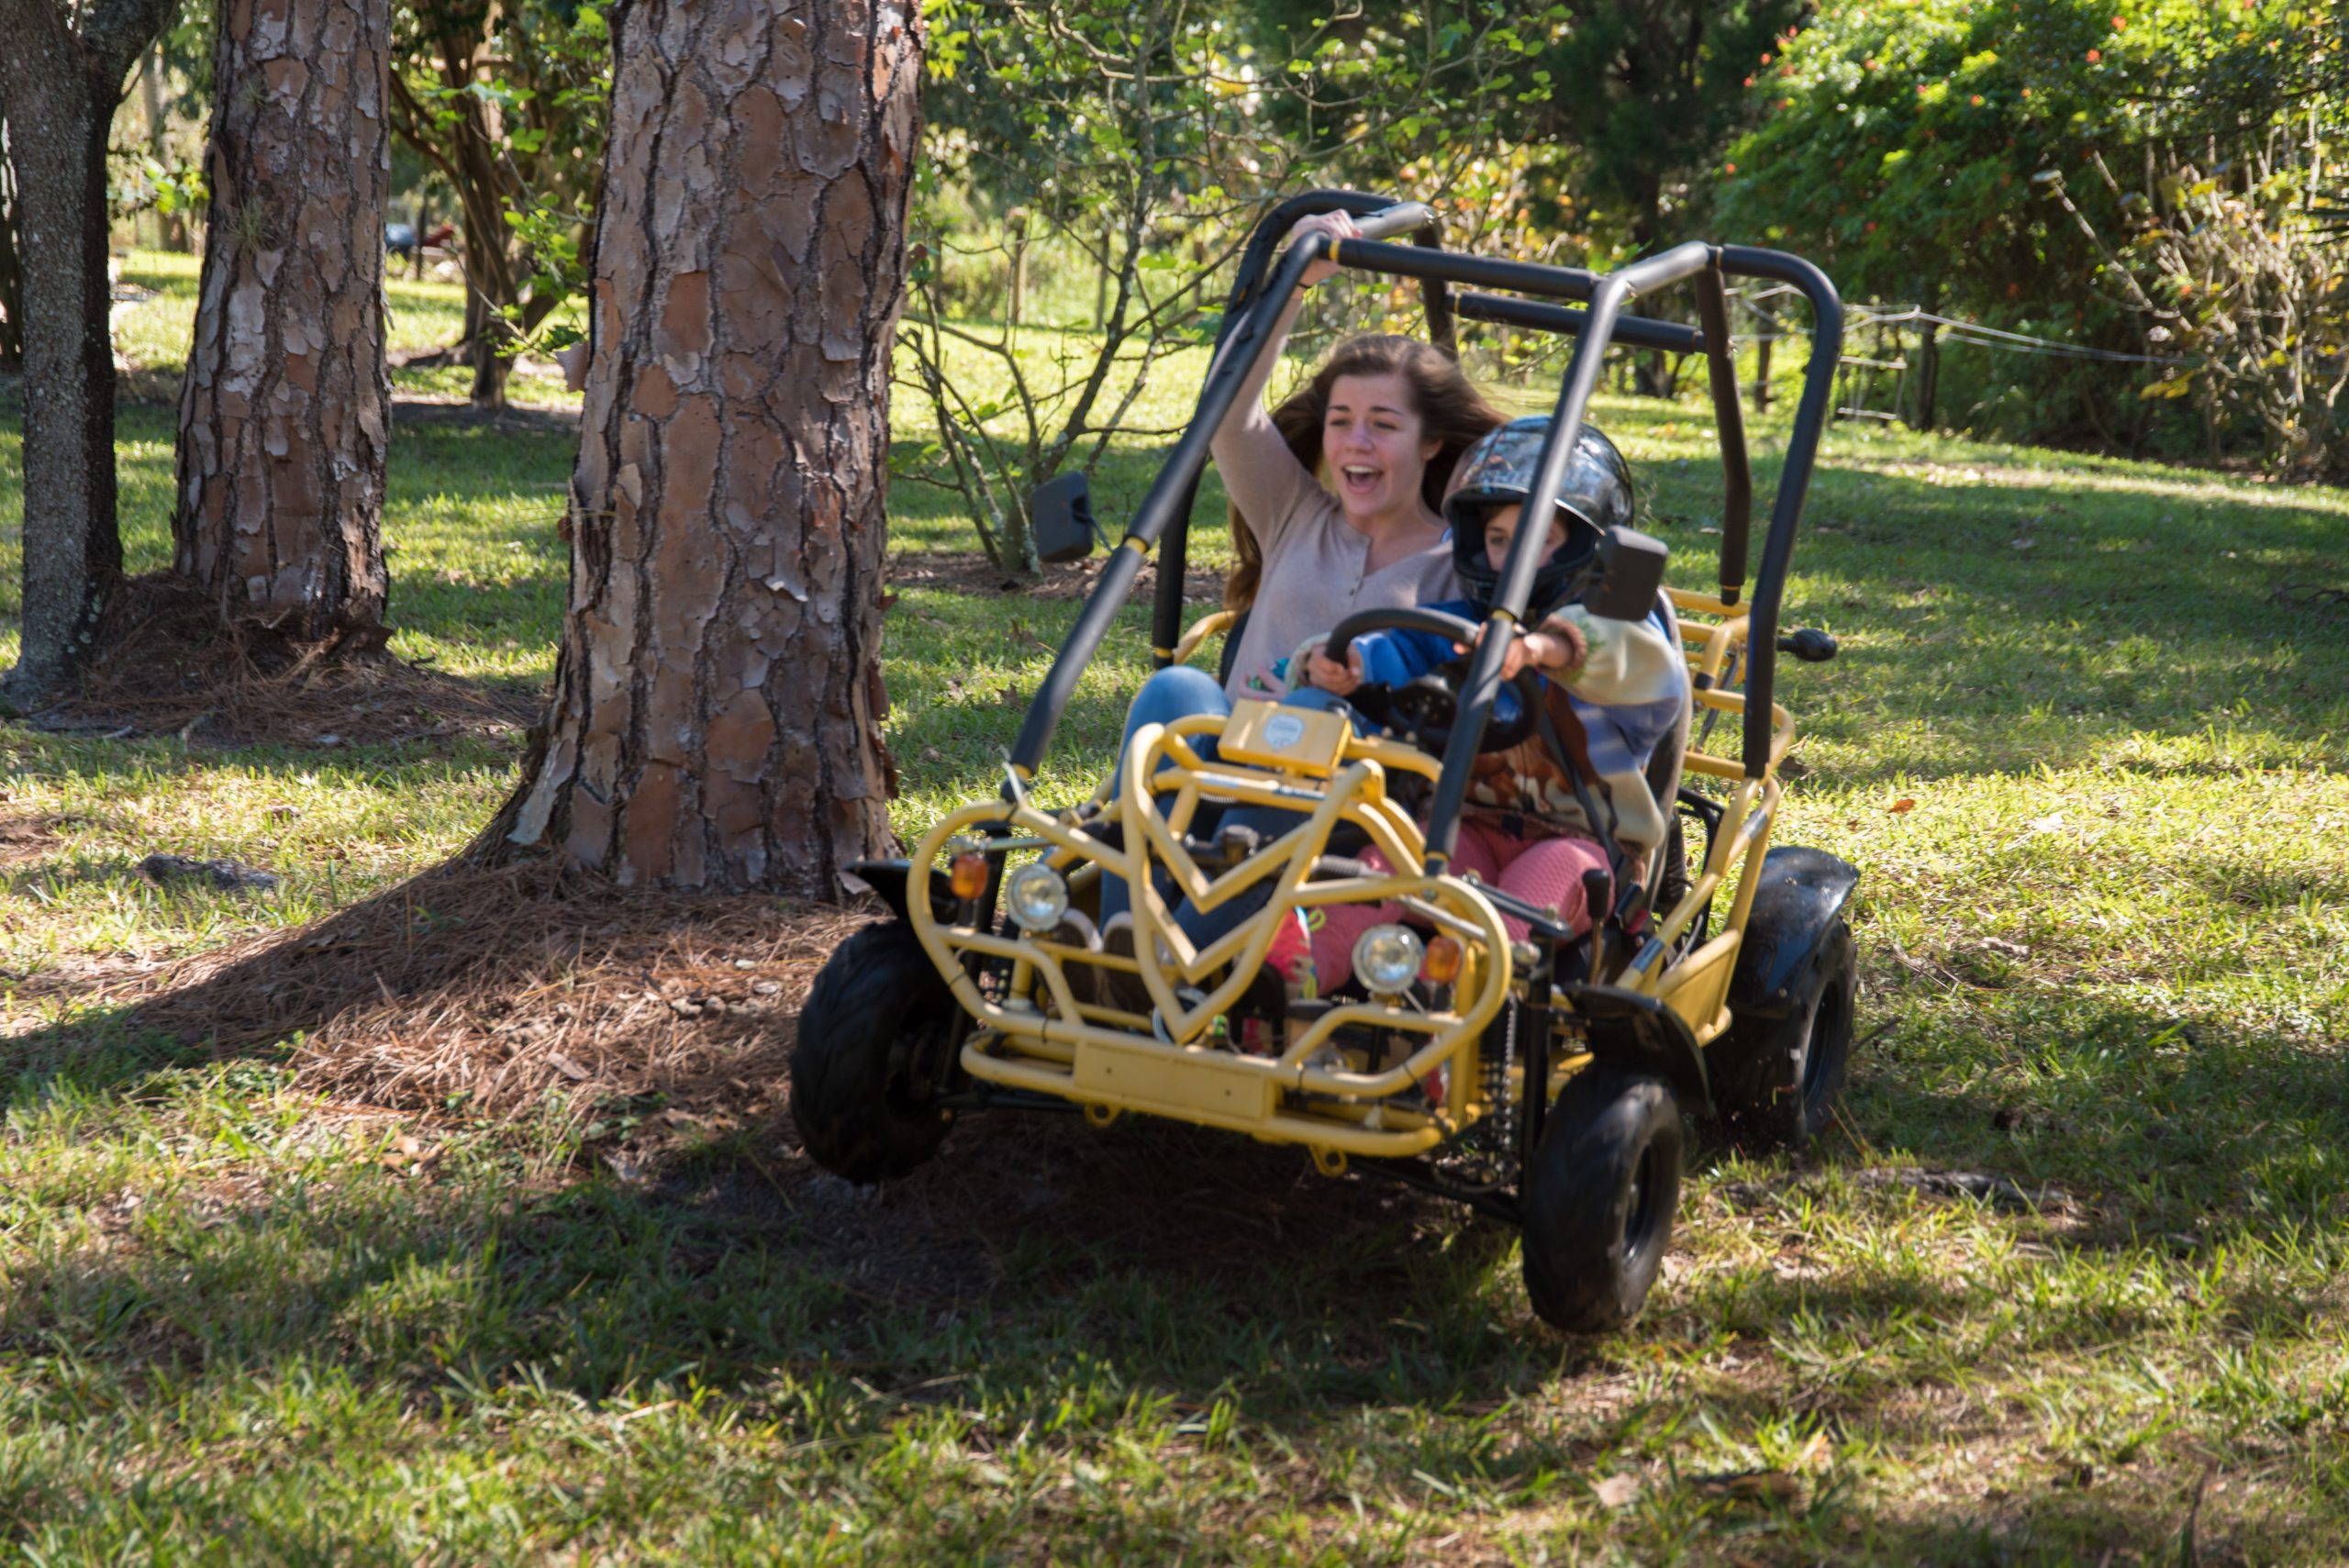
While in Florida at a family reunion, we were suddenly in the backyard watching our kids enjoying Go Karting. I started shooting this with my Nikon D750 with a Sigma 24-105mm f/4 DG OS HSM Art Lens. I quickly realized the performance differed from what I was used to with my Nikon D4.

Nikon D4, Sigma 70-200mm f/2.8 EX DG APO OS HSM, ISO 1250, ƒ/2.8, 1/2000

I returned to the car and got my Nikon D4 and Sigma 70-200mm f/2.8 EX DG APO OS HSM. I immediately went to the “Shooting menu bank” and picked what I saved as my sports settings.

Next, I went to my “Custom menu settings” and picked the setting I saved as my sports settings.

Lastly, I put the shutter release on continuous high.

To see what each of these settings are on my Nikon D4, you can read this earlier blog post on my Sports Settings for the Nikon D4.

The Nikon D750 could have performed much better, but the point of this blog post is how important it is to concentrate on the action when you need to capture a moment, not your camera.

The one significant advantage of the Nikon D4 over the D750 was 11 fps. The focus tracking and 11 fps gave me more moments to choose my best shot. In addition, the buffer is more significant, so you can shoot more frames before the buffer fills.

The best thing to know is that if you need to get the shot, you must know that you have maximized your camera settings. You don’t do this when you need a photo; you do this when you take your camera and go and practice. For example, maybe you go by a busy road and practice shooting moving traffic so you can tweak your focus settings. After you get that set, then you move to another location to set.

Once you get all the settings just right, then save them. My Nikon D4 gives me four different memory banks to save my settings.

Nikon D4, Sigma 70-200mm f/2.8 EX DG APO OS HSM, ISO 1250, ƒ/2.8, 1/2000

The payoff for maximizing my camera’s settings is having a moment like this to remember my daughter and her cousin having fun.

You will pick the camera you are most comfortable with to get the photo you need, so take the time and calibrate the camera for the situations you will shoot.

Creating the promotional poster for a theater production

Reading Time: 4 minutes
 
Nikon D4, Sigma 24-105mm f/4 DG OS HSM Art Lens, ISO 1250, ƒ/8, 1/50

Just the other week, I teased you with some test shots. These are some of the final images from our shoot.

Editorial Note: Due to the contract signed to put on the play we cannot promote the name of the play until February 23rd. Another theater company is putting it on right now and has rights to PR and Advertising in our market.

Now to give you a feel for the before and after, here is a shot my wife took on her phone.


Yes, we are shooting during daylight. So you cannot get this photo with your smartphone or, for that matter, any camera.

Photography like this is about lighting and controlling it.

I set up 3 Alienbees B1600 flashes with CTO gels on the lights earlier. The camera is white balanced for tungsten. This white balance adjustment means wherever the flashes of orange light hit will be neutral and give good skin tones. However, all the available daylight will now be blue.

Nikon D4, Sigma 24-105mm f/4 DG OS HSM Art Lens, ISO 2500, ƒ/6.3, 1/8000

For the individual cast member shots, I just used one flash off to the side about 45º right of the camera and about 45º above the cast member’s head.

You should notice that the shutter speed is 1/8000. To make this work, I am using the PocketWizard TT5 on the flash with an AC-9 adapter plugging into the phone cord connection on the Alienbee B1600. This gear will let me shoot at any shutter speed. We call this high-speed sync.

I have the PocketWizard TT1 transmitter with the AC-3, which lets me remotely control the flashes’ power from the camera. For example, I turn up or down the power from -3 to +3 in 1/3 increments.

There are three groups, A, B, and C, and two Channels, 1 & 2. Each flash was on a different group setting, and all were simultaneously on the same channel to fire.

Nikon D4, Sigma 24-105mm f/4 DG OS HSM Art Lens, ISO 2500, ƒ/5.6, 1/5000
Nikon D4, Sigma 24-105mm f/4 DG OS HSM Art Lens, ISO 2500, ƒ/7.1, 1/5000
Nikon D4, Sigma 24-105mm f/4 DG OS HSM Art Lens, ISO 2500, ƒ/6.3, 1/8000

We moved the group around in our backyard, trying different locations and lighting.

Nikon D4, Sigma 24-105mm f/4 DG OS HSM Art Lens, ISO 1600, ƒ/5, 1/8000

The most significant changes from my test shots, which you can see in the earlier blog post, were 1) Costumes, 2) Makeup & 3) smoke machine.

As you can see, we had to work to get the right shot with the smoke. So often, it overpowers the photo.

Here is a view of the photo without the strobes going off.

Now you know how sometimes they film those nighttime scenes in so many movies.

Shooting wireless tethered for headshots

Reading Time: 2 minutes
 
Nikon D4, Nikon 85mm ƒ/1.8G, ISO 50, ƒ/4.5, 1/160

Yesterday I did headshots for my daughter’s theater. I used a straightforward setup that I have shown here before.

As I was shooting, you can also see the setup with my wife helping with putting the names into the metadata fields.

Now I was shooting wireless tethered by using the CamRanger system.

You can look at my earlier blog post on the system to see how to use this system. I shot all these as RAW this time and didn’t shoot JPEGs.

There is a delay from the time shot is taken to the time it pops up on the computer.

Here is the workflow outlined for you:

You can see the screenshot of adding the subject’s names to the caption field using PhotoMechanic.

The client can download with a password I provided or order prints online.

Here you can see the screen when they add it to their cart:

A Director of Photography is your organizations parachute and/or translator

Reading Time: 3 minutes
 
Nikon D3S, AF-S NIKKOR 28-300mm f/3.5-5.6G ED VR, ISO 400, ƒ/5.6, 1/2000

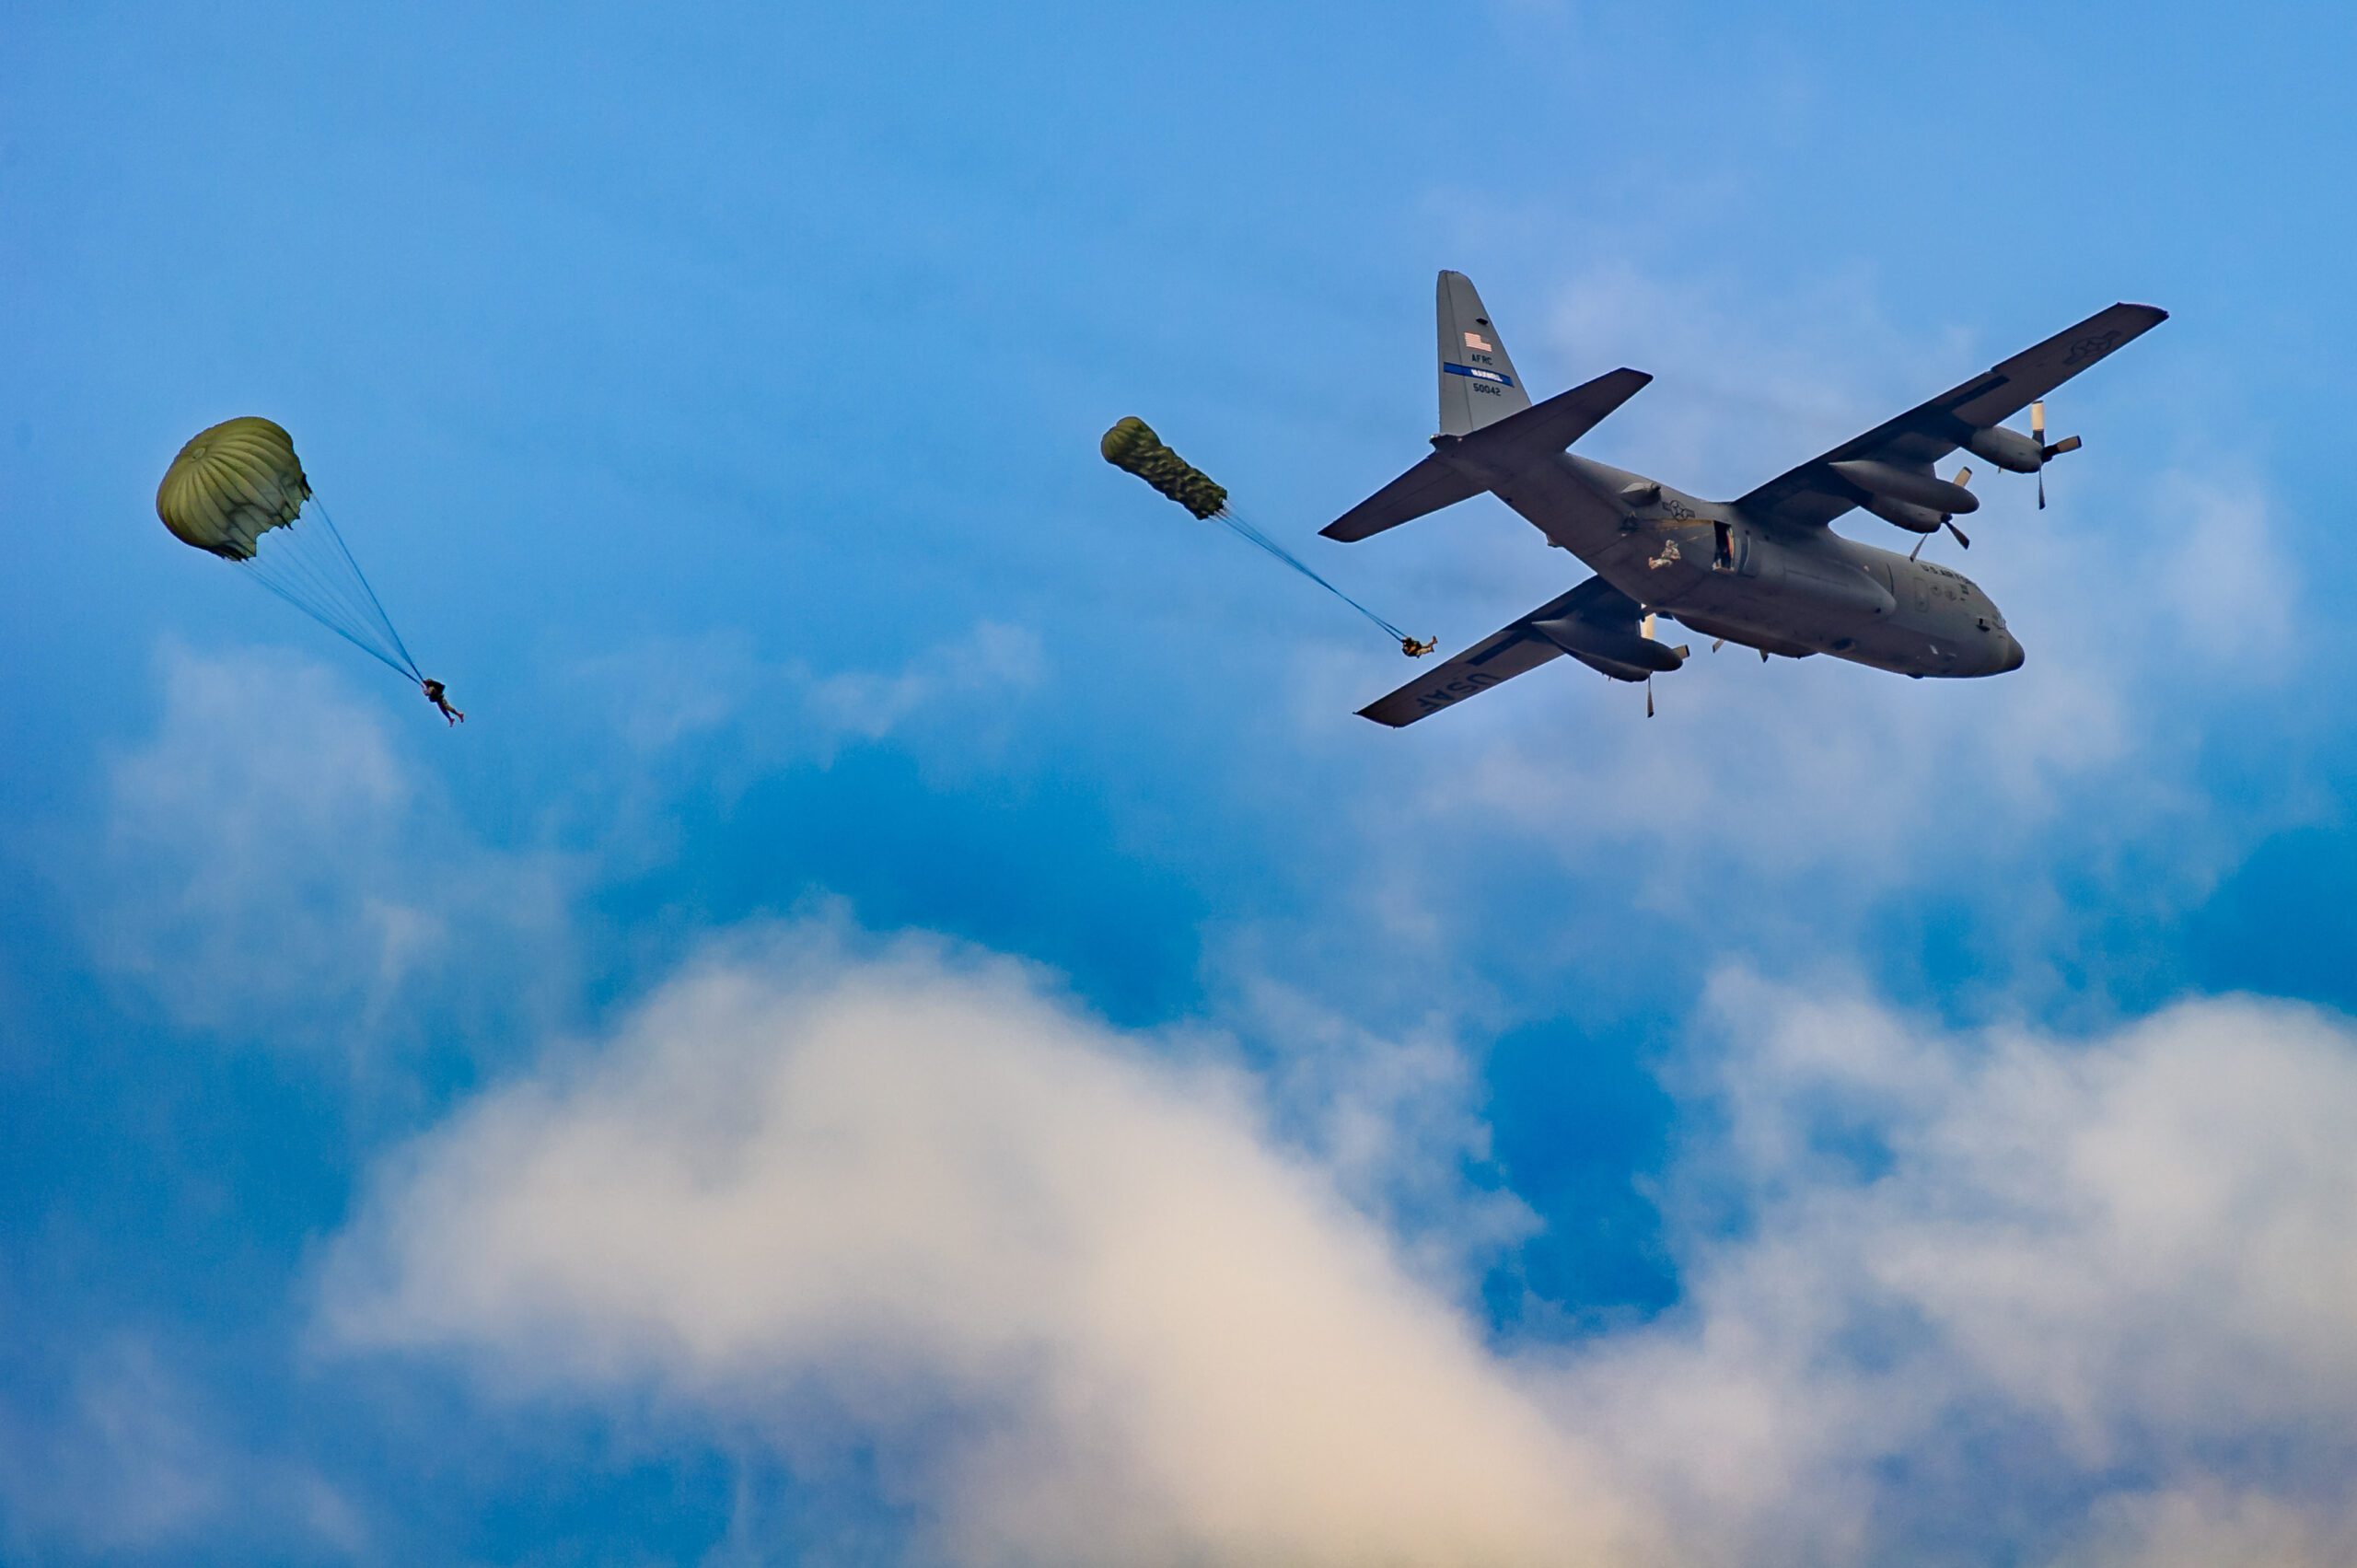
You don’t jump out of a plane without a parachute unless you want to die. It is pretty self-explanatory as to why you need support, or you will crash to the ground.

The parachute is a device used to slow the motion of an object through an atmosphere by creating drag. For example, when jumping out of a plane, it is more important that you are alive when you land than how fast it took you to get to the ground.

Nikon D3S, AF-S NIKKOR 28-300mm f/3.5-5.6G ED VR, ISO 450, ƒ/5.6, 1/2000

Our son Nelson is on the left in this photo. He had just finished his first jump at the Army’s Airborne School in Fort Benning, Georgia. After they land, each soldier is required to repack their parachute.

They will use the same parachute again and again during school. So you don’t use the parachute once to help you navigate the jump and abandon it later.

The Director of Photography is like a parachute to the organization that hires photographers. They help protect the organization and the photographers so that the mission is safely accomplished.

Here Patrick Murphy-Racey talks with Lily Wang the way sometimes a director of photography does with their photographers. Sometimes they coach their photographers about things they need to do for the organization.

Another metaphor is to think of the Director of Photography as a translator. They handle the details to ensure the project is done correctly and completely.

To be a translator, you cannot just speak both languages. You have to take tests and prove that you understand the nuances of the wording, or you get those translations we call Chinglish.

Cecil B. De Mille wrote:

“The Director of Photography is the custodian of the heart of film making… as the writers are of its soul… his tool is a box with a glass window, lifeless until he breathes into it his creative spirit and injects into its steel veins, the plasma of his imagination… the product of his camera, and therefore of his  magic, means many things to many persons – fulfillment of an ambition… realization of dreams.”

The Director of Photography for a movie has a similar role as a Director of Photography for still photography projects.

Here are some things that a Director of Photographer should do for your organization:

  • It is in the meetings that projects are created to help determine if photography is a good solution
    • Generates ideas for the organization
    • Helps refine ideas by suggesting different treatments for projects
    • Continues to remind the team to remember visuals in their projects
  • Finds the best photographer for the job
  • Communicates with the photographer all the needs and expectations of the project
  • Negotiates rates based on
    • The difficulty of the job
    • Rights management
    • Scope of the project
  • Insures metadata is embedded properly into all images
    • Proper caption information
    • Keywording
    • Rights are spelled out
    • Model/Property Release
    • Filename
  • Works with the photographer to get all model and property releases as needed and that they are also digitally filed with the photos into the image database
 
James Dockery works as a lead video editor for ESPN and is here talking with students about their projects during our workshop last year in Romania. So often, the director of photography wears this hat where they are helping the photographer flesh out an idea or treatment of the story.
 
They serve as a sounding board for the organization’s communications staff and the photographers.
 
Maybe from your experience, you can add other aspects that I might have left out in the comments section.

Make your family photos more valuable for future generations

Reading Time: 4 minutes
 
Nikon D750, Sigma 24-105mm f/4 DG OS HSM Art Lens, ISO 200, ƒ/6.3, 1/160–Neewer T850, Neewer 433MHz Wireless 16 Channel Radio system

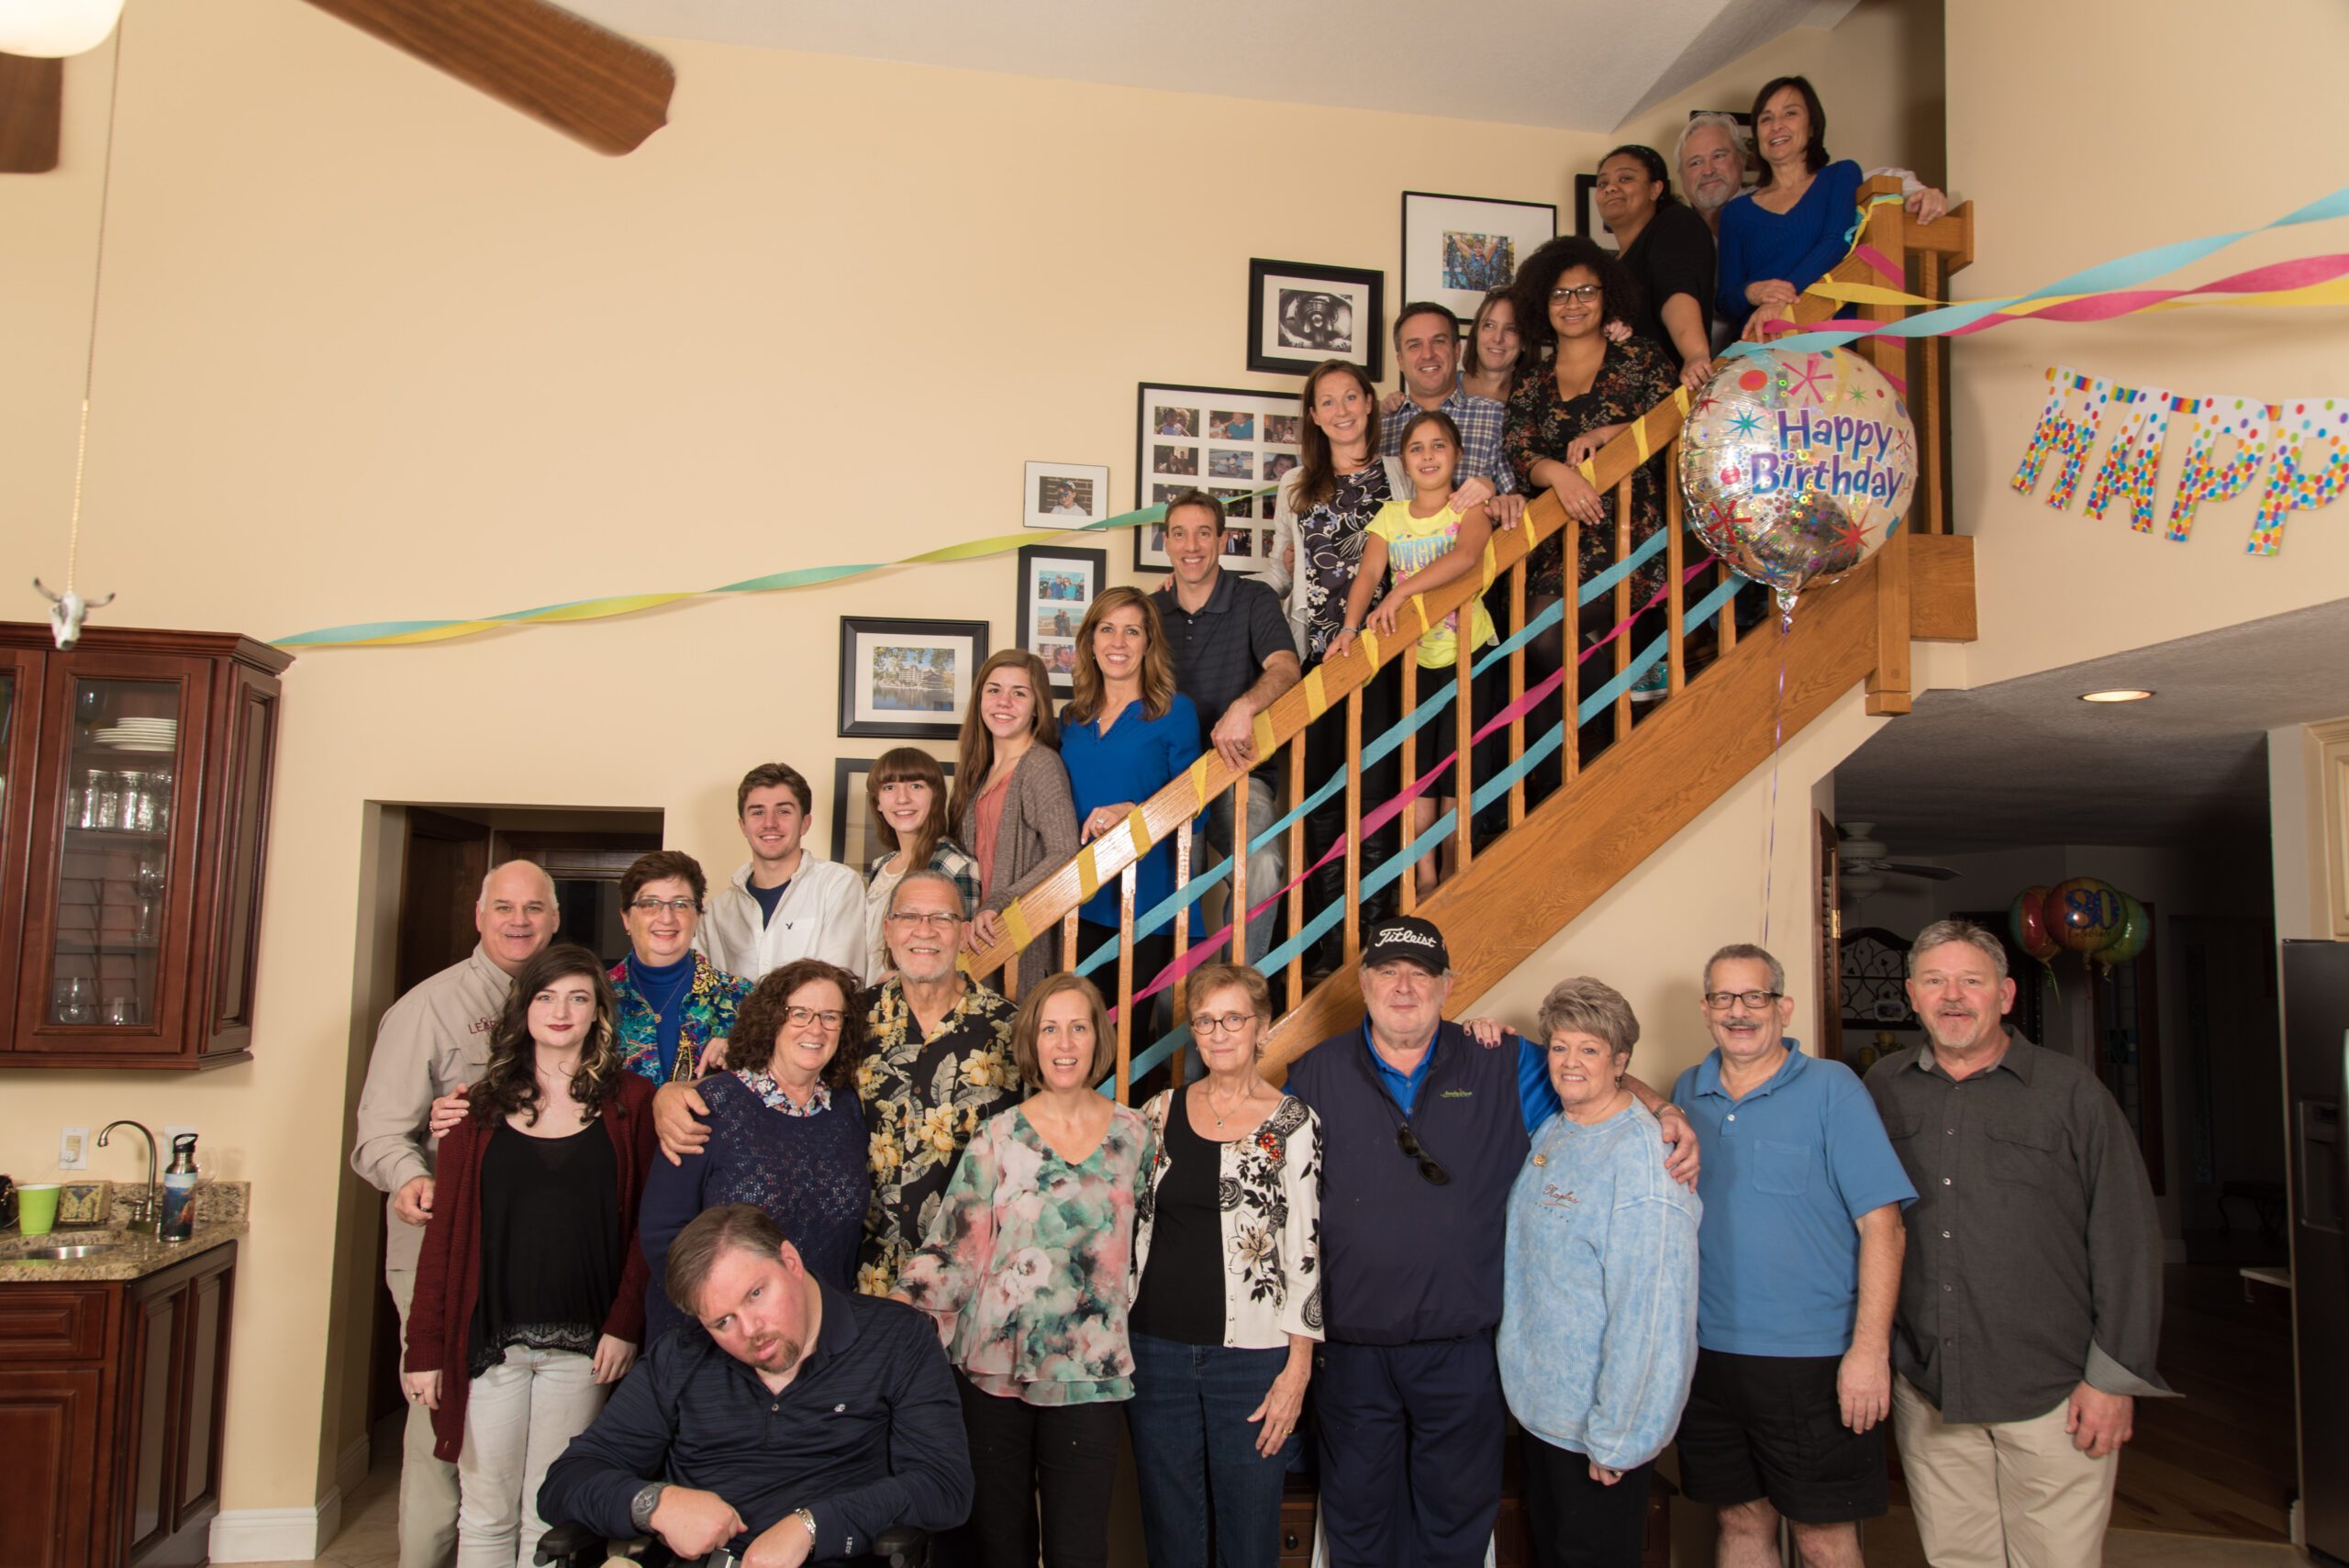
This past weekend our family flew down to Jupiter, Florida, to surprise my wife’s oldest sister for her 80th birthday.

We met some of the family for the first time and others my wife hadn’t seen in 39 years.

After taking this photo, I didn’t wait till I got home to work on it on the computer. I wanted to be sure to make this photo the most valuable asset it can be to our family from now on.

Here is a video to help you know how to do this in Adobe Lightroom:

[youtube https://www.youtube.com/watch?v=45_zCZnqmqU]
After I had the photo in Adobe Lightroom editing software, I used Face Recognition technology to help identify every person in all the photos I took this weekend. Now the software, while not perfect, did a great job. However, I did have to force it to tag some of the faces.

The good thing is now inside the metadata of the image is everyone’s name in this photograph.

Metadata is “data that provides information about other data”. Two types of metadata exist: structural metadata and descriptive metadata. Structural metadata is data about the containers of data. Descriptive metadata uses individual instances of application data or the data content.

Metadata was traditionally in the card catalogs of libraries. As information has become increasingly digital, metadata is also used to describe digital data using metadata standards specific to a particular discipline. Describing the contents and context of data or data files increases their usefulness. For example, a web page may include metadata specifying what language the page is written in, what tools were used to create it, and where to find more information about the subject; this metadata can automatically improve the reader’s experience.

The main purpose of metadata is to facilitate in the discovery of relevant information, more often classified as resource discovery. Metadata also helps organize electronic resources, provide digital identification, and helps support archiving and preservation of the resource. Metadata assists in resource discovery by “allowing resources to be found by relevant criteria, identifying resources, bringing similar resources together, distinguishing dissimilar resources, and giving location information.”

This photo is from my dad’s side of the family. I know the man on the far left (even though this is sketchy) is my great grandfather, who owned the blacksmith. He is H. P. Sewell.

Who are the rest of the people? We don’t know.

Make your photos from your family more valuable. Take the time to identify who is in the picture.

Nikon D750, Sigma 24-105mm f/4 DG OS HSM Art Lens, ISO 100, ƒ/4, 1/200

This photo is of the three sisters from the weekend and my wife’s great niece. Just imagine a few generations later where they tell their children stories about who their ancestors were.

In the past, people put the names of people on the back of the print. Today embedding that information using metadata is even better.

In PhotoShop, go to the menu item File>File Info.

Under the primary table in the description box, put the people’s names in the photo. You can even put them from left to right and row 1, 2, and so on to help people in the future who will not know who anyone is in the photograph.

This screenshot is the Spotlight search on a Mac, but you can do a text search on a PC and get the same results. Because the names are embedded in a photo, you can now search and find those people. Here I put the last name in for Teubner. I didn’t even have to finish spelling it before the photos started listing for me in the search box.

I set up two umbrellas with hot-shoe flashes to make the group photos this past weekend. Once I had them set up, we had one of our family members take a picture of our family, which rarely happens. Like the cobbler, we have a few photos of us as a family.

Nikon D750, Sigma 24-105mm f/4 DG OS HSM Art Lens, ISO 180, ƒ/4, 1/250–fill flash.

While we set up and took some posed photos, we enjoyed those moments, capturing the family having fun.

Nikon D4, Sigma 70-200mm f/2.8 EX DG APO OS HSM, ISO 1250, ƒ/2.8, 1/2000
Nikon D750, Sigma 24-105mm f/4 DG OS HSM Art Lens, ISO 12800, ƒ/5.6, 1/60

I feel great about this past weekend. I not only got to meet family members I didn’t know we had, but I can now look back at the photos, tell my family who is who, and help them know what a wonderful family heritage we have.

Think of Social Media as another publication

Reading Time: 3 minutes
 

If you grew up in the industry shooting and writing for a printed newspaper, magazine, or even for a website, you need to see Social Media as another publication.

Too many editors, journalists, and photojournalists are too consumed by the story and not enough about the audience. In most traditional places, for news media to contribute the way it worked was somewhat of a mystery for the content providers.

The content was the carrot to get advertisers. But unfortunately, most journalists didn’t understand how their pay was created and concentrated on creating content.

Great content is useless if audiences don’t know that it exists. Today the audience is more accessible to reach than ever before. You don’t need publishers and large conglomerates to help you to get them.

Today when you post onto a social media outlet like Instagram, you show your portfolio. You have gone not to one photo editor but around them to their audience and asking them to respond.

Instead of leaving your business card, you leave them a link to your channel. They can then decide to follow you or not. If they don’t, then your content isn’t relevant to them. You search for an audience interested in your content or write content for your audience.

Now even though you are posting, say, on Instagram or Twitter, you are not really in front of your audience until you start using #hastags. #Sports will put you in front of Twitter #Sports or on Instagram. Think of Instagram as your cable company and the #hastags as a channel.

Twitter even shows you on your page the trending #hastags

I used to work for a Missionary Agency that had its magazine and used state papers to distribute their stories for years. However, their audience stopped looking at their content. Those audiences were, for the most part, local churches.

My church’s Facebook page

Today, those local churches have their own Facebook groups, Twitter accounts, and Instagram accounts. So now, if you know their #hashtags, you can, in essence, produce content and drop it right into their publication.

Take a moment and first Google an organization using hashtags like #firstBaptistHendersonville to see if you can uncover their audience. I found that they are using the acronym #fbchnc. If I want them to see my content, I tweet a sentence with their hashtag and then be sure there is a link to where I put the content. Wa-la, now I have just published on their pages.

If you have Facebook, search for those organizations and audiences you are interested in joining. See if they will let you join their group. If they let you join, you can post your content in the group. Again, just like a publication as a way to reach that audience. Now, as long as your content is valuable, they will continue to allow you to be a part of their group. However, if your content isn’t well received, they will block you and remove you from their group.

Now, if you are creating all that great content like the great journalist or photojournalist that you think you are, then you are on the way to becoming a household name.

Now, after a while, you may not need to go and publish as often on these social media outlets because you have so many “followers” of your own, and people are referring people to your content.

You can quickly get advertisers at this point.

For example, if you create video content and post it on Youtube, their top content creators earn millions. Check out the article on Forbes about the top earners in 2015 here http://www.forbes.com/sites/maddieberg/2015/10/14/the-worlds-highest-paid-youtube-stars-2015/#2715e4857a0b16cdcf7f542c

For those who don’t want to do all this and want to create content, you need to hook up with someone who is doing this and get them to let you help them create more content. Doing this ensures you will make less money than if you did it yourself.

Expression is often the key element to great photos

Reading Time: 5 minutes
 
Nikon D4, Sigma 120-300mm ƒ/2.8 DG OS HSM | S, Sigma TC-2001 2x, ISO 12800, ƒ/5.6, 1/1250
Key elements of the sports photo often include the ball and the competition. Here you can see the player’s expression and the valiant effort of the receiver to catch the ball. He is fully extended, running full speed, and keeping his eyes on the ball. Also, the defensive player can see the catch and his concentration on the ball.
 
Nikon D4, Sigma 120-300mm ƒ/2.8 DG OS HSM | S, Sigma TC-2001 2x, ISO 12800, ƒ/5.6, 1/2000
Here you can see the runner extending for all he can and also see a defensive player’s look of concern that he is still moving ahead.
Nikon D4, Sigma 120-300mm ƒ/2.8 DG OS HSM | S, Sigma TC-2001 2x, ISO 5000, ƒ/5.6, 1/2000

The key to almost all good to great photos of people is EXPRESSION. In sports, it can be the one thing that helps tell you more about the game.

The closer crop of the top photo shows how intense the defensive player is playing.

Nikon D4, Sigma 120-300mm ƒ/2.8 DG OS HSM | S, Sigma TC-2001 2x, ISO 12800, ƒ/5.6, 1/2000

In this photo, you can see the defensive players reacting to the quarterback starting to pass the ball on the left and right.

Sometimes sports photographers tend to crop tight to ensure that you need to see. However, sometimes pulling back and including more of the action helps to communicate more about the play. For example, you miss that two players’ faces are reacting, and you forget how close the sack of the quarterback is on the play by being a little looser on the space.

Sports enthusiasts like to see the game elements, whereas those who are just a photographer will tend to crop tight for impact.

As one who played sports, I can tell you that we like to see more play. Seeing the player’s feet during basketball is how players decide which way to drive, for example. It is why the crossover is such a big deal.

While this cropped version helps you see the player’s faces, the looser shot gives you the perspective of the play development.

Nikon D4, Sigma 120-300mm ƒ/2.8 DG OS HSM | S, Sigma TC-2001 2x, ISO 12800, ƒ/5.6, 1/400

When you have very little space to use a photo, it is better to go tight, but this is why so many sports enthusiasts love getting Sports Illustrated. Those photos that filled two pages didn’t need to be tight as the photo in the newspaper’s sports section. Instead, they had the space, which helped those who play sports better understand the play.

Nikon D4, Sigma 120-300mm ƒ/2.8 DG OS HSM | S, Sigma TC-2001 2x, ISO 4000, ƒ/5.6, 1/2000

In a high school game, the quarterback concentrates more on the execution, which shows in the face. However, they are moving so much quicker in the pros that it must be an instinct that kicks in for the quarterback to make the handoff.

Nikon D4, Sigma 120-300mm ƒ/2.8 DG OS HSM | S, Sigma TC-2001 2x, ISO 7200, ƒ/5.6, 1/2000

Expression is more than just in the face. Here you see the bodies all twisting to adjust to the play that just went by them. You also see the ball carrier looking more downfield and missing the defensive player to his left.

Nikon D4, Sigma 120-300mm ƒ/2.8 DG OS HSM | S, Sigma TC-2001 2x, ISO 6400, ƒ/5.6, 1/2000

This photo is a split second later when his forward advance is stopped.

Which photo here is the best picture? You will see photo editors studying an image for the nuances of the expression of the bodies in motion.

Nikon D4, Sigma 120-300mm ƒ/2.8 DG OS HSM | S, Sigma TC-2001 2x, ISO 6400, ƒ/5.6, 1/2000

 This first one looks like the defensive player is about to give up.

Nikon D4, Sigma 120-300mm ƒ/2.8 DG OS HSM | S, Sigma TC-2001 2x, ISO 6400, ƒ/5.6, 1/2000

 In the second photo, the defensive player looks like he is matching his stride, and you wonder if he will catch him.

Nikon D4, Sigma 120-300mm ƒ/2.8 DG OS HSM | S, Sigma TC-2001 2x, ISO 6400, ƒ/5.6, 1/2000

In the last photo, you can see the offensive player pulling away, and the defensive player is giving his previous diving effort to stop the touchdown.

Which photo is best? Well, which one not only tells the outcome of the play, but it often needs to be the moment that communicates the game. Unfortunately, most media outlets do not have unlimited space and must choose the moments they use to communicate.

Nikon D4, Sigma 120-300mm ƒ/2.8 DG OS HSM | S, Sigma TC-2001 2x, ISO 5000, ƒ/5.6, 1/2000

You have to pick the right moment to capture the intensity of the play.

Returning to the photo above, compare it to the previous split second.

Nikon D4, Sigma 120-300mm ƒ/2.8 DG OS HSM | S, Sigma TC-2001 2x, ISO 12800, ƒ/5.6, 1/400

See how the defensive player’s head is down, and you don’t see the eyes?

Now, look at the photo from the split second later of the same play.

Nikon D4, Sigma 120-300mm ƒ/2.8 DG OS HSM | S, Sigma TC-2001 2x, ISO 12800, ƒ/5.6, 1/400

The most significant difference between the two photos is being able to see the expression.

Order of importance:

  1. Expression
  2. Composition
  3. Exposure
The difference between the genuinely great photos and the rest is that all three are well executed. But the sign of the technician photographer is often those who concentrate more on the last two elements of composition and exposure and not enough on expression.
 
Nikon D3, AF-S NIKKOR 28-300mm f/3.5-5.6G ED VR, ISO 280, ƒ/7.1, 1/200
The expression can also be in the form of light, which helps to create a mood.
 
Nikon D3, AF-S NIKKOR 14-24mm f/2.8G ED, ISO 200, ƒ/7.1, 1/100