

This is based on my experience, and others may have other suggestions that might contradict my comments.
I recommend a few settings when shooting a video on your Nikon D4. When this becomes critical, you decide to shoot multiple cameras and need everything to match when you get into post-production.
I think editing RAW images in Adobe Lightroom and getting ideas to match from different cameras is much easier and more accurate than using the video editing software of Adobe Premiere or Final Cut Pro X.
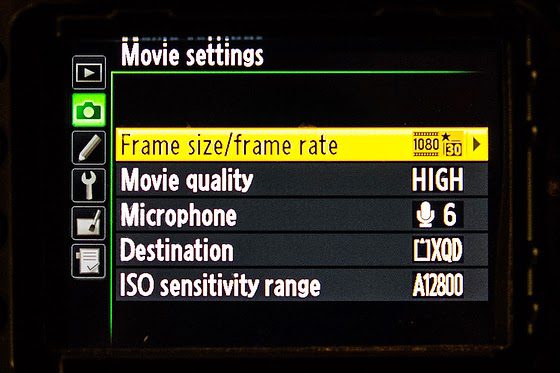
Before you go to the Movie settings on the camera, I recommend creating a menu bank for Video, as I have done here. This way, once you have made all the settings, they are saved.

In the movie Settings, choose your Frame Size/Frame Rate. The standard Frame Rate for movie theaters and TV is 24 fps.
When you pan or right to left, you will see Frame Rate affect the look and feel of the image. The public is so used to 24 fps that this is the best default. Some use 30 fps.

People often shoot higher Frame rates to make a slow motion by slowing it down to 24 fps.
Your shutter speed on the camera should be set to twice the Frame Rate for the movie settings. If you shoot 24 frames, you will be at 1/60 since this is the closest. If you hit 60 fps, then 1/125 should be your setting.

I usually shoot on 1080/30fps and set it for high quality.


Most of the time, the microphone setting must be set manually, and the sound levels must be used to adjust the recording volume. I highly recommend using headphones and looking at the audio meter on the viewfinder. Be careful because the recording level and the headphone volumes are set separately.

I have my color space set on Adobe RGB. You also want to set the Picture Control, then.

Some of this is personal preference, but the key is if using more than one camera, all the settings are set the same, or you will have trouble matching the Video, and color can look off switching between the cameras.
You can adjust your microphone levels and exposure when you go to Live View in movie mode. To prevent light entering via the viewfinder from interfering with exposure, close the viewfinder eyepiece shutter.
It would help if you went to manual mode to have the most control over the settings. A subject’s movement can change the exposure even when the light stays the same. Use manual mode.
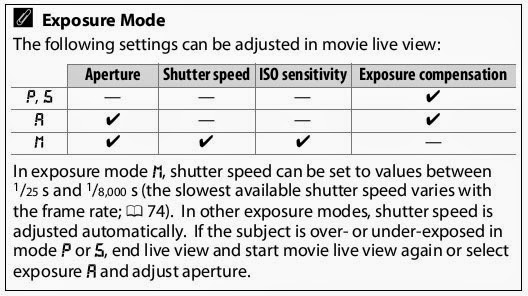
As you can see from this chart, you can control more in manual mode.
Regarding focus, I use autofocus when I have a subject framed and then go to the manual guide.
The motor for the lens tends to make a noise I don’t want to pick up.
Microphone
I recommend using a Lavalier microphone for interviews, and for natural sound and quick-moving situations, I recommend a shotgun microphone.
Here is an earlier blog post I did to help you with the audio recording.