One Week Lighting Workshop With Stanley

Since 2006 I have been doing a one-week lighting workshop as part of the School of Photography program of YWAM with Dennis Fahringer in Kona, Hawaii.

This year I was asked by two of his former students to come to Dunham, Quebec, Canada, and teach the same thing, but this time to a school that will be in French and English.

This was their very first time leading a School of Photography for YWAM. The leaders Raphael Paquet and Julie Gavillet hosted me during the week and translated me into French.

We did four lighting assignments.

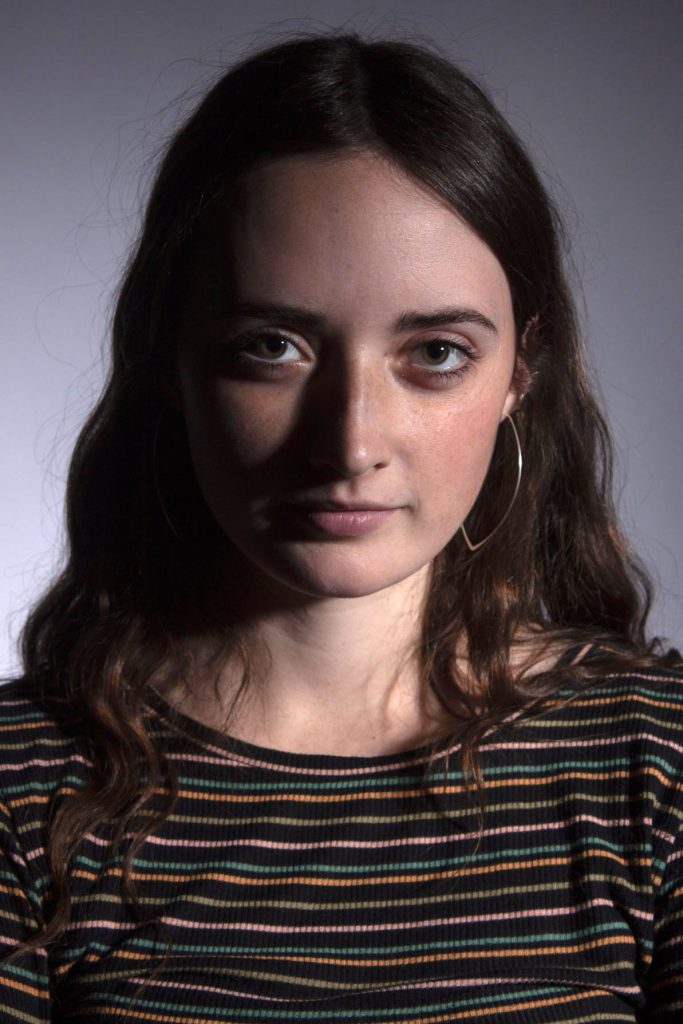
Rembrandt

© Heidi Bergeron

The students were learning where to place the leading light for a starting position with portraits. They also were learning not to light everything evenly.

Students in class working on Rembrandt Lighting

1:3 Lighting Ratio

© Heidi Bergeron

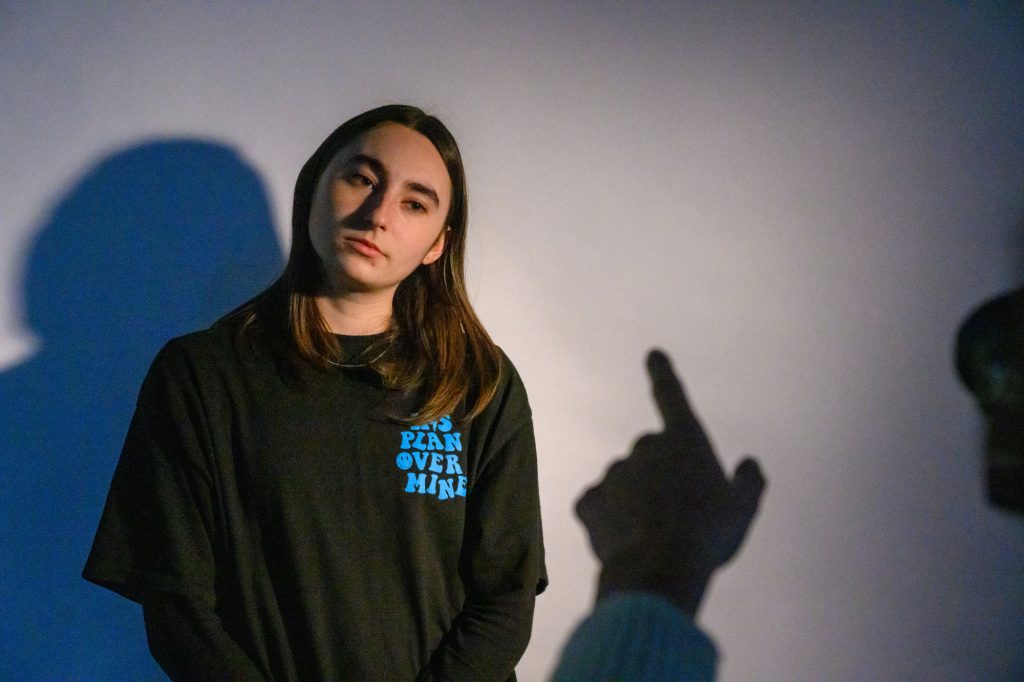
Clamshell Lighting

To demonstrate the Clamshell/Butterfly lighting, I took everyone’s photo. Here are the three students.

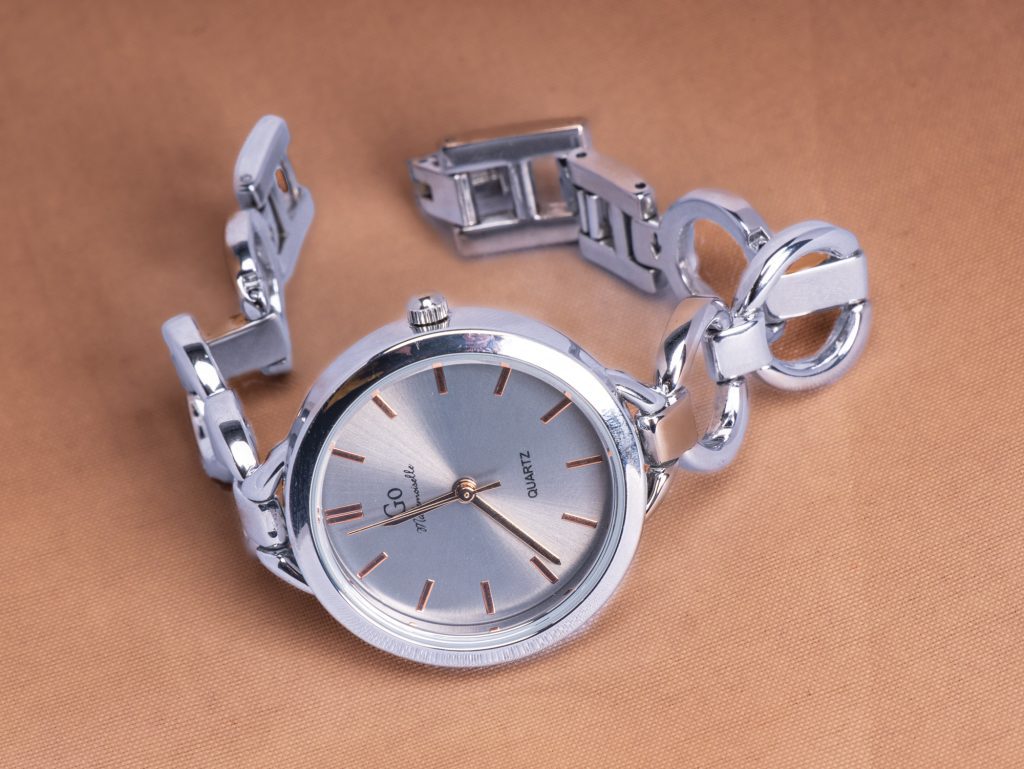
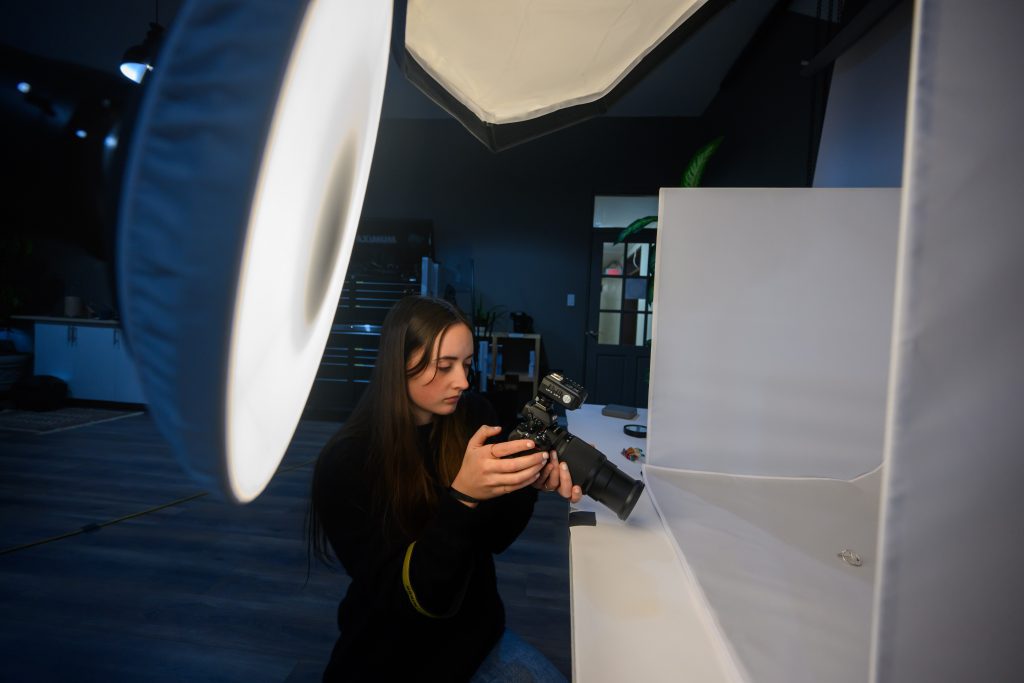
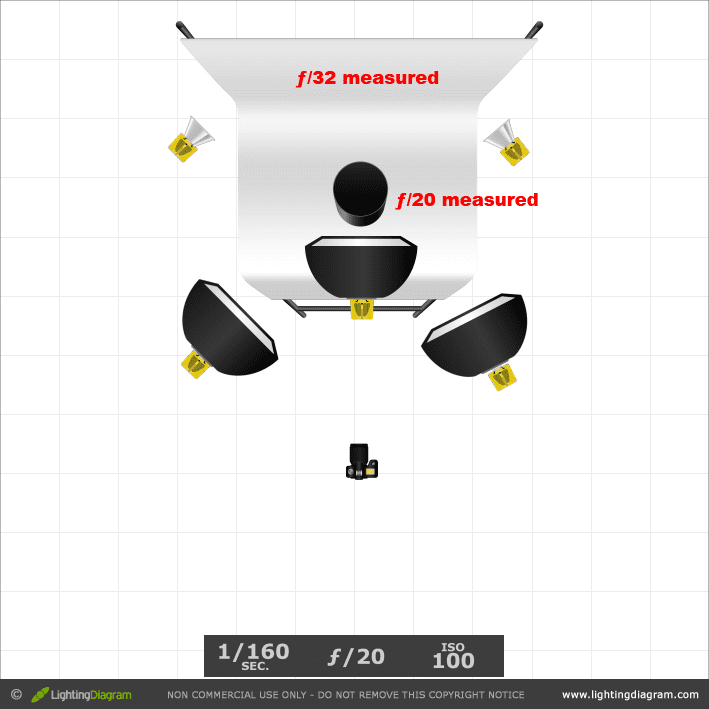
Tent Lighting for Products

This is because some students work with the tent lighting setup to photograph products.

Table Top Photography

I also told about my journey in photography and how it took time before I got the assignments I wanted. I also taught them a little about how to make a living with Business Practices.

You may be interested in a Lighting Workshop. Drop me a line if you are interested.

Working under Mercury-Vapor Lights

If you read my blog regularly, my favorite way to set my white balance is to do a custom white balance setting using ExpoDisc. So here is a quick reminder–skip down if you want to see another way to set your white balance.

Remember under fluorescent and mercury vapor to set the white balance at shutter speeds of 1/100 or slower. Then, after custom white balancing the camera, you can later shoot under a faster shutter speed.

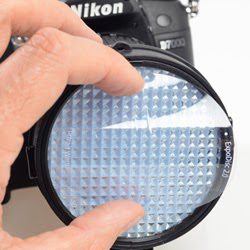
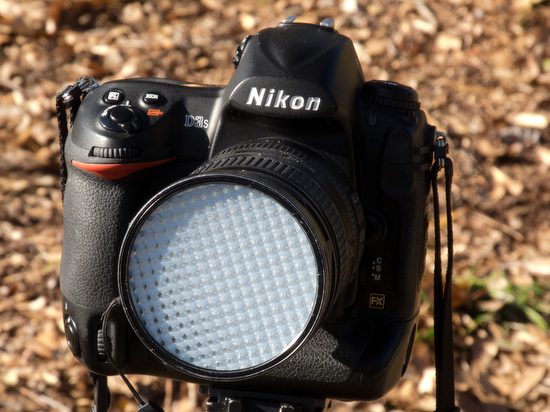
ExposDisc goes in front of the lens, and then you use it to get an incident reading rather than a reflective reading of the light.
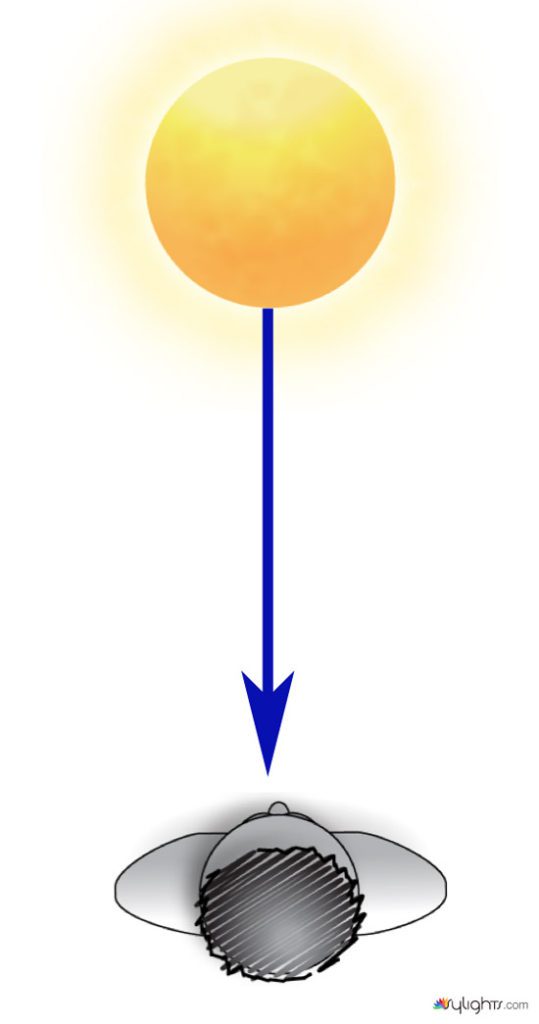
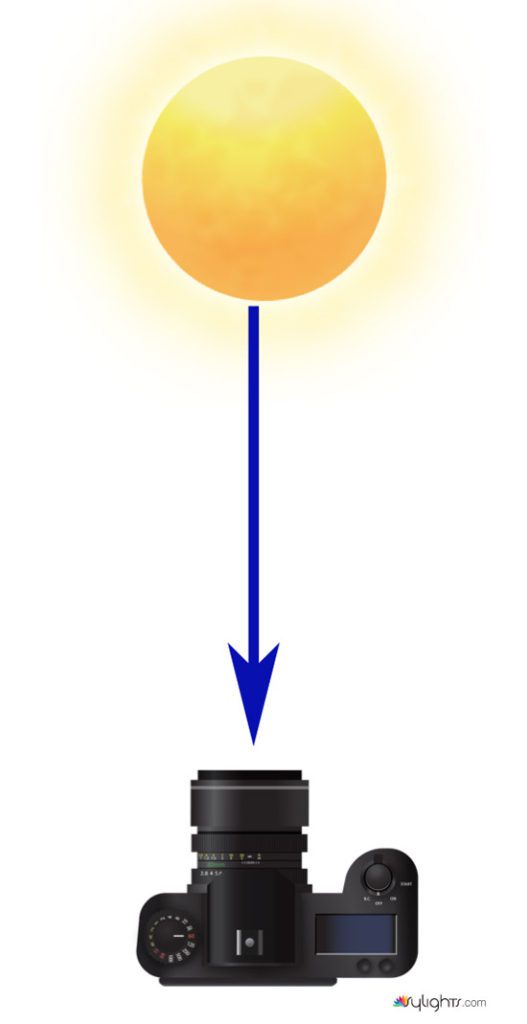
Notice the direction of the light hitting the subject. Next, you move to the same position to get the light reading below.
Point the camera toward the direction of the light falling on the subject.

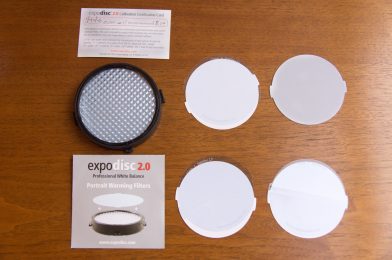
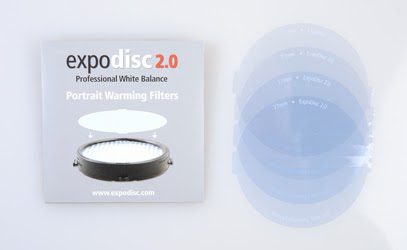
The latest upgraded version has introduced the warming filters you place before the ExpoDisc. They are light blue, and since the camera tries to neutralize the colors will add yellow to your photos, thus warming them up. The actual color blends cyan and blue, adding red/yellow to your photos. Depending on your taste, they come in different densities to allow you to add just a little or more.

Presets in Nikon D4

Check your manual for your camera because this is for the Nikon D4. Then, somewhere in your menu, you can adjust using presets for white balance.


On my Nikon D4, in the menu for White Balance, you can choose up to seven different presets for fluorescent. However, I have found a significant problem trying this method; it isn’t easy to pick the right color because the monitor on the back of the camera isn’t that easy to see color in all situations.

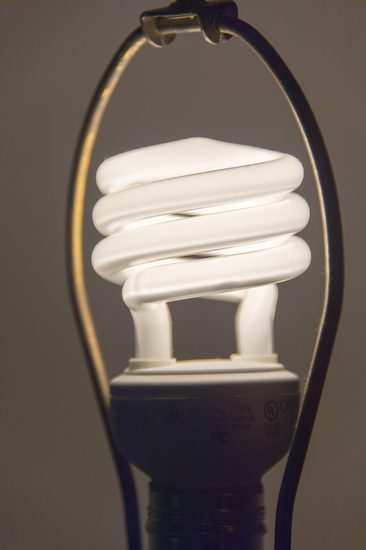
Fluorescent lamps are manufactured to alter the mixture of phosphors inside the tube. Warm-white fluorescents have a color spectrum of 2700 K and are famous for residential lighting. Neutral-white fluorescents have a color spectrum of 3000 K or 3500 K. Cool-white fluorescents have a color spectrum of 4100 K and are renowned for office lighting. Finally, daylight fluorescents have a color spectrum of 5000 K to 6500 K, bluish-white.

Note that on the Nikon D4, you also have a preset for those awful Mercury-Vapor lights. Sometimes I have found that I prefer one of the fluorescent settings under some of the newer mercury-vapor lights when using this system instead of the custom white balance.

White balance 2.0: Saving even more time in post-production


I just recently upgraded my ExpoDisc. The upgrades come with the Portrait Warming Filters. This little addition saves me more steps in Adobe Lightroom and gives me more time to enjoy life.

I have been using ExpoDisc since 2005. George Wallace invented ExpoDisc to help his students at San Jose State to get better exposure to Kodachrome 25. He studied with Ansel Adams and Minor White, where he learned to master the zone system.

I wrote about how to use the ExpoDisc a while back, but here is the basic idea of how it works.

ExposDisc goes in front of the lens, and then you use it to get an incident reading rather than a reflective reading of the light.
Notice the direction of the light hitting the subject. Next, you move to the same position to get the light reading below.
Point the camera toward the direction of the light falling on the subject.

The latest upgraded version has introduced the warming filters you place before the ExpoDisc.


In Adobe Lightroom in the Develop Module, you can adjust the color temperature; this is where I often warm up my photos.
 
Now I no longer need to do this. I currently use the +1 warming filter, which introduces just a little warmth into all my photos.
 
The cool thing is if you don’t want to do this for any reason, you don’t have to use the filter. Instead, if you want it even warmer, just use the +2 or start stacking the filters.
 
The Auto White Balance [AWB] setting on your camera is looking at the scene in front of the lens, and then it will read all the colors it sees and try to make it 18% gray. So if you have a red wall you photograph, the camera will all cyan to make this red wall appear gray.
 
If someone is in that photo, their skin will have a cyan color cast.
 
The problem with 18% gray cards depends on the angle you hold them. You can get a glare which will shift the camera color settings. I have found that every other system I have tried that uses reflective light reading [you point the camera at the device] is not as accurate as when the camera is put into the light, making an incident reading.
 
 
The second benefit of the newer ExpoDisc V 2.0 is it comes with a carrying case. When I first bought my ExpoDisc years ago, it came in the standard filter case, like all other filters you purchased. This new case you can put on your belt if you like and have it readily available.
 
When I first bought my ExpoDisc, I paid more than $120 for the device. Today it comes with more options and only costs $49.95.
 
If you consistently use ExpoDisc, I promise you that you will notice a consistency in skin tone with all your images that will make people see.

Custom White Balance vs Presets

Custom White Balance using ExpoDisc

Today I shot the Wreaths Across America Day event at Roswell Presbyterian Cemetery.

While shooting this, I realized many folks assume those presets for white balance will give good enough results. Well, sometimes they do. They will put you in the ballpark for each type of situation.

Auto White Balance

Now you may be satisfied with Auto White Balance. The point here is that it is different from the custom white balance above.

It was raining, and they didn’t have a rainy preset.

Cloudy Preset

While the cloudy preset is closer, I think it is slightly too orange.

Daylight Preset

Even the Daylight preset is different.

Shade Preset

I think the Shade Preset is the closest, but still some minor differences.

The latest version of ExpoDisc 2.0 comes with warming filters. They are slightly a cyan color of different densities to let you pick how much you want to warm up your image. So without them, you get a pure 18% grey; by adding these, you warm up the photo.

You just put the warming gel in the front of the ExpoDisc and then take your reading. This way, you can keep consistent warming to all your photos.

So what should you do? I would advise always doing custom. You can always change it later using Adobe Lightroom if you shot it RAW.

To the left, here is the pull-down menu available to you in Adobe Lightroom if you shot it RAW. Again, these are very similar to the presets on your camera.

Sometimes the perfect custom white balance maybe not be your preference in the end.

Click on the link below to see more photos from Wreaths Across America Day at Roswell Presbyterian Cemetery.

Wreaths Across America Day – Images | Stanley Leary
stanleyleary.photoshelter.com

Black & White bails me out

Nikon D4, 70-200, ISO 12800, 1/1600, ƒ/2.8 with Custom White balance using ExpoDisc

I walked into the gym and I knew right away I was going to have problems. In an earlier post you will see a basketball shot in color that looks really good. To the untrained eye the gyms may look alike in their lighting, but they are far from it.

I talked about shooting under fluorescent lights earlier in a blog posting. You need to set your custom white balance while the shutter speed is below 1/100 to be sure the cycling of the lights don’t affect the setting. Sodium Vapor lights, which these were are also cycling like the fluorescent lights.

The older the lights to more likely you will get color shifts and banding in the photos. One more factor that can affect the color shift is if the lights were not installed correctly. If some of the lights polarity is different from the others you will get banding.

While shooting this basketball game on this blog the minute I went above 1/100 I was getting color shift all through the image as you can see in the first photo. I was more interested in stopping the action than correct color.

By going to black and white I eliminate the color shifts in the photo. While I would prefer to have all the photos in color, unless you strobe the gym like I did here in this blog you really should just convert all the photos to black and white.

Nikon D4, 70-200, ISO 12800, 1/640, ƒ/2.8

Having the color off will make your work look amateurish. By eliminating the color you have now solved a problem with the color.

Nikon D4, 70-200, ISO 12800, 1/500, ƒ/2.8

Now please also note that while the ISO and the aperture never changed in all the photos, the shutter speed is different.

Here are my custom settings for this photo shoot from an earlier blog.  These are all for a Nikon D4

  • Auto ISO Low 100 – High 12,800
  • Minimum Shutter Speed set 1/2000
  • Shutter only when pushing release
  • Back button focusing
  • Auto Focus 21 pts centered and locked

Shooting under fluorescent requires you to slow down

Shooting under fluorescent lights can give unpredictable results if you do not slow down.

Fluorescent lamps using a magnetic mains frequency ballast do not give out a steady light; instead, they flicker at twice the supply frequency. This results in fluctuations in light output and color temperature, which may pose problems for photography and people who are sensitive to the flicker.

When the fluorescent light is at the end of its life, it can flicker more, and for those with photosensitive epilepsy, it can trigger a seizure.

Today, there are a range of types of fluorescent lights. You may have gone into a Home Depot or Lowe’s and noticed displays showing you different color temperatures of fluorescent lamps.


Color Temperature

Typical incandescent lighting is 2700 K, which is yellowish-white. Halogen lighting is 3000 K.

Fluorescent lamps are manufactured to a chosen color by altering the mixture of phosphors inside the tube. Warm-white fluorescents have a color spectrum of 2700 K and are famous for residential lighting. Neutral-white fluorescents have a color spectrum of 3000 K or 3500 K. Cool-white fluorescents have a color spectrum of 4100 K and are renowned for office lighting. Daylight fluorescents have a color spectrum of 5000 K to 6500 K, bluish-white.

On my Nikon D4, in the menu for White Balance, you can choose up to seven different presets for fluorescent. I have found a significant problem trying this method; it isn’t easy to pick the right color because the monitor on the back of the camera isn’t that easy to see color in all situations.

Flicker problem

Incandescent lights burn constantly, so your color temperature is consistent, regardless of your shutter speed. However, since fluorescent tubes act as light a flash and flickering, you will get an effect different than with flash where above your sync speed part of the frame is dark.

Look at these two different photos and see the color difference.

Everything is set the same (Nikon D4, ISO 12,800, f/5.6, 1/500) in each photo, but you can see the color difference is due to the flickering of the fluorescent.

Now, besides a color shift on the whole picture, you may end up with a band across the photo. I find this more annoying since it isn’t as easy to fix in post-production. Has this happened a few times, and you are screaming at that computer and camera?

Slow Down

You can get consistent color under fluorescent if you shoot at 1/100 or slower shutter speed.

Anytime you are under Fluorescent, Sodium-Vapor, or High Temp Mercury-Vapor, be sure to shoot slower than 1/100. You may need to shoot at 1/60 with some older model lights.

Why Strobes Are Used

Sometimes, shooting at 1/100th of a second isn’t going to cut it. A great example of this is shooting sports inside under those Sodium-Vapor lights in most arenas. This is why many pro photographers are using strobes for shooting sports. They need a consistent color without streaks or bands of color shift in the photograph.

If not for this flickering problem with these lights, it would be much more practical not to use strobes with today’s high ISO cameras.

Custom White Balance

The best solution I have found shooting under these lights that flicker like fluorescent is to do a custom white balance.

My favorite way to get a custom white balance is using my ExpoDisc.


ExposDisc goes in front of the lens, and then you use it to get an incident reading rather than a reflective reading of the light.
Notice the direction of the light hitting the subject. You move to the same position to get the light reading below.
Point the camera toward the direction of the light falling on the subject.

If the subject is facing me and the light is from the side, I face the camera with the ExpoDisc on it so it is pointing toward the camera position. The chart above is to help you understand the concept, but you can modify it.

Now, do a custom white balance if you are shooting in an arena with Sodium-Vapor lights. However, do the custom setting at a shutter speed lower than 1/100. You can then raise your shutter speed to higher than that for shooting, but this will give you more consistent color over your images. Even doing this will cause problems with about 5 – 10% of the photos.

Now you know to slow down your shutter speed when shooting under this light source.

Off Camera Flash Examples

Nikon D4, 28-300mm, ISO 100, 1/250, f/4.5, Off-Camera Fill Flash with Alien Bees 1600 and fired with Pocket Wizard Plus System.

Walk and Talk

This past week I was privileged to photograph on a college campus. I was combining two things that give me some of my best photos. By combining off-camera flash and having people moving I get two great results; great expressions and good color.

The very first thing I started with on the assignment was a group photo, but the best results as far as expressions was not when they were standing still, but when they all walked towards me. Now mind you I almost lost my photo assistant a few times. He was having to walk backwards and keep the same distance from the group constant. This was to ensure I had good exposures.

Nikon D4, 28-300mm, ISO 100, 1/250, f/6.3, Off-Camera Fill Flash with Alien Bees 1600 and fired with Pocket Wizard Plus System.

Since I had a good group and we finished early with the group photo, I then broke them up into small groups and then had each of those do what I call walk and talks. We assign one person to talk and the others to listen, not just with their ears but their eyes. So, the person talks. The others listen and then they all are walking towards me.

Thankfully we didn’t have the assistant ever fall this week while walking backwards, carrying lights and watching the subjects to be sure the light was on them.

Nikon D3S, 14-24mm, ISO 200, 1/50, f/5.6, Off-Camera Fill Flash with 2 – Alien Bees 1600 and fired with Pocket Wizard Plus System.

Buildings

I love shooting buildings at dusk. The photo here of the building and the students walking is at 7:55 p.m. and sunset is at 7:58 p.m.  I love this digital camera. You can see all the information, like what time I shot the photos.  While the sky looked better at about 20 minutes after sunset, we had to let the students go to another commitment.

We had them walk through the scene a few times.  The building is being lighted by my two Alien Bees 1600 on full power.  They are being powered by the Vagabond batteries made by Paul Bluff. 

Nikon D3S, 14-24mm, ISO 200, 1/1.6, f/11, Off-Camera Fill Flash with 2 – Alien Bees 1600 and fired with Pocket Wizard Plus System. The flash sync was set to Rear Sync to get the car lights behind the car and not in front of it.

The photo above was taken at 8:24 p.m. and as you can see the sky is much darker blue, but not black.  I use the Alien Bees to light up the building since this campus didn’t have lights on their buildings at night.

Fill flash in the woods

Nikon D4, 28-300mm, ISO 250, 1/80, f/9, Off-Camera Fill Flash with Alien Bees 1600 and fired with Pocket Wizard Plus System.

One of the ugliest lighting is under trees. You get a green cast due to the light going through the leaves. What I did here is used the off-camera flash with the Alien Bees 1600 to kick in light from the front to mainly offset the green light. I also benefited from having light in their face rather than raccoon eyes. Raccon eyes are caused by top lighting, which you see during the day and gives you dark circles around the eyes.

Fill flash in direct sunlight

Nikon D3S, 14-24mm, ISO 200, 1/200, f/13, Off-Camera Fill Flash with Alien Bees 1600 and fired with Pocket Wizard Plus System.

Why use a flash in direct sunlight? You need to avoid raccoon eyes and also if you want you can help drive the audience to the subject by the use of the light as I have done here.

Fill flash inside

Nikon D4, 28-300mm, ISO 3200, 1/125, f/6.3, Off-Camera Fill Flash with Nikon SB900 with the lightest green gel that comes with the system. Also, I am using the Radio Poppers radio transmitters with the Nikon SU-800 and Nikon SB900 so that I do not have to be in the line of sight for the infrared to work in triggering the flash.

When I am inside and people are working like this lady on her computer, you are just as prone to get raccoon eyes as outside. Why? The reason is the fluorescent lights above her are acting like the noon day sun. I have the photo assistant hold the flash and direct it to her face. The Nikon SB900 is zoomed to 200mm and therefore is light using a grid on studio strobes.  It is directing the light to just her face. 

To balance the flash to the room lights I used the lighter green gel that comes with the Nikon SB900 system. To get the correct lighting I took a custom light reading by using the ExpoDisc and had the assistant point the flash to the lens when I did this.  I tried both green gels that came with the camera and the lighter of the two gave the best result in balancing the color with the rest of the room.

The sync speed was set to Slow-Sync. I shot the photos in Aperture Priority on Auto ISO with the maximum shutter speed set to 1/100 so I would avoid the color shift that happens with fluorescent lights.

Attaining good skin tones with digital cameras

Sepia Tone filter
Bleach Bypass filter
Aged Photo filter
Auto Color with the camera.

The photograph’s color can take you back in time, create a mood, or make your work look amateurish.

Instagram

In an homage to both the Kodak Instamatic and Polaroid cameras, Instagram confines photos into a square shape. It lets you apply a filter and, combined with edge effects, the square format can make an image taken today look like a nostalgic piece. You can make it look like the 1920s, 1950s, or 1970s. The transformation in time is because the photo triggers memories for those who lived during this time or those who have found a shoebox or old family albums and looked through the pictures.

On the other end of creating a mood is the amateur look. This is where you have a color cast in your photos. If under fluorescent light, they may look green. While inside with incandescent lamps, you have an orange effect.

If you mix flash with the available light, you may have proper light on the objects closest to the camera, and then the background shifts.

How do you know if your color is off?

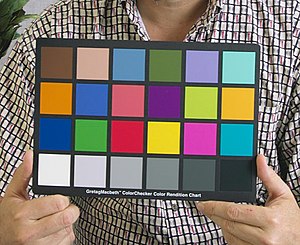
Macbeth color chart
Each square can then be checked to match the available numbers.

There are a few ways to know if your color is off. First, you can take a picture using the Macbeth Color Checker Chart, as I did in the photo above. Then you can use the densitometer built into PhotoShop or Lightroom to compare the RGB color patch numbers.

Skin Tone: The telling sign of good color

The first giveaway to the human eye that the color is off will likely be skin tone. Look at these photos here. I let the camera figure it out for the first one, which is acceptable on Auto White Balance. Next, look at the following ones.

Temp 5100, Tint +14, Camera setting Auto White Balance
Temp 4950, Tint +12, Camera setting Sunny White Balance
Temp 3100, Tint +10, Camera setting Incandescent White Balance
Temp 4700, Tint +75, Camera setting Fluorescent 1 White Balance
Temp 7250, Tint +29 Camera setting Fluorescent 2 White Balance
Temp 5250, Tint +22 Camera setting Custom White Balance off the coffee cup top

Sometimes, a person is surrounded by a dominant color, like a red wall. This will tell your camera that you are seeing in red light and will try a compensate, giving your subject a cyan tone to their face.

I have done photo shoots where I used strobes and still needed to do a custom white balance because the ceiling, floor, or walls were all creating a color cast that made the skin tones not look correct.

Skin Tone Swatch

You can find online skin tone swatches that you can compare a person’s skin to an approximate ethnicity color swatch. For example, the RGB value for caucasian skin is R:239, G:208, and B:207. The numbers may be darker or lighter than the light on the skin, but the numbers will generally go up and down uniformly.

Here is a link to the Curvemeister website showing you how to use the skin swatch system to see if you are close to the correct white balance in a photograph.

I recommend shooting RAW but constantly getting a custom white balance in every situation.

My favorite way to get a custom white balance is using my ExpoDisc.

ExposDisc goes in front of the lens, and then you use it to get an incident reading rather than a reflective reading of the light.
Notice the direction of the light hitting the subject. Next, you move to the same position to get the light reading below.
Point the camera toward the direction of the light falling on the subject.

If the subject is facing me and the light is from the side, I face the camera with the ExpoDisc on it so it is pointing toward the camera position. The chart above is to help you understand the concept, but you can modify it.

One way you can modify it is if the light is the same where you are standing, you could cheat and take a reading from where you are. The problem that can arise is if they are lit by Window light, and the camera position is in the shade, your color balance will be off if you do not take it from the subject’s perspective.

Use the wrong color sometimes.

Yes, I just said not to use the proper color sometimes.

Night scene

Most all Hollywood movies that show nighttime scenes are often shot during the daytime. So how do they achieve that look? First, set the camera to incandescent, giving you a blue cast and making everything look lit by moonlight. Next, underexpose the scene. This is where a spotlight on the subject and underexposing the rest of the scene can help you set the mood for a night scene.

High Tech Look

If you have daylight in the scene, you light the subject with bright incandescent light and set the camera to incandescent. The issue with the correct skin color and the area illuminated by daylight will be blue.

Under fluorescent lights, if you have the camera set to incandescent, they will also turn blue, just a different blue than daylight. So if you light the subject with incandescent, you get that blue effect.

CSI Miami lets the fluorescent light go blue by lighting the cast with incandescent and setting the camera to white balance for the incandescent. This way, everything illuminated by the fluorescent goes blue while skin tones look natural.

Sunset 

You can fake a sunset by putting a CTO filter over the camera lens, making the scene look orange. Then you can use a flash and put a CTB filter over the flash, which puts out a blue light. The subject seems correct with the skin tones, but the rest of the scene is orange, like a sunset.

Amateur Look

When you are unsure what you are going for, and you just let the camera do it all, this is the surest way to have the color of your photos announce you are an amateur. Want to take your game up to the next level? Learn how to get the correct skin tones and when to go for an effect.

Why do so many photographers choose to 
shoot Black and White

One of the most significant signs for pros who don’t know how to get good skin tones is to go to black and white. This is the easiest way to eliminate the sign they are still an amateur regarding color balance.

I think so many wedding photographers shoot in black and white. I think they are not using it so much for effect or to create a mood, but they don’t know how to correct the color. Most likely, they shot everything in JPEG and if you are off with the color in JPEG, fixing it in post-production is very difficult compared to working with a RAW image.

How to capture better color with your camera

glare
Reflections in hood and glass
no glare
Polarizing filter eliminates reflections
“I’ll fix that in post,” is the mantra for so many photographers.  As long as you get the best possible exposure and shoot in the RAW mode of your camera there is a great deal that you can correct in the postproduction.  However, there is one thing that cannot be fully corrected that needs attention before you push that shutter release.
If you shoot RAW rather than JPEG you can change the color temperature much easier and more precisely in the postproduction.  For example when you open the photo in either PhotoShop or Lightroom the RAW image will give you a pull down menu that is similar to the white balance menu built into the camera.  You can pick Auto, tungsten, fluorescent, daylight, flash or custom white balance settings.  If you shoot JPEG these options are not available.
So, the mantra for the RAW shooter of, “I will fix that in post” can be done as far as white balance.  The problem with being able to correct a photo after the fact can give you the false sense of security that everything is fixable in post.
If you miss the exposure even in raw you can adjust the exposure in post, but the results will not be stellar.  Correct exposure will give you more dynamic range in the RAW image than one poorly exposed.
I recommend before you press the shutter to take the photo to do a custom white balance with your camera.  This is where you tell the camera the perfect white balance in that setting. 
expodisc
ExpoDisc is used to get a incident “white balance”
grey card
Grey card is used to get a reflective “white balance”
There are different devices to help you set the custom white balance.  I use the ExpoDisc as my primary device.  This is a device you put on your lens like a filter, stand in the place of the subject and point the lens back towards the direction of either the light or the camera.  This is called an incident reading.
Another great and inexpensive way to set your white balance is a grey card.  This is a 15% grey card that is calibrated to give you what would be the absolute middle tone in your histogram.  You put this where the subject is and filling the frame with nothing but the grey you set your camera to it.  The card is facing the direction of the camera.  This is called a reflective reading.  
If you take time to get a custom white balance you will save this step in postproduction and increase the accuracy of the color in your photos.
no glare2
Polarizing filter diminishes the glare in foliage
glare2
Without the polarizing filter you have glare in foliage
One thing that is not correctable in post is glare.  This is often everywhere in a photo.  The polarizing filter is the best way to correct for this flaw in photos.
Often fishermen wear polarizing sunglasses so they can see below the surface of the water and see the fish.  It helps cut the glare of the light on the surface of the water to see the fish below.

Polarizing sunglasses also help those operating motor vehicles.  The glare from the dashboard, hood and road can be removed with the polarizer.

The polarizing filter fits onto the lens of the camera and after it is attached the photographer rotates the filter while looking through the camera lens is able to decide how much of the glare they want to remove from a scene.  
Besides water and driving conditions glare is everywhere.  The landscape photographer uses the polarizing filter to improve the color of foliage.  Leaves and grass often have glare that a polarizer helps to remove and give a richer color that is not possible to correct in postproduction.
There is one more thing that a polarizer does besides cut glare, but this is a little tricky to grasp.  The polarizer can give you a darker sky, but this depends on the direction you are pointing your camera in relationship to the sun.  Only ½ the sky can be darkened.  Without going to a long explanation, you just need to rotate the filter to see what part of the sky is affected.  If it gets darker then you know it is working and if it doesn’t get darker it isn’t working.
The one thing you want to be careful about when using the polarizer is if the sky in part of the photo is in the area that will darken and some of the sky is in the area that will not darken in the same photo.  
When you listen to the weather report you often hear them talk about humidity.  This is how much water is in the air.  Humidity can be something a polarizer can help with as well.  The water in the air can add to the glare.  Using the polarizer can help in this situation.  The lower the humidity the richer the color because there is less interference between the lens and subject.  Where you will see this the most is in the sky.  In dry climates the sky will almost be black with a polarizer.
I highly recommend you own a polarizer and use it to improve your photos—because postproduction will not fix what it will.