How to Create HD 360º Panoramic


First of all, you are going to have to invest some money in these items:

  1. Fisheye Lense – I recommend the 180º that creates a circle image. I have the Sigma Fisheye 8mm f/3.5 EX DG Circular Fisheye Autofocus Lens for Nikon AF for $899.00
  2. Nodal Panoramic head – link for some on B&H. Expect to pay about $500
  3. Panorama Image Stitching Software – I use Panoweaver 9, which runs for $299.00
  4. Good tripod to put a panoramic head on
  5. Release cable – I use an infrared remote with my Nikon D750
  6. Adobe PhotoShop – While you can use the panoramic so you can fix the floor if you don’t want a logo there. $600
Click on it to see the larger version
So here is my camera with my nodal panoramic head on a tripod.
 
 
Here is a side view
 
 
Now the other side


You will take four photos and then stitch them together with the software. Next, I create a Cubic Panorama, the six sides of a cube.

Use a remote to keep the camera very still.

 
I then export that image to PhotoShop. Using PhotoShop is where I will remove the tripod, as seen in this photograph.
 
 
To get rid of the tripod [why I use PhotoShop], I go to filter and select vanishing point
 
 
Next, I select the cloning tool, hold the option key, and select the area I want to clone from to fill over the tripod.
 
 
Because I chose the vanishing point, the cloning will keep all the dots in perspective and makes for easy patching. Great for floors where tiles and other patterns are not always squared but more often slightly askew.

Now, I am using the more expensive Panoweaver to have something that works on mobile devices like the iPad and iPhone. There are two versions created; one is flash based and has the little planet view that you see at the top and below. I have you fly down into the panoramic, creating a video-like feel to the panoramic.

Now, if that were all there is to this, it would be super easy. However, after doing this for about ten years, I have found that the knowledge of stitching helps you pick better locations. For that reason, if you enjoy them and would like me to create them for your place of work or something else, give me a shout.

How to see a photo 4 different ways

 
Little Planet Version

Here is the same photo, but I am showing it to you in 4 different ways. The top image is what we call the Little Planet view.

It would help if you had special software to do all these photos. Some Apps exist to help you create pictures similar to these with your phone–just not as consistent and precise as the way I did it with a tripod, fisheye lens, and particular nodal head on the tripod.

iPhone Apps
Android Apps

Photo #2 360º Panoramic gut stretched horizontally

Photo #2 is the same but extended to a large horizontal photo. Often this is cropped with less sky and ground to give a more strip print. This photo would then be like the inside of a cylinder.

Photo #3 Cubed 360º Panoramic

Photo #3 is the same photo, but instead of how it would appear inside a ball, this is how it would appear inside a box. Again, the first four panels are the sides, then the top and bottom are the last two.

This last one is an interactive 360º panoramic. You can watch it; it will rotate and let you see the 360º cylinder, or you can click on the menu arrows to go up and down or change direction. You can also just put your mouse and, while clicking and holding, drag the image up, down, and sideways to control it yourself.

Covering the bicycle race–The Roswell Criterium

 
Nikon D750, AF-S NIKKOR 28-300mm f/3.5-5.6G ED VR, ISO 220, ƒ/14, 1/30

Today I decided to go and have some fun covering The Roswell Criterium for a beautiful Sunday sunny day after a lot of rain in our town.

I thought I would play with panning, and let me say it is hard to play with panning. That is hard to get a good photo with bicyclists blazing by about 45 mph.

Nikon D750, AF-S NIKKOR 28-300mm f/3.5-5.6G ED VR, ISO 280, ƒ/14, 1/30

I tried with the 14-24mm but felt that I needed to be closer, and the Nikon 28-300mm at 28mm on the curve was just perfect.

Nikon D4, AF-S NIKKOR 28-300mm f/3.5-5.6G ED VR, ISO 800, ƒ/5.6, 1/2000

The pack of bicyclists would come by at such a clip that you had a hard to unless you had decided before they came into view your next course of action. Will you pan or shoot tight? Who will you focus on? Will it be the leader or someone else in the pack?

Technical choices like panning require you to shoot at a slow shutter speed and freeze the action as I did of the pack was shot at 1/2000.

Nikon D4, AF-S NIKKOR 28-300mm f/3.5-5.6G ED VR, ISO 900, ƒ/6.3, 1/2000

I preferred shooting at a greater depth-of-field since I hadn’t shot much bicycling and wanted at least a few in-focus photos. Also, this gave the camera a little room front to back to play with focus sharpness.

Nikon D4, AF-S NIKKOR 14-24mm f/2.8G ED, ISO 1400, ƒ/13, 1/2000
Here you can see I used my ultra wide-angle lens, the Nikon 14-24mm @ 14mm. Unless you shoot this wide, you might not realize how close I was to the action, but the rider came by me less than a foot from me.
 
[NIKON D4, 14.0-24.0 mm f/2.8, Mode = Aperture Priority, ISO 1600, 1/2000, ƒ/13, (35mm = 14)]

I didn’t like the power lines in the background, but I couldn’t move to an angle and get rid of them for this type of photo.

Nikon D4, Sigma 120-300mm ƒ/2.8 DG OS HSM | S, Sigma TC-2001 2x, ISO 1800, ƒ/8, 1/2000
I did pull out the long glass and shot this photo at 600mm to pull in the start and finish lines.
 
Nikon Dr, Sigma 120-300mm ƒ/2.8 DG OS HSM | S, Sigma TC-2001 2x, ISO 3200, ƒ/8, 1/2000
When they are coming up a hill, it looks like I am on the ground, but I was standing for this photo to shoot over the fence.
 
Nikon Dr, Sigma 120-300mm ƒ/2.8 DG OS HSM | S, Sigma TC-2001 2x, ISO 640, ƒ/6.3, 1/2000
For this last photo, I decided to clean up my background and make it “A Classy Clutter” for a background.
 
We often have bicycle races in Roswell, so look for them in the news and come and shoot it yourself. No press pass was necessary for all access. Here is another group to follow that will tell you about the subsequent events http://www.bikeroswell.com/.

What would you say if Eugene Smith was on the front row listening?

Don Rutledge was the speaker on the second day of the Atlanta Photojournalism Conference in 1975. The night before, William Albert Allard had blown away the group with his work on the American Cowboy. The first time anyone had spoken to the group and gotten a standing ovation.
 
Following Don Rutledge would be Eugene Smith. Don admired Smith’s work more than any other photographer at the time. Eugene Smith is sitting right in front of Don during this talk.
 

Don Rutledge
photo by: Ken Touchton

Listen to Don’t talk here:

There are three types of photographers

Snap Shooter
Gimmick Shooter
The fullness of Photography Shooter

The Snap Shooter enjoys taking pictures. The Gimmick Shooter uses tricks to keep your interest. Finally, the Fullness of Photography shooter uses his eyes, brain, and heart to shoot.
Don got those three elements from Ernest Haas.

The Fullness of Photography Shooter I will call the concerned photographer. They identify where people are in this world.

Now all of us can drift away from being concerned. Photographers use excuses. Many photographers use reasons like lack of time to dominate situations.

The concerned photographer listens and looks. They put it all together and stand flat-footed in this world. We are tuned into the moments in the zone and can anticipate those peak moments.

1) We need to learn to turn handicaps into advantages.

SIDE NOTE

I used to travel with Don doing stories for the Black Star photo agency. These would be features that he could take at his own pace. Later I understood how this was Don’s way of training himself to have muscle memory when he had to rush.

Don pointed out that all photos are taken at a fraction of a second, so it isn’t a lack of time–it is a lack of discipline we lack in these times of having to work quickly.

2) We complain about photo editors who don’t understand. To update this a bit, it is anyone you are shooting for today.

Our problem is often our ego. We think we are a great photographer. So we often say or want to speak to our clients if you only gave me a chance. “This is where a picture is worth a thousand words,” says Don, with the audience laughter following.

Don’s advice is to shoot the photo the way you want to and show it to them when they crop it poorly. Then, talk to them about what you were trying to say.

IMPORTANT!!!!!! Don said you would probably not be heard the first or second time. But you are educating people over time.

I watched and wrote about how long it took Don to turn around organizations in my thesis. Here are links to it.

Storyteller: Master’s Thesis on Don Rutledge: Chapter OneJan 16, 2013
For this reason, this writer is doing his thesis on Don Rutledge for publication. Don has worked for the Black Star photo agency in New York for over thirty years. During this time, he has also worked for the Home Mission and 
https://t86.1e3.myftpupload.com/Storyteller: Master’s Thesis on Don Rutledge: Chapter TwoJan 12, 2013
Don was born in Smithfield, Tennessee. The family moved to Murfreesboro, Tennessee, south of Nashville, shortly after being born. “Good ole’ home folk,” is what you would say about the Rutledges. They lived on a farm 
https://t86.1e3.myftpupload.com/
Storyteller: Master’s Thesis on Don Rutledge: Chapter ThreeJan 13, 2013
Master’s Thesis on Don Rutledge: Chapter Three. HOME MISSION BOARD, 1966 TO 1980. When Walker Knight went to the Home Mission Board of the Southern Baptist Convention in 1959, he was handed a photo story
https://t86.1e3.myftpupload.com/
Storyteller: Master’s Thesis on Don Rutledge: Chapter FourJan 15, 2013
When Dr. Keith Parks went to the Foreign Mission Board in 1975, his responsibility was to head up the mission support division. Establishing one of the finest communications departments possible was one of the goals that 
https://t86.1e3.myftpupload.com/Storyteller: Master’s Thesis on Don Rutledge: ConclusionJan 16, 2013
To a non-Christian, Don would have been considered crazy for taking the positions with Southern Baptist. Going to the Home Mission Board was a step down in pay and prestige for Don Rutledge. Why would
https://t86.1e3.myftpupload.com/

Bottom line Don is telling us we need to prepare for some “Show and Tell.”

Next, Don warns us to have our Egos and Abilities in check with each other. We need to know our abilities and not have our egos way out and in front.

Now Don also mentions that being a part of an institution like LOOK Magazine helps a photographer. It will open doors for you and give you a budget to work with. However, there is a downside to an institution for a creative. You will find that they want to stop you and make you fit their system.

Just know that being a creative photographer and wanting to change the world sometimes will take time, time for you to educate those around you about the work you are producing. You must be able to articulate your vision to help them see it.

Face Recognition with Lightroom 6

It takes time to explore new or upgraded software, so all I am writing about is just what I discovered and loved immediately with the latest Lightroom upgrade. As I discover all the new bells and whistles in Lightroom 6, I will write about them if I see something worth my time. For example, I downloaded Adobe Lightroom 6 and fell in love with the Face Recognition feature. Open a collection and then click on the little face [red arrow pointing to it], and it will bring up all the faces, just like what happens on Facebook when you upload images, asking you if you want to tag people.

Click on the image to see larger.

Throughout my career, I have shot large projects and had to go through and identify everyone in the photo. Now I can at least scan a complete shoot and put the names that Lightroom sees into every image’s metadata.

Now when you go to each photo, you can check to see the names of people. If the face isn’t recognized, you can still click on the box at the bottom, as I have done here, create a box, and type in the person’s name.

Click on the image to see larger.

Here it missed Philip Lin, and I went back and then typed his name into the photo.

Click on the image to see larger.

It puts all the names in alphabetical order based on the first letter in the name. Now, while the photo isn’t captioned left to right as you would have in the caption, having all the names from a large 3,000 + images in each photo is a huge time saver.

It put the names in two IPTC fields: 1) Keywords & 2) People Shown.

When you export, you can remove all the names or add them with a click. The names are all saved in your RAW files.

I can see almost all my friends who are photojournalists and need to have names with all their photos being thrilled with this feature. The other group of photographers that will benefit is anyone who keeps a database of pictures and needs to search for them to find people.

I know of one client I have that this feature could improve their image archive system almost overnight.

Photographing Women’s Soccer

 
Nikon D4, Sigma 120-300mm ƒ/2.8 DG OS HSM | S, Sigma TC-2001 2x, ISO 1100, ƒ/8, 1/2000

I spent an afternoon shooting a girl’s middle school soccer game. These are just a few of the photos from the shoot.

I shot 1458 images and edited them down to 444 photos; that is what I consider OK.

Nikon D4, Sigma 120-300mm ƒ/2.8 DG OS HSM | S, Sigma TC-2001 2x, ISO 900, ƒ/5.6, 1/2000

Here is a link to all the sports settings I used for the Nikon D4 in the earlier blog Nikon D4: Sports Camera Setting.

Nikon D4 Camera Settings:

  • Auto ISO 100 – 12800
  • Minimum shutter speed setting in Auto ISO 1/2000
  • RAW
  • AF Focus Tracking setting at 4
  • AFC – Continuous-servo Autofocus
  • 21-point dynamic-area AF
  • Focus point center and on lock
  • AF Activation – Auto Focus only: use the back focus button on focusing, and shutter release only controls the shutter
  • Release Mode–Continuous High Speed
Nikon D4, Sigma 120-300mm ƒ/2.8 DG OS HSM | S, Sigma TC-2001 2x, ISO 1000, ƒ/8, 1/2000
I like to stand in the endzone of the goal that the team I am covering is trying to score.
 
 
Getting on your knees is even better than standing.
 
Nikon D4, Sigma 120-300mm ƒ/2.8 DG OS HSM | S, Sigma TC-2001 2x, ISO 1100, ƒ/8, 1/2000
The athletes’ level of play will determine how good photos you will get. The better the game, the more opportunities for great action photos will increase.

What gear and where to sit to capture theater productions

Nikon D750, Sigma 120-300mm ƒ/2.8 DG OS HSM | S, Sigma TC-2001 2x, ISO 12800, ƒ/5.6, 1/200

If you were in the front row of the theater, you would not see this photo. The reason is simple. The actor is lying on the stage just above the orchestra pit area.

I like to go to the very back of the auditorium to shoot photos of theater productions at my daughter’s high school. I can even stand if I need to because no one is behind me.

Fuji X-E2, Fuji XF 55-200mm, ISO 6400, ƒ/6.4, 1/55

Here is another photo of the same theater. Again, you can see people in the front few rows below the stage.

Fuji X-E2, Fuji XF 55-200mm, ISO 6400, ƒ/4.4, 1/400

Now the downside to being in the back of the room means you will need longer glass than a kit lens.

Nikon D750, Sigma 120-300mm ƒ/2.8 DG OS HSM | S, Sigma TC-2001 2x, ISO 9000, ƒ/5.6, 1/500 [600mm]

I love shooting with the Sigma 120-300mm ƒ/2.8 DG OS HSM | S and the Sigma TC-2001 2X converter. It lets me close like in this photo from the Little Shop of Horrors at Roswell High School.

Most of the photos I take are between 200mm to 600mm.

Nikon D750, Sigma 120-300mm ƒ/2.8 DG OS HSM | S, ISO 2200, ƒ/2.8, 1/500 [300mm]

I took the 2X converter off and zoomed all the way in to get this photo.

I highly recommend shooting with a monopod to keep the camera steady, and also, that is one big beast with a Nikon D4, Sigma 120-300mm ƒ/2.8 DG OS HSM | S, and the Sigma TC-2001 2x.

This lens combination is excellent with many events and situations other than sports or wildlife.

Nikon D750, Sigma 120-300mm ƒ/2.8 DG OS HSM | S, Sigma TC-2001 2x, ISO 2000, ƒ/5.6, 1/100 [550mm]

Theater Camera Gear Recommendations:

  • Nikon 28-300mm ƒ/3.5–5.6
  • Sigma 120-300mm ƒ/2.8 DG OS HSM | S
  • Sigma TC-2001 2X
  • Sigma TC-1401 1.4X
  • Nikon D750
  • Manfrotto 294 Aluminum 4 Section Monopod
  • Manfrotto by Bogen Imaging 323 RC2 System Quick Release Adapter w/200PL-14
Mirrorless Camera System Recommendations:
  • Fuji X-E2
  • Fuji XF 18-55mm
  • Fuji XF 55-200mm
Nikon D750, Sigma 120-300mm ƒ/2.8 DG OS HSM | S, Sigma TC-2001 2x, ISO 7200, ƒ/5.6, 1/500 [550mm]
Camera Settings Tips:
  • Auto ISO – when shooting, check the LCD and use the EV dial to under or overexpose to compensate.
  • Check Histogram for accuracy.
  • Use Blinking Highlights to let you know what has no details. Be sure faces always have detail.
  • Custom White Balance for “White Light” if possible. Many theater lighting schemes use a lot of colors, be careful that you are balancing the lights without gels.
  • Tungsten is often the correct white balance for theater lighting–but not always. Don’t try and color correct every scene when the lights are often intentionally giving a color cast.
  • Scene brightness will change the color temperature as well. For example, a dimmer set at 10% will make the light more orange than 100% brightness.
  • Try to use a shutter speed that is closest to the focal length. If 200mm, use 1/200, and if 500mm, then use 1/500. Possible movement is why having a monopod will let you shoot darker scenes to help keep the camera steady.
 

What is an environmental portrait and what is not


An environmental portrait is not something that has to be formal. I captured Philip Newberry, who had lost both legs and arms to spinal meningitis. Little Philip jumped up on the merry-go-round and was having fun and smiling at his parents. I just composed and had a great “environmental portrait.” of Philip.


This photo could also be used as an “environmental portrait” and may work better since I know a little more about Philip’s loss of feet and hands here. It helps tell the story. Again this is not a “Posed Portrait.”

Sometimes you may have to set up a portrait, as I did here in the man’s kitchen. I added a light to help them see his face better.

Think of setting up the photo without the man and then having the man sit down in the image. That is what I did here.

Vertical photo is often the mistake made by new photographers when they have been assigned to make an environmental portrait. Too often, young new photographers think the picture is the orientation.

They must think of their computer, and when they go to set up their page or print it, they remember there are a “Portrait” and a “Landscape” choices. These refer to vertical and horizontal and not a style of photography. For example, you can have a vertical environmental portrait, but it would not be this photo. Here I have eliminated most of the environment so that the surroundings tell us very little about the subject.

By composing the image so tightly around the subject, you have “eliminated” the environment.

Environmental Portrait Tips

  1. Think first of composing for the environment first. Then, find the angle that best captures the space for which the subject either: works, plays, or lives, for example. 
  2. The environment should be enough to communicate something about the subject.
  3. Let the subject move in the environment as naturally as they usually will if you are not there. Then, sit and wait and take photos until you have a selection of places where the subject has moved in the frame. 
  4. Look for the “moment” and not just the subject’s location in the frame. The moment is more subtle. For example, the subject may turn their head ever so slightly to the light that the light makes their face glow, or there is an expression that best captures their personality. 
  5. Just remember, people have many traits to their character, and the more you shoot, the better the chances you will have more options to choose from to capture the very best of the person.
  6. Use off camera flash, turn on a desk lamp or do something to help be sure you have the best light to help communicate more effectively. You don’t want a silhouette of the subject for an environmental portrait.
 
Here I believe the “expression” of the young boy is the strength of the photo. The environment tells a little, and I would have preferred more surroundings than I have.
 
 
Here I have a father with his children and wife in the background of his kitchen. The photo tells a little about the man that, had I cropped in tight, would have been left out.
 
 
I had very little time at this home, so hanging out in the room with this teenager until I could find a natural moment was not going to happen. However, I have traveled from Atlanta to Chiapas, Mexico, so I had to get what I could. 
 
As you can see, the window behind the teenager would have made him a silhouette, so I am using an off-camera flash to the far left pointed to his face.
 
 
Here I had him stand, and I moved the off-camera flash on a light stand to my right, his left, and then took more photos to show what a typical teenager’s room would look like in Mexico.
 
 
The man on the street is a new pastor who is starting work in the medical center area of Houston, TX. I took almost all my photos of him inside a hotel meeting room. Nothing in the room said “Houston.” I wanted to be sure I had something of him showing that he is working in Houston. 
 
The photo was my intro shot of Ben telling his story in Houston in a slideshow. Here you can see how I used the image to introduce Ben Hays in a package.
 

http://www.stanleylearystoryteller.com/BenHays/_files/iframe.html

Often in print, the space is so scarce that the environmental portrait is the only photo they will use. So you need to capture as much as possible in one picture to help tell a little about the person’s story and introduce them to the audience.

Here is a photo of Philip and Matt Moulthrop, who learned how to turn bowls from Philip’s dad Ed. I wanted to capture pictures of them with their bowls and photos of them making them.

The magazine used my photos in the article. As you can see, sometimes, they need to introduce the person to the audience. The bowls were just as important here, but this was an Alumni magazine package, so the people were the hook for the story.

Sometimes they use your photo as a vertical shot, as they did here for a magazine cover. Notice how this, too, is an environmental portrait.

Here are a few more examples for you and see where I sometimes used artificial light to help the photo.

While this appears to be natural light, it is not. Here is the lighting setup for the man at the desk:

My last suggestion is to use layers in the photograph when possible. Have things in front and behind the subject to create depth.

Photographers be like farmers in the Springtime–Prepare the fields


Fuji X-E2, Fuji XF 18-55mm, ISO 1000, ƒ/4.5, 1/500

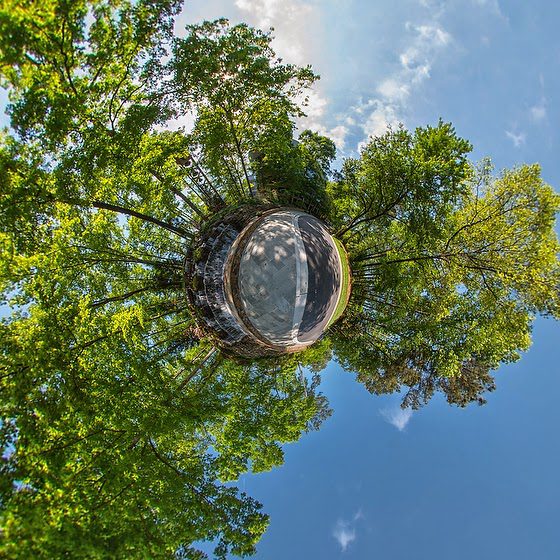
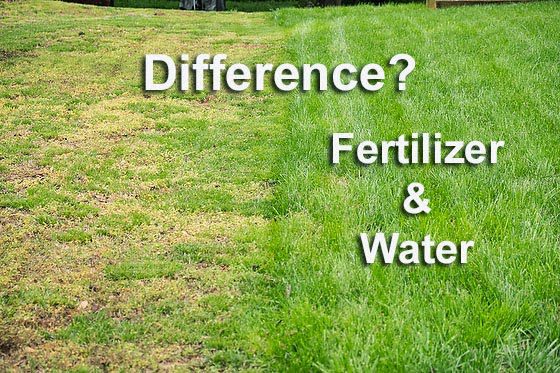
This time of year is when you can drive around your neighborhood and see a significant difference in lawn care. This photo shows just the difference spreading Weed & Feed with the watering can make in the appearance of your lawn.

Only the farmer who faithfully plants seeds in the Spring, who reaps a harvest in the Autumn.
 
B. C. Forbes
Fuji X-E2, Fuji XF 18-55mm, ISO 2500, ƒ/4.5, 1/500

A few weeks ago, I tackled the problem of bare spots in my yard. Well, they are more significant than spots. There is a lot of shade, so this will always be an area that needs more work than the sunny sections of the yard.

I went to HomeDepot and bought Powermate 10. 43 cc 2-Cycle Gas Cultivator to help turn the soil with the Rebel tall fescue, pelletized limestone, & Vigoro 15m weed & feed.

Just two weeks later, you can see the results of a much greener yard in these photos.

Fuji X-E2, Fuji XF 18-55mm, ISO 3200, ƒ/4.5, 1/500

Here you can see the areas I didn’t cultivate did not produce as much grass. Some grass seed and fertilizer fell in those areas, but the difference was in the turning the soil about 2″ – 3″ that buried the seeds and helped them grow.

Just celebrating Easter at our church reminded me of the Parable of the Sower that Jesus told.

Matthew 13: 3-9
“A farmer went out to sow his seed. As he was scattering the seed, some fell along the path, and the birds came and ate it up. Some fell on rocky places, where it did not have much soil. It sprang up quickly, because the soil was shallow. But when the sun came up, the plants were scorched, and they withered because they had no root. Other seed fell among thorns, which grew up and choked the plants. Still other seed fell on good soil, where it produced a crop—a hundred, sixty or thirty times what was sown. Whoever has ears, let them hear.”

Photographer Tips:

You reap what you sow. We have all heard this before, but what can a photographer learn from this? First, you must return to your present clients and reconnect with them. Next, you need to give them more information about you and what new things you are doing. Reconnecting with clients is like fertilizing your yard.

Now some ground is hard as a rock. So first, a farmer uses a tiller to break up dirt that has not been farmed or has become extremely hard. Next, a farmer uses a cultivator to loosen the soil in an existing planting area, weeding the area during the growing season, and mixing compost into the ground.

You may have to do a lot of leg work and go and beat the pavement finding those new clients. You may need some good examples to leave with them through your website, e-newsletter, or printed material. You may need to get friends working with those potential clients to help introduce you and break the ice for you.

Competition:

Even Jesus knew that your competition would try and sabotage all your good work. So he told a parable about it as well. It follows the Parable of the Sower:

Matthew 13:24-30
Jesus told them another parable: “The kingdom of heaven is like a man who sowed good seed in his field. But while everyone was sleeping, his enemy came and sowed weeds among the wheat, and went away. When the wheat sprouted and formed heads, then the weeds also appeared.

“The owner’s servants came to him and said, ‘Sir, didn’t you sow good seed in your field? Where then did the weeds come from?’

“‘An enemy did this,’ he replied.

“The servants asked him, ‘Do you want us to go and pull them up?’

“‘No,’ he answered, ‘because while you are pulling the weeds, you may uproot the wheat with them. Let both grow together until the harvest. At that time I will tell the harvesters: First collect the weeds and tie them in bundles to be burned; then gather the wheat and bring it into my barn.’”

They didn’t have weed & feed in those days. We as photographers may not have the weed control to put out either, but the lesson is clear others will try and attack you at times. Be careful at trying to fix this–you could damage the excellent seed you planted.

The message is straightforward having a big harvest requires you to work the field. First, you must get that tiller and break up the harsh ground. Next, using the cultivator to mix the seed and fertilizer would be best. Finally, you will need to water the field if you expect to see a crop worthy of harvesting.

You can’t reap what you do not sow.

Capturing A “Moment” Helps To Build A Brand

Nikon D3S, AF-S NIKKOR 28-300mm f/3.5-5.6G ED VR, ISO 560, ƒ/5.3, 1/80

I was covering a meeting where Dan Cathy, the president of Chick-fil-A, talked about Daddy Daughter Date Night events. Dan projected my photo as he talked about how every daughter wants this attention from their dad.

This moment on stage is one of those rare moments when people are talking about the work I produced, and I am getting to hear it.

Nikon D3S, Sigma 70-200mm f/2.8 EX DG APO OS HSM, ISO 6400, ƒ/2.8, 1/320

Here is the actual photo here. I am guessing that the picture on that stage was 45′ x 30′. I was impressed that the Nikon D3s ISO 6400 image looked that great project that size.
The client was comfortable enough to use the photo by the president of the company to talk about one of the most important things their brand does–emotional connections.

Nikon D3S, AF-S NIKKOR 28-300mm f/3.5-5.6G ED VR, ISO 3200, ƒ3.8, 1/25–Off camera fill-flash using the Nikon SB-900.  The flash is on the Pocketwizard TT5 and is triggered by the Mini TT1 on the Camera. There is also the AC3on the Mini TT1 to control the flash’s output.

My job is to look for those moments where the emotional connection happens and be sure the brand is part of those moments. For example, I was capturing a Father & Son Camp Out at a local Chick-fil-A. Chick-fil-A is creating events to help bring families closer together. What better way to capture these moments than with a photograph?
Remember, while you need to have a good quality image technically, you also need a “moment.”

Great Photography Implores Yin-Yang of …


Photography requires one to understand yin-yang.

Wikipedia definition of Yin-Yang

In Chinese philosophy, yin and yang (also, yin-yang or yin yang) describes how apparently opposite or contrary forces are actually complementary, interconnected, and interdependent in the natural world, and how they give rise to each other as they interrelate to one another. Many tangible dualities (such as light and dark, fire and water, and male and female) are thought of as physical manifestations of the duality of yin and yang.

Yin and yang can be thought of as complementary (rather than opposing) forces that interact to form a dynamic system in which the whole is greater than the assembled parts. Everything has both yin and yang aspects, (for instance shadow cannot exist without light). Either of the two major aspects may manifest more strongly in a particular object, depending on the criterion of the observation. The yin yang shows a balance between two opposites with a little bit in each.

Here are some Yin-Yang dualities in photography that I deal with constantly, and this list isn’t comprehensive by any means.

Nikon D3, AF-S NIKKOR 14-24mm f/2.8G ED, ISO 500, ƒ/2.8, 1/20, Nikon SB-900 off camera triggered with Pocketwizard TT1 and TT5 on the flash

Shutter-Speed/Aperture–You cannot change one without the other being affected. Changing Shutter-Speed or Aperture was more accurate in the days of film when you were stuck with one ISO until you changed the film.

ISO/Noise–As you change your ISO, you affect the image quality. Today’s cameras’ high ISO capabilities make this less noticeable, but it still exists.

Flash/Authentic Moments–When I shoot with a flash, I announce myself, and blending into a room is much more challenging.

Nikon D3S, Nikon 24-120mm ƒ/3.5-5.6, ISO 12800, ƒ/5.6, 1/200

Mixed Lighting–Situations where you have, say, window light and fluorescent lights in a room competing as the subject moves closer or further from the window, the constant fighting of color temperature is ongoing.

Gear/Photographer–This is the biggest issue I have regarding Yin-Yang. There is an ongoing struggle between the science and philosophy of the image. It is like a struggle between science/technology and the liberal arts; you need both to make the best images.

Nikon D4, AF-S NIKKOR 14-24mm f/2.8G ED, ISO 200, ƒ/2.8, 1/160

Lifelong Learning

What I love the most about photography continues to frustrate me just as well as I have rarely looked at my work and felt like the images I made couldn’t be improved.

Great photos, I believe, are the results of years of understanding and knowledge of the gear to make it perform at the peak of its capabilities, along with years of knowledge of the subject. You can anticipate and execute an incredible image because you are ready for the “moment.”

Sooner or later, I have had gear fail me because I pushed it beyond its capabilities. Photographers complain, and the manufacturers listen and create newer equipment that exceeds the previous gear’s abilities.

I have to admit while photography can frustrate me, it pales to the learning curve of humanity and my ability to anticipate what people will do.

While I know today’s cameras will do even more than their predecessors, I don’t think we fully maximized all that the simple box camera will do.

Nikon Coolpix P7000, ISO 100, ƒ/2.8, 1/1100

Two topics that will result in better images

We need to spend more time getting to know the subject of the images. We need to become experts on our subjects to capture moments that help people connect through photos to those subjects in ways they did not see before.

Second, we need to constantly be learning all that our camera gear will do and what we can do to capture those “moments” with our subjects that help clear up the image so that the “moment” really “clicks” with the audience.

Forming a Photographic Style

Nikon D4, AF NIKKOR 85mm f/1.4D, ISO 200, ƒ/1.4, 1/80

My friends and I were teaching a class, and we had one student that we all were trying to figure out why they were taking the course. He found each of us and wanted to tell us all he knew about photography.

One of us mentioned how it takes 10,000 hours to master something. Malcolm Gladwell talks about this in his book, and I have also written about it on the blog. Here is that link.

The student then went on to say then I am a master then. One is a master when others acknowledge it about you and not the other way around.

My mentor Don Rutledge was trying to form a style and talked about how one guy told him about his style.

Listen to Don talk about it here:

Your browser does not support the audio element.

[Here is a link to many other recordings of Don Rutledge that I have]

Why is it so hard to establish one’s style? I think the hardest thing for most pros is the lack of feedback.

Once you were a hobbyist, your friends would compliment your work and tell you how good you were and you should be a photographer. But, once you become a pro, they no longer give you that feedback. Why? You see, now you are expected to take great photos.

I think professional photographers need to seek out and pay for feedback.

The other day my friend Will Flora experimented with some workers. He is a training director for a company. He got some front-line workers to come to a bowling alley where he paid them to bowl for the day.

There was a catch. Will had covered all the monitors and put up a curtain so they could not see how many pins they took down or see their scores. After a while, the workers wanted to quit and go home.

They were being paid to bowl for the day and wanted to quit.

As they took off their shoes, Will removed the curtain and uncovered the monitors. A guy asked if they could still bowl without the stuff in the way. He said, of course. They then started to bowl and have fun. You see, people enjoy work when they understand their part–especially when they can make a game of it.

Nikon Coolpix P7000, ISO 100, ƒ/7.1, 1/1000

While it is essential that you get paid as a professional photographer and paid a good wage for your creative talents, we still need and want feedback. How are we doing?

Here is a to-do list for you:

  1. Find a Mentor/Coach to help you discover your style
  2. Be sure the style you are pursuing is the core of who you are and want to become
  3. If you like a photo and you know the photographer, tell them that you like it and why. You must be willing to give feedback if you want to receive it.
Fuji X-E2, FUJINON XF 55-200mm, ISO 6400, ƒ/8, 1/400

Don’t be the photographer that is a legend in their mind.