Holidays are celebrated with visuals

We often wish for a “White Christmas” and Christmas 2010 our family drove from Roswell, GA to Morganton, NC and this is what we experienced arriving at the Grandparent’s home. (Nikon D3, 14-24mm, ISO 200, ƒ/2.8, 1/2500)

Turn on the radio this time of year and you are most likely to hear Bing Crosby singing White Christmas.

Many of us will watch those classic movies like: White Christmas; Miracle on 34th Street; It’s a Wonderful Life; and many more that you might name.

Even tho it is just a song on the radio it still conjures up the visuals in my head.

Nativity Scenes

At our house and most of my extended family we put up Nativity Scenes of the first Christmas. This one here above is more traditional, but our family has made them at our church during Advent family events.

We had fun decorating my wife in a decorating a person competition for live Christmas tree.

Here we are creating a Advent Wreath during the family Advent event at our church.

The kids enjoyed creating their own reindeer antlers.  
This is a nativity scene we made another year at our church’s family Advent event. Every year we put it out.

Why have events to make nativity scenes when you can buy ones that most likely are of better quality? The holidays are about memories. We are to remember our faith and we do things to help create new memories around these core tenants of our faith.

Our peanuts nativity scene ornament on our tree. My wife loves the peanuts and this helps her bring back memories of her childhood with her parents, siblings and friends in Sparta, New Jersey.
This was given to us by my sister whose family served as missionaries to Swaziland. 

Ornaments

We love to decorate our tree and many families do the same. Each year our family puts ornaments on together. Each person has ornaments special to them that they put on each year. This tradition is so fun.

Since our family has allergies to live trees, we now have a fake tree. When my daughter was just a toddler I had her help me with putting up the tree. She would hand me the parts and I would assemble them.

The following year my daughter came to me and said it is time for us to put up the tree. I turned and looked at my wife and she said it is now tradition.

This year we added a few new ornaments. This is one we bought at the Magical Night of Lights at Lake Lanier this year.

We also bought this turtle ornament and had all our names put on it. There is an inside family story on turtles. By the way if you look closely you can also see where our Elf on the Shelf was this day.

Each ornament on our tree has a story. So each year we assemble our stories and as we look at the tree during the holidays it will help us remember Christmas from over the years. Also, as we celebrate this year we will be creating new memories.

Two of our nutcrackers are to remember our oldest son Nelson. He is a 1st Lieutenant in the Army, so that explains the one on the left. He was in the Summerall Guards when he was at The Citadel and this is the nutcracker on the right. 
This is our son in the Afghanistan. This will be our first Christmas without him around during the holidays.

The Word became Flesh

John 1:14

The Word became flesh and made his dwelling among us. We have seen his glory, the glory of the one and only Son, who came from the Father, full of grace and truth.

I like this time of year because this is when I celebrate the coming of the Messiah. God became visual to us through Christ.

Every story I read about him is one that conjures those visuals. Even the parables that he told also were visual.

Just think about it, when God wants our attention he has used visuals. He knows we are wired to want to see something.

Big events are celebrated visually

Now if we use visuals to celebrate holidays to help us remember the stories of our faith and families, then shouldn’t we use this medium to tell the important stories in other places?

Are you using visuals to help tell your companies story and mission?

Historic Roswell Georgia: Took 20 years to discover

Nikon D4, 14-24mm, ISO 100, ƒ/5.6, 1/400

During the 1996 Olympics I was reminded of how much people travel from all over the world to my part of the world just to see what we have here.

I have lived in Roswell, Georgia since 1993 and just now did I take in some of the local historical sites almost 20 years later.

BBC sent a reporter to the Road to Tara Museum to film for the special on “Gone with the Wind”  It was rated in the top book favorites of all time for the BBC audience.

During the Thanksgiving holiday our family took in two of the three historical homes on the tour of Historical Roswell.

This is Bulloch Hall built in 1839 and the childhood home of Mittie Bulloch, President Theodore Roosevelt’s mother.

Besides seeing the house we also listened to the cell phone tour and listed as well to the docent.  We learned quite a lot about the history of the house and the founders of Roswell.

Teddy Bears which have their roots with Teddy Roosevelt.
Each room had a president’s theme. This was the Teddy Roosevelt room in Bulloch Hall. 

Photographer reasons to visit historical sites

The reason I like to visit locations is to gain a better understanding of visual cues. Historical locations help you understand how things looked during a certain period of time in history. The more you are aware of these visual cues the more you can pull upon this knowledge when helping clients.

Barrington Hall is listed on the National Register of Historic Places and was voted one of the 50 Most Beautiful Homes in the Atlanta area. The surrounding seven acres of grounds feature the only public antebellum garden in the greater Atlanta area. With guided garden walks, cooking classes and other special events, the site is a popular destination.

President Jimmy Carter’s aunt lived just down the street from these two homes and would come to visit here as well.  I think for those who enjoy history and want to know more about the history of Metro Atlanta, they need to come to Roswell, GA and take in Bulloch Hall, Barrington Hall and The Smith Plantation.

My daughter now wants an arbor after visiting Barrington Hall.  

While Thanksgiving wasn’t the best time of the year to take in the garden, we did see some flowers.

These photos were taken just taking the tour with the family. I may go back another time and do a story on the homes during the spring when the azaleas and dogwoods are in bloom.

Have you taken for granted things closer to your home that you could photograph? Tour groups come from all over the world to see things in Roswell, GA. How about your town?  Have you been there yourself?

Covering a typical community meeting tips

Rabbi Greene of Temple Beth Tikvah speaks to the HomeStretch volunteers at their appreciation dinner. (Nikon D4, 70-200mm,  ISO 12,800, ƒ/2.8 and 1/160, Custom White Balance with ExpoDisc)

One of the staples of many professional photographers is covering meetings. Very seldom do these photos end up in your portfolio. Unless you are covering a meeting where they hired a lighting crew you have to work just to get acceptable photos.

This event was in the meeting room of the local synagogue.  They had wonderful stage lighting, but like many groups they choose not to put their speaker on the platform where the stage lighting would have helped. No they put the speaker on the floor where the lighting was the worst in the entire room.

Lucky for me in the first photo that the podium was draped with an off white cloth. It helped to kick light back into the face of the speaker.  I prefer not to use a flash because it can be distracting to everyone. So I did use it sometimes, but tried to use it sparingly as more of a backup.

I wanted to show you this overall photo of the meeting I covered. Now notice how the white tables are kicking light back up into the faces of those people seated. You can see their eyes.  Now look at those people standing around.  The canned lights above are creating raccoon eyes for them.

From this photo I can tell I can easily shoot the people around the tables, but I may need some fill flash on those with the raccoon eyes.

As a photojournalist I was trained to see those things to be sure the photos were useable.

(Nikon D4, 28-300mm,  ISO 12,800, ƒ/5.6 and 1/50, Custom White Balance with ExpoDisc)

I decided I didn’t need the flash for the ladies at the table.  I just cranked the ISO up and shot it.

Here I put a CTO (Color Temperature Orange) filter over my Nikon SB-900 flash. It comes with the flash. I still shot at ISO 12,800 ƒ/5.6 and 1/100 so that the background wouldn’t go dark and look natural. I also did a custom white balance using the ExpoDisc.

I wanted to be sure I was getting good skin tones, so I would get a few shots of speakers and people in the room using a fill flash.

In all of these photos I was what I call running and gunning. As a photojournalist I don’t stop people and ask them to do it again. Now when I shoot for a company where we need certain things to look a certain way it is OK to make changes–it isn’t photojournalism it is advertising or corporate communications.

It is due to all my training as a photojournalist that companies need me. They need a photographer that can deliver in any situation with photos that communicate.

The professional photographer needs to get the best possible photo and sometimes that means without taking away from the atmosphere of what you are covering. They need the fly on the wall and not the Hollywood film crew making the meeting a set for their movie or TV show. Sure the photos would look 100% better doing just that, but the reason they are having the meeting isn’t primarily for the photos.

Can you get photos like these of your meetings?  Maybe this is why you should hire a pro sometimes.

How I covered Hurricane Sandy Disaster Relief

This is just some of the damage to homes by Hurricane Sandy in Union Beach, New Jersey that I saw last week while covering a companies work there.
Ken is one of my mentors helping me with business practices.

My good friend and fellow photographer Ken Touchton, pointed out to me how we are called on day to day to cover the ordinary and make it look extraordinary.

Photographer’s on tour

The camera manufacturers and even our professional organizations often have photographers who create some cool photos doing their “dog and pony show” at seminars and workshops. Many of these photographers create these incredible images which help them to be professional speakers and lead workshops.

My hats off to these guys. They do an incredible job and create some outstanding images. The reality is that in my lifetime I will most likely have very few if any of these types of photo assignments.

Lately those photographers on tour are no longer using dogs and ponies. Now they have elephants, dancers and just find the most exotic people and places to capture. It does make sense that to have a great photograph start with great material.

It would be fun to have the budget to hire a few exotic animals, a few models and fly them all to an exotic location. I also think it would be cool to have all that equipment to light the subjects and make a truly memorable photo.

However, Ken and I are often called on by companies to tell the stories of normal every day folks doing what may visually appear to be mundane, but are truly extraordinary.

This is some of my coverage of Chick-fil-A cooking sandwiches that they do everyday and giving them to people in need.

Chick-fil-A has a food truck that they use to distribute sandwiches at large events. Here it is in Howell, NJ where they were distributing sandwiches to Hurricane Sandy victims, first responders and volunteers.

In total over four days, Chick-fil-A’s food truck produced and distributed 13,650 Chick-fil-A Sandwiches to folks in northern New Jersey and Staten Island.

Eddy Taylor from Chick-fil-A gives sandwiches to workers helping to clean up Union Beach, New Jersey. (Nikon D4, 14-24mm, Nikon SB-900 shot on TTL on camera on slow sync. Camera settings ISO 100, ƒ/8 and 1/250)

My objective was to capture Chick-fil-A personnel giving away sandwiches to those affected by Hurricane Sandy. When in a disaster I don’t get to scout the area and then plan which models to bring in for the photo shoot. I don’t get to come in and light the scene to make this pop as I might do in an advertising photo shoot. This is finding moments as they happen to tell a story. These moments were in short one to two minute intervals of the volunteers giving out sandwiches. It doesn’t take long to give them a sandwich and give a quick word of encouragement.

The hardest part of the coverage was showing people receiving sandwiches that you could tell by the visuals alone they were part of a disaster.  I needed the food distribution and I needed to show this was about Hurricane Sandy. The photo above comes very close to communicating the two in the same photo.

(Nikon D4, 14-24mm,  ISO 100, ƒ/8 and 1/160)

One of my favorite photos from my coverage isn’t necessarily the best storytelling shot, but I love the motion of the Chick-fil-A personnel walking down the street of Union Beach, NJ where there is major damage. You can see all the debris stacked behind them that had to be cleared off the roads for vehicles to get into this neighborhood.

Chick-fil-A delivered free sandwiches to the Union Beach command post where they had setup a dining room in a tent to feed all the emergency responders. Here the State Troopers from all over the country are taking a lunch break. (Nikon D4, 14-24mm. Camera settings ISO 8000, ƒ/8 and 1/100 and AUTO White Balance)

Most of the time in disasters people are in the centers where people can come to get clothing, counseling or information about their homes. While the photo above of food being distributed to the first responders communicates the food distribution it lacks the context of Hurricane Sandy without some text.

While you can put a series of photos together on a page to help tie the communication package into a more cohesive package, the photojournalist is trying to do this with one photo, because often that is all the space they have.

Running and Gunning

In all of these photos I was what I call running and gunning. As a photojournalist I don’t stop people and ask them to do it again. You keep the camera up to your eye a lot of the time and quickly fire shots as they come up.

Now when I shoot for a company where we need certain things to look a certain way it is OK to make changes–it isn’t photojournalism it is advertising or corporate communications. However, my photojournalism background helped me stay focused during my coverage. Chick-fil-A was on a timetable of delivering these sandwiches to people in less than 20 minutes.

They know that food safety is important and also gives the customer the best experience.  If you look closely you will notice they are on the move in giving these sandwiches out to people.

(Nikon D4, 14-24mm,  ISO 100, ƒ/5 and 1/500 No Flash)

I wanted to show how at times the photojournalist will use on camera flash in a fast moving situation to help hold some of the shadow details. In the photo above I was believing this would work OK since the skin tones of the people getting sandwiches was light. When the darker skinned volunteers came up and they were all backlit I didn’t want to risk not seeing their faces so I put on the Nikon SB 900 and using the high speed sync mode and slow-sync was able to pop a little fill flash ensure I was capturing people’s faces.

Another side note you can see how I altered the frame in the two photos. I don’t need multiple shots with just the people changing, I wanted to tell more about the location, but had no time to move around. I just composed to show how the devastation to the left of the house was there in the second photo.

By the way we were in this location for less than five minutes. We had hot sandwiches that needed to be delivered to more places.

(Nikon D4, 14-24mm,  ISO 100, ƒ/5 and 1/500 with Nikon SB-900 on camera fill flash on slow-sync)

The Results

You might wonder how all this went for Chick-fil-A. Here is one person’s response to the call center for Chick-fil-A:

Customer Comments: The customer stated that he and his family are
survivors of Hurricane Sandy. He stated that the Howell Restaurant
delivered Chicken Sandwiches to people in his area.  He informed me that
the Red Cross has not even made it into his area yet but Chick-fil-A has
come two times.  He and his family really appreciate the gesture.

It is due to all my training as a photojournalist that companies need me. They cannot turn the hurricane disaster coverage into an advertising location photo shoot. They need a photographer that can in any situation come away with photos that communicate.

Ken Touchton and I are going to the Atlanta Photojournalism Seminar next week the first weekend in December. It is their 40th anniversary and Ken was there 40 years ago.  I am also one of the organizers for the Southwestern Photojournalism Seminar that is March 1 – 3, 2012. Both of these are great places to learn from storytellers and ask them how they handle situations.

Many of the speakers are photojournalists who also shoot commercially. Maybe the reason some of them make great advertising photographers is they know what looks authentic and have a knack for helping creating those impactful moments.

I still advise anyone starting in this industry to try and get a job with a small town newspaper. The experience gained from shooting day to day assignments will help you know how to get the best possible photo in any situation. It will also help you appreciate the ability to plan and do preproduction to get those advertising shots where you are in control.

Stanley’s DSLR Buying Guide

I get asked all the time which cameras I suggest people buy.  While I will mention specific models, those can change at anytime, so I will address features to look for when buying a DSLR camera.

I will first cover the different features and then my recommendations for the first time buyer of DSLR suggestions.

List of features:

Effective pixels
Sensor Size
Card Slot/Storage Media
Shooting speed
ISO Sensitivity
Movie
File format still/video
Lens Compatibility
Maximum Auto Focus Points
Built in flash
Live View Shooting
Microphone/Headphone for Video

There are many other features and even in these it maybe more than the nuts and bolts I think are most important.

Effective Pixels

How many pixels per inch does your camera capture?  First of all we need to know that for the most part today’s camera are capable of producing larger size prints than most people will ever need.  However with that said you could read this blog post if you need to figure out how big of a print the camera will produce.


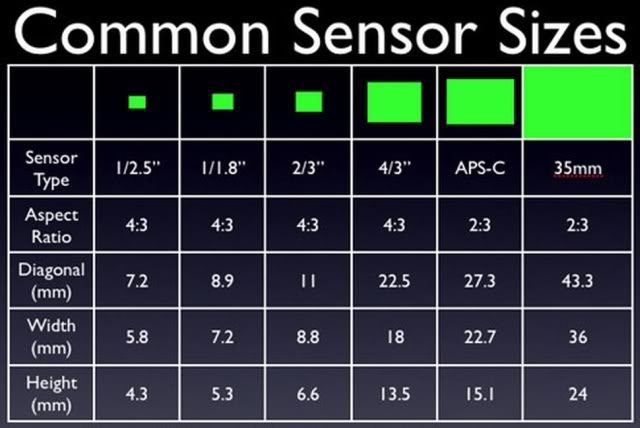
There are basically two different physical sized sensors on the market.  Full framed sensors and cropped size of 1.5 or 1.6 sensors.

While the number of pixels may be the same the larger sensor has less noise as a rule and therefore cleaner images when taking photos at a higher ISO.

The larger full-framed sensor means you need lenses that support this.  The smaller sensor can usually use the full-framed size lenses, but not the other way around.  Lens made for the smaller sensors cannot be used on the larger sensor.

Besides noise differences the physical size of the camera gear weighs more and is heavier with the full-framed cameras.

Card Slot/Media Storage

DSLR cameras take 4 different types of cards. SD, CF, QXD & CFast.  The SD and CF are the two most dominant. The QXD is a new format used in the Nikon D4 and the CFast will be used in some newer Canon cameras.

SD cards are used in most point and shoot cameras and are the card readers are build into most laptop computers. If you choose any of the other cards then you will need a card reader most likely to transfer from the card to the computer.

You also want to read the small print details to see which cards in a format they support.

Shooting Speed

This refers to how many frames per second you can make.  Very important for things like sports photography.

ISO Sensitivity

In the days of film, the film you bought determined the ISO settings on the camera.  Today the digital camera works like having a shelf of film ready and you can change the sensitivity of the camera from frame to frame if you like. You can even let the camera figure all this out for you if you choose Auto ISO.

Basically the higher the second number the less light you need to make a picture. Today’s cameras are usually looking at ISO settings of 1600, 3200, 6400, 12,800, 25,600 or even higher.

The cameras have what they call their sweet range for the camera. It may look like this ISO 100 – 3200 and then state can be boosted to ISO 12,800 for example.  What this means is the ISO 3200 will make acceptable prints and the ISO numbers above this will give you an image, but it may be pixelated.

Movie

Many of the cameras will also take video.  In general there are two formats 720 and 1080.  This refers to the pixel height.  Both of these are really high resolution and if you are showing this video on a TV bigger than 46” you will notice a difference.

What type of movie file the camera makes is useful to know what you need on your computer to open it and or edit it.  Most all will play on any computer, but when it comes to editing this is when you need to really pay attention to the format.  You may have to purchase special editing software.

File formats

For stills the major thing to look for is if your camera shoots RAW in addition to JPEGs and possibly Tiff.  You have more control of a RAW image, but you need a RAW editing program like Adobe Lightroom or PhotoShop to edit these images.

Lens compatibility

If you buy a Nikon or Canon that doesn’t mean all the Nikon lenses will work on all the Nikon Cameras and the same for Canon.  Read the fine print. In general the entry-level cameras have less lens choices.

Higher end cameras have motors to operate lenses whereas some of the entry-level cameras save money and the lens has to have the motor.

Maximum focus points

Each camera manufacturer addresses this a little differently, but the general rule is the more expensive cameras in the manufacturers line have more focus points and more settings you can choose to help you focus a camera.  This is important to those who want the camera to help them focus more accurately and quickly.

Built in flash

While the top end cameras do not have built in flash there are many reasons you may like to have it. First of all they are not all that powerful, but they are always there if you need it. Second, both Nikon and Canon for example have very advanced flash systems where the built in flash can help trigger an off camera flash wirelessly. For the top end camera you will need to buy an additional piece of equipment to fire the off camera flash.

Live View Shooting

Since most cameras now have video capabilities, this helps photographers use the LCD screens on the back for more than just movie mode. You can often use this to view the subject rather than the viewfinder only.  Can help you when you want to shoot from the floor or above your head for example.

Microphone/headphone Jack

If you want to do some serious video with your DSLR then I suggest being sure it has a microphone jack. To control the recording level with just the camera you will need a headphone jack. If you have no headphone jack you can run your microphone through something like the Juicebox to monitor your recording levels.

What I suggest are key features

First thing that needs to be decided is this for professional use or as a hobby?  I will first address the hobbyist.

Hobbyist suggestions

In general the least expensive camera will do for general all purpose shooting. However, if your hobby is photographing your children playing sports or wildlife for example you need to spend just a little more to be satisfied.

For the most part the number one feature to consider is the ISO. The highest ISO cameras will let you take photos in low light situations and/or situations where you need to stop the action.  ISO 6400 or higher is necessary to really shoot indoor sports and in the woods of wildlife.

If you are shooting sports inside the high ISO will let you make photos without a flash and this is very important for many sports where flash isn’t allowed.  Spend the extra $500 to $1,000 to get the high ISO.

You may also need to invest in faster lenses. Think of the ƒ-number for a lens as a fraction.  The smaller the fraction the cheaper the lens and requires more light to take a photo. In general a ƒ/2.8, ƒ/2 or ƒ/1.4 lens is what you want to photograph sports and wildlife.  This combined with a high ISO will let you get the photo.

The kit lens and low end camera is not going to be the camera for the parent with a kid in sports.  It is a great camera for people who travel and take photos of friends.

You may want to consider the full-framed camera to reduce noise as well if you are needing the high ISO.

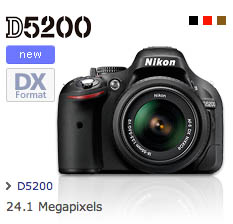
In the Nikon lineup I recommend the Nikon 3200 for the person just wanting to take snapshots. If you want to do video as well I think the Nikon 5200 is the model I would look at due to the swiveling LCD.

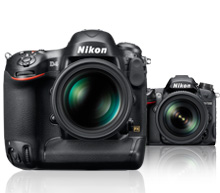
For the sports shooter I would start with the Nikon D600.  If you have the funds then look into the Nikon D4.  It is the perfect camera for the sports shooter.

Considering going pro

The minute you decide you want to go pro plan on backup for everything. You need an extra body a few lenses and a couple flashes to do jobs. You cannot be caught shooting a wedding for example and the camera dies on you.

Now that you know you need two cameras and multiple lenses, be sure everything is compatible. For example While you can have one full-framed camera and the other a smaller chip, the lenses should most likely all be good for the full-frame or you will be caught if the smaller chip camera dies having to shoot everything with the full-framed camera.

Some of the major differences between the very top of the line cameras and the next level is about how well they are built.

The high end cameras have better seals to help keep out moisture. They are not water proof, but water resistent. Very important for the photojournalist who is called to shoot in all types of conditions. Even if you have the high end camera still buy some rain gear for the camera and lenses.

If you are primarily shooting portraits in a studio, then even the entry level cameras will work fine.  Put more of your money into lights and other gear, than all of it in a camera which is overkill for your use.

In general it is harder to make the mistake of buying too good of a camera if you can afford it.  The problem is under estimating and then having to sell the camera and buy a better camera later.  Cameras loose a lot of value quickly as compared to lenses, flashes and other camera gear.  As soon as the next model comes out your camera will drop in value and for every new model introduced since your camera, it will continue to drop.

There are three cameras I recommend for the pro shooter today in the Nikon lineup. Nikon D4, D800 or D600.

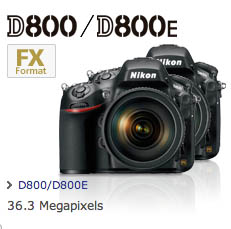
The Nikon D800 is the studio camera and for those who remember photographers shooting medium format, unless you are ready to shell out $25,000 for those cameras this is a great medium format quality camera in a DSLR 35mm size.  The D800 is also one of the favorite video cameras of those shooting video with DSLRs today.

If you need a work horse camera to shoot everything from sports, portraits, weddings, to video the Nikon D4 is the camera to get. It does a great job with video. It has microphone and headphone jacks making it possible to monitor sound.

I believe the Nikon D600 is the lower end pro camera only due to the weather seals and body build, but as far as functions, this camera rocks.

300 PPI and Output sizes

“The magazine that is going to publish my pictures says the images must be at least 300 ppi.  How do I change the resolution to 300 ppi?”


Editorial Note: While DPI is commonly accepted, it is not technically correct. DPI (or dots per inch) refers to the resolution of output devices such as laser or ink jet printers and platesetters or film imagesetters. For the sake of accuracy we will use the term PPI (or Pixels Per Inch).


I’m asked this question a lot and it is based on a misunderstanding that I hope we can clear up in this newsletter.

First of all, it is rare that you need to do anything.  They are requesting an image with a resolution of 300 ppi when printed to a specific size.  A request for a 300 ppi or any ppi without any associated width and height dimensions of the print it is nonsense.  The dimensions of the print need to be know.

The Formula:  

Width x 300 = a
Height x 300 = b

Multiply a times b to determine the minimum size mega pixel camera needed to make the photo.

Here’s an example for an 8 x 10 inch print.  Width 8 x 300 ppi = 2400.  Height 10 x 300 ppi = 3000. 

You need an image of at least 2400 x 3000 pixels.  Multiply 2400 x 3000 = 7,200,000 or 7.2 mega pixels.
Now we know the minimum size mega pixel camera that’s needed, but how do we change resolution?  Photoshop to the rescue…. again.
The dialogue to change the ppi-number in Photoshop is Image->Image Size.  When you choose it, you get a dialogue box like the one shown Example 1.  Be sure the Resample Image checkbox is left unchecked.  This prevents accidentally throwing away pixels that will diminish the quality of the image.

The Image Size box is a resolution calculator.  Your camera manufacturer has a default setting.  It may be set at 72 ppi or something else.  In this example the default setting is 240.  Remember you can change this to 300 ppi and it will then tell you the maximum size print you can make with this image.  As long as the Resample Image checkbox is unchecked you will not accidentally damage your image.

Take a look at Example 2.  Here you can see that the Resample Image box is unchecked and the Resolution was changed to 300 ppi.  Note: the Width and Height remain the same in Pixel Dimensions.  The actual image didn’t change.  You now have a calculator that tells you the size print you can make at any ppi.

There are many different output devices.  Let’s look at printers. Canon and HP desktop inkjets are usually optimized at 600 ppi, for Epson it is 720 ppi. The Fuji Frontier, used in many minilabs, is usually optimized for 300 ppi, some laser jet printers offer a choice between 200 ppi and 400 ppi.  You should refer to the manufacturer’s specifications or ask the lab to determine the optimum resolution for a specific printer.

You need to know the optimum ppi for your printer to determine the largest size print you can make.  Just be sure the size image is not larger than your printer’s quality capabilities.  You want it large enough, but there is a slight chance it can be too big.
An often forgotten aspect of quality prints is the distance from which the prints will normally be viewed.
The viewing distance changes everything.  You do not need a 300 ppi image to produce a billboard.  Actually you only need about 6000 total pixels for a Billboard. 
Use the chart below to help you in making display prints for trade shows or other places you need extremely large images.

Determining PPI by Viewing Distance

To determine an optimal PPI (resolution in Photoshop) for a photo the calculation is as follows:

7000 / viewing distance in inches = PPI

This is for optimal results.  Using half that number will still provide good quality results. Any lower and you will begin to sacrifice image quality.

A Quick Chart for Determining PPI by Viewing Distance

Under 24 inches = 300 PPI

24″ to 36″ = 200 PPI

36″ to 60″ = 120 PPI

5′ to 10′ = 60 PPI

10′ to 20′ = 30 PPI

Billboard = 10 to 20 PPI

I hope this bit of information about ppi, image size, viewing distance and printer capabilities has been of use to you.
Nothing is EVER simple, right?

Selling photos online couldn’t be easier

Today it is easier to sell your images than ever before.  I wanted to share what I am using to sell images online.

I have been posting images in galleries online for people to purchase since 1993, so from all this experience I chose PhotoShelter as my online gallery.

Here is what my clients see when they go to the home page of my gallery:

I could probably use this as my website.  It has everything pretty much here in addition to the galleries clients want to go to for their images.

Security

Now I can create a private gallery that with just an email and password people can access. I prefer doing this with most clients since they are less likely to pass around their email address with a password.

I can also create a gallery that has access with a password.

What can you order?

There are four things I offer on some of my galleries. Depending on which ones I turn on I have the option to sell: 1) Prints, 2) Products, 3) Downloads and 4) Rights managed Downloads.

This is an example of once a person likes a certain photo and clicks on the +Buy button they will see something like this screen above. The three colored arrows I added to help you see there are three of the four things I offer here with this photo.

Prints are highlighted here by the red arrow. My clients can order just about any size print that my supplier offers. I just go through the form when setting up my price and just those that I put my price on will show up.  I can have as many price lists I want and choose the list for any group of photos. I may have print prices really high since the photos might be rare or they are for fine art work to display in galleries.

The products tab which is highlighted by the blue arrow lets the customer order things like coffee mugs, mouse pads, t-shirts and more things like this. Again, only those item I choose to price will show up.

So many of my customers just want the digital image for usually two reasons. First of all most people want an image they can use on social media. They just want to display it for their Facebook friends for example.  These are low resolution and you cannot do too much with this size image other than social media.  I also offer a full high resolution download as well.  This is for folks that want to make their own prints. Since this means they will not be order a multiple print package and I will loose these sales the price is much higher to offset the sales I am loosing.

Rights Managed Sales

I also have media outlets and companies that want to buy my images to use to help their business. Depending how they want to use them they pay a different price. Now this is where the online website does so much for me that I would always prefer the customer buying online rather than the phone call.

The prices for stock sales go from really small amount to rather high due to how they plan to use it. PhotoShelter has built into their system FotoQuote’s pricing for stock. You can make modifications to the pricing structure. You can lower or raise your rates in different categories by percentage of fotoQuote’s rates.

The client just picks from the pull down menus and when they are done they have a price that they can agree upon and quickly pay and get the download right then.  No phone calls or negotiating.  Of course they can send an email and let me know they want to pay me double the price if they like, or as many will try and do get me to lower my price. Either way they now have a starting price based on parameters. Gives us a starting place for negotiation.

As you can see in the screen grab above, the client made choices and ended up with a quote of $126 for use of an image one time in the magazine and digital version.

What the photographer does to make all this work

I upload the high resolution images to PhotoShelter. I must pick a vendor to fullfil my prints and products. I then set the prices for the vendor.  I setup the prices for download for personal usage and also setup the rights managed prices.

After I upload and set of images then I normally select all the images in that gallery and price them choosing from the price lists I created.

I then set the security for the galleries and then send links to the customers I need to see the images.

The only other thing I can do is then also promote stock images I have for sale.

Once they are up I just get notices when an order is made and then payments online to my PayPal account. Now that is super easy for me.

Check out PhotoShelter yourself.

Pricing depends: Full-time or Part-time

Regularly, I get a variation of the question, “How much should I charge?”

I teach a class with a few assignments yearly to help the students price a project. I have noticed that many students copy each other’s work rather than try to figure out the numbers themselves.

Many people make assumptions that are costly mistakes for their success.

Myth #1

Everyone’s situation is the same. While people may say this isn’t true, their actions say otherwise. If you have researched the prices of other photographers and then charged a similar price, you might be just proving me right.

Many people who shoot weddings all charge similar amounts in a market. A new photographer comes along and sees that everyone is charging $2,500 to shoot a wedding. Upon further investigation, that photographer finds out what is typically being offered with a $2,500 wedding package and, after looking at how much it costs to make prints, create an online gallery of images, and create a book, sees that they can charge the $2,500 and still make a lot of money, so they offer the same package.

It takes some time before someone will discover if this pricing will work.

Hawaii Tropical Botanical Garden

Myth #2

Pricing is relative to the quality of work. Most photographers believe a highly skilled photographer should be the most successful photographer. This is a widespread stake in any profession. Businesses fail every day because people think it is all about the quality of the product.

The “Return On Investment” formula:

Return On Investment (ROI)

You need to understand the “Return On Investment” to understand why quality alone does not equate to success.

One of the best examples I have firsthand experience with is shooting sports. Most teams that use photography do so to help promote the team. High schools and colleges need photos of their athletes for their websites and maybe a media guide. They need an image they can use rather than a Sports Illustrated-quality image; the organization will not benefit monetarily from the better photograph.

Even professionally, the great photograph of an athlete rarely translates into profits for the team.

If you have a great action photograph of the league MVP, you will see a difference in sales. You will not see more sales if the picture is equally suitable for an average high school player. Why? The thing driving the sales is more about the player’s performance than the photo’s quality.

Great-quality photos do help organizations build a brand. Sports Illustrated, for example, built a brand around high-quality photography and writing about sports. However, few organizations are willing to pay to build their brand in this way.

The bottom line is that you must produce good photography to have someone pay you for it, but many other factors influence the purchase rather than the quality alone.

Honu’apo Bay, The Big Island of Hawaii


Myth #3

How long you have been making photographs determines your pricing. The number one group I hear this from is college students who think they must charge less for their work because they are students.

A customer is looking for a photographer. They see a couple of photographers work on their websites. They like the photographs of one photographer. They will then check and see if they can afford that photographer to do the work.

The only time a customer factors in whether someone is in school is when it comes to price. Customers need some photography and realize they can save money by looking for a different photographer. The number one place most of these customers look is to students.

What matters the most to customers when hiring a photographer is that the quality of work matches the examples shown by the photographer.

Experience cuts two ways in photography. Many customers look for a fresh eye and experience old style. Where you need more experience to help you is when a client always goes for the safe and secure photographer. This is rare but does exist.

Your Situation

You must know your situation and what you are trying to do with photography to understand how to price.

Hobbyist 

You enjoy photography but have no plans to do it professionally. You are very pleased with your profession and love what you do, but you also like taking pictures as a hobby.

There are two types of hobbyists I see shooting today.

The first group is financially capable of buying the gear they need. They may even have enough money to make prints and give them to their friends as gifts. Many of these photographers enjoy traveling, and some enjoy shooting sports. To gain better access to things they like to photograph, they offer to give their photographs to the groups they photograph.

They know that to get better photographs, they need to be closer. So, to move from the stands to the sidelines of their kid’s games, they give their photos to the team so they can get better access.

The second hobbyist group is those who need help funding their hobby. They need to offset their equipment purchases. This group will price their work so they have enough income to offset their gear purchases.

Part-time photographers

One classic example is a bi-vocational photographer. I have also seen many school teachers who like to shoot weddings. Since most brides get married in the spring and summer months, this works well with teachers’ schedules.

I have seen many professionals who also like editorial work. Many National Geographic Photographers have been biologists, anthropologists, and other experts in the field. Their photography and their profession go hand in hand.

Full-time photographers

I don’t have to go into the details here, but this group earns a living alone through photography.

Which photographer are you?

You need to know which category you fit into and own it. You must understand pricing if you are in any category other than a full-time photographer and want to become a full-time photographer.

You cannot make the switch as long as you need another job to pay your bills because photography does not generate enough income.

Balloon Ride in North Georgia

How to make the switch to Full-time Photographer

First, you’ll need to take the time to know what your financial needs and wants are. If you have Microsoft Excel, a great tool comes with it to help you. There is a template in the personal section for “Household Budget.” If you don’t have this, you can use the “free” Kiplinger online form to get help.  (http://www.kiplinger.com/tools/budget/)

Second, you need to know all the expenses related to the business’s operation.

Third, you will have to get a good idea of what you will offer and how many times people will hire you a year. If you have no idea, this is like putting your finger in the wind. The best way to know this is to have been getting small jobs on the side of your full-time job. It is easier to get a feel for this by starting as a hobbyist and part-time photographer than just graduating from school or quitting your job and starting from scratch.

Once you know these three figures, it is much easier to understand how much you need to charge to do this full-time.

Myth #4

I can do that later. After seeing what you need to do to determine your prices, you decide you are not ready to do all that work. You inside that work on your photography, and when you get to the point where you think you are prepared to go full-time, you will work on that business stuff.

We all put off working on unpleasant or tedious tasks occasionally. I understand that completely, but procrastination is the surest way to failure. If you want to go full-time and remain full-time, you must take the steps I outlined to make the switch immediately.

Let me tell you a little dirty secret about many full-time photographers. Most of them produce mediocre work. So how do they stay in business? They know what to charge and are okay with telling people their prices. They can say with complete confidence that this is their price. They know that if they lower their price, they are, in essence, paying the customer to work rather than them being paid.

When you have done the math, you know the point at which you are making or losing money.

Rock Band Promo Shot

Nikon D4, 28-300mm (44mm), ISO 100, 1/160, ƒ/5

“Hey can you take some photos of our band for a promo shot?” Was the request from Late Night Reading’s drummer Drew Cottrell.

Earlier I took some pictures of the band when they were in town a couple of months ago.  Here is the blog post I did then.  What I wrote about back then was that even the D4 was struggling to take photos in a dark hole like the Swayze’s Venue in Marietta, GA.

I had in my van my monobloc lighting kit this time in addition to the Nikon Speedlights.

I went into the parking lot a little later after they had played and set up my lights.  I also asked them if they had something they were looking for.  They didn’t have any ideas, so I took the lead and told them about this concept you see above.

Here is the setup for the photo.

Now lets play

Once I have the lights set and get a few of the shots that I was initially looking for, I asked the band to have some fun.

I then took the same setup and moved it to where you could see the Tatoo Shop and the Pawn Store lights in the background.  Here are some of those shots.

For these I used a tripod and dragged the shutter to 1/13th of second.  Everything else stayed the same since there was almost no light on the band.

I would prefer to shoot the promo photos all the time over the concert photos.  Just compare these above to the same band performing below.

Live Performance 

Nikon D4, 14-24mm ƒ/2.8, ISO 6400, 1/60, ƒ/4

The strobes are on the PocketWizard Transceiver TT5 and They are on Manfrotto 5001B Nano Black Light Stands and the Manfrotto 175F Justin Spring Clamp with Flash Shoe to hold the flashes. I am triggering the TT5 using the PocketWizard Mini TT1 and PocketWizard AC3.

I turned the ISO up to about ISO 6,400 because I didn’t want the background to go totally dark.

Nikon D4, 14-24mm ƒ/2.8, ISO 6400, 1/60, ƒ/4
Nikon D4, 28-300mm ƒ/3.5-5.6, ISO 10,000, 1/60, ƒ/5.6

While these are pretty good for shooting in a dark hole, I still prefer having the control I had with the studio strobes and moving the band members around.

My friend Zach Arias launched his successful freelancing business just shooting bands like Late Night Reading’s promo shots. He started by just using a Vivitar 285 on a light stand. He was so successful he started a workshop teaching photographers his “One Light” technique.

You can see my whole take here from the evening.

Photography can help self esteem

Gift giving is part of our lives. We enjoy giving gifts as much as we enjoy receiving them.

I have found that photography is one of the best gifts you can give. When we get together for events we often like to remember these times with photos.

Pure Fashion’s fashion show at St. Thomas More Church in Decatur, GA.

Making the Photo

When you point your camera at someone you are saying you are important. People do not take picture for the most part of things they dislike, rather they point their cameras to those things they cherish most. While we do not announce to everyone with a megaphone that is what we are doing, the act of photographing someone is giving that person importance.

I have been hired to help a client impress their clients by having a professional photographer to take photos of them at an event. Some clients will even create a red carpet and have extra people their popping the flashes on their camera just to help create that environment that those walking on the red carpet are important.

My daughter at her fashion show. She enjoyed learning how to carry herself and how to look her best.

Just taking someone’s picture is one of the best ways to give honor, dignity and respect to another person.

When we take pictures we are taking them not just for ourselves, but to share. We want to show our friends and family who we met and what we saw.

Professional makeup artists worked individually with all the Pure Fashion models to teach them how to apply makeup that help to accentuate their beauty without making them look over done.

My daughter is having her makeup done while her friend watches.  

What I liked about this event was everyone was celebrating each other and learning from each other. They all wanted each other to look their best and it wasn’t about someone looking better than everyone.

Dressing Up

We take time every morning to go through a ritual to look our best. We learn what looks best on us. We are color coordinating clothing so we look not just out best, but the best for each situation.

Designer works with the models to show them how they can accessorize with her scarfs.

Pure Fashion teaches the model how to carry themselves. They know that the way you look and talk will help your self esteem.  The confidence you project helps to draw people to you.

Our next door neighbor and my daughter’s friend is in the program as well.

I tried taking photos of the girls walking the runway with available light, but decided I wanted the best possible light.  I wanted the photos to look their best. If they had taken this much time to pick out outfits and style their hair and put on makeup–I needed to bring my best as well.

I put four Alienbees B1600s with 7″ reflector in the corners of the room bouncing off the ceiling.  They at on 1/8 power so I was shooting at ISO 1250.  
One of the most important things to me in a photograph is expression.  Here I feel like I captured the fun everyone was having. 

Sharing the Photographs

Giving people photos after they come to your home for a party is a great way to help them and you remember those good times. People may put your photos even in the most honored spot in the American home–the refrigerator door.

Today I probably share as many photos with my friends and family through Facebook as anywhere else.

For the Pure Fashion event I wanted to share the photos but also make it easy for the parents to order prints or just about anything they like to put their daughter’s photos on. I put all the photos in an online gallery.

Here are the photos I shared with the parents.

Once they click on the image and see it larger, they can click on the “+Buy” green button. When they do that this window pops up.

They can see the photo on the left and options. If they click the tab in the top right hand corner they can choose to order products (i.e. coffee mugs, mouse pads, iPad covers, etc) or they can choose download as show below here.

I gave the parents the option to order a small resolution image for use in Social Media (Facebook, Twitter etc) or they could purchase at a higher price the higher resolution image which they can use to make their own prints.

Today I think people want the digital image at least large enough for them to share using their preference for Social Media.

Other Outlets

Since Pure Fashion was hosted by St. Thomas More Church, which is part of the Archdiocese of Atlanta. I have done work in the past for their newspaper The Georgia Bulletin.  I sent an email to the editor and asked if they were interested and they even had a writer already there.

They were very interested in the photos. Now besides having a photos made of each model so they could have a professional photograph from the event to remember it, they were going to be celebrated through the media.

Even if the model’s photo isn’t used in the publication it elevates the event and makes this a big deal. It helps to improve their self esteem.

You can bless someone’s life

One of my good friends started taking pictures and giving them to people. While he was working in Japan his son’s played baseball. They spoke almost no Japanese. He would take action photos, team photos and even individuals of each of the boys on the team.

He made prints and found some nice folios to put the photos in to give to each of the parents. He knew in Japanese culture your presentation of a gift was just as important as the gift.

The families had not ever had this done before and the response was overwhelming. Today some of those families have flown from Japan to visit them in the states.

My friend discovered that his hobby of taking photos was a blessing to those he gave the photos.

Want to be a blessing to others and improve their self esteem–take photos and share them.

Shooting Volleyball with the Nikon D4 using available light

Nikon D4, 70-200 ƒ/2.8, ISO 12,800, 1/1250, ƒ/4

Today I shot a volleyball game with just available light. I was pleasantly surprised at how nice the quality of the images were for shooting under sodium vapor lights.

The Nikon D4 is something I wish I had back in the 1980s.  During those years I was shooting sports every week for the daily newspaper that I worked back then. Now I only occasionally shoot sports.

While the Nikon D4 has the high ISO capabilities the new technology of vibration reduction also contributes to the photos being sharper than I can remember.

Nikon D4, 70-200 ƒ/2.8, ISO 12,800, 1/800, ƒ/4

White Balance Setting

To insure I got the best skin tones possible, I used the ExpoDisc.  I put the ExpoDisc over the lens and pointed it towards the lights in the gym.  I also slowed the shutter speed to 1/100 to be sure I was not catching the lights during a cycle.  After doing this for both of the Nikon D4 cameras, I cranked the shutter speed preference in the Auto ISO settings to 1/2000.

Nikon D4 Exposure Settings

  • Aperture Priority
  • Auto ISO
    • Lowest ISO 100
    • Highest ISO 12,800
    • Shutter Preference 1/2000

I also was using the Vibration Reduction on the lens to help improve sharpness due to handholding the lens.

Nikon D4, 70-200 ƒ/2.8, ISO 12,800, 1/1250, ƒ/4

With the Nikon D4 you also have auto focus setting as well to choose from. 

Auto Focus Setting for the Nikon D4

  • Continuous Auto Focus
  • 21 Grouping
  • Kept it centered and locked it
  • Focus Tracking on Long
  • Shutter on C-H 10fps

Nikon D4, 120-300 ƒ/2.8, ISO 12,800, 1/1000, ƒ/5.6

My Favorite Angle

This is my favorite angle for shooting volleyball. However, the one thing I would have loved even more was to shoot from a slightly higher angle. The reason for this would help me keep the net from trying to refocus my lens.

Why I like this angle is I can show the team I am covering. You can see their face expressions and while I cannot see the other teams faces, I can see the competition in the body language.

The good thing in shooting up a the players is it gives them this Greek gods feel.  I like athlete looking like they are bigger than life.  Shooting up at them helps to create this feel.

There you have it, my settings and secret weapon, the Nikon D4.

Whining yourself out of jobs

My daughter dressed up for Halloween this year as Alice: Madness Returns..

Not a day goes by where I am not hearing or reading some photographer complaining about the new normal for the industry.

What is the new normal?

Here is a list of some of the changes that impacts the industry:

Instant results – Today the digital camera gives unprecedented quick feedback to the photographer. Before digital you had to wait at least 90 seconds to see an image you just took. Polaroid camera let you create a quick print.
Auto focus – The biggest area this has impacted in my opinion has been sports. It wasn’t that long ago when you had to know how to follow focus to get an in focus photograph of action sports.
Matrix Metering – The earliest SLR cameras didn’t have meters built in. Later when they were built in the photographer still had to know how to use it because just pointing at a scene would not give you consistent results. Today’s matrix metering TTL systems allow the camera to take multiple readings through the lens and using very complex algorithms giving extremely accurate exposures. Each time a new camera is introduced, it appears to be even more accurate than the previous generation.
TTL Flash – We have come a long way since in the days of Matthew Brady where they had to use flash powder to take a photograph in low light situations. You can now control unlimited number of hotshoe flashes within the camera. The accuracy isn’t quite as good as matrix metering is with available light, but this is so much better than we have ever experienced.
YouTube – Today if you want to know how to photograph just about anything you can search for it on YouTube and there will be many videos teaching you how to do this for free.  There are almost no secrets any more that give some photographers an edge over their competition.
Online Photography Databases – Flickr is just one example of online database that you can search for photos at incredibly low prices or even for free to use. You can upload images and if you do a good job with key wording your images are visible to the world. In the past you had Stock Photography Agencies that you had to use. The agencies would push those photographers whose images typically sold well. They didn’t have the time or resources to put just any photos into the system for consideration.

It is very easy to complain about your situation. It is easy to talk about how some people are causing you to loose business.

Photographers need to wake up and realize every business is going through this today. Just look at how many professions are almost gone due to the invention of the personal computer. How many secretaries lost their jobs in the 1980s and 1990s when it first came out?

The United States Postal Service has been crippled due to email. We no longer need them to send a letter to someone.

Why stop whining?

1. Complaining about your work is excusing yourself from responsibility. You are only convincing yourself it isn’t your responsibility and no one else.
2. You are annoying everyone. You may find yourself being defriended on Facebook or just not knowing they are no longer paying attention to you.
3. You are wasting time and being nonproductive.

This is a Habitat for Humanity volunteer helping a family improve their situation with affordable housing.

Take charge of the situation

1. Look for solutions – Blowing off a little steam is OK and even healthy to do. Learn to roll with the punches. You need to focus on talking through a situation to look for solutions rather than just talking in circles.
2. Be the hero and not the victim – When you are feeling frustration remember it is rooted in fear. What are you afraid of? Once you have identified your fear it is much easier to then to address what you need to do to overcome this obstacle.
3. Count to ten – When you feel that urge to complain, stop and look for a solution.


Pray

The American theologian Reihold Niebuhr wrote the Serenity Prayer that was later adopted by the Alcoholics Anonymous and I recommend for Whiners.

God, grant me the serenity to accept the things I cannot change,
The courage to change the things I can,
And the wisdom to know the difference.

According to a University of Wisconsin-Madison sociologist, 75 percent of Americans who pray on a weekly basis do so to manage a range of negative situations and emotions — illness, sadness, trauma and anger.  What is often happening with people who pray is they are considering another point of view. In the case of prayer they are considering God’s perspective.

If you are unwilling to acknowledge that your perspective is limiting, then you may never get over whining.